Page 53 of 248
TURN SIGNAL CONTROL
²Push down to activate the left
turn signal.
²Push up to activate the right turn
signal.
INTERIOR LAMPS
Rear courtesy/reading lamps
The courtesy lamp lights when:
²any door is opened.
²any of the remote entry controls
are pressed and the ignition is
OFF.
With the ignition key in the ACC or
ON position, the reading lamp can
be turned on by pressing the rocker
control.
BULBS
Replacing exterior bulbs
Check the operation of the following lamps frequently:
²Headlamps
²Tail lamps
²Brakelamps
²High-mount brakelamp
²Turn signals
²Backup lamps
²License plate lamp
HI
LO
F
S
OFF
Lights
53
Page 69 of 248

Climate control features
²Press TEMP up or down to adjust temperature.
²Press FAN up or down to adjust fan speed.
MOON ROOF (IF EQUIPPED)
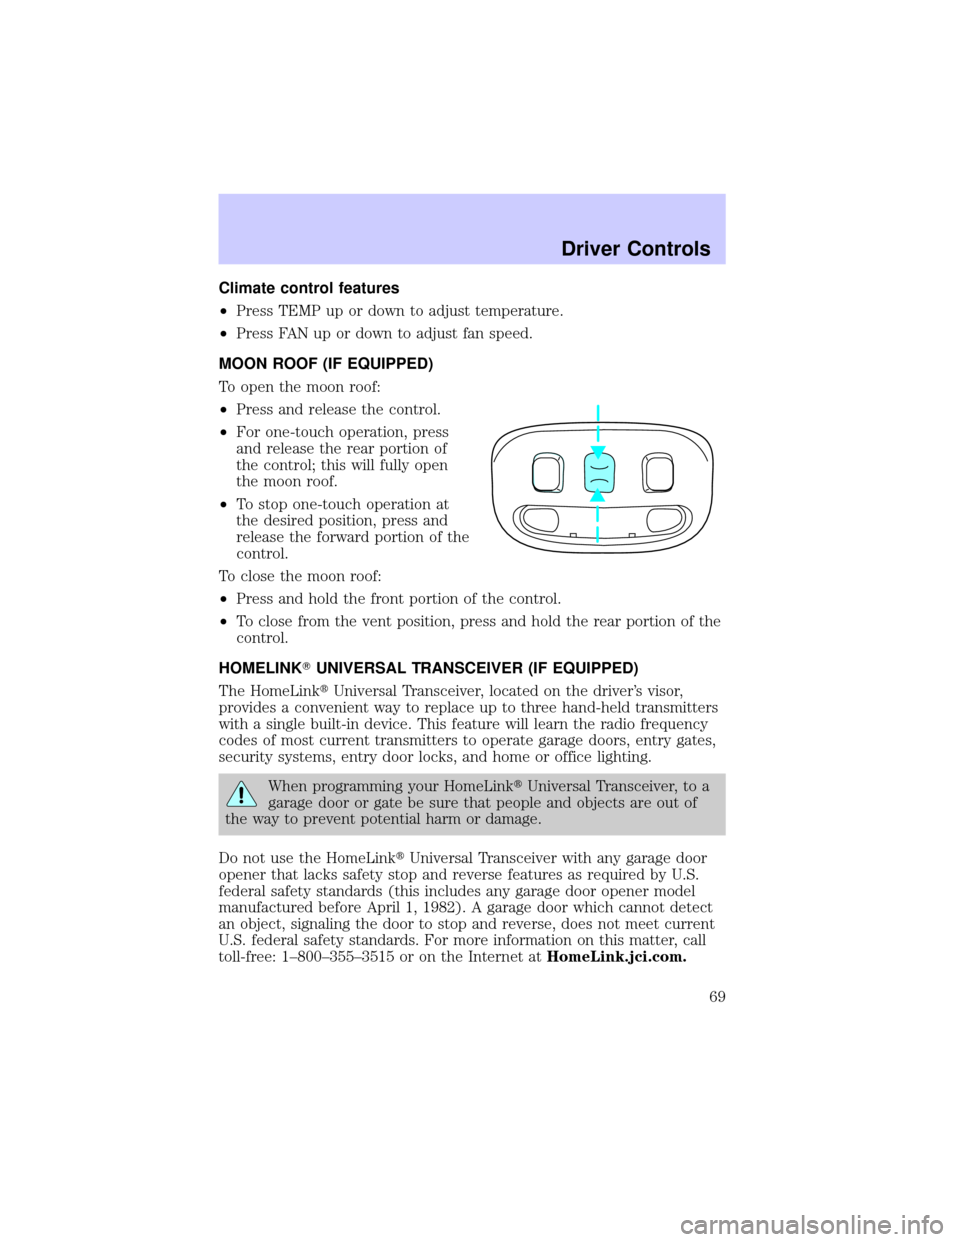
To open the moon roof:
²Press and release the control.
²For one-touch operation, press
and release the rear portion of
the control; this will fully open
the moon roof.
²To stop one-touch operation at
the desired position, press and
release the forward portion of the
control.
To close the moon roof:
²Press and hold the front portion of the control.
²To close from the vent position, press and hold the rear portion of the
control.
HOMELINKTUNIVERSAL TRANSCEIVER (IF EQUIPPED)
The HomeLinktUniversal Transceiver, located on the driver's visor,
provides a convenient way to replace up to three hand-held transmitters
with a single built-in device. This feature will learn the radio frequency
codes of most current transmitters to operate garage doors, entry gates,
security systems, entry door locks, and home or office lighting.
When programming your HomeLinktUniversal Transceiver, to a
garage door or gate be sure that people and objects are out of
the way to prevent potential harm or damage.
Do not use the HomeLinktUniversal Transceiver with any garage door
opener that lacks safety stop and reverse features as required by U.S.
federal safety standards (this includes any garage door opener model
manufactured before April 1, 1982). A garage door which cannot detect
an object, signaling the door to stop and reverse, does not meet current
U.S. federal safety standards. For more information on this matter, call
toll-free: 1±800±355±3515 or on the Internet atHomeLink.jci.com.
Driver Controls
69
Page 70 of 248

Programming
Do not program the HomeLinktUniversal Transceiver with the
vehicle parked in the garage.
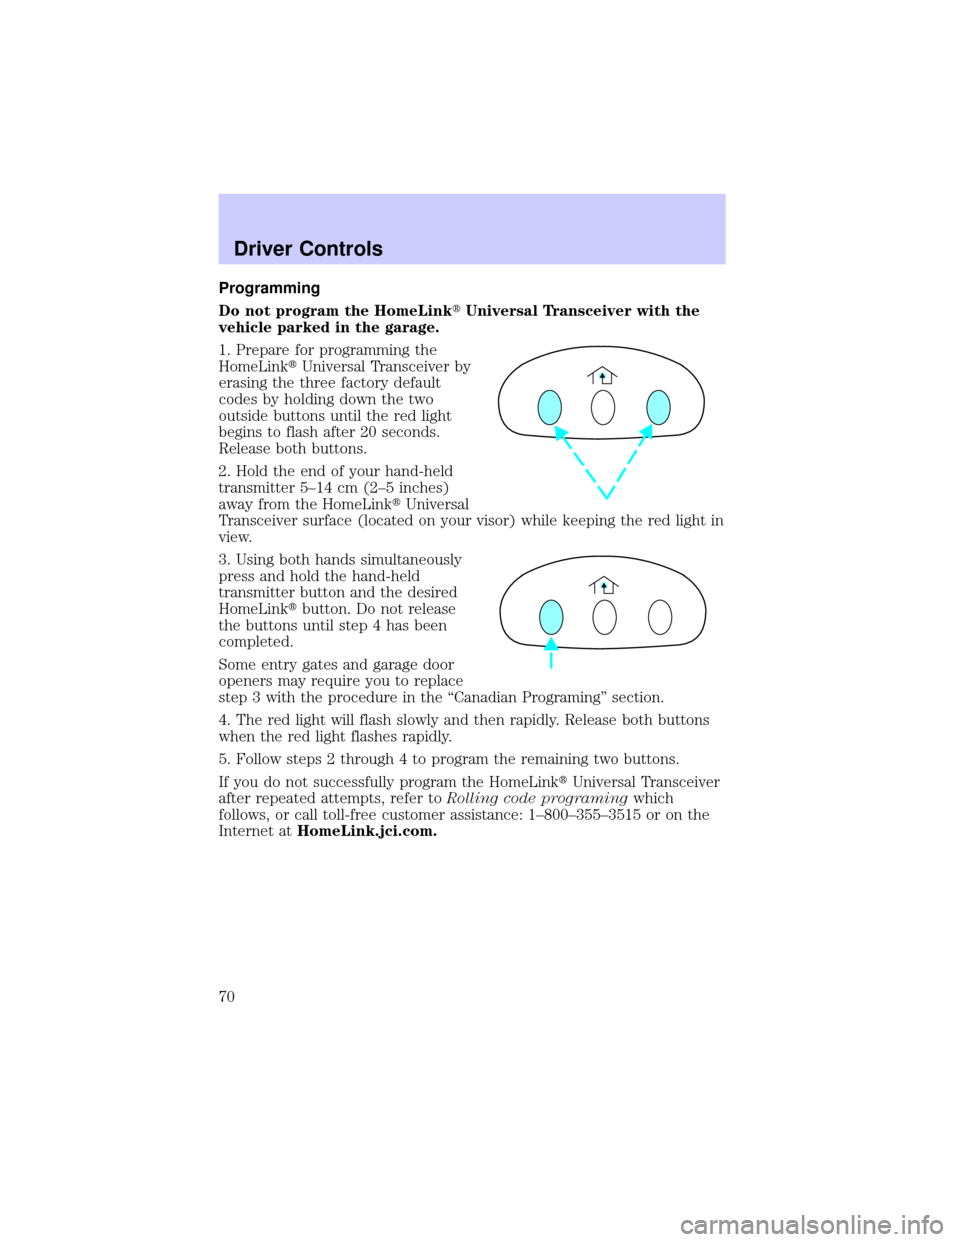
1. Prepare for programming the
HomeLinktUniversal Transceiver by
erasing the three factory default
codes by holding down the two
outside buttons until the red light
begins to flash after 20 seconds.
Release both buttons.
2. Hold the end of your hand-held
transmitter 5±14 cm (2±5 inches)
away from the HomeLinktUniversal
Transceiver surface (located on your visor) while keeping the red light in
view.
3. Using both hands simultaneously
press and hold the hand-held
transmitter button and the desired
HomeLinktbutton. Do not release
the buttons until step 4 has been
completed.
Some entry gates and garage door
openers may require you to replace
step 3 with the procedure in the ªCanadian Programingº section.
4. The red light will flash slowly and then rapidly. Release both buttons
when the red light flashes rapidly.
5. Follow steps 2 through 4 to program the remaining two buttons.
If you do not successfully program the HomeLinktUniversal Transceiver
after repeated attempts, refer toRolling code programingwhich
follows, or call toll-free customer assistance: 1±800±355±3515 or on the
Internet atHomeLink.jci.com.
Driver Controls
70
Page 85 of 248
²To program position two, repeat the previous procedure using control 2.
²To program position three, repeat the previous procedure but press
controls 1 and 2 simultaneously.
A position can only be recalled when the transmission gearshift is in
Park. A memory seat position may be programmed at any time.
The memory positions are also recalled when you press your remote
entry transmitter UNLOCK control.
To program the memory settings to remote entry transmitter, refer to
Remote entry systemin theCLocks and Security chapter.
REAR CENTER CONSOLE FEATURES (IF EQUIPPED)
The rear center console incorporates the following features:
²utility compartment
²cupholders
²auxiliary power point (if equipped)
²remote radio/climate controls (if equipped)
²remote seat adjustment (if equipped)
Radio/climate controls
Refer toSteering Wheel Controlsin
this chapter for operation
instructions.
NEXT
MODE
Driver Controls
85
Page 90 of 248

REMOTE ENTRY SYSTEM
This device complies with part 15 of the FCC rules and with RS-210 of
Industry Canada. Operation is subject to the following two conditions:
(1) This device may not cause harmful interference, and (2) This device
must accept any interference received, including interference that may
cause undesired operation.
Changes or modifications not expressly approved by the party
responsible for compliance could void the user's authority to
operate the equipment.
The remote entry system allows you to lock or unlock all vehicle doors
without a key.
The remote entry features operate with the ignition in any position,
except in ACC, and the transmission in P (Park) or N (Neutral).
If there is any potential remote keyless entry problem with your vehicle,
ensureALL key fobs(remote entry transmitters) are brought to the
dealership, to aid in troubleshooting.
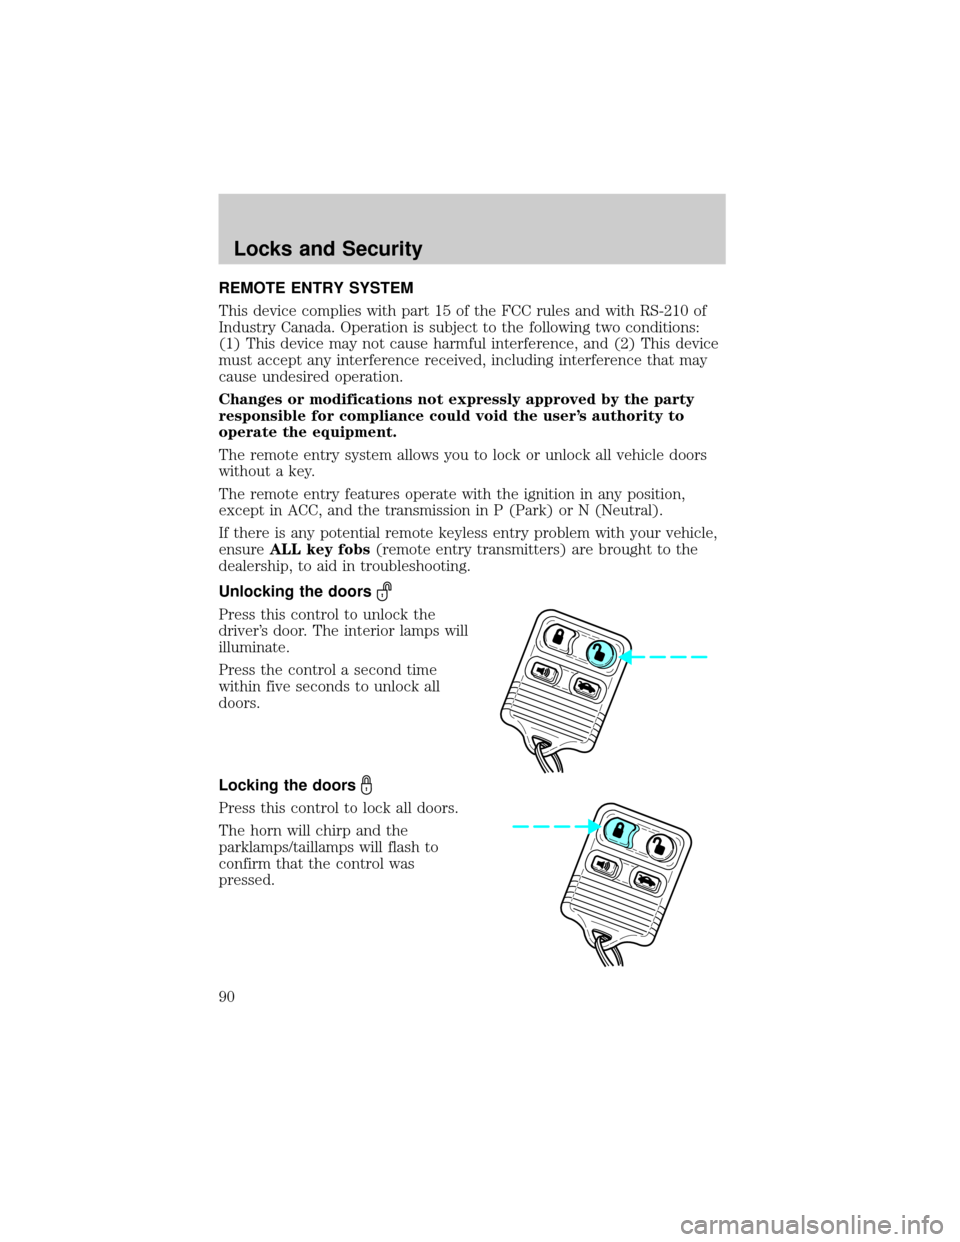
Unlocking the doors
Press this control to unlock the
driver's door. The interior lamps will
illuminate.
Press the control a second time
within five seconds to unlock all
doors.
Locking the doors
Press this control to lock all doors.
The horn will chirp and the
parklamps/taillamps will flash to
confirm that the control was
pressed.
Locks and Security
90
Page 92 of 248

The remote entry system allows you to open the trunk while the ignition
is in any position. However, if the ignition is in the ON position and the
gearshift is in D (Drive), the trunk will only open if the vehicle is moving
5 km/h (3 mph) or slower.
Replacing the battery
The remote transmitter is powered by one coin type three-volt lithium
battery CR2032 or equivalent. Typical operating range will allow you to
be up to 10 meters (33 feet) away from your vehicle. A decrease in
operating range can be caused by:
²weather conditions
²nearby radio towers
²structures around the vehicle
²other vehicles parked next to the vehicle
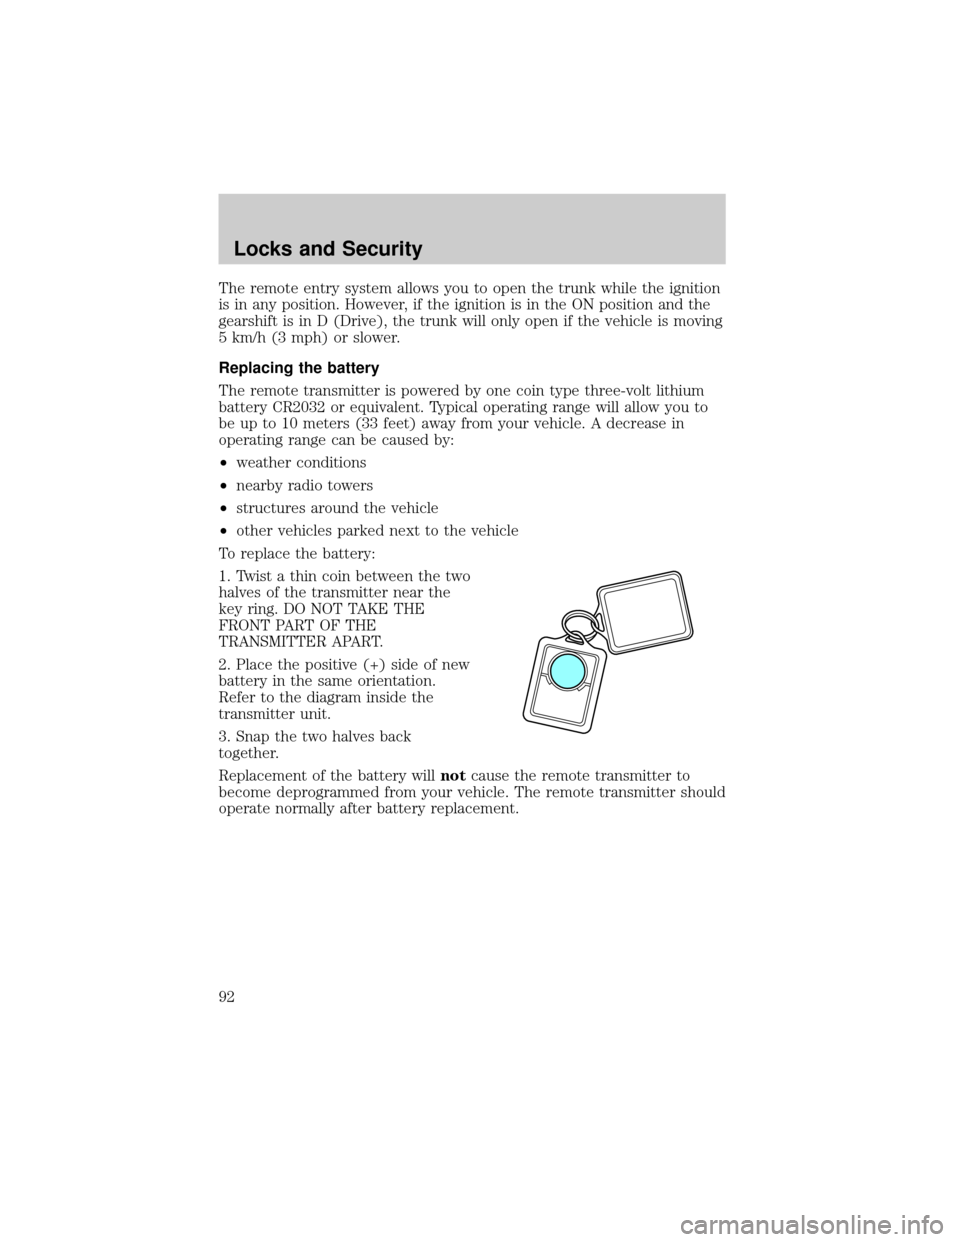
To replace the battery:
1. Twist a thin coin between the two
halves of the transmitter near the
key ring. DO NOT TAKE THE
FRONT PART OF THE
TRANSMITTER APART.
2. Place the positive (+) side of new
battery in the same orientation.
Refer to the diagram inside the
transmitter unit.
3. Snap the two halves back
together.
Replacement of the battery willnotcause the remote transmitter to
become deprogrammed from your vehicle. The remote transmitter should
operate normally after battery replacement.
Locks and Security
92
Page 93 of 248

Replacing lost transmitters
Take all your vehicle's transmitters
to your dealer if service is required.
If a remote transmitter has been lost
and you would like to remove it
from the vehicle's memory, or you
would like to purchase additional
remote transmitters and have them
programmed to your vehicle:
²Takeallyour vehicle's
transmitters to your dealer for
programming, or
²Perform the following programming procedure yourself
To reprogram the transmitters
yourself, place the key in the
ignition and turn from 2 (LOCK) to
3 (OFF) and cycle between 3 (OFF)
and 4 (ON) four times in rapid
succession within 3 seconds. After
doors lock/unlock, press any control
on all transmitters (up to four).
When completed, turn the ignition
to 3 (OFF).
All transmittersmustbe programmed at the same time.
Illuminated entry
The interior lamps illuminate when the remote entry system is used to
unlock the door(s) or sound the personal alarm.
The system automatically turns off after 25 seconds after the UNLOCK
button on the remote transmitter is pressed or when the ignition is
turned to the START or ACC position.
The inside lights will not turn off if:
²they have been turned on with the dimmer control or
²any door is open
The battery saver will shut off the interior lamps 30 minutes after the
last door is closed or after 10 minutes if the door is left open.
3
1
2
5
4
Locks and Security
93
Page 94 of 248

Autolock
The autolock feature will lock all of the vehicle doors when:
²all doors are closed
²the engine is running and
²you shift into any gear putting the vehicle in motion
The autolock feature repeats when:
²any door, except the drivers door, is opened then closed while the
engine is running and
²you put the vehicle in motion
Autolock can also be activated or deactivated using the following
procedure:
You must complete steps 1 through 7 within 30 seconds or the procedure
will have to be repeated. If the procedure needs to be repeated, you
must wait 30 seconds.
1. Turn the ignition key to ON.
2. Press the power door unlock control on the door panel three times.
3. Turn the ignition key from ON to OFF.
4. Press the power door unlock control three times.
5. Turn the ignition key back to ON. The doors will lock and unlock.
6. Press the power door unlock control. The horn will chirp once upon
successful toggling of the Autolock feature.
7. Turn ignition to OFF.
Memory seat/mirrors/adjustable pedals feature (if equipped)
The remote keyless entry system can also control the
seat/mirrors/adjustable pedals feature. With this feature, the first two
programmed transmitters will recall a different memory position.
Locks and Security
94