Page 91 of 248
Deactivating/activating the horn chirp feature
The horn chirp feature can be turned on/off through the following
procedure:
Complete steps 1-7 within 30 seconds or you must repeat the procedure.
Wait 30 seconds before repeating the procedure.
1. Turn ignition key to ON.
2. Press power door unlock control on the door panel 3 times.
3. Turn ignition key from ON to OFF.
4. Press power door unlock control 3 times.
5. Turn ignition key back to ON. The doors will lock and unlock.
6. Press unlock control twice within 5 seconds. The horn will chirp twice
upon successful toggling of the horn chirp feature.
7. Turn ignition to OFF.
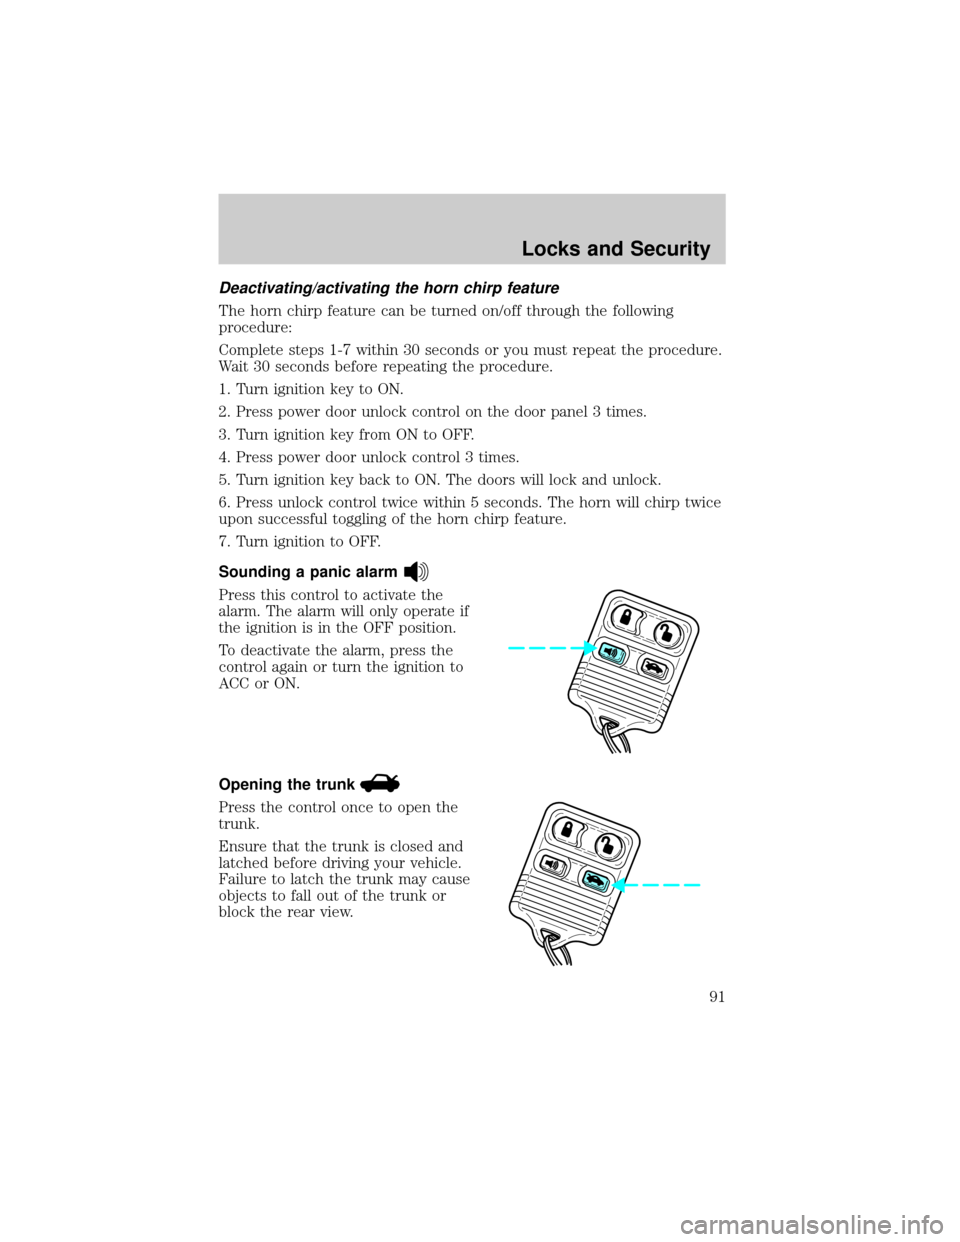
Sounding a panic alarm
Press this control to activate the
alarm. The alarm will only operate if
the ignition is in the OFF position.
To deactivate the alarm, press the
control again or turn the ignition to
ACC or ON.
Opening the trunk
Press the control once to open the
trunk.
Ensure that the trunk is closed and
latched before driving your vehicle.
Failure to latch the trunk may cause
objects to fall out of the trunk or
block the rear view.
Locks and Security
91
Page 92 of 248
The remote entry system allows you to open the trunk while the ignition
is in any position. However, if the ignition is in the ON position and the
gearshift is in D (Drive), the trunk will only open if the vehicle is moving
5 km/h (3 mph) or slower.
Replacing the battery
The remote transmitter is powered by one coin type three-volt lithium
battery CR2032 or equivalent. Typical operating range will allow you to
be up to 10 meters (33 feet) away from your vehicle. A decrease in
operating range can be caused by:
²weather conditions
²nearby radio towers
²structures around the vehicle
²other vehicles parked next to the vehicle
To replace the battery:
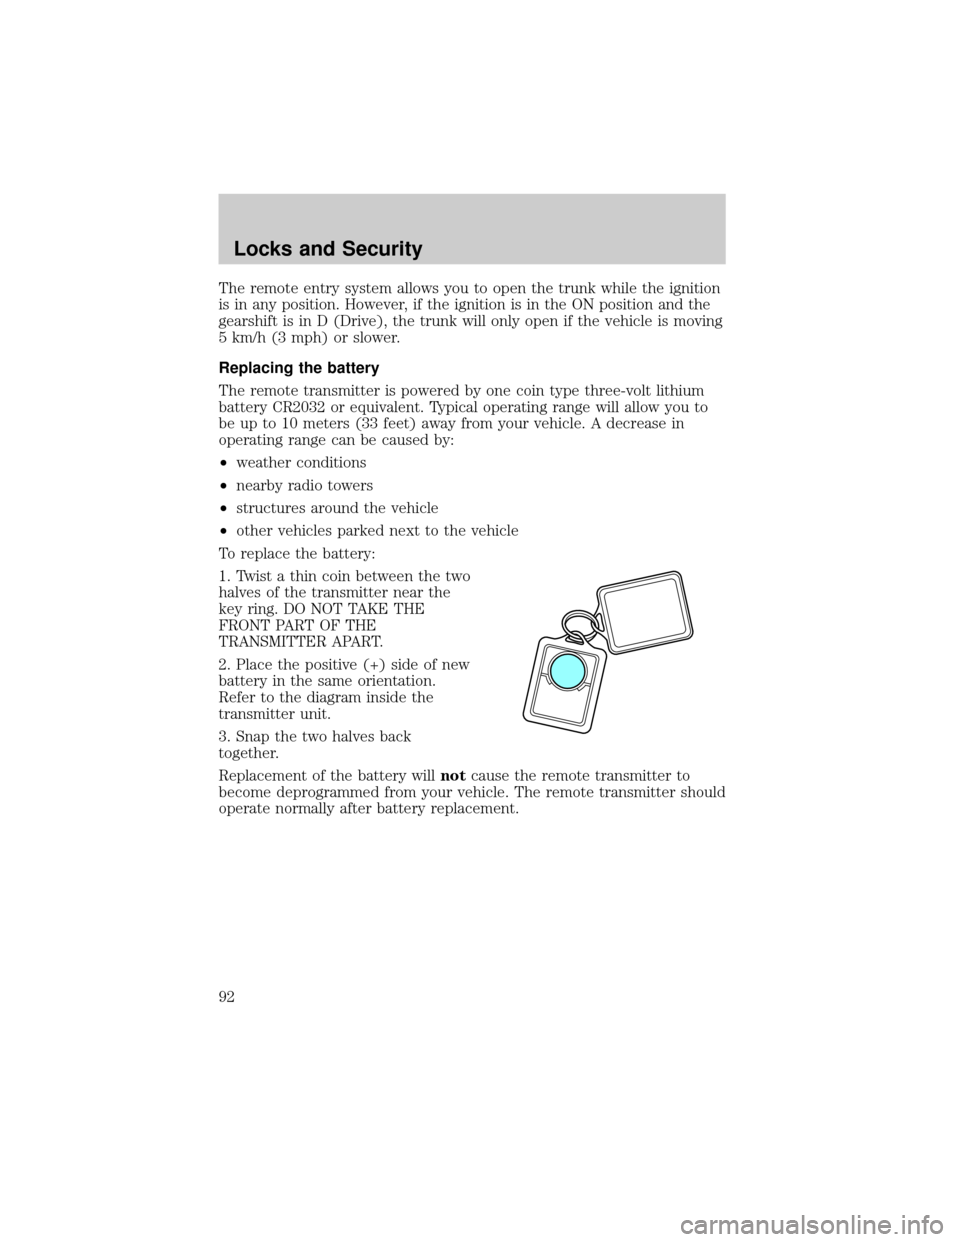
1. Twist a thin coin between the two
halves of the transmitter near the
key ring. DO NOT TAKE THE
FRONT PART OF THE
TRANSMITTER APART.
2. Place the positive (+) side of new
battery in the same orientation.
Refer to the diagram inside the
transmitter unit.
3. Snap the two halves back
together.
Replacement of the battery willnotcause the remote transmitter to
become deprogrammed from your vehicle. The remote transmitter should
operate normally after battery replacement.
Locks and Security
92
Page 97 of 248
You can program up to three personal codes to unlock your vehicle.
These codes do not replace the permanent code that the dealership gave
you.
Erasing personal code
To erase all of the personal entry codes programmed to a vehicle:
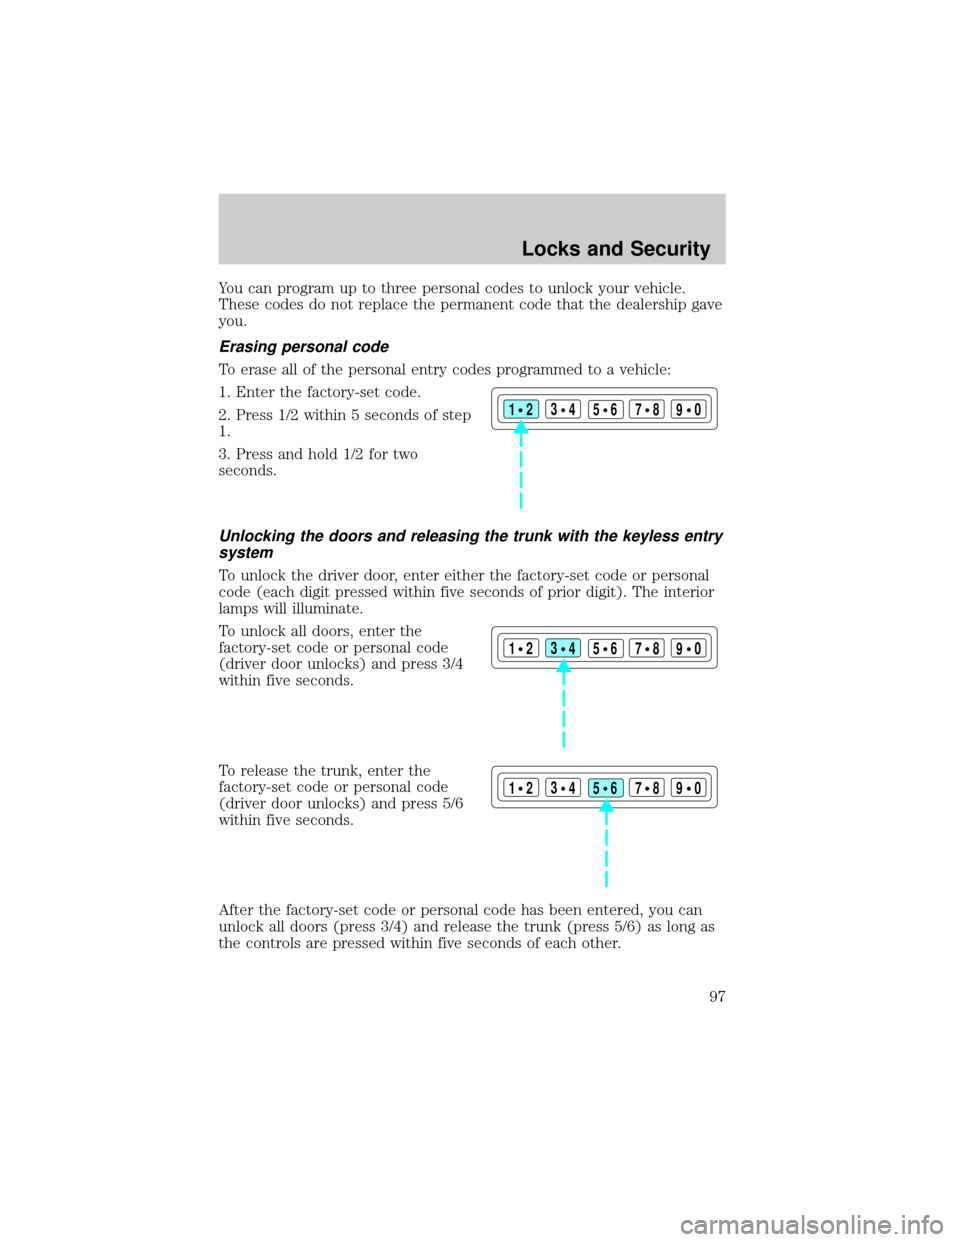
1. Enter the factory-set code.
2. Press 1/2 within 5 seconds of step
1.
3. Press and hold 1/2 for two
seconds.
Unlocking the doors and releasing the trunk with the keyless entry
system
To unlock the driver door, enter either the factory-set code or personal
code (each digit pressed within five seconds of prior digit). The interior
lamps will illuminate.
To unlock all doors, enter the
factory-set code or personal code
(driver door unlocks) and press 3/4
within five seconds.
To release the trunk, enter the
factory-set code or personal code
(driver door unlocks) and press 5/6
within five seconds.
After the factory-set code or personal code has been entered, you can
unlock all doors (press 3/4) and release the trunk (press 5/6) as long as
the controls are pressed within five seconds of each other.
123
45678
90
123
45678
90
123
45678
90
Locks and Security
97
Page 138 of 248
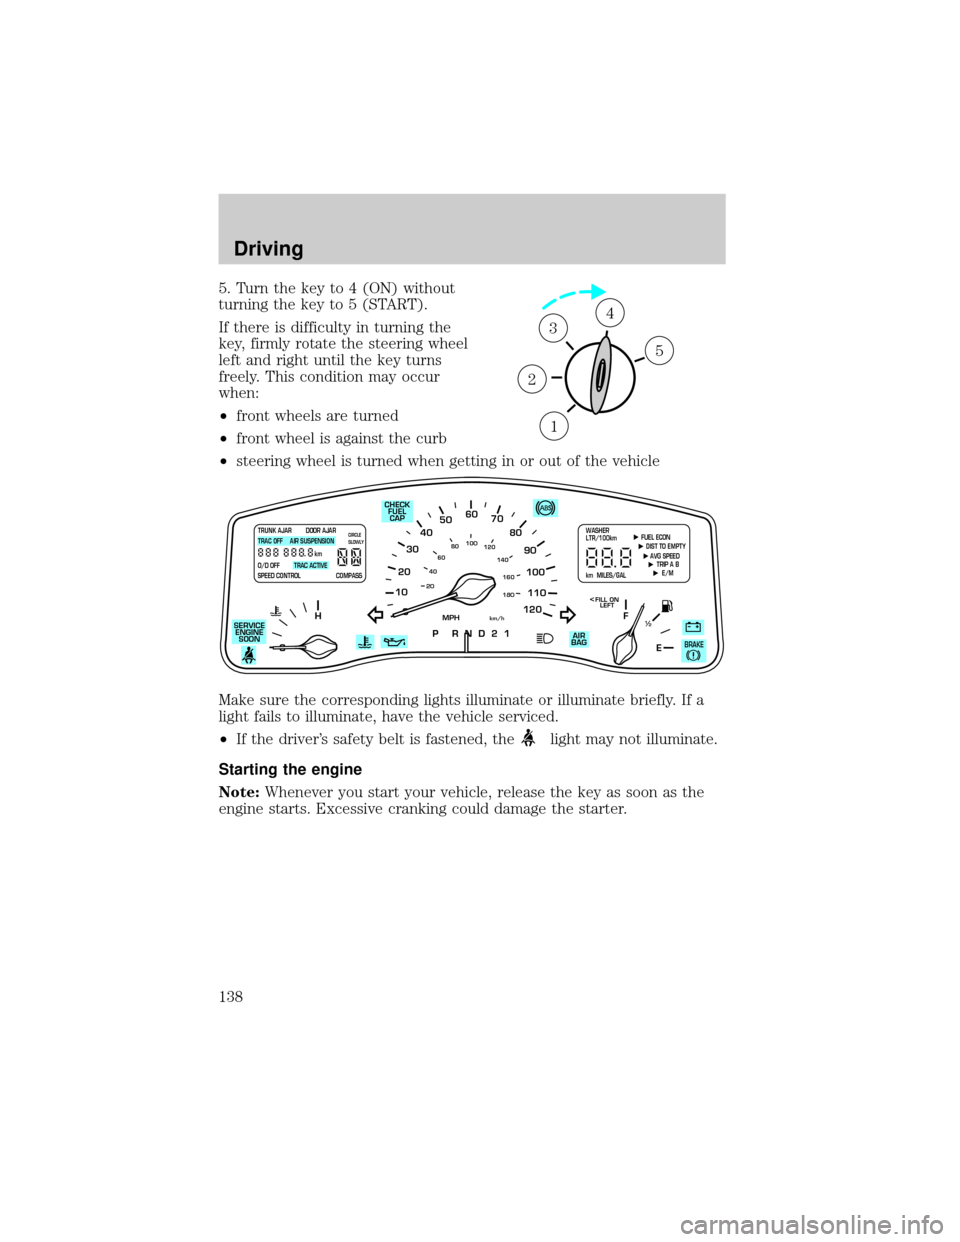
5. Turn the key to 4 (ON) without
turning the key to 5 (START).
If there is difficulty in turning the
key, firmly rotate the steering wheel
left and right until the key turns
freely. This condition may occur
when:
²front wheels are turned
²front wheel is against the curb
²steering wheel is turned when getting in or out of the vehicle
Make sure the corresponding lights illuminate or illuminate briefly. If a
light fails to illuminate, have the vehicle serviced.
²If the driver's safety belt is fastened, the
light may not illuminate.
Starting the engine
Note:Whenever you start your vehicle, release the key as soon as the
engine starts. Excessive cranking could damage the starter.
1
2
34
5
10
2030405060
70
80
90
100
120206080
40100
120
160 140
180
P R N D 2 1
MPHkm/h
110
HF
E1
2
FILL ON
LEFT<
AIR
BAG SERVICE
ENGINE
SOON
TRUNK AJAR DOOR AJAR
TRAC OFF AIR SUSPENSION
O/D OFF TRAC ACTIVE
SPEED CONTROL COMPASSkmCIRCLE
SLOWLY FUEL ECON
DIST TO EMPTY
AVG SPEED
TRIP A B
E/M
km MILES/GALWASHER
LTR/100km
BRAKE
CHECK
FUEL
CAP
Driving
138
Page 145 of 248

²high crosswinds
²wheels out of alignment
²loose or worn suspension components
Speed sensitive steering
The steering in your vehicle is speed sensitive. At high speeds, steering
assist will decrease to improve steering feel. At lower speeds,
maneuverability will be increased.
If the amount of effort required to steer your vehicle changes while
driving at a constant vehicle speed, have the power steering system
checked by your dealer or a qualified service technician.
AIR SUSPENSION SYSTEM
The air suspension system is designed to improve ride, handling and
general vehicle performance during:
²certain road conditions
²steering maneuvers
²braking
²accelerations
This system keeps the rear of your vehicle at a constant level by
automatically adding air or releasing air from the springs.
If you exceed the load limit, the rear air suspension may not operate.
The air suspension shut-off switch is
located on the left side of the trunk.
If this switch is in the OFF position,
the rear air suspension will not
operate.
On vehicles equipped with
Air Suspension, turn OFF
the Air Suspension switch prior to
jacking, hoisting or towing your
vehicle.
Normal vehicle operation does not
require any action by the driver.
AIR SUSPENSION
SWITCH
INTERRUPTEUR DE
LA SUSPENSION
PNEUMATIQUE
WARNING
AVERTISSEMENTOFF-ARRET
To prevent sudden
vehicle movement,
turn off air suspen-
sion switch prior to
jacking, hoisting or
towing vehicle.
Pour prévenir tout mouvement soudain du véhi-
cule, placer à l'arrêt l'interrupteur de la suspension
pneumatique avant de lever to véhicule (cric ou
pont élévateur) ou de le remorquer.
OFF
Driving
145
Page 148 of 248
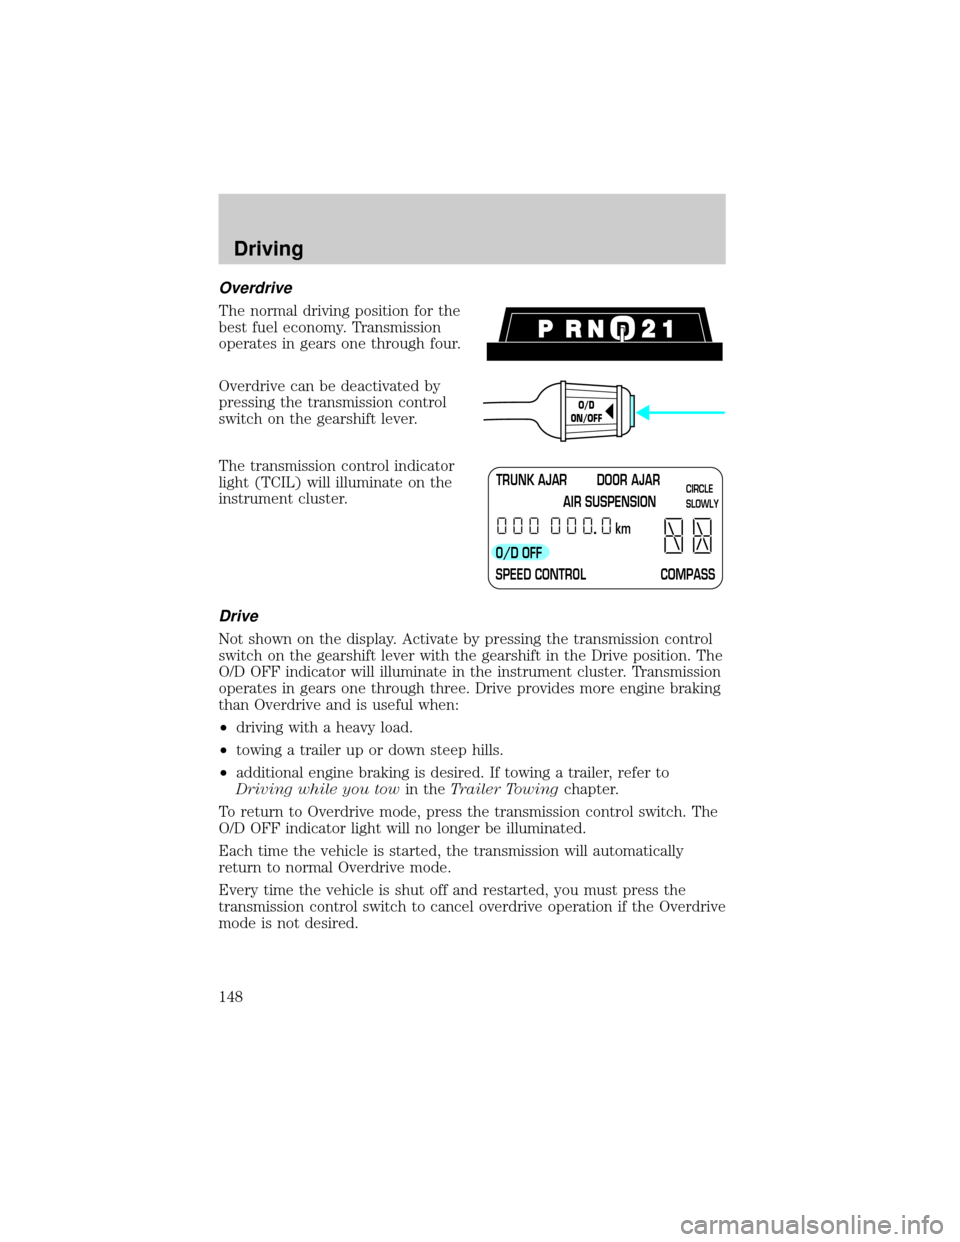
Overdrive
The normal driving position for the
best fuel economy. Transmission
operates in gears one through four.
Overdrive can be deactivated by
pressing the transmission control
switch on the gearshift lever.
The transmission control indicator
light (TCIL) will illuminate on the
instrument cluster.
Drive
Not shown on the display. Activate by pressing the transmission control
switch on the gearshift lever with the gearshift in the Drive position. The
O/D OFF indicator will illuminate in the instrument cluster. Transmission
operates in gears one through three. Drive provides more engine braking
than Overdrive and is useful when:
²driving with a heavy load.
²towing a trailer up or down steep hills.
²additional engine braking is desired. If towing a trailer, refer to
Driving while you towin theTrailer Towingchapter.
To return to Overdrive mode, press the transmission control switch. The
O/D OFF indicator light will no longer be illuminated.
Each time the vehicle is started, the transmission will automatically
return to normal Overdrive mode.
Every time the vehicle is shut off and restarted, you must press the
transmission control switch to cancel overdrive operation if the Overdrive
mode is not desired.
O/D
ON/OFF
TRUNK AJAR DOOR AJAR
AIR SUSPENSION
O/D OFF
SPEED CONTROL COMPASSkmCIRCLE
SLOWLY
Driving
148
Page 162 of 248
Fuse/Relay
LocationFuse Amp
RatingPassenger Compartment Fuse
Panel Description
22 20A Multi-Function Switch, High
Mounted Stop Lamps, Stop Lamps
23 20A Datalink Connector, I/P Cigar
Lighter, Reardoor Cigar Lighters
(Long Wheel Base Only)
24 5A Front Radio Control Unit
25 15A Lighting Control Module (LCM),
Courtesy/Demand Lamps
26 5A Digital Transmission Range (DTR)
Sensor, Starter Relay Coil
27 20A Fuel Filler Door Release Switch
28 10A Heated Mirrors
29 20A LF Door Module, Door Locks,
Decklid Release
30 7.5A LF Seat Module, Trunk Lid
Release Switch, Door Lock
Switches, LF Seat Control Switch,
LF Door Module, Power Mirror
Switch
31 7.5A Main Light Switch, Lighting
Control Module (LCM)
32 25A Brake Pedal Position Switch
(BPP), Brake Pressure Switch,
Fuses 20 and 22
33 15A Front Radio Control Unit, Digital
Compact Disk Changer, Cellular
Telephone Transceiver, VCS
Relay 1 Ð Accessory Delay Relay
(Signature/Cartier) or Power
Window Relay (Executive)
Roadside Emergencies
162
Page 241 of 248

Load limits .................................150
GAWR ......................................150
GVWR ......................................150
trailer towing ..........................150
Locks
autolock .....................................94
childproof ..................................88
doors ..........................................88
Lubricant specifications ...228, 230
Lumbar support, seats .............103
M
Message center ...........................77
english/metric button ...............82
reset button ..............................78
Mirrors .........................................61
automatic dimming rearview
mirror ........................................63
heated ........................................64
programmable memory ............94
side view mirrors (power) .......63
Moon roof ....................................69
Motorcraft parts ................212, 226
O
Octane rating ............................211
Odometer .....................................18
Oil (see Engine oil) ..................195
Overdrive .............................83, 148
P
Panic alarm feature, remote
entry system ................................91
Parking brake ............................142Parts (see Motorcraft parts) ....226
Passenger Occupant
Classification Sensor .................108
Pedals (see Power adjustable
foot pedals) .................................64
Power distribution box
(see Fuses) ...............................163
Power door locks ........................88
Power steering ..................144±145
fluid, checking and adding ....217
fluid, refill capacity ................227
fluid, specifications .........228, 230
R
Rear window defroster ...............48
Relays ........................................158
Remote entry system ...........90±91
illuminated entry ......................93
locking/unlocking doors ...........90
opening the trunk .....................91
panic alarm ...............................91
replacement/additional
transmitters ...............................93
replacing the batteries .............92
S
Safety belts (see Safety
restraints) ............16, 106, 110±114
Safety defects, reporting ..........185
Safety restraints ........106, 110±114
belt minder .............................116
cleaning the safety
belts .................................120, 191
extension assembly ................120
for adults .........................111±113
for children .....................128±129
Index
241