2002 LINCOLN TOWN CAR fuel
[x] Cancel search: fuelPage 84 of 248

FUEL DOOR RELEASE
Your vehicle is equipped with a
locking fuel door. To open the door,
press the control located on the
door.
Fuel filler door override release
If the remote release is inoperative,
open the trunk, then pull the
override release handle located
inside the trunk to open the fuel
filler door.
MEMORY SEATS/REARVIEW MIRRORS/ADJUSTABLE PEDALS
(IF EQUIPPED)
This system allows automatic
positioning of the driver seat,
outside rearview mirrors, and
adjustable pedals to three
programmable positions.
The memory control is located on the driver door.
²To program position one, move the driver seat, mirrors, and pedals to
the desired position using the controls. Press the SET control. The
SET control indicator light will briefly illuminate. While the light is
illuminated, press control 1.
SET
12
Driver Controls
84
Page 136 of 248

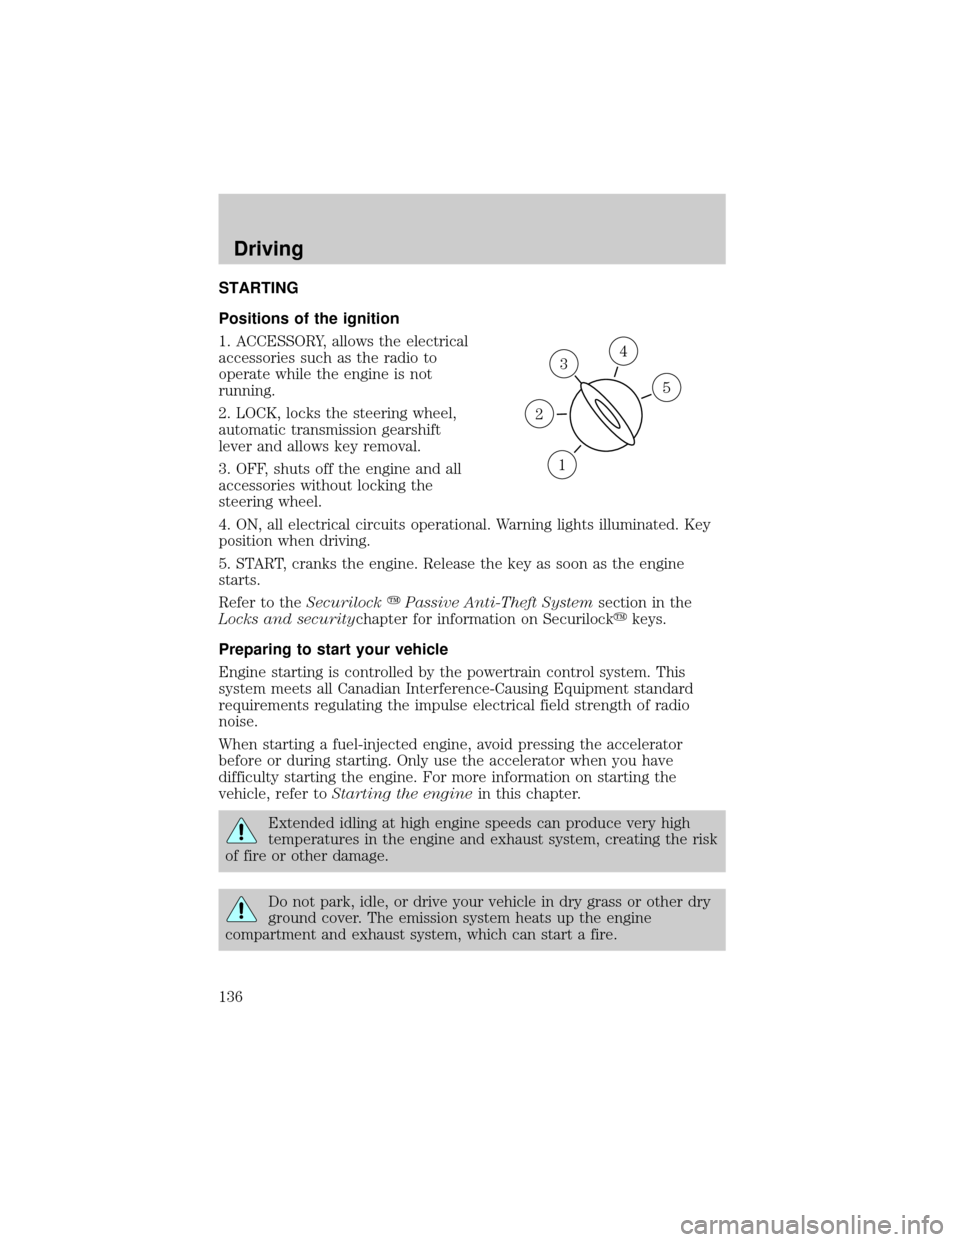
STARTING
Positions of the ignition
1. ACCESSORY, allows the electrical
accessories such as the radio to
operate while the engine is not
running.
2. LOCK, locks the steering wheel,
automatic transmission gearshift
lever and allows key removal.
3. OFF, shuts off the engine and all
accessories without locking the
steering wheel.
4. ON, all electrical circuits operational. Warning lights illuminated. Key
position when driving.
5. START, cranks the engine. Release the key as soon as the engine
starts.
Refer to theSecurilockyPassive Anti-Theft Systemsection in the
Locks and securitychapter for information on Securilockykeys.
Preparing to start your vehicle
Engine starting is controlled by the powertrain control system. This
system meets all Canadian Interference-Causing Equipment standard
requirements regulating the impulse electrical field strength of radio
noise.
When starting a fuel-injected engine, avoid pressing the accelerator
before or during starting. Only use the accelerator when you have
difficulty starting the engine. For more information on starting the
vehicle, refer toStarting the enginein this chapter.
Extended idling at high engine speeds can produce very high
temperatures in the engine and exhaust system, creating the risk
of fire or other damage.
Do not park, idle, or drive your vehicle in dry grass or other dry
ground cover. The emission system heats up the engine
compartment and exhaust system, which can start a fire.
3
1
2
5
4
Driving
136
Page 138 of 248

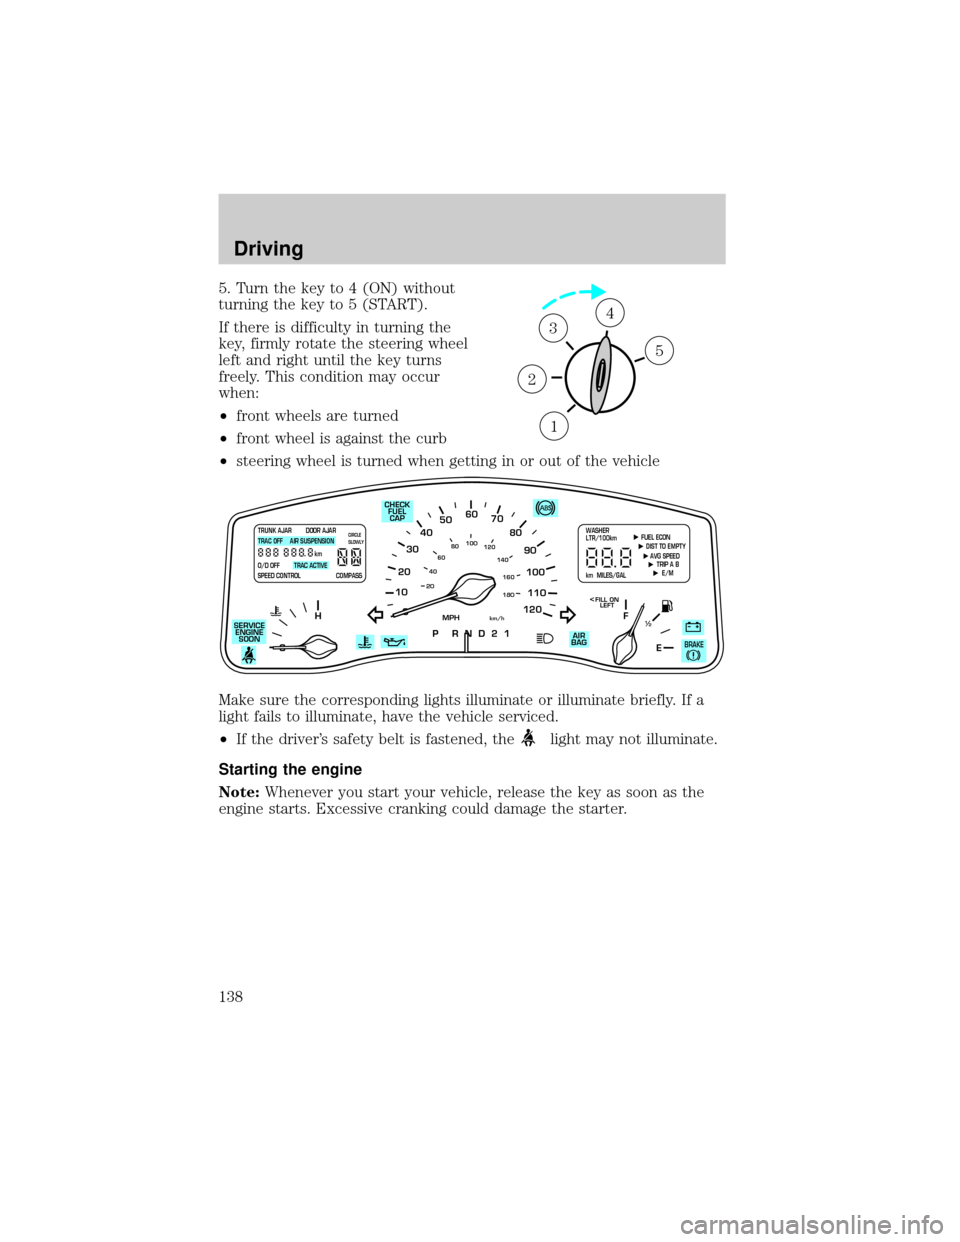
5. Turn the key to 4 (ON) without
turning the key to 5 (START).
If there is difficulty in turning the
key, firmly rotate the steering wheel
left and right until the key turns
freely. This condition may occur
when:
²front wheels are turned
²front wheel is against the curb
²steering wheel is turned when getting in or out of the vehicle
Make sure the corresponding lights illuminate or illuminate briefly. If a
light fails to illuminate, have the vehicle serviced.
²If the driver's safety belt is fastened, the
light may not illuminate.
Starting the engine
Note:Whenever you start your vehicle, release the key as soon as the
engine starts. Excessive cranking could damage the starter.
1
2
34
5
10
2030405060
70
80
90
100
120206080
40100
120
160 140
180
P R N D 2 1
MPHkm/h
110
HF
E1
2
FILL ON
LEFT<
AIR
BAG SERVICE
ENGINE
SOON
TRUNK AJAR DOOR AJAR
TRAC OFF AIR SUSPENSION
O/D OFF TRAC ACTIVE
SPEED CONTROL COMPASSkmCIRCLE
SLOWLY FUEL ECON
DIST TO EMPTY
AVG SPEED
TRIP A B
E/M
km MILES/GALWASHER
LTR/100km
BRAKE
CHECK
FUEL
CAP
Driving
138
Page 143 of 248

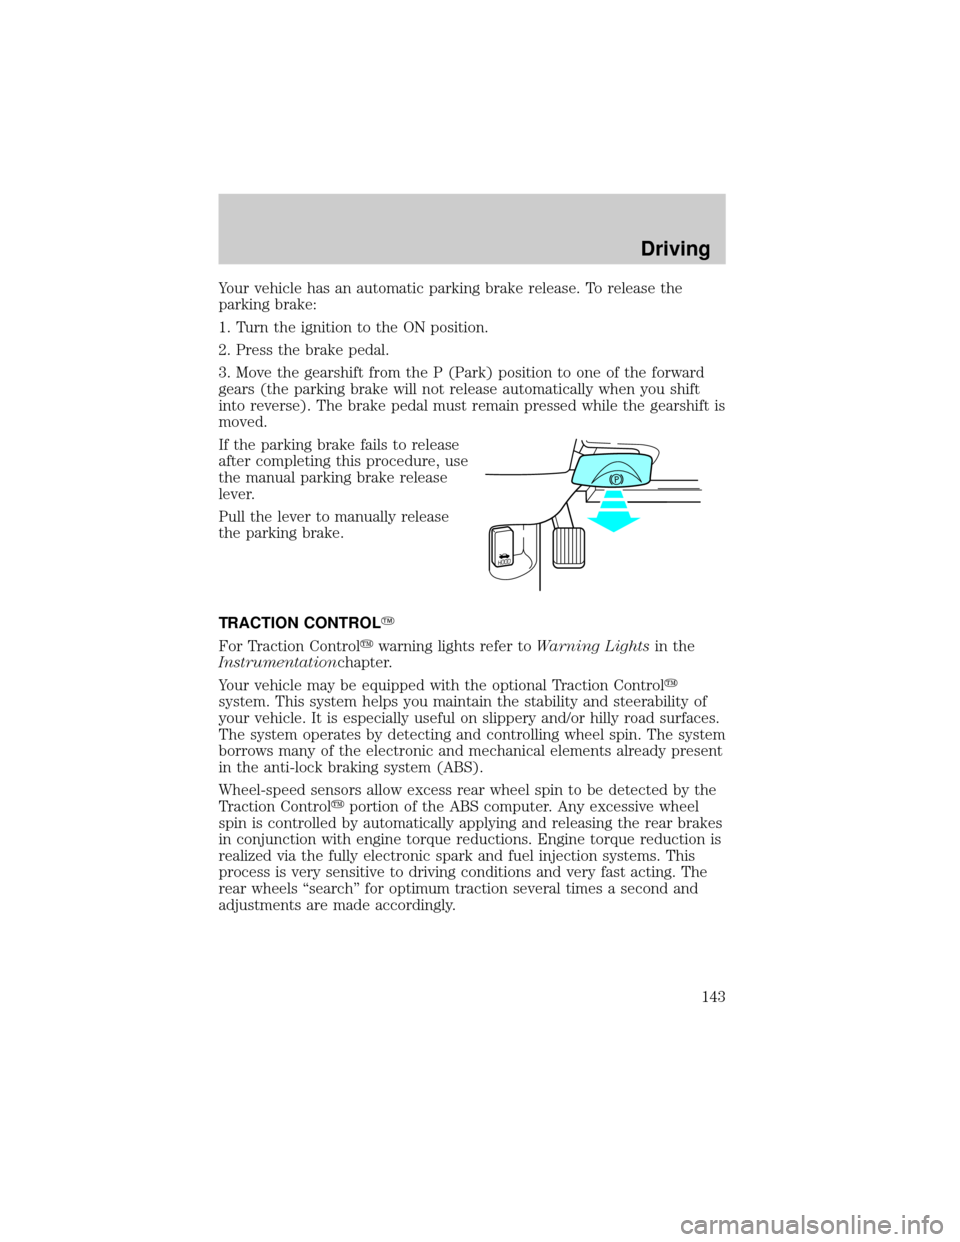
Your vehicle has an automatic parking brake release. To release the
parking brake:
1. Turn the ignition to the ON position.
2. Press the brake pedal.
3. Move the gearshift from the P (Park) position to one of the forward
gears (the parking brake will not release automatically when you shift
into reverse). The brake pedal must remain pressed while the gearshift is
moved.
If the parking brake fails to release
after completing this procedure, use
the manual parking brake release
lever.
Pull the lever to manually release
the parking brake.
TRACTION CONTROLY
For Traction Controlywarning lights refer toWarning Lightsin the
Instrumentationchapter.
Your vehicle may be equipped with the optional Traction Controly
system. This system helps you maintain the stability and steerability of
your vehicle. It is especially useful on slippery and/or hilly road surfaces.
The system operates by detecting and controlling wheel spin. The system
borrows many of the electronic and mechanical elements already present
in the anti-lock braking system (ABS).
Wheel-speed sensors allow excess rear wheel spin to be detected by the
Traction Controlyportion of the ABS computer. Any excessive wheel
spin is controlled by automatically applying and releasing the rear brakes
in conjunction with engine torque reductions. Engine torque reduction is
realized via the fully electronic spark and fuel injection systems. This
process is very sensitive to driving conditions and very fast acting. The
rear wheels ªsearchº for optimum traction several times a second and
adjustments are made accordingly.
HOOD
Driving
143
Page 148 of 248

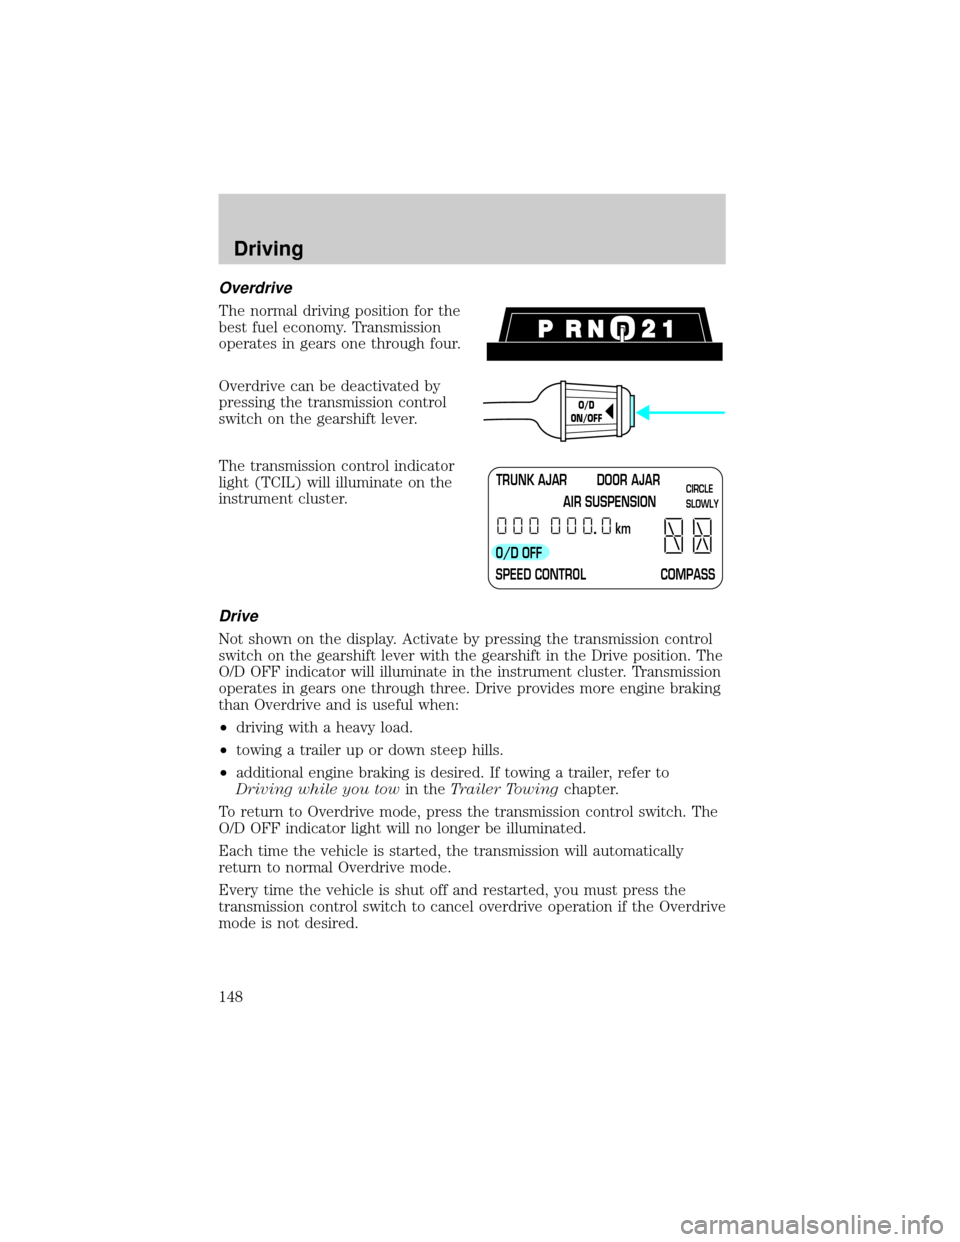
Overdrive
The normal driving position for the
best fuel economy. Transmission
operates in gears one through four.
Overdrive can be deactivated by
pressing the transmission control
switch on the gearshift lever.
The transmission control indicator
light (TCIL) will illuminate on the
instrument cluster.
Drive
Not shown on the display. Activate by pressing the transmission control
switch on the gearshift lever with the gearshift in the Drive position. The
O/D OFF indicator will illuminate in the instrument cluster. Transmission
operates in gears one through three. Drive provides more engine braking
than Overdrive and is useful when:
²driving with a heavy load.
²towing a trailer up or down steep hills.
²additional engine braking is desired. If towing a trailer, refer to
Driving while you towin theTrailer Towingchapter.
To return to Overdrive mode, press the transmission control switch. The
O/D OFF indicator light will no longer be illuminated.
Each time the vehicle is started, the transmission will automatically
return to normal Overdrive mode.
Every time the vehicle is shut off and restarted, you must press the
transmission control switch to cancel overdrive operation if the Overdrive
mode is not desired.
O/D
ON/OFF
TRUNK AJAR DOOR AJAR
AIR SUSPENSION
O/D OFF
SPEED CONTROL COMPASSkmCIRCLE
SLOWLY
Driving
148
Page 153 of 248

Do not connect a trailer's hydraulic brake system directly to your
vehicle's brake system. Your vehicle may not have enough
braking power and your chances of having a collision greatly increase.
The braking system of the tow vehicle is rated for operation at the
GVWR not GCWR.
Trailer lamps
Trailer lamps are required on most towed vehicles. Make sure your
trailer lamps conform to local and Federal regulations. See your dealer or
trailer rental agency for proper instructions and equipment for hooking
up trailer lamps.
Driving while you tow
When towing a trailer:
²Ensure that you turn off your speed control. The speed control may
shut off automatically when you are towing on long, steep grades.
²Consult your local motor vehicle speed regulations for towing a trailer.
²Use a lower gear when towing up or down steep hills. This will
eliminate excessive downshifting and upshifting for optimum fuel
economy and transmission cooling.
²Anticipate stops and brake gradually.
Exceeding the GCWR rating may cause internal transmission
damage and void your warranty coverage.
Servicing after towing
If you tow a trailer for long distances, your vehicle will require more
frequent service intervals. Refer to your scheduled maintenance guide for
more information.
Trailer towing tips
²Practice turning, stopping and backing up before starting on a trip to
get the feel of the vehicle trailer combination. When turning, make
wider turns so the trailer wheels will clear curbs and other obstacles.
²Allow more distance for stopping with a trailer attached.
Driving
153
Page 156 of 248

GETTING ROADSIDE ASSISTANCE
To fully assist if you should have a vehicle concern, Ford Motor Company
offers a complimentary roadside assistance program. This program is
separate from the New Vehicle Limited Warranty. The service is available:
²24±hours, seven days a week
²for the Basic warranty period (Canada) or New Vehicle Limited
Warranty period (U.S.) of three years or 60 000 km (36 000 miles),
whichever comes first on Ford and Mercury vehicles, and four years or
80 000 km (50 000 miles) on Lincoln vehicles
Roadside assistance will cover:
²changing a flat tire
²jump-starts
²lock-out assistance
²limited fuel delivery*
²towing of your disabled vehicle to the nearest Ford Motor Company
dealership, or your selling dealer if within 25 kms (15.5 miles) of the
nearest Ford Motor Company dealership (one tow per disablement).
Even non-warranty related tows, like accidents or getting stuck in the
mud or snow, are covered (some exclusions apply, such as impound
towing or repossession).
* Canadian customers refer to yourRoadside Assistance supplement
for exact fuel amounts.
USING ROADSIDE ASSISTANCE
Complete the roadside assistance identification card and place it in your
wallet for quick reference. In the United States, this card is found in the
Owner Guide portfolio in the glove compartment in Ford vehicles and is
mailed to you if you own a Mercury or Lincoln. In Canada, the card is
found in the Roadside Assistance book in the glove compartment.
U.S. Ford or Mercury vehicle customers who require roadside assistance,
call 1±800±241±3673; Lincoln vehicle customers call 1±800±521±4140.
Canadian customers who require roadside assistance, call
1±800±665±2006.
Roadside Emergencies
156
Page 157 of 248

If you need to arrange roadside assistance for yourself, Ford Motor
Company will reimburse a reasonable amount. To obtain reimbursement
information, U.S. Ford or Mercury vehicles customers call
1-800-241-3673; Lincoln vehicle customers call 1±800±521±4140.
Canadian customers who need to obtain reimbursement information, call
1±800±665±2006.
ROADSIDE COVERAGE BEYOND BASIC WARRANTY
In the United States, you may purchase additional roadside assistance
coverage beyond this period through the Ford Auto Club by contacting
your Ford or Lincoln Mercury dealer.
Similarly in Canada, for uninterrupted Roadside Assistance coverage, you
may purchase extended coverage prior to your Basic Warranty's Roadside
Assistance expiring. For more information and enrollment, contact
1±877±294±2582 or visit our website at www.ford.ca.
HAZARD FLASHER
Use only in an emergency to warn traffic of vehicle breakdown,
approaching danger, etc. The hazard flashers can be operated when the
ignition is off.
²The hazard lights control is
located on top of the steering
column.
²Depress hazard lights control to
activate all hazard flashers
simultaneously.
²Depress control again to turn the
flashers off.
FUEL PUMP SHUT-OFF SWITCH
FUEL
RESET
The fuel pump shut-off switch is a device intended to stop the electric
fuel pump when your vehicle has been involved in a substantial jolt.
After a collision, if the engine cranks but does not start, the fuel pump
shut-off switch may have been activated.
Roadside Emergencies
157