Page 99 of 288
Warnings Status
Engine power reduced Warning cannot be reset
Pull off road safely
Turn off ignition
Driver's door ajar
Passenger door ajar
Driver rear door ajar
Passenger rear door ajar
Check engine temp Warning returns after 10 minutes
Check charging system
Transmission overheated
Check transmission
Low fuel level
Check fuel cap
Low brake fluid level Warning returns after the ignition key
is turned from OFF to RUN
Check tail lamps
Check brake lamps
Check front turn lamps
Check side repeater lamps (if
equipped)
Check rear turn lamps
Check Traction Control (if
equipped)
Check AdvanceTrac (if
equipped)
Trunk ajar
Low washer fluid
Check AC (cabin) filter
Change oil soon
Oil change required
Data error
Driver Controls
99
Page 101 of 288

CHECK TRANSMISSION.Indicates the transmission is not operating
properly. If this warning stays on, contact your dealer as soon as
possible.
LOW FUEL LEVEL.Displayed when you have approximately 80 km
(50 miles) to empty.
CHECK FUEL CAP.Displayed when the fuel filler cap is not properly
installed. Check the fuel filler cap for proper installation. Refer toFuel
filler capin theMaintenance and specificationschapter.
LOW BRAKE FLUID.Indicates the brake fluid level is low and the
brake system should be inspected immediately. Refer toChecking and
adding brake fluidin theMaintenance and specificationschapter.
CHECK TAIL LAMPS.Displayed when the tail lamps are activated and
at least one is burned out. Check the lamps as soon as safely possible
and have the burned out lamp replaced.
CHECK BRAKE LAMPS.Displayed when the brake lamps are
activated and at least one is burned out. Check the lamps as soon as
safely possible and have the burned out lamp replaced. The center
high-mount brakelamp is not monitored.
CHECK FRT TURN LAMPS.Displayed when the turn signals are
activated and at least one is burned out. Check the lamps as soon as
safely possible and have the burned out lamp replaced.
CHECK SIDE REPEATER LAMPS (if equipped).Displayed when
the turn signals are activated and at least one is burned out. Check the
lamps as soon as possible and have the burned out lamp replaced.
CHECK REAR TURN LAMPS.Displayed when the turn signals are
activated and at least one is burned out. Check the lamps as soon as
possible and have the burned out lamp replaced.
CHECK TRACTION CONTROL (if equipped).Displayed when the
Traction Controlysystem is not operating properly. If this message is
displayed on the message centerandthe amber T/C OFF light in the
Traction Controlyon/off switch isnotilluminated, the Traction
Controlysystem will be partially operable. If this warning stays on,
contact your dealer for service as soon as possible. For further
information, refer toTraction controlyin theDrivingchapter.
Driver Controls
101
Page 107 of 288

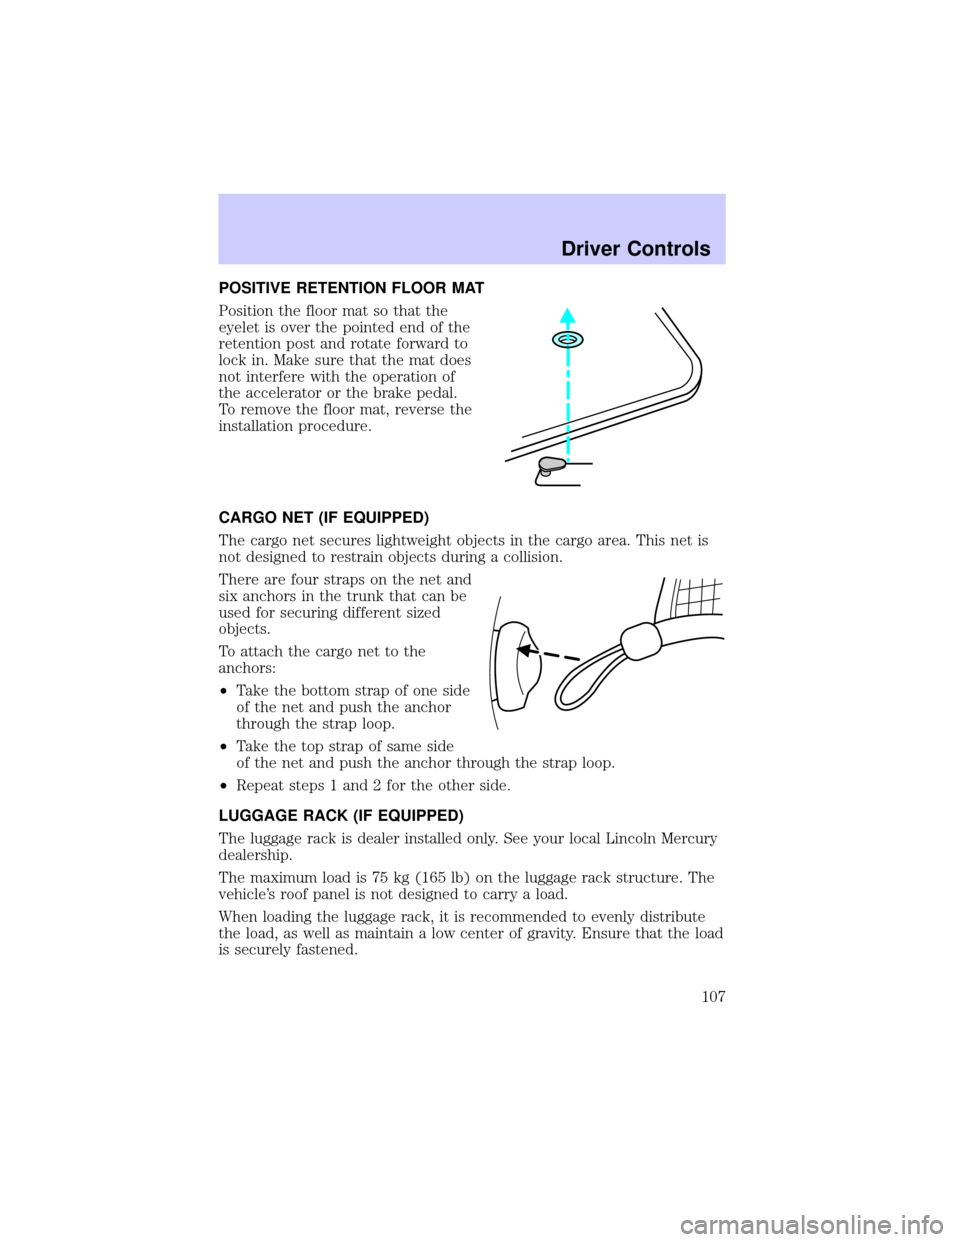
POSITIVE RETENTION FLOOR MAT
Position the floor mat so that the
eyelet is over the pointed end of the
retention post and rotate forward to
lock in. Make sure that the mat does
not interfere with the operation of
the accelerator or the brake pedal.
To remove the floor mat, reverse the
installation procedure.
CARGO NET (IF EQUIPPED)
The cargo net secures lightweight objects in the cargo area. This net is
not designed to restrain objects during a collision.
There are four straps on the net and
six anchors in the trunk that can be
used for securing different sized
objects.
To attach the cargo net to the
anchors:
²Take the bottom strap of one side
of the net and push the anchor
through the strap loop.
²Take the top strap of same side
of the net and push the anchor through the strap loop.
²Repeat steps 1 and 2 for the other side.
LUGGAGE RACK (IF EQUIPPED)
The luggage rack is dealer installed only. See your local Lincoln Mercury
dealership.
The maximum load is 75 kg (165 lb) on the luggage rack structure. The
vehicle's roof panel is not designed to carry a load.
When loading the luggage rack, it is recommended to evenly distribute
the load, as well as maintain a low center of gravity. Ensure that the load
is securely fastened.
Driver Controls
107
Page 125 of 288

Memory seats/steering column/mirrors (if equipped)
This system allows automatic
positioning of the driver seat,
outside rearview mirrors, and power
adjusted tilt/telescope steering
column to two programmable
positions.
The memory seat control is located
on the driver door.
²To program position one, move
the driver seat to the desired
position using the seat controls. Press the SET control. The SET
control indicator light will briefly illuminate. While the light is
illuminated, press control 1.
²To program position two, repeat the previous procedure using control
2.
A position can only be set or recalled when the transmission gearshift is
in Park (automatic transmission) or the park brake is set (manual
transmission). A memory seat position may be programmed at any time.
The memory seat positions are also recalled when you press your remote
entry transmitter UNLOCK control.
To program the memory seat to remote entry transmitter, refer to
Remote entry systemin theControls and features chapter.
2ND SEAT/SPLIT-FOLDING REAR SEAT
One or both rear seatbacks can be folded down to provide additional
cargo space.
To lower the seatback(s), pull the
release handle(s) located inside the
trunk.
SE T
12
Seating and Safety Restraints
125
Page 130 of 288

BELT AND RETRACTOR ASSEMBLY MUST BE REPLACED if
the seat belt assembly ªautomatic locking retractorº feature or
any other seat belt function is not operating properly when checked
according to the procedures in Workshop Manual.
Failure to replace the belt and retractor assembly could increase
the risk of injury in collisions.
The front outboard and rear safety restraints in the vehicle are
combination lap and shoulder belts. The front passenger and rear seat
safety belts have two types of locking modes.
Vehicle sensitive mode
The vehicle sensitive mode is the normal retractor mode, allowing free
shoulder belt length adjustment to your movements and locking in
response to vehicle movement. For example, if the driver brakes
suddenly or turns a corner sharply, or the vehicle receives an impact of
approximately 8 km/h (5 mph) or more, the combination safety belts will
lock to help reduce forward movement of the driver and passengers.
Automatic locking mode
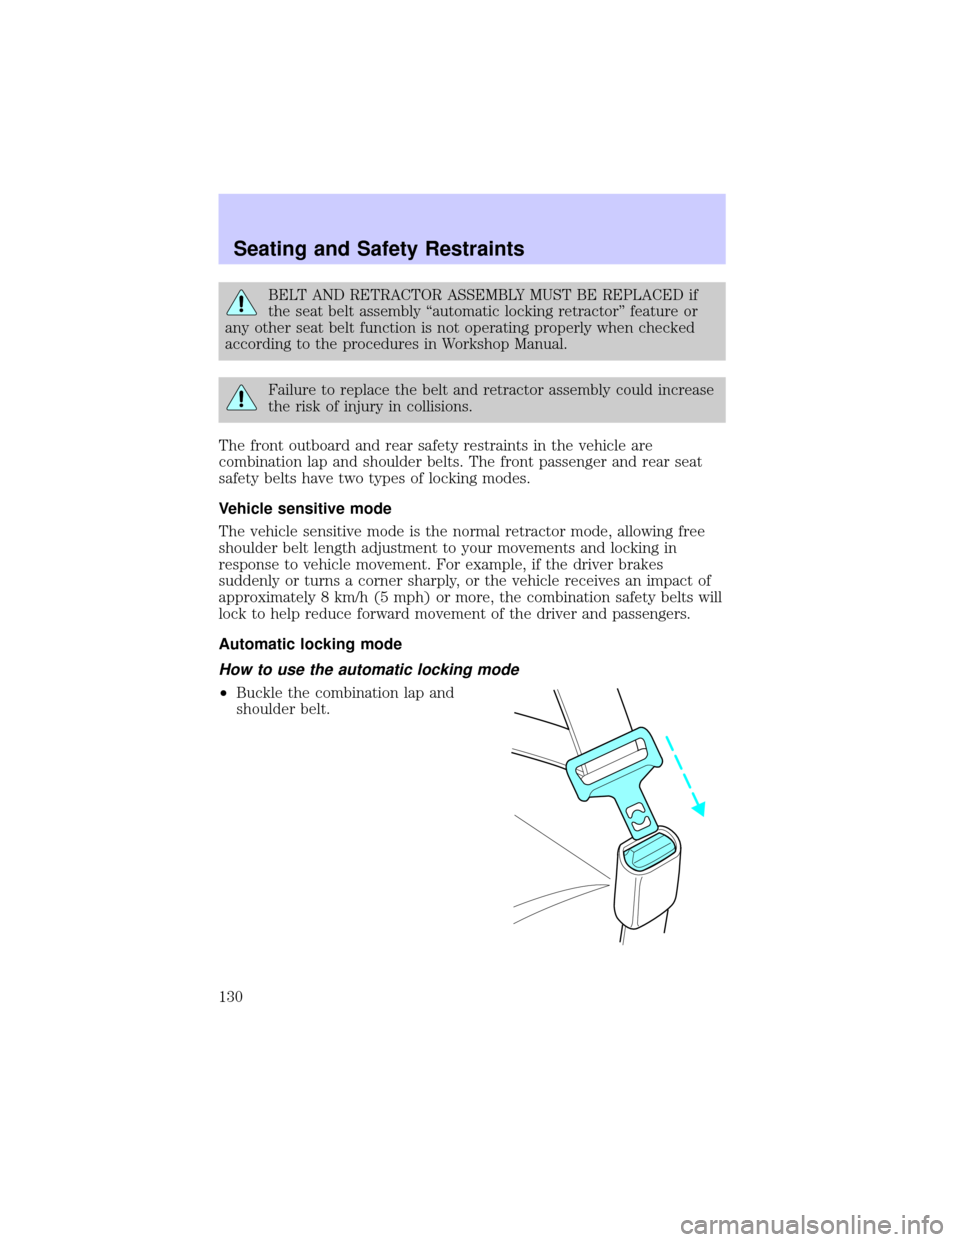
How to use the automatic locking mode
²Buckle the combination lap and
shoulder belt.
Seating and Safety Restraints
130
Page 136 of 288

Reasons given... Consider...
ªI have an air bagº Air bags offer greater protection when
used with safety belts. Frontal airbags
are not designed to inflate in rear and
side crashes or rollovers.
ªI'd rather be thrown clearº Not a good idea.Peoplewho are
ejected are 40 times more likely
to DIE.Safety belts help prevent
ejection, WE CAN'T ªPICK OUR
CRASHº.
Do not sit on top of a buckled safety belt to avoid the Belt
Minder chime. Sitting on the safety belt will increase the risk of
injury in an accident. To disable (one-time) or deactivate the Belt
Minder feature please follow the directions stated below.
One time disable
Any time the safety belt is buckled and then unbuckled during an
ignition ON cycle, BeltMinder will be disabled for that ignition cycle only.
Deactivating/activating the BeltMinder feature
Read steps1-9thoroughly before proceeding with the
deactivation/activation programming procedure.
The BeltMinder feature can be deactivated/activated by performing the
following procedure:
Before following the procedure, make sure that:
²The parking brake is set.
²The gearshift is in P (Park) (automatic transmission) or the neutral
position (manual transmission).
²The ignition switch is in the OFF position.
²All vehicle doors are closed.
²The driver's safety belt is unbuckled.
²The parklamps are in OFF position.
To reduce the risk of injury, do not deactivate/activate the Belt
Minder feature while driving the vehicle.
Seating and Safety Restraints
136
Page 139 of 288

AIR BAG SUPPLEMENTAL RESTRAINT SYSTEM (SRS)
Your vehicle is equipped with a crash sensing and diagnostic module
which records information about the air bag and sensor systems. In the
event of a collision this module may save information related to the
collision including information about the air bag system and impact
severity. This information will assist Ford Motor Company in the
servicing vehicle and helping to better understand real world collisions
and further improve the safety of future vehicles.
Important supplemental restraint system (SRS) precautions
The supplemental restraint system
is designed to work with the safety
belt to help protect the driver and
right front passenger from certain
upper body injuries.
Air bags DO NOT inflate slowly or
gently and the risk of injury from a
deploying air bag is greatest close to
the trim covering the air bag
module.
All occupants of the vehicle, including the driver, should always
properly wear their safety belts, even when an air bag (SRS) is
provided.
PU
LL A
U
TORESUME
SET
CANCELO
NO
F
F
MUTE
VOL
MEDIA
HI
LO
INTINTOFF
MIST
P! BRAKEHC123456700204060801001201401604080120160
200240km/hRPMX1000RESETMPHFE
SEEKMUTEVOL
PUSH ON
CD TAPEEJBASS
TREBSELBAL
FADE
TUNESCANAUTOAM FMREW1FF2SIDE 1-23COMP5SHUFF6 4RDS
AUTO OFFA/C
R EXT
F CFF
Seating and Safety Restraints
139
Page 156 of 288

STARTING
Positions of the ignition
1. LOCK, locks the gearshift lever
(automatic transmission only) and
allows key removal.
2. OFF, shuts off the engine and all
accessories without locking the
steering wheel (if equipped). This
position also allows the automatic
transmission shift lever to be moved
from the P (Park) position without
the brake pedal being depressed.
3. ACCESSORY, allows the electrical accessories such as the radio to
operate while the engine is not running.
4. RUN, all electrical circuits operational. Warning lights illuminated. Key
position when driving.
5. START, cranks the engine. Release the key as soon as the engine
starts.
Preparing to start your vehicle
Engine starting is controlled by the powertrain control system. This
system meets all Canadian Interference-Causing Equipment standard
requirements regulating the impulse electrical field strength of radio
noise.
When starting a fuel-injected engine, avoid pressing the accelerator
before or during starting. Only use the accelerator when you have
difficulty starting the engine. For more information on starting the
vehicle, refer toStarting the enginein this chapter.
Extended idling at high engine speeds can produce very high
temperatures in the engine and exhaust system, creating the risk
of fire or other damage.
Do not park, idle, or drive your vehicle in dry grass or other dry
ground cover. The emission system heats up the engine
compartment and exhaust system, which can start a fire.
2
3
4
5
1
Driving
156