Page 130 of 240

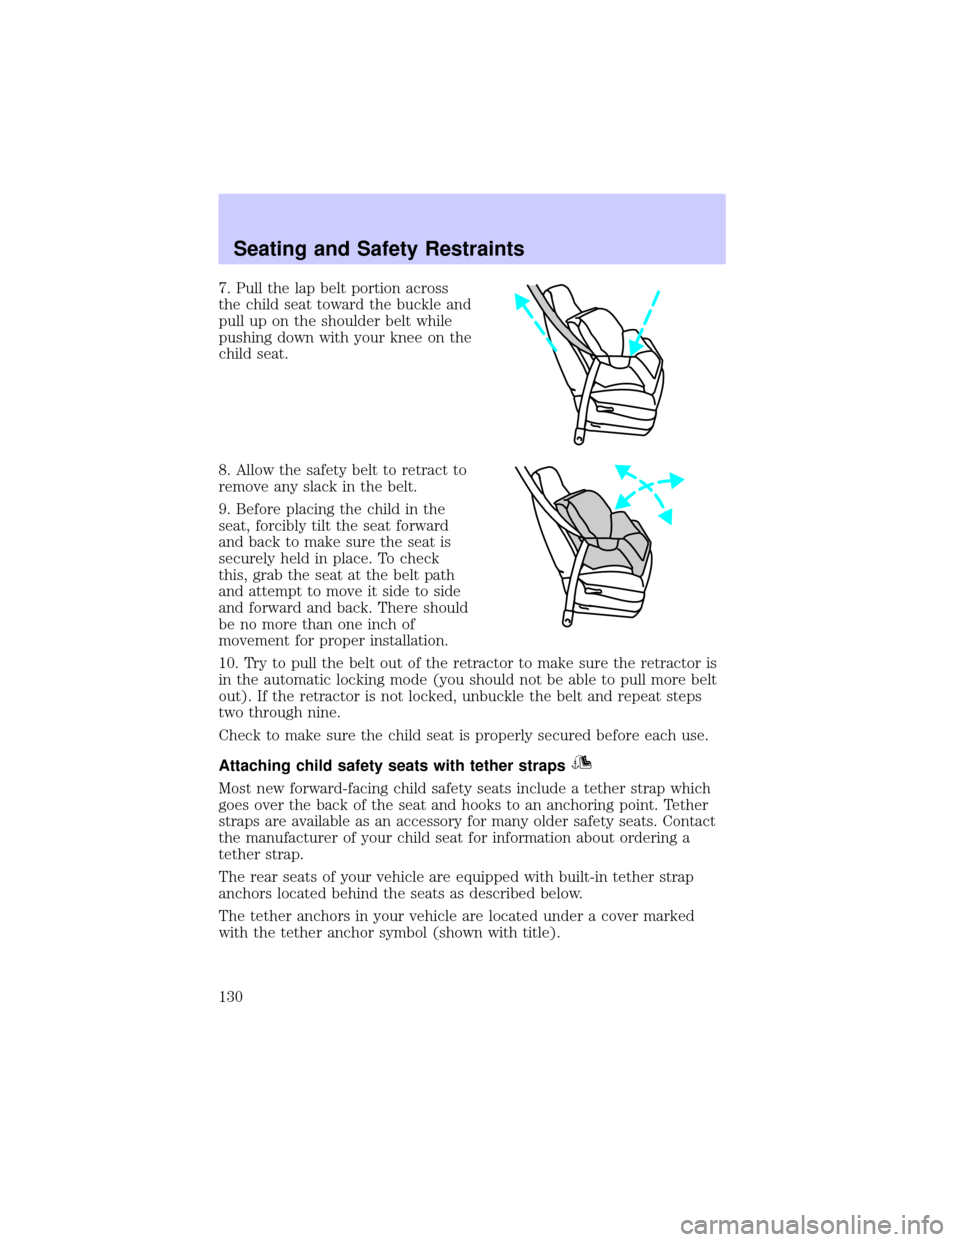
7. Pull the lap belt portion across
the child seat toward the buckle and
pull up on the shoulder belt while
pushing down with your knee on the
child seat.
8. Allow the safety belt to retract to
remove any slack in the belt.
9. Before placing the child in the
seat, forcibly tilt the seat forward
and back to make sure the seat is
securely held in place. To check
this, grab the seat at the belt path
and attempt to move it side to side
and forward and back. There should
be no more than one inch of
movement for proper installation.
10. Try to pull the belt out of the retractor to make sure the retractor is
in the automatic locking mode (you should not be able to pull more belt
out). If the retractor is not locked, unbuckle the belt and repeat steps
two through nine.
Check to make sure the child seat is properly secured before each use.
Attaching child safety seats with tether straps
Most new forward-facing child safety seats include a tether strap which
goes over the back of the seat and hooks to an anchoring point. Tether
straps are available as an accessory for many older safety seats. Contact
the manufacturer of your child seat for information about ordering a
tether strap.
The rear seats of your vehicle are equipped with built-in tether strap
anchors located behind the seats as described below.
The tether anchors in your vehicle are located under a cover marked
with the tether anchor symbol (shown with title).
Seating and Safety Restraints
130
Page 132 of 240
5. Clip the tether strap to the
anchor as shown.
If the tether strap is clipped
incorrectly, the child safety
seat may not be retained properly
in the event of a collision.
6. Refer to theInstalling child
safety seats in combination lap and shoulder belt seating positions
section of this chapter for further instructions to secure the child safety
seat.
7. Tighten the child safety seat tether strap according to the
manufacturer's instructions.
If the safety seat is not anchored properly, the risk of a child
being injured in a collision greatly increases.
Seating and Safety Restraints
132
Page 134 of 240

Do not start your vehicle in a closed garage or in other enclosed
areas. Exhaust fumes can be toxic. Always open the garage door
before you start the engine. SeeGuarding against exhaust fumesin
this chapter for more instructions.
If you smell exhaust fumes inside your vehicle, have your dealer
inspect your vehicle immediately. Do not drive if you smell
exhaust fumes.
Important safety precautions
A computer system controls the engine's idle revolutions per minute
(RPM). When the engine starts, the idle RPM runs faster to warm the
engine. If the engine idle speed does not slow down automatically, have
the vehicle checked. Do not allow the vehicle to idle for more than 10
minutes at the higher engine RPM.
Before starting the vehicle:
1. Make sure all vehicle occupants have buckled their safety belts. For
more information on safety belts and their proper usage, refer to the
Seating and safety restraintschapter.
2. Make sure the headlamps and vehicle accessories are off.
²Make sure the parking brake is
set.
BRAKE RELEASEHOOD
Driving
134
Page 135 of 240
²Make sure the gearshift is in P
(Park).
3. Turn the key to 4 (ON) without
turning the key to 5 (START).
If there is difficulty in turning the
key, firmly rotate the steering wheel
left and right until the key turns
freely. This condition may occur
when:
²front wheels are turned
²front wheel is against the curb
²steering wheel is turned when getting in or out of the vehicle
Make sure the corresponding lights illuminate or illuminate briefly. If a
light fails to illuminate, have the vehicle serviced.
²If the driver's safety belt is fastened, the
light may not illuminate.
1
2
34
5
80
MPH km/h
ABS
P!BRAKE
+ –
RPMx1000NORM
T/C
OFF
CHEF
FILL ON RIGHT
SERVICE
ENGINE
SOON AIR
BAG TURN ON
HEAD
LAMPS0 123456
7
0 2060
80
100
120
0 204060100
120
140
160
180
200
40
000000.0
P R N D 3 1
Driving
135
Page 169 of 240
3. Connect the negative (-) cable to the negative (-) terminal of the
assisting battery.
4. Make the final connection of the negative (-) cable to an exposed
metal part of the stalled vehicle's engine, away from the battery and the
carburetor/fuel injection system.Do notuse fuel lines, engine rocker
covers or the intake manifold asgroundingpoints.
Do not connect the end of the second cable to the negative (-)
terminal of the battery to be jumped. A spark may cause an
explosion of the gases that surround the battery.
5. Ensure that the cables are clear of fan blades, belts, moving parts of
both engines, or any fuel delivery system parts.
+–+–
+–+–
Roadside Emergencies
169
Page 172 of 240
WRECKER TOWING
If you need to have your vehicle towed, contact a professional towing
service or, if you are a member, your roadside assistance center.
It is recommended that your vehicle be towed by wheel lift or flatbed
equipment. Do not tow your vehicle with a slingbelt equipment. Ford
Motor Company has not approved a slingbelt towing procedure.
If your vehicle is to be towed from the rear using wheel lift, the front
wheels (drive wheels) must be placed on a dolly to prevent damage to
the transaxle.
Roadside Emergencies
172
Page 186 of 240

CLEANING THE ENGINE
Engines are more efficient when they are clean because grease and dirt
buildup keep the engine warmer than normal. When washing:
²The engine must be cool to the touch before spraying with water.
²Never spray a hot engine with cold water, as damage to the
engine block or engine components may occur.
²Use caution when using a self-serve power washer (1000psi maximum
pressure) to clean the engine, as the high-pressure fluid could
penetrate the sealed parts and cause damage.
²Never apply anything to any exposed belts in the engine
compartment, including the belt dressing.
For general cleaning of the engine and engine compartment, spray
Engine Shampoo and Degreaser (F4AZ-19A536±A) on all parts that
require cleaning and pressure rinse the area with cool water.
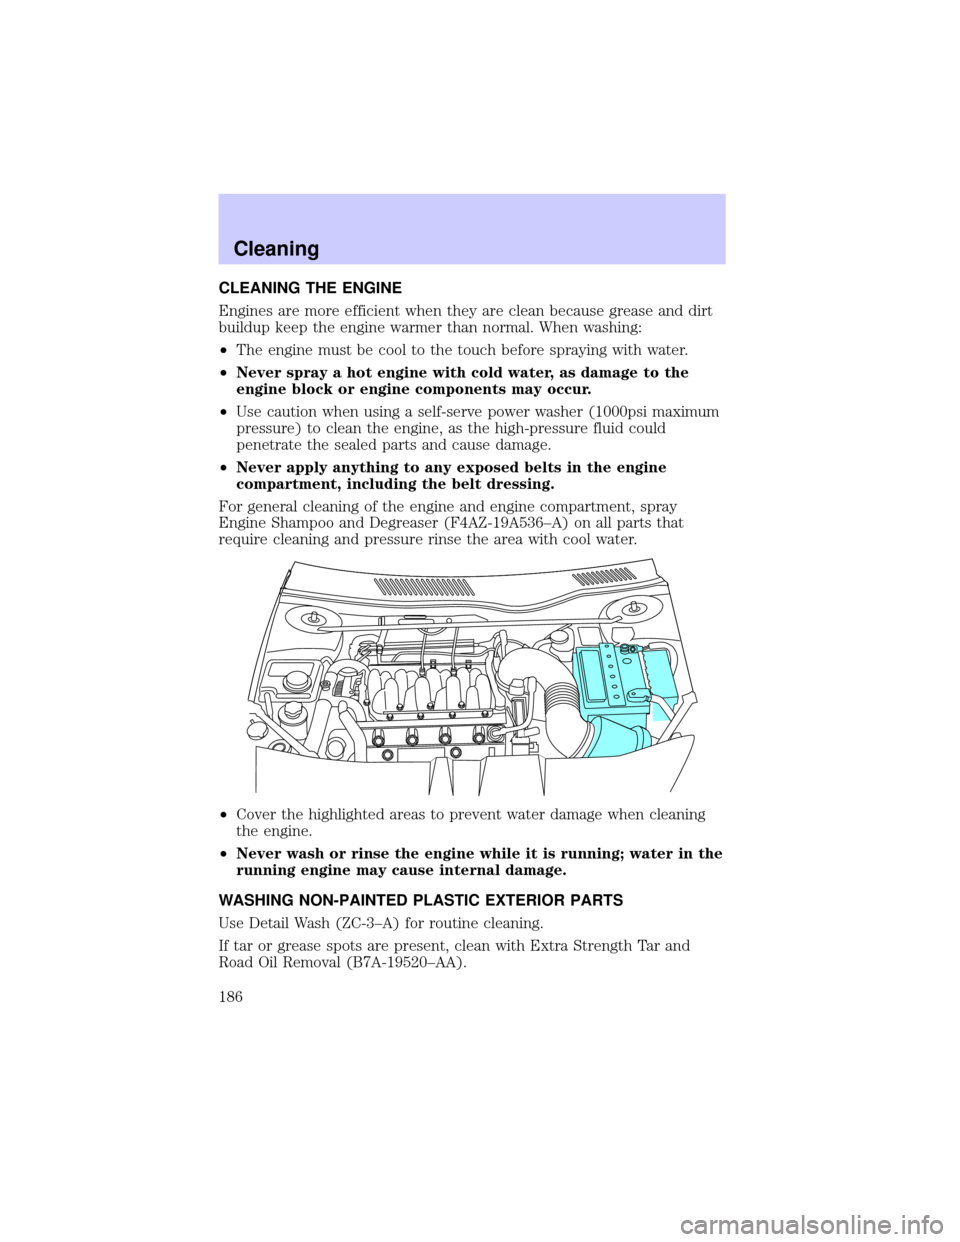
²Cover the highlighted areas to prevent water damage when cleaning
the engine.
²Never wash or rinse the engine while it is running; water in the
running engine may cause internal damage.
WASHING NON-PAINTED PLASTIC EXTERIOR PARTS
Use Detail Wash (ZC-3±A) for routine cleaning.
If tar or grease spots are present, clean with Extra Strength Tar and
Road Oil Removal (B7A-19520±AA).
Cleaning
186
Page 189 of 240

It is recommended that you use the Deluxe Leather Care Kit
(F8AZ-19G253±AA), available from your authorized Ford, Lincoln or
Mercury dealer. The mild cleaner and special pad available in the kit
cleans the leather and maintains its natural beauty. For best results,
follow the instructions printed on the cleaner label. Regular cleaning of
your leather upholstery helps maintain its resiliency and color.
Do not use household cleaning products, alcohol solutions,
solvents or cleaners intended for rubber, vinyl and plastics, or
oil/petroleum-based leather conditioners. These products may
cause premature wearing of the clear, protective coating.
CLEANING THE INSIDE WINDOWS
Use Ultra Clear Spray Glass Cleaner (E4AZ-19C507±AA) for the inside
windows if they become fogged.
To clean, use two lint-free, soft towels, folded into a pad-shape. Mist the
glass completely with cleaner, and use one of the towels to evenly agitate
the surface. Use the other towel to remove the residue.
CLEANING AND MAINTAINING THE SAFETY BELTS
Clean the safety belts with Extra Strength Upholstery Cleaner
(E8AZ-19523±AA), available from your authorized Ford, Lincoln or
Mercury dealer.
Do not use bleach, dye or any other solvent to clean the belts, as
these actions may weaken the belt webbing.
UNDERBODY
Flush the complete underside of your vehicle frequently. Keep body and
door drain holes free from packed dirt.
Cleaning
189