2002 LINCOLN CONTINENTAL change time
[x] Cancel search: change timePage 31 of 240

CD AND CD CHANGER CARE
²Handle discs by their edges only. Never touch the playing surface.
²Do not expose discs to direct sunlight or heat sources for extended
periods of time.
²Do not insert more than one disc into each slot of the CD changer
magazine.
Do not insert any promotional (odd shaped or sized) discs, or
discs with removable labels into the CD player as jamming may
occur.
CLEANING CASSETTE PLAYER
Clean the tape player head with a cassette cleaning cartridge after 10 to
12 hours of play in order to maintain the best sound and operation.
CASSETTE AND CASSETTE PLAYER CARE
²Use only cassettes that are 90 minutes long or less.
²Do not expose tapes to direct sunlight, high humidity, extreme heat or
extreme cold. Allow tapes that may have been exposed to extreme
temperatures to reach a moderate temperature before playing.
²Tighten very loose tapes by inserting a finger or pencil into the hole
and turning the hub.
²Remove loose labels before inserting tapes.
²Do not leave tapes in the cassette player for a long time when not
being played.
RADIO FREQUENCY INFORMATION
The Federal Communications Commission (FCC) and the Canadian Radio
and Telecommunications Commission(CRTC) establish the frequencies
AM and FM stations may use for their broadcasts. Allowable frequencies
are:
AM 530, 540±1600, 1610 kHz
FM 87.7, 87.9±107.7, 107.9 MHz
Not all frequencies are used in a given area.
Entertainment Systems
31
Page 34 of 240

When in AUTO and weather conditions require heat, air will be sent to
the floor. However, if the engine is not warm enough to provide heat, the
fan will not operate. In approximately 3
1¤2minutes or less, the fan speed
will start to increase and the airflow location will change to the floor
area.
If unusual conditions exist (i.e.-window fogging, etc.), the manual
override controls allow you to select airflow locations and the fan control
allows you to adjust fan speed as necessary.
Temperature selection
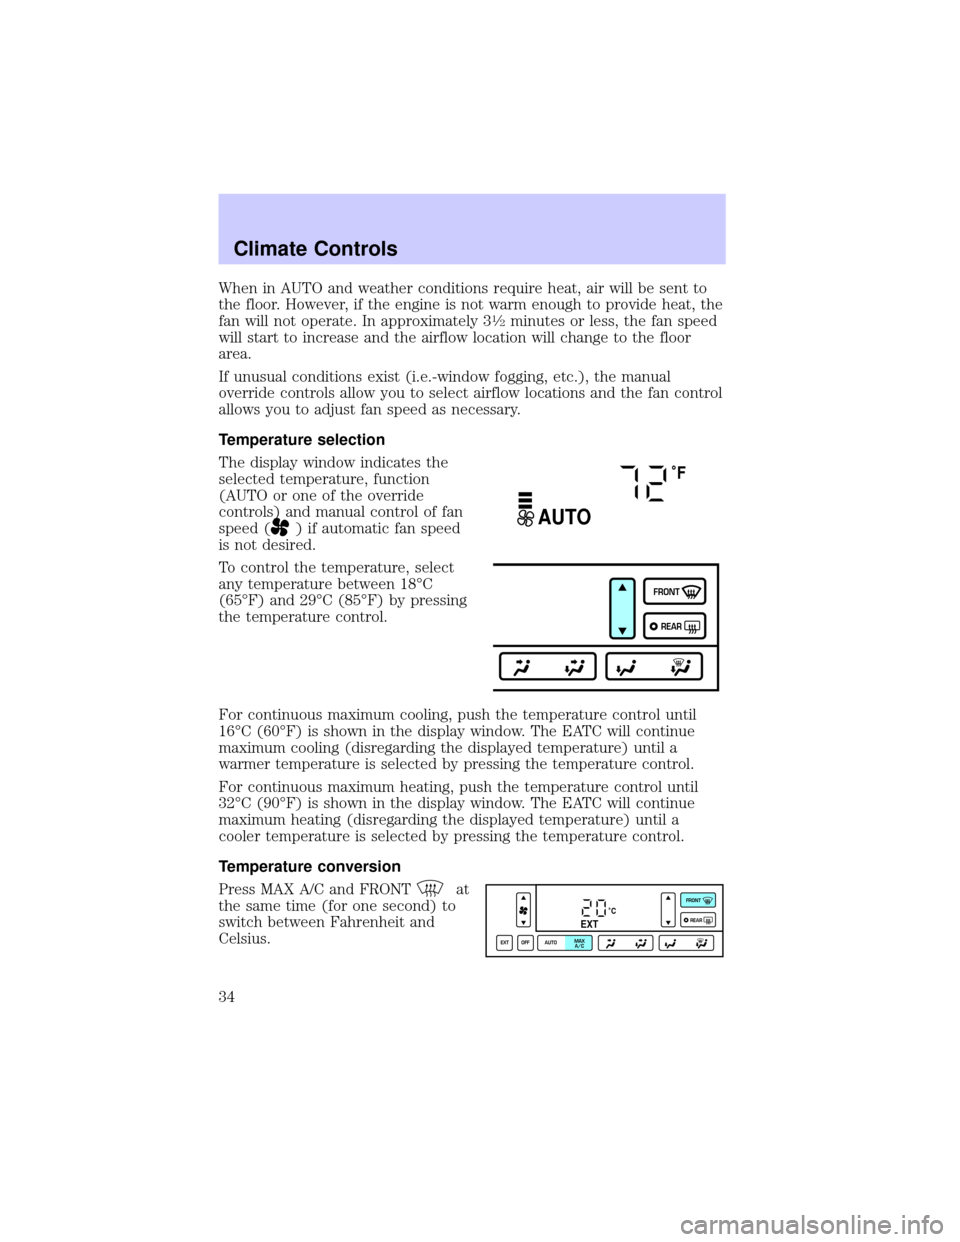
The display window indicates the
selected temperature, function
(AUTO or one of the override
controls) and manual control of fan
speed (
) if automatic fan speed
is not desired.
To control the temperature, select
any temperature between 18ÉC
(65ÉF) and 29ÉC (85ÉF) by pressing
the temperature control.
For continuous maximum cooling, push the temperature control until
16ÉC (60ÉF) is shown in the display window. The EATC will continue
maximum cooling (disregarding the displayed temperature) until a
warmer temperature is selected by pressing the temperature control.
For continuous maximum heating, push the temperature control until
32ÉC (90ÉF) is shown in the display window. The EATC will continue
maximum heating (disregarding the displayed temperature) until a
cooler temperature is selected by pressing the temperature control.
Temperature conversion
Press MAX A/C and FRONT
at
the same time (for one second) to
switch between Fahrenheit and
Celsius.
˚F
AUTO
FRONT
REAR
˚CEXT
EXT OFF AUTOMAX
A/CFRONT
REAR
Climate Controls
34
Page 35 of 240

Your vehicle has an English/Metric (E/M) control to change your
electronic message center display from English to Metric. This control
will also change the temperature display. Refer toMessage Centerin the
Driver controlschapter.
Fan speed (
)
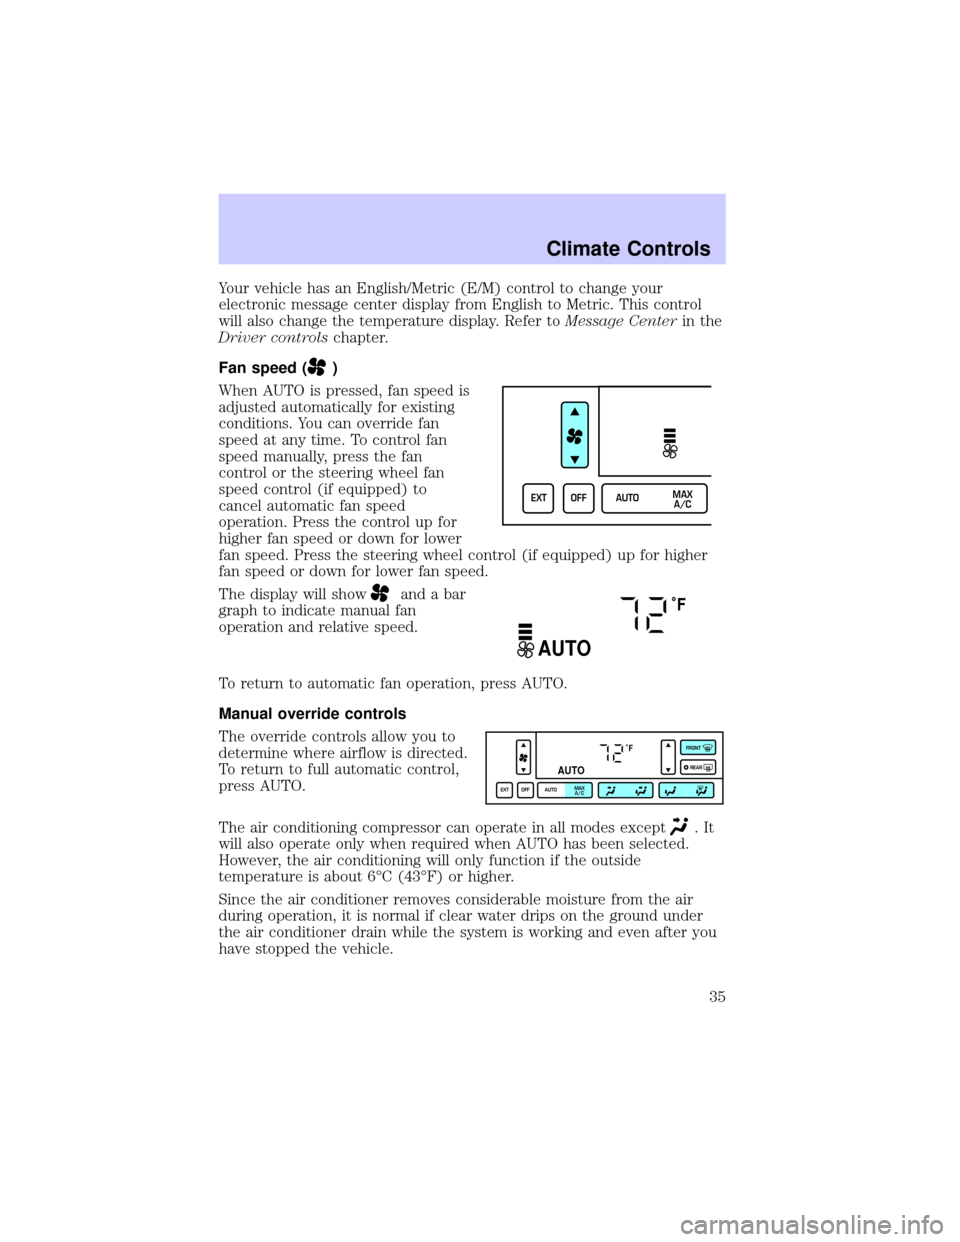
When AUTO is pressed, fan speed is
adjusted automatically for existing
conditions. You can override fan
speed at any time. To control fan
speed manually, press the fan
control or the steering wheel fan
speed control (if equipped) to
cancel automatic fan speed
operation. Press the control up for
higher fan speed or down for lower
fan speed. Press the steering wheel control (if equipped) up for higher
fan speed or down for lower fan speed.
The display will show
and a bar
graph to indicate manual fan
operation and relative speed.
To return to automatic fan operation, press AUTO.
Manual override controls
The override controls allow you to
determine where airflow is directed.
To return to full automatic control,
press AUTO.
The air conditioning compressor can operate in all modes except
.It
will also operate only when required when AUTO has been selected.
However, the air conditioning will only function if the outside
temperature is about 6ÉC (43ÉF) or higher.
Since the air conditioner removes considerable moisture from the air
during operation, it is normal if clear water drips on the ground under
the air conditioner drain while the system is working and even after you
have stopped the vehicle.
EXT OFF AUTOMAX
A/C
˚F
AUTO
˚F
AUTO
EXT OFF AUTOMAX
A/CFRONT
REAR
Climate Controls
35
Page 36 of 240

²MAX A/C-Uses recirculated air to cool the vehicle. The temperature
display will remain unchanged and air will be cooled based on the
selected temerature. To exit, press AUTOMATIC or any other override
controls. MAX A/C is noisier than normal A/C but more economical
and will cool the inside of the vehicle faster. Airflow is from the
instrument panel registers. This mode can also be used to prevent
undesirable odors from entering the vehicle.
²
(Panel) -Distributes outside air through the instrument panel
registers. However, the air cannot be cooled below the outside
temperature because the air conditioning does not operate in this
mode.
²
(Panel and floor) -Distributes outside air through the instrument
panel registers and the floor ducts. Heating and air conditioning
capabilities are provided in this mode. The air will be heated or cooled
based on the temperature selection. For added customer comfort, the
air distributed through the floor ducts will be slightly warmer than the
air sent to the instrument panel registers.
²
(Floor)-Distributes outside air through the floor ducts. Heating
and air conditioning capabilities are provided in this mode.
²
(Floor and defrost)-Distributes outside air through the windshield
defroster ducts and the floor ducts. Heating and air conditioning
capabilities are provided in this mode. The air will be heated or cooled
based on the temperature selection. For added customer comfort, the
air distributed through the floor ducts will be slightly warmer than the
air sent to the windshield defroster ducts. If the temperature is about
6ÉC (43ÉF) or higher, the air conditioner will automatically dehumidify
the air to reduce fogging.
²FRONT
-Distributes outside air through the windshield defroster
ducts. It can be used to clear ice or fog from the windshield. If the
outside air temperature is about 6ÉC (43ÉF) or higher, the air
conditioner will automatically dehumidify the air to reduce fogging.
²OFF-Outside air is shut out and the fan will not operate. For short
periods of time only, use this mode to reduce undesirable odors from
entering the vehicle.
Climate Controls
36
Page 49 of 240

To install the new bulb:
Handle a halogen headlamp bulb carefully and keep out of
children's reach. Grasp the bulb only by its plastic base and do
not touch the glass. The oil from your hand could cause the bulb to
break the next time the headlamps are operated.
1. Install the new bulb in lamp assembly by pushing straight in with the
bulb's plastic base facing upward. You may need to turn the bulb slightly
to align the grooves in the plastic base with the tabs in the lamp
assembly.
2. Install the bulb retaining ring over the plastic base and lock the ring
by rotating clockwise until it snaps into place.
3. Connect the electrical connector to the bulb.
4. Install the protective dust shield and lock the shield by rotating it
clockwise until it locks into position.
5. Carefully position the headlamp assembly onto the vehicle making sure
the alignment pins are inserted into the proper holes.
6. Hold the headlamp assembly snugly against the vehicle and push down
on the retainer pins to lock the lamp into place.
7. Before reinstalling the protective cover, make sure the cover tabs are
fully seated under the grille molding.
8. Turn the headlamps on and make sure they work properly. If the
headlamp was correctly aligned before you changed the bulb, you should
not need to align it again.
Replacing front parking lamp/turn signal/cornering lamp bulbs
1. Make sure the headlamp control is in the OFF position.
2. Open the hood and remove the protective cover from the top of the
headlamps by lifting up on the rear corners and release the velcro
attachments. Lift the cover and pull towards the windshield.
Lights
49
Page 83 of 240

DRIVER ID (if equipped)
Press this control and use SELECT
to choose DRIVER 1 or DRIVER 2
when choosing operator selectable
features. Seat and mirror positions
and nine operator selectable features, found under the MENU and
VEHICLE HANDLING controls, will be saved to DRIVER 1 or DRIVER 2.
These will be automatically recalled when the drivers identify themselves
to the system with the remote entry transmitter (refer toBasic
Operation of Memory Profile Systemin this section) or selecting
DRIVER 1 or DRIVER 2 in the message center. When a vehicle setting is
changed, the message center will display ªSAVED TO DRIVER 1 or
DRIVER 2º for 5 seconds to confirm the change has been made. Press
the SELECT to choose ªOFFº for temporary position/setting changes
which will not be stored.
MENU
Press this control to change various
convenience settings throughout the
vehicle. Each press of the MENU
control will display the following:
²Traction control (returns to ªONº everytime vehicle is started).
²Express window (completely goes down with one touch on the power
switch).
²Auto lock (locks the doors when the vehicle reaches 5 km/h [3 mph]).
²Horn chirp (sounds horn one time whenever the doors are locked
using the remote transmitter).
²Seat access (moves seat back to aid entry/exit from the vehicle).
²Reverse mirrors (tilts the exterior mirrors downward to assist parking
using reverse).
²English/metric (changes the odometer and display readouts)
Press the SELECT control to change the settings to ON or OFF.
These settings will be saved to the vehicle not individualized settings.
Vehicles equipped with the DRIVER ID control, the settings will be saved
to DRIVER 1 or DRIVER 2.
DRIVER ID
MENU
Driver Controls
83
Page 84 of 240

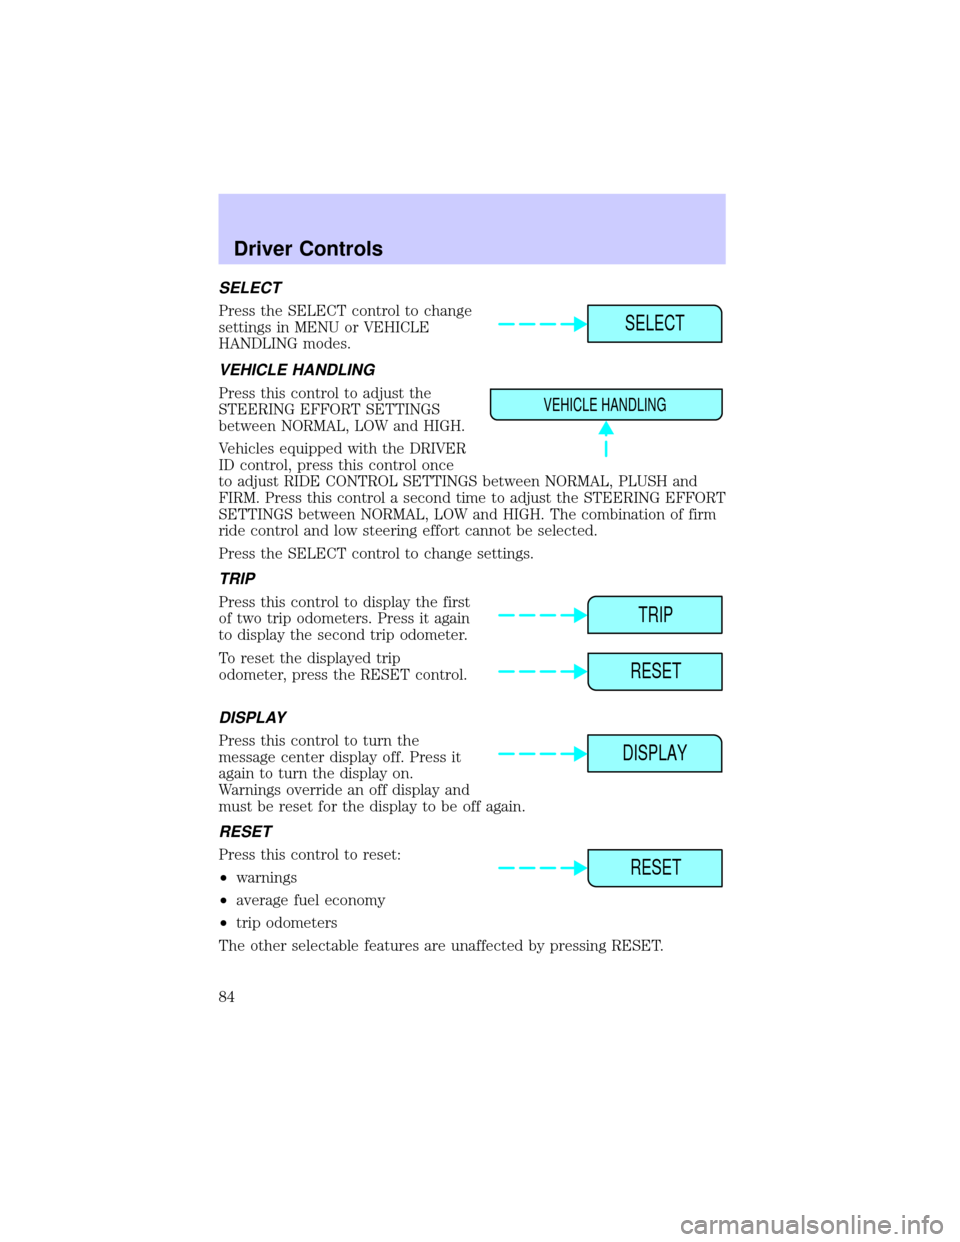
SELECT
Press the SELECT control to change
settings in MENU or VEHICLE
HANDLING modes.
VEHICLE HANDLING
Press this control to adjust the
STEERING EFFORT SETTINGS
between NORMAL, LOW and HIGH.
Vehicles equipped with the DRIVER
ID control, press this control once
to adjust RIDE CONTROL SETTINGS between NORMAL, PLUSH and
FIRM. Press this control a second time to adjust the STEERING EFFORT
SETTINGS between NORMAL, LOW and HIGH. The combination of firm
ride control and low steering effort cannot be selected.
Press the SELECT control to change settings.
TRIP
Press this control to display the first
of two trip odometers. Press it again
to display the second trip odometer.
To reset the displayed trip
odometer, press the RESET control.
DISPLAY
Press this control to turn the
message center display off. Press it
again to turn the display on.
Warnings override an off display and
must be reset for the display to be off again.
RESET
Press this control to reset:
²warnings
²average fuel economy
²trip odometers
The other selectable features are unaffected by pressing RESET.
SELECT
VEHICLE HANDLING
TRIP
RESET
DISPLAY
RESET
Driver Controls
84
Page 90 of 240

REMOTE ENTRY SYSTEM
The remote entry system allows you to lock or unlock all vehicle doors
without a key.
The remote entry features operate in any ignition position except when
the vehicle is running and the transmission isnotin P (park) or N
(Neutral).
If there is any potential remote keyless entry problem with your vehicle,
ensureALL key fobs(remote entry transmitters) are brought to the
dealership, to aid in troubleshooting.
This device complies with part 15 of the FCC rules and with RS-210 of
Industry Canada. Operation is subject to the following two conditions:
(1) This device may not cause harmful interference, and (2) This device
must accept any interference received, including interference that may
cause undesired operation.
Changes or modifications not expressly approved by the party
responsible for compliance could void the user's authority to
operate the equipment.
Unlocking the doors
Press this control to unlock the
driver's door. The interior lamps will
illuminate.
Press the control a second time
within five seconds to unlock all
doors.
Locks and Security
90