Page 206 of 248
9. Insert the glass end of the new bulb into the headlamp assembly.
When the grooves in the plastic base are aligned, push the bulb into the
lamp assembly until the plastic base contacts the rear of the lamp
assembly.
10. To complete installation, follow the removal procedure in reverse
order.
Replacing front parking lamp/turn signal bulbs
1. Make sure the headlamp control is in the OFF position.
2. Open the hood.
3. At the back of the headlamp,
remove the headlamp assembly
retainers by pushing rearward and
pulling up.
4. Pull the headlamp assembly
forward slightly to expose the
electrical connectors.
5. Release clip and disconnect the
electrical connector from the bulb
socket.
6. Rotate the bulb socket
counterclockwise and remove.
7. Pull the bulb straight out of the
socket and push in the new bulb.
8. To complete installation of the
parking lamp/turn signal assembly,
follow the removal procedures in reverse order.
Maintenance and care
206
Page 207 of 248

Replacing foglamp bulbs
The halogen bulb contains gas under pressure. The bulb may
shatter if the glass envelope is scratched or if the bulb is
dropped. Handle the bulb carefully. Grasp the bulb only by its
base. Avoid touching the glass envelope.
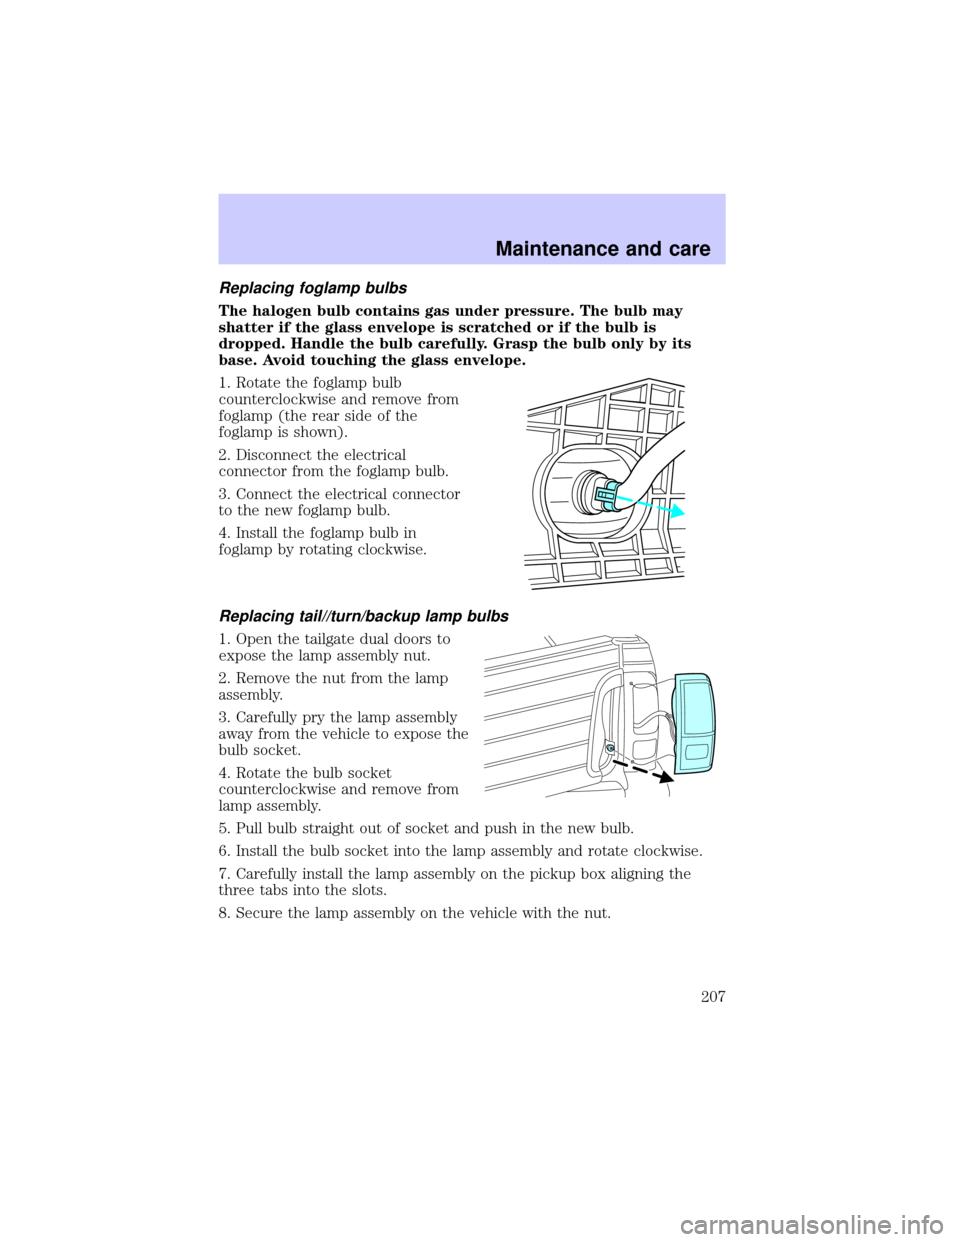
1. Rotate the foglamp bulb
counterclockwise and remove from
foglamp (the rear side of the
foglamp is shown).
2. Disconnect the electrical
connector from the foglamp bulb.
3. Connect the electrical connector
to the new foglamp bulb.
4. Install the foglamp bulb in
foglamp by rotating clockwise.
Replacing tail//turn/backup lamp bulbs
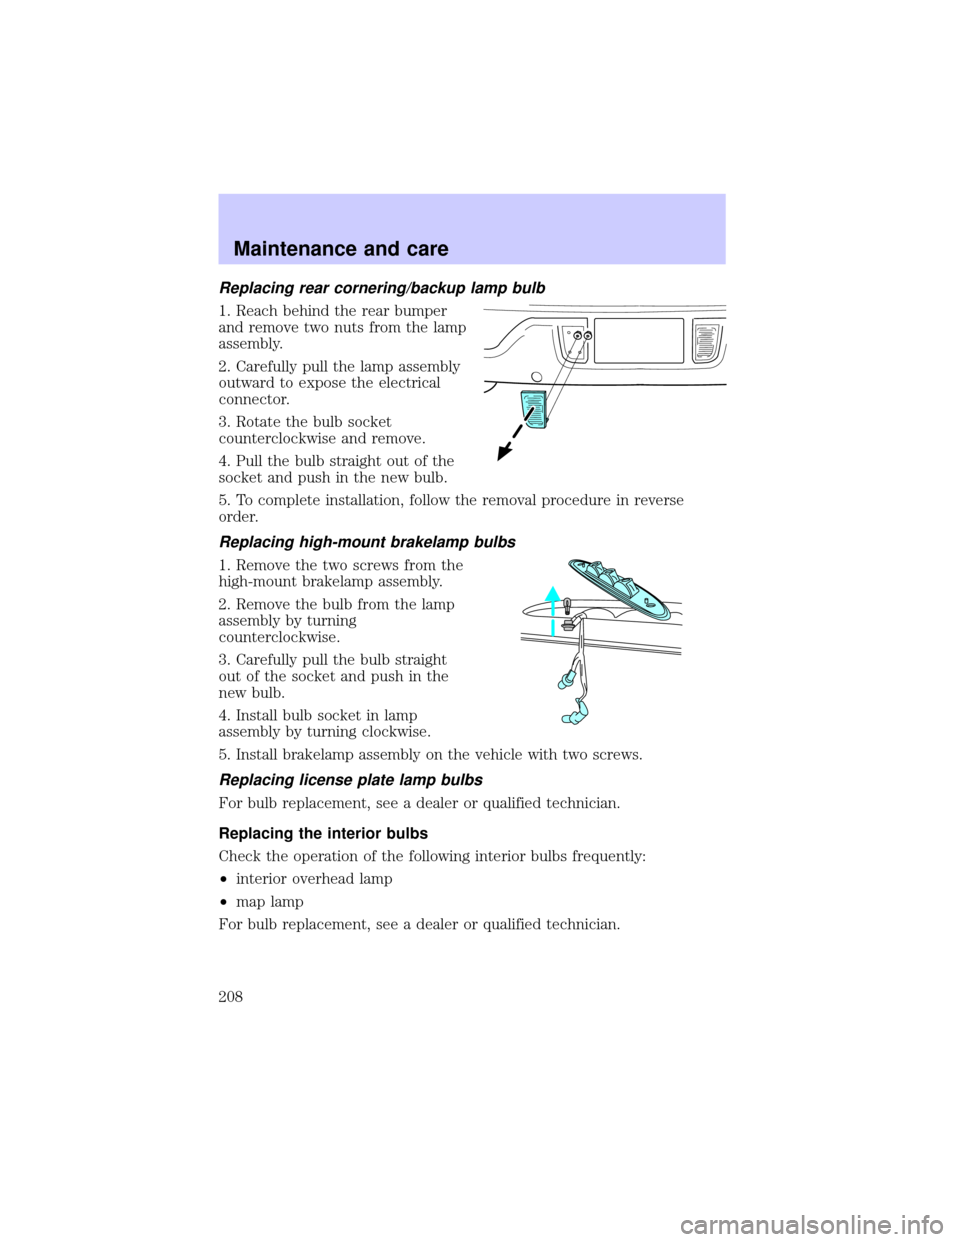
1. Open the tailgate dual doors to
expose the lamp assembly nut.
2. Remove the nut from the lamp
assembly.
3. Carefully pry the lamp assembly
away from the vehicle to expose the
bulb socket.
4. Rotate the bulb socket
counterclockwise and remove from
lamp assembly.
5. Pull bulb straight out of socket and push in the new bulb.
6. Install the bulb socket into the lamp assembly and rotate clockwise.
7. Carefully install the lamp assembly on the pickup box aligning the
three tabs into the slots.
8. Secure the lamp assembly on the vehicle with the nut.
Maintenance and care
207
Page 208 of 248

Replacing rear cornering/backup lamp bulb
1. Reach behind the rear bumper
and remove two nuts from the lamp
assembly.
2. Carefully pull the lamp assembly
outward to expose the electrical
connector.
3. Rotate the bulb socket
counterclockwise and remove.
4. Pull the bulb straight out of the
socket and push in the new bulb.
5. To complete installation, follow the removal procedure in reverse
order.
Replacing high-mount brakelamp bulbs
1. Remove the two screws from the
high-mount brakelamp assembly.
2. Remove the bulb from the lamp
assembly by turning
counterclockwise.
3. Carefully pull the bulb straight
out of the socket and push in the
new bulb.
4. Install bulb socket in lamp
assembly by turning clockwise.
5. Install brakelamp assembly on the vehicle with two screws.
Replacing license plate lamp bulbs
For bulb replacement, see a dealer or qualified technician.
Replacing the interior bulbs
Check the operation of the following interior bulbs frequently:
²interior overhead lamp
²map lamp
For bulb replacement, see a dealer or qualified technician.
Maintenance and care
208
Page 239 of 248

in rear seat ..............................119
Cleaning your vehicle ...............212
exterior ....................................212
instrument cluster lens ..........216
instrument panel ....................216
interior .....................................216
plastic parts ....................214±215
safety belts ..............................217
washing ....................................212
waxing .....................................212
wheels ......................................213
windows ..................................216
wiper blades ............................215
woodtone trim ........................216
Climate control (see Air
conditioning or Heating) ............41
Clock ............................................21
Compass, electronic
calibration .................................61
set zone adjustment .................60
Console
overhead ....................................57
Controls
power seat .................................90
steering column ........................55
Coolant
checking and adding ..............175
refill capacities ................179, 218
specifications ..................220, 222
Cruise control
(see Speed control) ....................50
Customer Assistance ................147
Ford accessories for your
vehicle .....................................232
Ford Extended Service
Plan ..........................................225
Getting assistance outside
the U.S. and Canada ..............231Getting roadside assistance ...147
Getting the service
you need .................................225
Ordering additional owner's
literature .................................236
The Dispute Settlement
Board .......................................228
Utilizing the
Mediation/Arbitration
Program ...................................231
D
Defrost
rear window ..............................19
Dipstick
automatic transmission
fluid ..........................................183
engine oil .................................171
Doors
door ajar warning .....................11
lubricant specifications ..........220
Driveline universal joint and
slip yoke ....................................185
Driving under special
conditions
through water .........................146
E
Emergencies, roadside
jump-starting ..........................162
Emission control system ..........202
Engine ........................................222
check engine/service engine
soon light ....................................8
coolant .....................................175
fail-safe coolant ......................180
idle speed control ...................185
Index
239
Page:
< prev 1-8 9-16 17-24