Page 1978 of 2199

WEATHERSTRIP/SEALS
TABLE OF CONTENTS
page page
B-PILLAR DOOR SEAL
REMOVAL............................105
INSTALLATION........................105
COWL WEATHERSTRIP
REMOVAL............................106
INSTALLATION........................106
FRONT DOOR GLASS RUN WEATHERSTRIP
REMOVAL............................106
INSTALLATION........................106
FRONT DOOR INNER BELT WEATHERSTRIP
REMOVAL............................106
INSTALLATION........................107
FDR OUTER BELT WEATHERSTRIP
REMOVAL............................107
INSTALLATION........................107
FLIP-UP GLASS WEATHERSTRIP
REMOVAL............................107
INSTALLATION........................107
FRONT DOOR 2ND WEATHERSTRIP
REMOVAL............................107
INSTALLATION........................107
FRONT DOOR WEATHERSTRIP
REMOVAL............................108INSTALLATION........................108
HOOD SEAL
REMOVAL............................108
INSTALLATION........................108
LIFTGATE OPENING WEATHERSTRIP
REMOVAL............................109
INSTALLATION........................109
RDR INNER BELT WEATHERSTRIP
REMOVAL............................109
INSTALLATION........................109
RDR OUTER BELT WEATHERSTRIP
REMOVAL............................109
INSTALLATION........................109
RDR SECONDARY WEATHERSTRIP
REMOVAL............................110
INSTALLATION........................110
REAR DOOR WEATHERSTRIP
REMOVAL............................110
INSTALLATION........................110
ROOF RAIL WEATHERSTRIP / RETAINR
REMOVAL............................110
INSTALLATION........................110
B-PILLAR DOOR SEAL
REMOVAL
The B-pillar seal is attached to the rear door with
adhesive tape.
(1) Peel seal from the door (Fig. 1).
INSTALLATION
(1) Clean contact area with MopartSuper Kleen
or equivalent.
(2) Remove carrier from seal.
(3) Align seal on door and press into place.
Fig. 1 B-Pillar Seal
1 - B-PILLAR SEAL
WJWEATHERSTRIP/SEALS 23 - 105
Page 1979 of 2199

COWL WEATHERSTRIP
REMOVAL
(1) Raise hood.
(2) Pull cowl plenum seal from cowl.
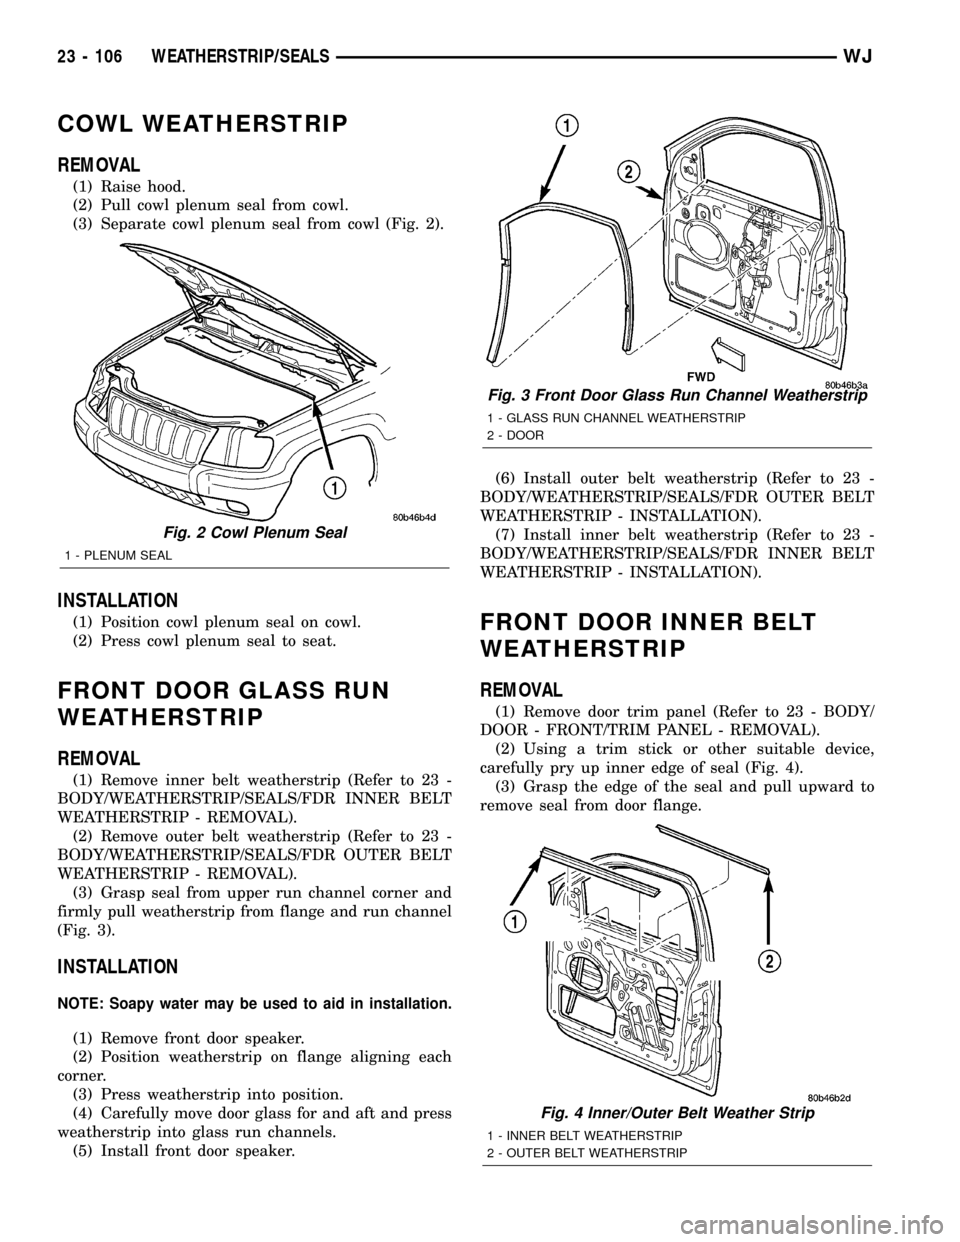
(3) Separate cowl plenum seal from cowl (Fig. 2).
INSTALLATION
(1) Position cowl plenum seal on cowl.
(2) Press cowl plenum seal to seat.
FRONT DOOR GLASS RUN
WEATHERSTRIP
REMOVAL
(1) Remove inner belt weatherstrip (Refer to 23 -
BODY/WEATHERSTRIP/SEALS/FDR INNER BELT
WEATHERSTRIP - REMOVAL).
(2) Remove outer belt weatherstrip (Refer to 23 -
BODY/WEATHERSTRIP/SEALS/FDR OUTER BELT
WEATHERSTRIP - REMOVAL).
(3) Grasp seal from upper run channel corner and
firmly pull weatherstrip from flange and run channel
(Fig. 3).
INSTALLATION
NOTE: Soapy water may be used to aid in installation.
(1) Remove front door speaker.
(2) Position weatherstrip on flange aligning each
corner.
(3) Press weatherstrip into position.
(4) Carefully move door glass for and aft and press
weatherstrip into glass run channels.
(5) Install front door speaker.(6) Install outer belt weatherstrip (Refer to 23 -
BODY/WEATHERSTRIP/SEALS/FDR OUTER BELT
WEATHERSTRIP - INSTALLATION).
(7) Install inner belt weatherstrip (Refer to 23 -
BODY/WEATHERSTRIP/SEALS/FDR INNER BELT
WEATHERSTRIP - INSTALLATION).
FRONT DOOR INNER BELT
WEATHERSTRIP
REMOVAL
(1) Remove door trim panel (Refer to 23 - BODY/
DOOR - FRONT/TRIM PANEL - REMOVAL).
(2) Using a trim stick or other suitable device,
carefully pry up inner edge of seal (Fig. 4).
(3) Grasp the edge of the seal and pull upward to
remove seal from door flange.
Fig. 2 Cowl Plenum Seal
1 - PLENUM SEAL
Fig. 3 Front Door Glass Run Channel Weatherstrip
1 - GLASS RUN CHANNEL WEATHERSTRIP
2 - DOOR
Fig. 4 Inner/Outer Belt Weather Strip
1 - INNER BELT WEATHERSTRIP
2 - OUTER BELT WEATHERSTRIP
23 - 106 WEATHERSTRIP/SEALSWJ
Page 1980 of 2199

INSTALLATION
(1) Position the seal on the door flange.
(2) Firmly press downward to seat seal on the door
flange.
(3)
Install the door trim panel (Refer to 23 - BODY/
DOOR - FRONT/TRIM PANEL - INSTALLATION).
FDR OUTER BELT
WEATHERSTRIP
REMOVAL
(1) Lower the door glass.
(2) Remove the screw from the inner door panel
attaching the seal to outer door panel (Fig. 4).
(3) Pull the seal rearward to release from the side
view mirror bezel.
(4) Lift seal and separate from door panel.
INSTALLATION
(1) Position seal on the door panel.
(2) Push the seal forward to install under the side
view mirror bezel.
(3) Install the screw from the inner door panel
attaching the seal to outer door panel.
(4) Raise the door glass.
FLIP-UP GLASS
WEATHERSTRIP
REMOVAL
(1) Raise flip up glass.
(2) Carefully pull the seal away from the flange
around the edge of the glass opening (Fig. 5).
(3) Remove it from the vehicle.
INSTALLATION
(1) Thoroughly clean the surface of the flange as
necessary.
(2) Align the weather strip seal with the window
opening corners.
(3) Firmly seat the seal around the entire flange.
But the seal ends together and smooth out any
remaining length.
(4)
Weatherstrip break should be 120mm left of latch
opening. Cut any surplus from non-plug end only.
FRONT DOOR 2ND
WEATHERSTRIP
REMOVAL
The front door secondary weatherstrip is attached
to the door shutface with push-in fasteners.(1) Open door.
(2) Using a trim panel removal tool, remove
push-in fasteners attaching secondary weatherstrip
to door shutface (Fig. 6).
(3) Separate secondary weatherstrip from door.
INSTALLATION
(1) Clean contact area as necessary.
(2) Position secondary weatherstrip on door shut-
face.
(3) Install push-in fasteners attaching secondary
weatherstrip to door shutface.
Fig. 5 Flip-up Glass Weatherstrip
1 - WEATHERSTRIP
2 - LIFTGATE W/FLIP-UP GLASS
Fig. 6 Front Door Secondary Weatherstrip
1 - SECONDARY WEATHERSTRIP
WJWEATHERSTRIP/SEALS 23 - 107
FRONT DOOR INNER BELT WEATHERSTRIP (Continued)
Page 1982 of 2199

LIFTGATE OPENING
WEATHERSTRIP
REMOVAL
(1) Pull seal away from flange around edge of lift-
gate opening.
(2) Separate weatherstrip from opening (Fig. 9).
(3) Clean weatherstrip flange as necessary.
INSTALLATION
(1) Position weatherstrip in opening with left end
of seal at opening centerline.
(2) Press weatherstrip onto flange in a clockwise
direction.
(3) Center and butt weatherstrip ends together at
centerline.
(4) If necessary, cut surplus from weatherstrip
(non-plug end only).
RDR INNER BELT
WEATHERSTRIP
REMOVAL
(1) Remove door trim panel (Refer to 23 - BODY/
DOORS - REAR/TRIM PANEL - REMOVAL).
(2) Using a trim stick, carefully pry rear inner
edge of inner belt weatherstrip upward.
(3) Grasp weatherstrip and pull upward to sepa-
rate from door flange (Fig. 10).
INSTALLATION
(1) Position weatherstrip on door flange.
(2) Firmly press downward to seat weatherstrip on
flange.
(3) Install trim panel (Refer to 23 - BODY/DOORS
- REAR/TRIM PANEL - INSTALLATION).
RDR OUTER BELT
WEATHERSTRIP
REMOVAL
(1) Remove trim panel (Refer to 23 - BODY/
DOORS - REAR/TRIM PANEL - REMOVAL).
(2) Using a small flat blade, disengage tangs
attaching outer belt weatherstrip to inner door panel.
(3) Lift weatherstrip upward and separate from
door (Fig. 10).
INSTALLATION
(1) Position the weatherstrip onto the door flange.
(2) Force the weatherstrip onto door flange and
engage tangs. Continue rearward until it is seated on
flange.
(3) Instal trim panel (Refer to 23 - BODY/DOORS
- REAR/TRIM PANEL - INSTALLATION).
Fig. 9 Liftgate Opening Weatherstrip
1 - LIFTGATE
2 - WEATHERSTRIP
Fig. 10 Rear Door Inner/Outer Belt Weatherstrip
1 - INNER BELT WEATHERSTRIP
2 - OUTER BELT WEATHERSTRIP
WJWEATHERSTRIP/SEALS 23 - 109
Page 2027 of 2199

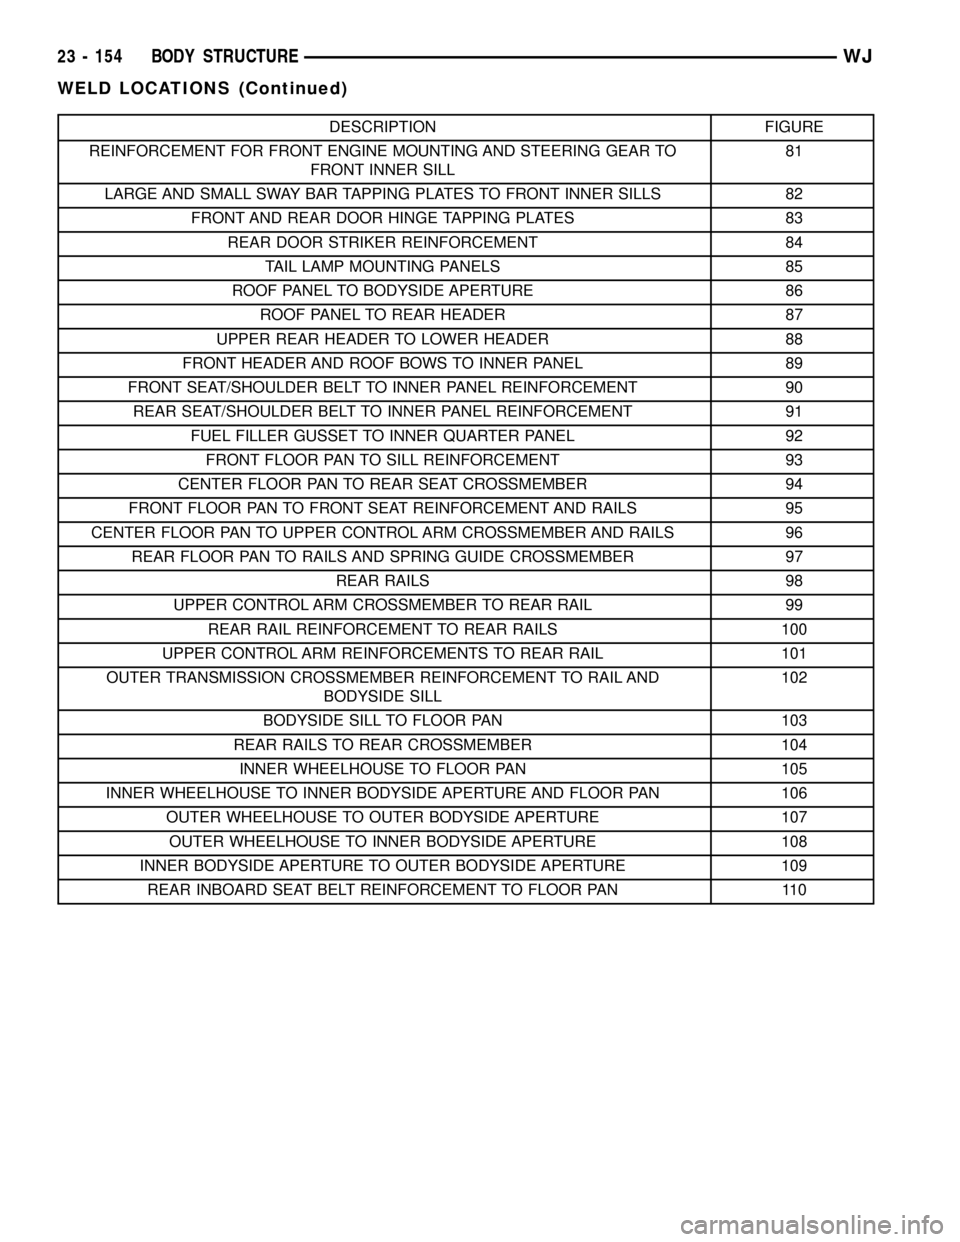
DESCRIPTION FIGURE
REINFORCEMENT FOR FRONT ENGINE MOUNTING AND STEERING GEAR TO
FRONT INNER SILL81
LARGE AND SMALL SWAY BAR TAPPING PLATES TO FRONT INNER SILLS 82
FRONT AND REAR DOOR HINGE TAPPING PLATES 83
REAR DOOR STRIKER REINFORCEMENT 84
TAIL LAMP MOUNTING PANELS 85
ROOF PANEL TO BODYSIDE APERTURE 86
ROOF PANEL TO REAR HEADER 87
UPPER REAR HEADER TO LOWER HEADER 88
FRONT HEADER AND ROOF BOWS TO INNER PANEL 89
FRONT SEAT/SHOULDER BELT TO INNER PANEL REINFORCEMENT 90
REAR SEAT/SHOULDER BELT TO INNER PANEL REINFORCEMENT 91
FUEL FILLER GUSSET TO INNER QUARTER PANEL 92
FRONT FLOOR PAN TO SILL REINFORCEMENT 93
CENTER FLOOR PAN TO REAR SEAT CROSSMEMBER 94
FRONT FLOOR PAN TO FRONT SEAT REINFORCEMENT AND RAILS 95
CENTER FLOOR PAN TO UPPER CONTROL ARM CROSSMEMBER AND RAILS 96
REAR FLOOR PAN TO RAILS AND SPRING GUIDE CROSSMEMBER 97
REAR RAILS 98
UPPER CONTROL ARM CROSSMEMBER TO REAR RAIL 99
REAR RAIL REINFORCEMENT TO REAR RAILS 100
UPPER CONTROL ARM REINFORCEMENTS TO REAR RAIL 101
OUTER TRANSMISSION CROSSMEMBER REINFORCEMENT TO RAIL AND
BODYSIDE SILL102
BODYSIDE SILL TO FLOOR PAN 103
REAR RAILS TO REAR CROSSMEMBER 104
INNER WHEELHOUSE TO FLOOR PAN 105
INNER WHEELHOUSE TO INNER BODYSIDE APERTURE AND FLOOR PAN 106
OUTER WHEELHOUSE TO OUTER BODYSIDE APERTURE 107
OUTER WHEELHOUSE TO INNER BODYSIDE APERTURE 108
INNER BODYSIDE APERTURE TO OUTER BODYSIDE APERTURE 109
REAR INBOARD SEAT BELT REINFORCEMENT TO FLOOR PAN 110
23 - 154 BODY STRUCTUREWJ
WELD LOCATIONS (Continued)
Page 2062 of 2199
Fig. 90 FRONT SEAT/SHOULDER BELT TO INNER PANEL REINFORCEMENT
WJBODY STRUCTURE 23 - 189
WELD LOCATIONS (Continued)
Page 2063 of 2199
Fig. 91 REAR SEAT/SHOULDER BELT TO INNER PANEL REINFORCEMENT
Fig. 92 FUEL FILLER GUSSET TO INNER QUARTER PANEL
23 - 190 BODY STRUCTUREWJ
WELD LOCATIONS (Continued)
Page 2076 of 2199
Fig. 110 REAR INBOARD SEAT BELT REINFORCEMENT TO FLOOR PAN
WJBODY STRUCTURE 23 - 203
WELD LOCATIONS (Continued)