2002 Hyundai Grandeur warning
[x] Cancel search: warningPage 153 of 230
WHAT TO DO IN AN EMERGENCY 3- 3
WARNING:
The gas produced by the battery during the jump-start operation ishighly explosive. If these instruc-tions are not followed exactly, seri- ous personal injury and damage to the vehicle may occur! If you arenot sure how to follow this proce-dure, seek qualified assistance.Automobile batteries contain sul-furic acid. This is poisonous and highly corrosive. When jump start- ing, wear protective glasses and becareful not to get acid on yourself,your clothing or on the car.
o If you should accidentally get acid on your skin or in your eyes, immediately remove any contami-nated clothing and flush the areawith clear water for at least 15 min- utes. Then promptly obtain medical attention. If you must be transportedto an emergency facility, continue toapply water to the affected areawith a sponge or cloth. o The gas produced by the battery
during the jump-start operation ishighly explosive. Do not smoke orallow a spark or open flame in thevicinity.
o The battery being used to provide
the jump start must be 12-volt. If youcannot determine that it is a 12-voltbattery, do not attempt to use it forthe jump start.
o To jump start a car with a discharged battery, follow this procedure ex-actly:
1. If the booster battery is installed in another vehicle, be sure the twovehicles are not touching.
2. Turn off all unnecessary lights and
accessories in both vehicles.
3. Attach the clamps of the jumper
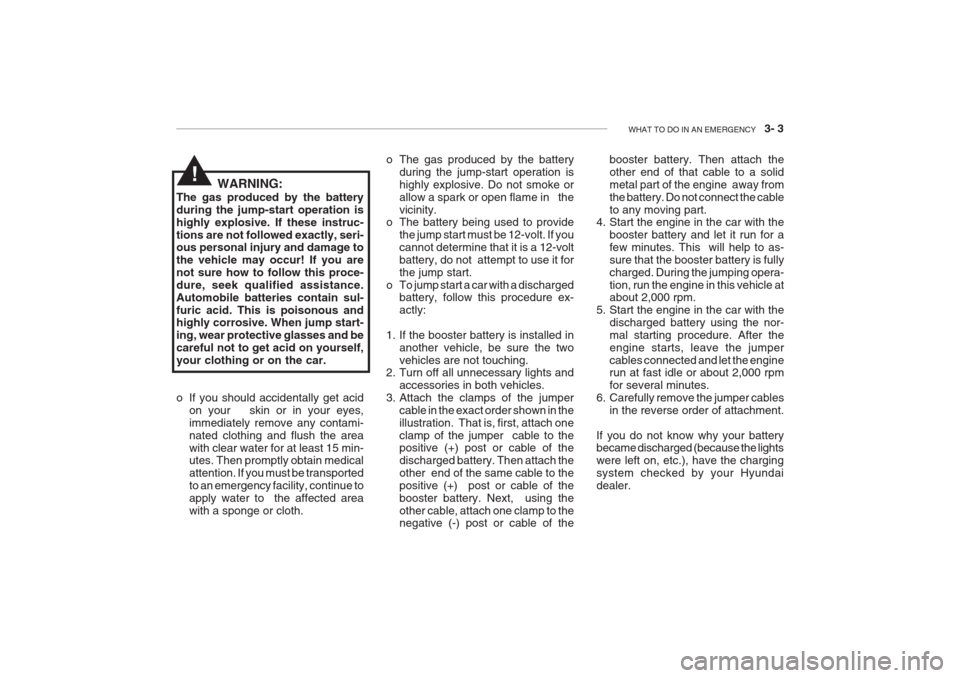
cable in the exact order shown in theillustration. That is, first, attach oneclamp of the jumper cable to the positive (+) post or cable of the discharged battery. Then attach theother end of the same cable to thepositive (+) post or cable of thebooster battery. Next, using theother cable, attach one clamp to the negative (-) post or cable of the booster battery. Then attach the other end of that cable to a solidmetal part of the engine away fromthe battery. Do not connect the cableto any moving part.
4. Start the engine in the car with the
booster battery and let it run for afew minutes. This will help to as-sure that the booster battery is fullycharged. During the jumping opera-tion, run the engine in this vehicle at about 2,000 rpm.
5. Start the engine in the car with the discharged battery using the nor- mal starting procedure. After theengine starts, leave the jumpercables connected and let the engine run at fast idle or about 2,000 rpm for several minutes.
6. Carefully remove the jumper cables
in the reverse order of attachment.
If you do not know why your battery became discharged (because the lights were left on, etc.), have the chargingsystem checked by your Hyundaidealer.!
Page 154 of 230
3- 4 WHAT TO DO IN AN EMERGENCY
check for coolant leaking from the radiator, hoses or under the car. (Ifthe air conditioning had been in use,it is normal for cold water to bedraining from it when you stop).
WARNING:
While the engine is running, keephair, hands, and clothing away frommoving parts such as the fan anddrive belts to prevent injury.
5. If the water pump drive belt is bro- ken or engine coolant is leaking out, stop the engine immediately andcall the nearest Hyundai dealer forassistance.
WARNING:
Do not remove the radiator cap whenthe engine is hot. This can allowcoolant to be blown out of the open-ing and cause serious burns.
D030A01A-AAT IF THE ENGINE OVERHEATS If your temperature gauge indicates overheating, you experience a loss ofpower, or hear loud pinging or knock-ing, the engine is probably too hot. Ifthis happens to you, you should:
1. Pull off the road and stop as soon as
it is safe to do so.
2. Place the gear selector lever in "P" (automatic), or neutral (manual transaxle) and set the parking brake. If the air conditioning is on, turn it off.
3. If engine coolant is running out un- der the car or steam is coming outfrom the hood, stop the engine. Donot open the hood until the engine coolant has stopped running or the steaming has stopped. If there is novisible loss of coolant and no steam,leave the engine running and checkto be sure the engine cooling fan isoperating. If the fan is not running, turn the engine off.
4. Check to see if the water pump drive belt is missing. If it is not missing, check to see that it is tight. If thedrive belt seems to be satisfactory, 6. If you cannot find the cause of the
overheating, wait until the enginetemperature has returned to nor-mal. Then, if the engine coolant hasbeen lost, carefully remove the ra- diator cap and add engine coolant to bring the fluid level in the reservoirup to the halfway mark.
7. Proceed with caution, keeping alert for further signs of overheating. Ifoverheating happens again, call a Hyundai dealer for assistance.
CAUTION:
Serious loss of engine coolant indi- cates there is a leak in the coolingsystem and this should be checkedas soon as possible by a Hyundai dealer.
!
!
!
Page 158 of 230
3- 8 WHAT TO DO IN AN EMERGENCY
D060G02Y-AAT 6. Changing Wheels
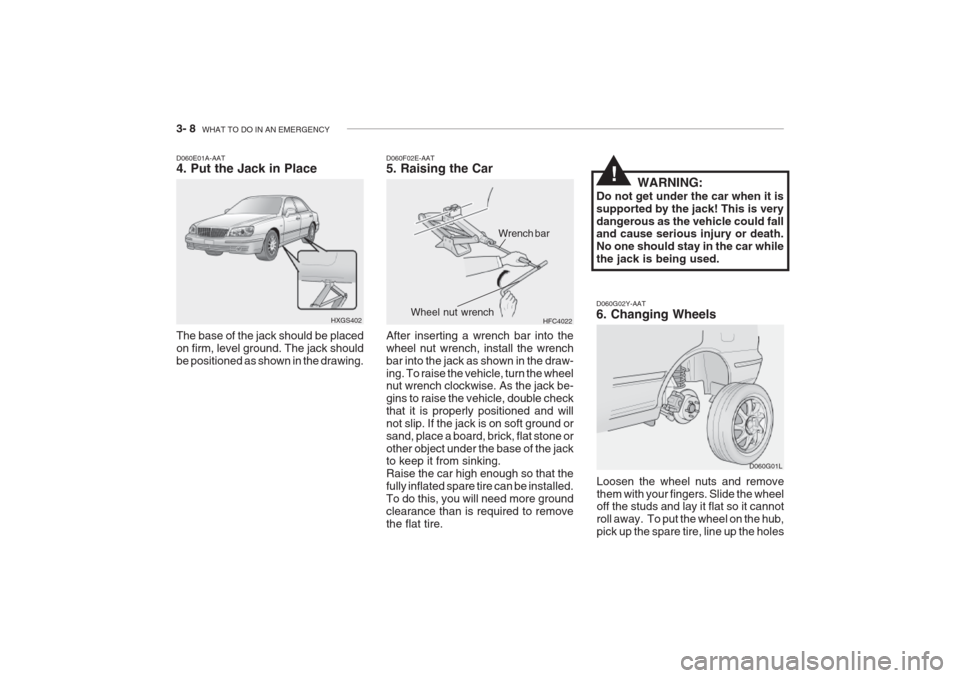
Loosen the wheel nuts and remove them with your fingers. Slide the wheel off the studs and lay it flat so it cannot roll away. To put the wheel on the hub,pick up the spare tire, line up the holes D060G01L
D060F02E-AAT 5. Raising the Car After inserting a wrench bar into the wheel nut wrench, install the wrenchbar into the jack as shown in the draw-ing. To raise the vehicle, turn the wheel nut wrench clockwise. As the jack be- gins to raise the vehicle, double checkthat it is properly positioned and willnot slip. If the jack is on soft ground orsand, place a board, brick, flat stone orother object under the base of the jack to keep it from sinking. Raise the car high enough so that thefully inflated spare tire can be installed.To do this, you will need more groundclearance than is required to removethe flat tire.
HFC4022
Wrench bar
Wheel nut wrench
D060E01A-AAT 4. Put the Jack in Place The base of the jack should be placed on firm, level ground. The jack shouldbe positioned as shown in the drawing. HXGS402 WARNING:
Do not get under the car when it issupported by the jack! This is verydangerous as the vehicle could fall and cause serious injury or death. No one should stay in the car whilethe jack is being used.
!
Page 159 of 230
WHAT TO DO IN AN EMERGENCY 3- 9
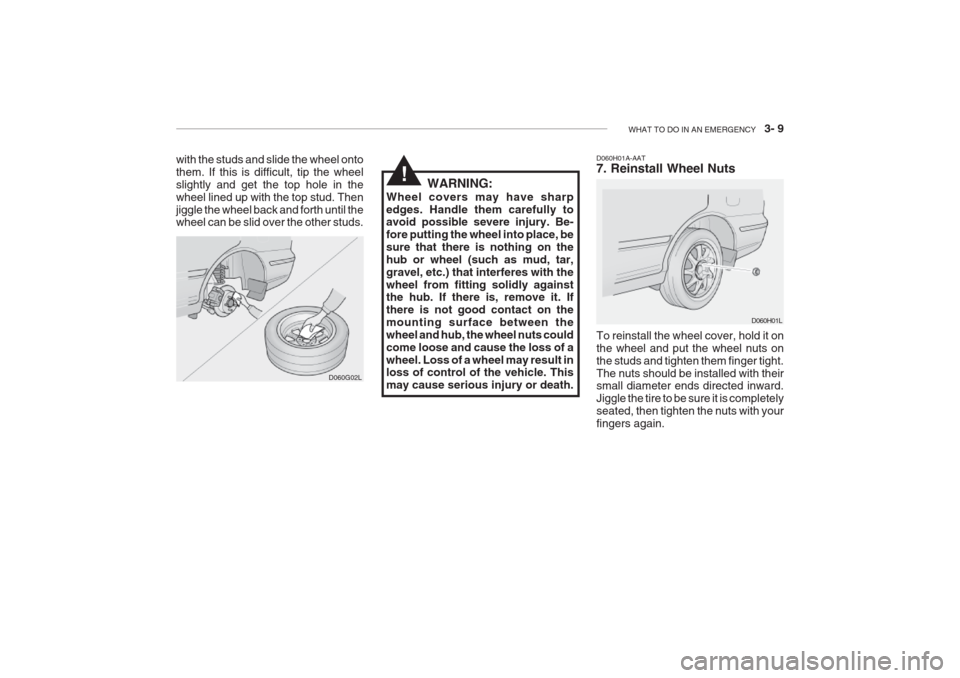
D060H01A-AAT 7. Reinstall Wheel Nuts To reinstall the wheel cover, hold it on the wheel and put the wheel nuts onthe studs and tighten them finger tight.The nuts should be installed with their small diameter ends directed inward. Jiggle the tire to be sure it is completelyseated, then tighten the nuts with yourfingers again. D060H01L
D060G02L
with the studs and slide the wheel ontothem. If this is difficult, tip the wheelslightly and get the top hole in thewheel lined up with the top stud. Thenjiggle the wheel back and forth until the wheel can be slid over the other studs.
WARNING:
Wheel covers may have sharp edges. Handle them carefully to avoid possible severe injury. Be- fore putting the wheel into place, besure that there is nothing on thehub or wheel (such as mud, tar,gravel, etc.) that interferes with thewheel from fitting solidly against the hub. If there is, remove it. If there is not good contact on themounting surface between thewheel and hub, the wheel nuts couldcome loose and cause the loss of awheel. Loss of a wheel may result in loss of control of the vehicle. This may cause serious injury or death.
!
Page 184 of 230
DO-IT-YOURSELF MAINTENANCE 6- 7
G040A02A-AAT
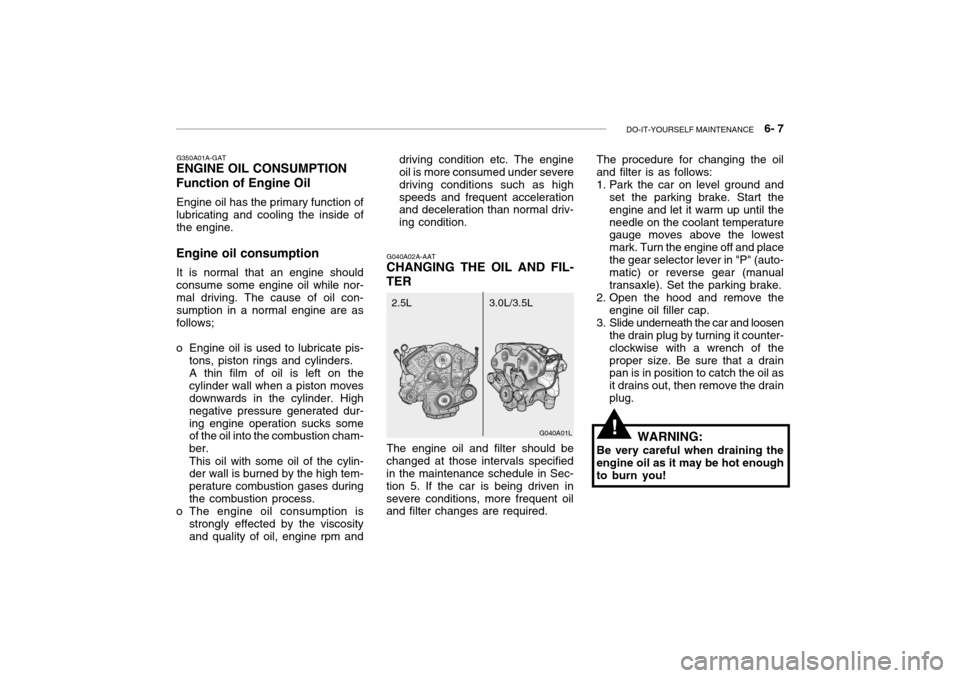
CHANGING THE OIL AND FIL- TER The procedure for changing the oil and filter is as follows:
1. Park the car on level ground and
set the parking brake. Start the engine and let it warm up until theneedle on the coolant temperature gauge moves above the lowest mark. Turn the engine off and placethe gear selector lever in "P" (auto- matic) or reverse gear (manual transaxle). Set the parking brake.
2. Open the hood and remove the engine oil filler cap.
3. Slide underneath the car and loosen the drain plug by turning it counter-clockwise with a wrench of theproper size. Be sure that a drain pan is in position to catch the oil as it drains out, then remove the drainplug.
WARNING:
Be very careful when draining theengine oil as it may be hot enoughto burn you!
The engine oil and filter should be
changed at those intervals specified in the maintenance schedule in Sec- tion 5. If the car is being driven insevere conditions, more frequent oil and filter changes are required. G040A01L
3.0L/3.5L
2.5L
G350A01A-GAT
ENGINE OIL CONSUMPTION Function of Engine Oil
Engine oil has the primary function of lubricating and cooling the inside ofthe engine.
Engine oil consumption It is normal that an engine shouldconsume some engine oil while nor-
mal driving. The cause of oil con- sumption in a normal engine are as follows;
o Engine oil is used to lubricate pis- tons, piston rings and cylinders.A thin film of oil is left on thecylinder wall when a piston moves downwards in the cylinder. High negative pressure generated dur-ing engine operation sucks some of the oil into the combustion cham- ber. This oil with some oil of the cylin- der wall is burned by the high tem- perature combustion gases duringthe combustion process.
o The engine oil consumption is
strongly effected by the viscosity and quality of oil, engine rpm and driving condition etc. The engine
oil is more consumed under severe driving conditions such as highspeeds and frequent acceleration and deceleration than normal driv- ing condition.
!
Page 185 of 230

6- 8 DO-IT-YOURSELF MAINTENANCE
4. When the oil has stopped draining,
replace the drain plug using a new washer and retighten by turning itclockwise. Oil pan drain plug tightening torque : 3.5 ~4.0 kgf.m
5. Remove the oil filter by turning it counterclockwise with a oil filter wrench of the proper size. A cer- tain amount of oil will come out when you remove the filter. So besure to have your drain pan in place underneath it.
6. Install a new oil filter in accordance with the instructions on the carton or on the filter itself. Do not over-tighten. Oil filter tightening torque : 1.2 ~ 1.6 kgf.m Be sure that the mounting surface on the engine is clean and that theold gasket is removed completely. Lubricate the new gasket on the filter with clean engine oil beforeinstallation. 7. Refill the crankcase with the rec-
ommended engine oil. Refer to thespecification in chapter 9 for en-gine oil capacity.
8. Start the engine and check to be sure no oil is leaking from the drain plug or oil filter.
9. Shut off the engine and recheck the oil level.
NOTE: Always dispose of used engine oil
in an environmentally acceptable manner. It is suggested that it beplaced in a sealed container and taken to a service station for recla- mation. Do not pour the oil on theground or put it in with the house- hold trash.
WARNING:
Used motor oil may cause irrita-
tion or cancer of the skin if left in contact with the skin for prolongedperiods of time. Wash your hands thoroughly with soap and warm water as soon as possible afterhandling used oil. G050A01A-AAT
CHECKING AND CHANGING THE ENGINE COOLANT
WARNING:
Do not remove the radiator cap
when the engine is hot. When the engine is hot, the engine coolantis under pressure and may erupt through the opening if the cap is removed. You could be seriouslyburned if you do not observe this precaution. Do not remove the ra- diator cap until the radiator is coolto the touch.
!
!
Page 187 of 230
6- 10 DO-IT-YOURSELF MAINTENANCE
4. Turn the radiator cap counterclock-
wise without pressing down on it, until it stops. This relieves any pres-sure remaining in the cooling sys- tem. And remove the radiator cap by pushing down and turning coun-terclockwise.Now fill the radiator with clean dem-ineralized or distilled water. Con- tinue to add clean demineralized or distilled water in small quantitiesuntil the fluid level stays up in the radiator neck. G050D01L
G050D02L
5. Start the engine, top off the radia- tor with water and then add enginecoolant to the reservoir until the level is between "LOW" and "FULL".
6. Replace the radiator and reservoir
caps and check to be sure thedrain cocks are fully closed and not leaking.
WARNING:
The cooling fan is controlled by
engine coolant temperature andmay sometimes operate even when the engine is not running. Useextreme caution when working near the blades of the cooling fan so that you are not injured by a
3. Check Section 9 for the capacity of
the cooling system in your car.Then, following the manufacturer'sdirections on the engine coolant container, add the appropriate quantity of coolant to the radiator. rotating fan blade. As the engine coolant temperature decreases, the fan will automatically shut off. Thisis a normal condition.
G060A01L
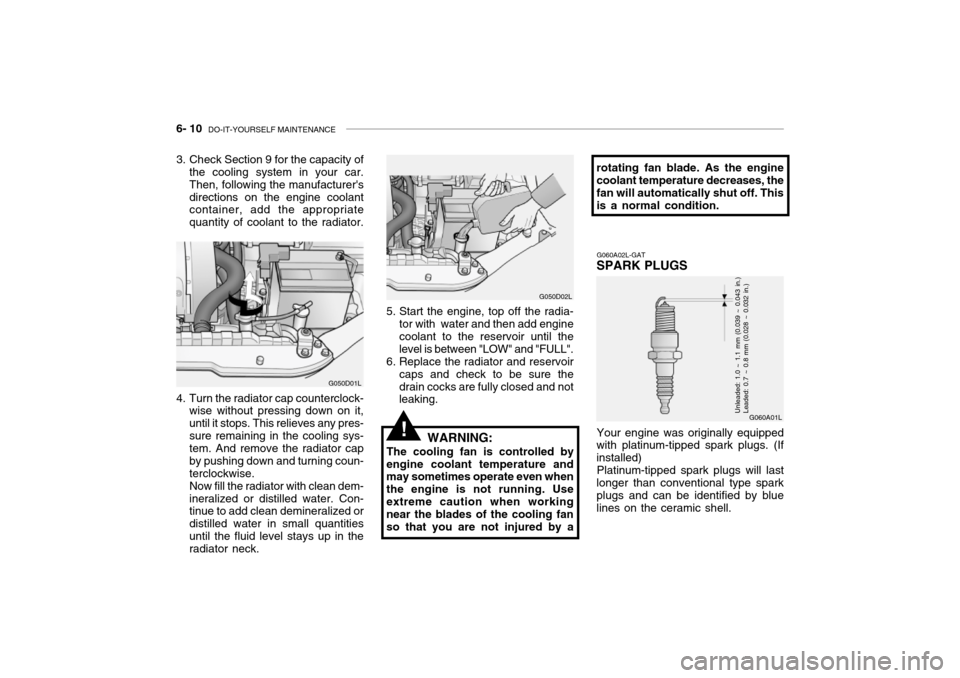
G060A02L-GAT
SPARK PLUGS
Your engine was originally equipped
with platinum-tipped spark plugs. (If installed)
Platinum-tipped spark plugs will last
longer than conventional type sparkplugs and can be identified by blue lines on the ceramic shell.Unleaded: 1.0 ~ 1.1 mm (0.039 ~ 0.043 in.) Leaded: 0.7 ~ 0.8 mm (0.028 ~ 0.032 in.)
!
Page 188 of 230
DO-IT-YOURSELF MAINTENANCE 6- 11
G060B03L-GAT
Replacing the Spark Plugs
The spark plugs should be changed
at the intervals specified in the ve- hicle maintenance schedule in Sec- tion 5 or whenever engine perfor- mance indicates they should bechanged. Symptoms that suggest poor spark plug performance include en- gine misfiring under load, loss of fueleconomy, poor acceleration, etc. When spark plugs are replaced, al- ways use spark plugs recommendedby Hyundai. The use of other spark plugs can result in loss of perfor- mance, radio interference or enginedamage.
NOTE:
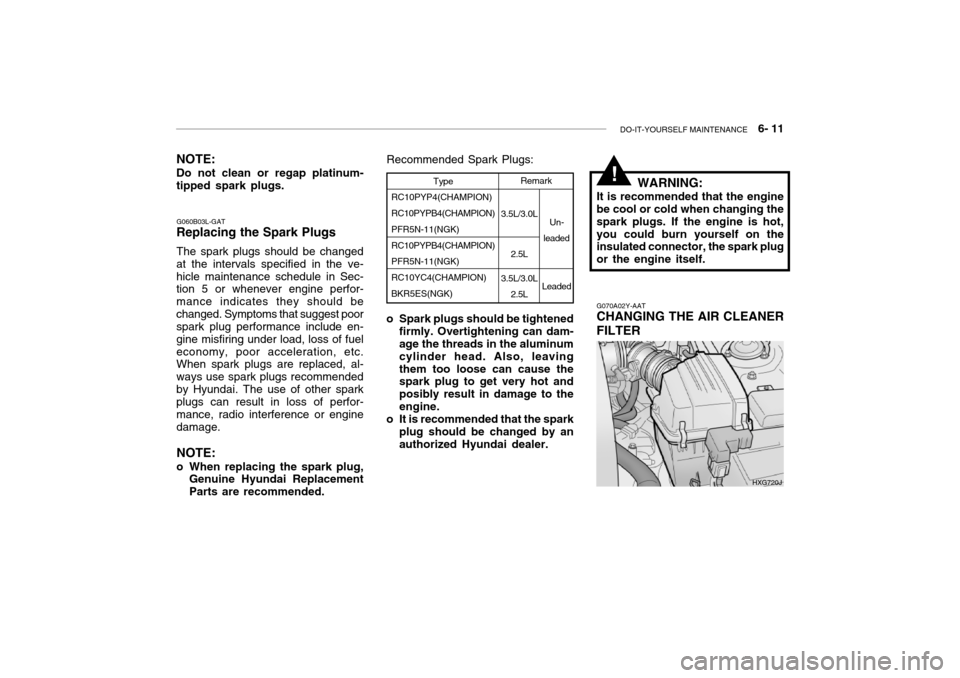
o When replacing the spark plug, Genuine Hyundai ReplacementParts are recommended. Recommended Spark Plugs:
NOTE: Do not clean or regap platinum- tipped spark plugs.
o Spark plugs should be tightenedfirmly. Overtightening can dam- age the threads in the aluminum cylinder head. Also, leavingthem too loose can cause the spark plug to get very hot and posibly result in damage to theengine.
o It is recommended that the spark plug should be changed by anauthorized Hyundai dealer.
!
3.5L/3.0L
2.5L
3.5L/3.0L 2.5L
Type
RC10PYP4(CHAMPION) RC10PYPB4(CHAMPION) PFR5N-11(NGK) RC10PYPB4(CHAMPION) PFR5N-11(NGK) RC10YC4(CHAMPION) BKR5ES(NGK)
Remark
Un-
leaded
LeadedWARNING:
It is recommended that the engine be cool or cold when changing the spark plugs. If the engine is hot,you could burn yourself on the insulated connector, the spark plug or the engine itself.
G070A02Y-AAT CHANGING THE AIR CLEANER FILTER
HXG720J