Page 127 of 399
A storage compartment is located by
the third seat on the driver’s side. To
open the compartment, pull the lever
and lif t the lid. To close, lower the lid
and push it down until it latches.The coin holder is located in the
f ront beverage holder. To open it,
pull on the bottom edge. Close it
with a firm push.
Open the center pocket by pulling
thehandle.Closeitwithafirmpush.
The light in the pocket comes on
when the instrument panel lights are
on.
On EX and EX-L models
Center Pocket
Rear Compartment Coin Holder
Inst rument s and Cont rols
Rear Compartment, Center Pocket, Coin Holder
124
L LEE V
V E
ER
R
R
RE EA
A R
R C
COOM M P
PA
A R
RTTM
M E
EN
NT T C
CE
EN
NT TE
ER
R
P
P O
OC CKKEET
T C
CO
OI INN
H
H O
OL LDD E
ER
R
Page 130 of 399

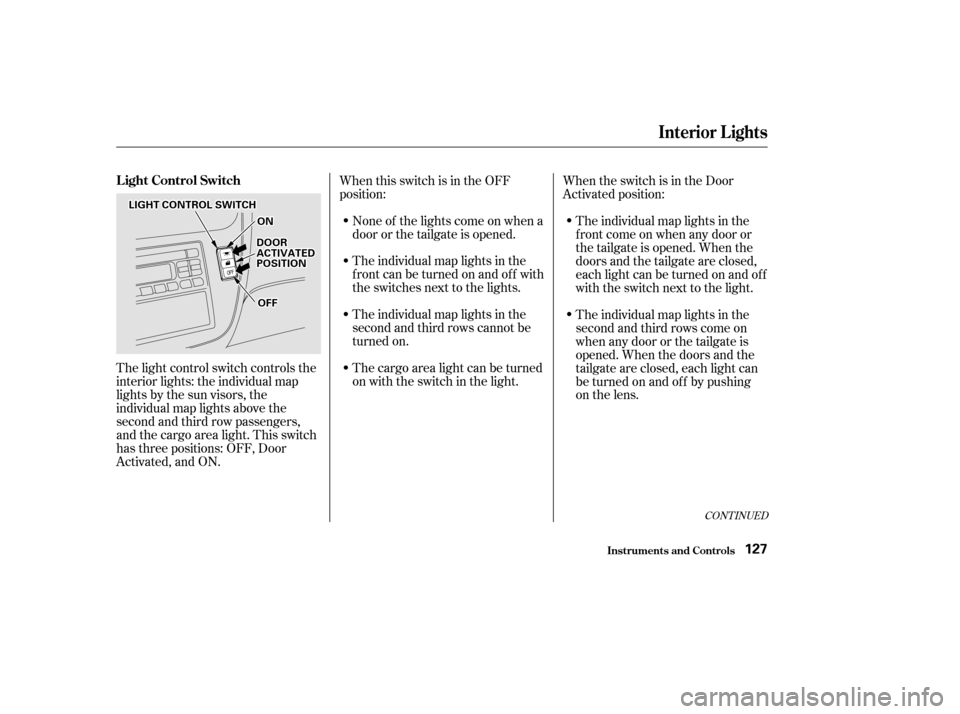
The light control switch controls the
interior lights: the individual map
lights by the sun visors, the
individual map lights above the
second and third row passengers,
and the cargo area light. This switch
has three positions: OFF, Door
Activated, and ON.When this switch is in the OFF
position:
None of the lights come on when a
door or the tailgate is opened.
The individual map lights in the
f ront can be turned on and of f with
the switches next to the lights.
The individual map lights in the
second and third rows cannot be
turned on.
The cargo area light can be turned
on with the switch in the light. The individual map lights in the
f ront come on when any door or
thetailgateisopened.Whenthe
doors and the tailgate are closed,
eachlightcanbeturnedonandoff
with the switch next to the light.
The individual map lights in the
second and third rows come on
when any door or the tailgate is
opened. When the doors and the
tailgate are closed, each light can
be turned on and of f by pushing
on the lens.
When the switch is in the Door
Activated position:
CONT INUED
Inst rument s and Cont rols
Interior Lights
L ight Control Switch
127
L LI
IGGH HT
T C
COON NTTR
RO OL L S
SWWI ITT C
CH H
O
ONN
D
D O
OO ORR
A
A C
CTTI
IVV A
AT
TE
ED
D
P
P O
OS SIITT I
IOON N
O
OF FFF
Page 131 of 399
The cargo area light comes on
whenanydoororthetailgateis
opened if the switch in the light is
in the door activated (center)
position. When the doors and the
tailgate are closed, it can be turned
on with the switch in the light.When the switch is in the ON
position:
All the individual map lights come
onandstayonaslongasthe
switch remains in the ON position.
The cargo area light comes on and
stays on if the switch in the light is
in the door activated (center)
position. The lights go out about six seconds
after all the doors and the tailgate
are closed.
With the light control switch in the
Door Activated position, all the
individual map lights and the cargo
area light (with the switch in the
center position) come on when you
unlock the door with the remote
transmitter (see page ).
Withanydoororthetailgateleft
open, the lights stay on about three
minutes, then go out.
84On EX and EX-L models
Interior Lights
Inst rument s and Cont rols128
Page 132 of 399
Turn on the f ront individual map
lights by pushing the button next to
each light. Push the button again to
turn it off. You can also operate
these lights with the light control
switch (see page ).Turn on each rear individual map
light by pushing the lens when the
ignition switch is in the
ACCESSORY (I) or ON (II) position.
Push the lens again to turn it off.
You can also operate these lights
with the light control switch (see
page ).The cargo area light has a three-
position switch. In the OFF position,
the light does not come on. In the
center position, it comes on when
you open the tailgate. In the ON
position, it stays on continuously.
This light also works with the light
control switch (see page ).
127
127 127
Inst rument s and Cont rols
Interior Lights
Individual Map L ights Cargo A rea L ight
129
F FRRO ON NTT R
RE
EA
A R
R
O
ONN O
OF
FFF
Page 133 of 399
The ignition switch light comes on
when you open the driver’s door, and
stays on several seconds after you
close the door.
Interior Lights
Inst rument s and Cont rols
Ignition Switch L ight
130
Page 135 of 399

Proper use of the Heating and
Cooling system can make the
interior dry and comf ortable, and
keep the windows clear f or best
visibility.
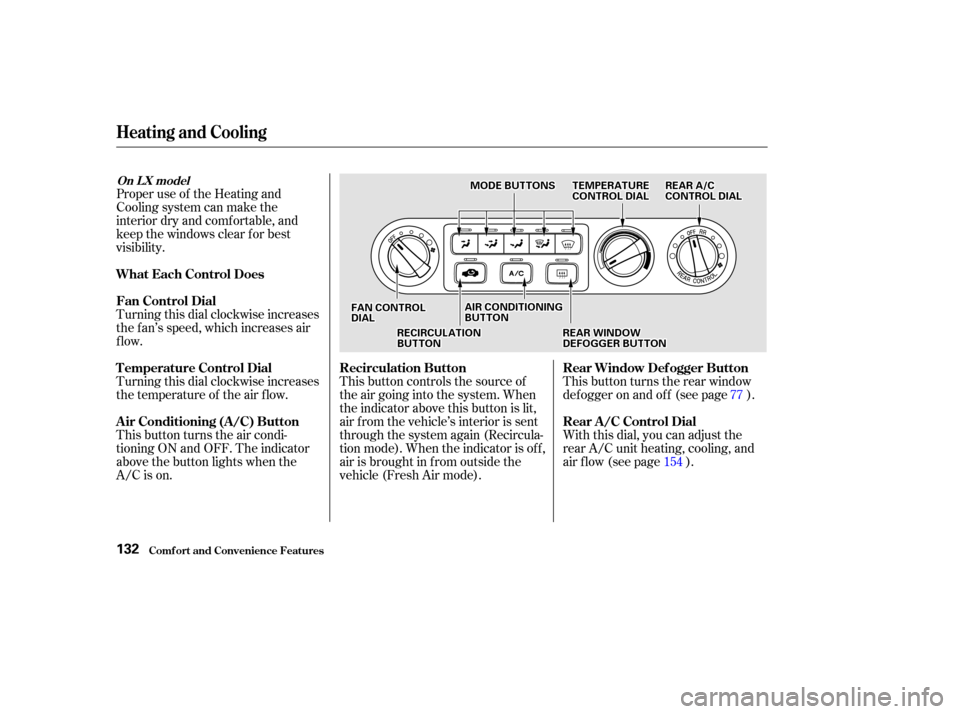
Turning this dial clockwise increases
the f an’s speed, which increases air
flow.
Turning this dial clockwise increases
the temperature of the air flow.
This button turns the air condi-
tioning ON and OFF. The indicator
above the button lights when the
A/C is on.This button controls the source of
the air going into the system. When
the indicator above this button is lit,
air f rom the vehicle’s interior is sent
through the system again (Recircula-
tion mode). When the indicator is off,
air is brought in f rom outside the
vehicle (Fresh Air mode).
With this dial, you can adjust the
rear A/C unit heating, cooling, and
air flow (see page ). This button turns the rear window
def ogger on and of f (see page ).
15477
Comf ort and Convenience Feat ures
Heating and Cooling
What Each Control Does
Fan Control Dial
T emperature Control Dial
Air Conditioning (A/C) Button
Recirculation Button
Rear Window Def ogger Button
Rear A /C Control Dial
On L X model
132
F FAA N
N C
COON NTTR
RO OL L
D
D I
IAA L
L R
RE
EA
A R
R A
A/
/C
C
C
CO ON NTTR
RO OL L D
DI
IAA L
L
R
RE EC
CI IRRC CUUL LAA T
TI
IOON N
B
BU UT TT
TO
ON N A
A
I
IRR C
COON NDDI
ITT I
IOON NIINNG G
B
BU UT TT
TO
ON N
R
REEA
A R
R W
WI INND DO
OW W
D
D E
EF
FOOG GGGEER
R B
BUUT TT
TO
ON N
T
T
E
EM
M P
PE
ER
RA A T
TU
UR REE
C
CO ON NTTR
RO OL L D
DI
IAA L
L
M
M
O
ODDE
E B
BUUT TT
TO
ON NSS
Page 165 of 399

�Û�µ�µ
Dolby B noise reduction turns on
when you insert a cassette. If the
tape was not recorded with Dolby B
noise reduction, turn it of f by
pressing the button.
When the system reaches the end of
the tape, it will automatically reverse
direction and play the other side. If
you want to remove the cassette
f rom the drive, press the EJECT
button.
You can use the instrument panel
brightness control knob to adjust the
illumination of the audio system (see
page ). The audio system
illuminates when the parking lights
are on, even if the radio is turned of f .
Turn the audio system ON. Make
sure the tape opening on the cassette
is f acing to the right, then insert the
cassette most of the way into the slot.
The system will pull it in the rest of
the way, and begin to play.
The tape direction indicator will light
to show you which side of the
cassette is playing. The indicates
thesideyouinsertedfacingupward
is now playing. If you want to play
the other side, press the PROG
button.
With a cassette playing, you can use
the FF, REW, SKIP, or REPEAT
f unction to f ind a desired program.
Fast Forward and Re-
wind move the tape rapidly. To re-
wind the tape, push the REW button.
You will see REW in the display. To
fast forward the tape, push the FF
button. You will see FF displayed.
Press the PLAY button to take the
system out of rewind or f ast f orward. If the system reaches the end of the
tape while in f ast f orward or rewind,
it automatically stops that function,
reverses direction, and begins to play.
The Skip Function allows
youtofindthebeginningof asong
or passage. To f ind the beginning of
the song or passage currently
playing, push the SKIP switch down.
You will see REW f lashing in the
display as the tape rewinds. To f ind
the beginning of the next song, push
the SKIP switch up. You will see FF
flashing in the display as the tape
fast forwards. When the system
f inds the beginning of a song or
passage, it goes back to PLAY mode.
73
Audio System
Comf ort and Convenience Feat ures
A udio System L ighting
Operating the Cassette Player
T ape Search Functions
FF/REWSK IP
162
Page 178 of 399

CONT INUED
You can use the instrument panel
brightness control knob to adjust the
illumination of the audio system (see
page ). The audio system
illuminates when the parking lights
are on, even if the radio is turned of f .
Your Honda’s radio can receive the
complete AM and FM bands.
Those bands cover these f requen-
cies:
AM band:
530 to 1,710 kilohertz
FM band:
87.7 to 107.9 megahertz
Radio stations on the AM band are
assigned f requencies at least ten
kilohertz apart (530, 540, 550).
Stations on the FM band are
assigned f requencies at least 0.2
megahertz apart (87.9, 88.1, 88.3).Stations must use these exact
f requencies. It is f airly common f or
stations to round-of f the f requency in
their advertising, so your radio could
display a f requency of 100.9 even
though the announcer may identif y
the station as ‘‘FM101.’’
How well your Honda’s radio
receives stations is dependent on
many f actors, such as the distance
from the station’s transmitter,
nearby large objects, and atmos-
pheric conditions.
A radio station’s signal gets weaker
as you get f arther away f rom its
transmitter. If you are listening to an
AM station, you will notice the sound
volume becoming weaker, and the
stationdriftinginandout.If youare
listening to an FM station, you will
see the stereo indicator f lickering of f
and on as the signal weakens.
Eventually, the stereo indicator willgo of f and the sound will f ade
completely as you get out of range of
the station’s signal.
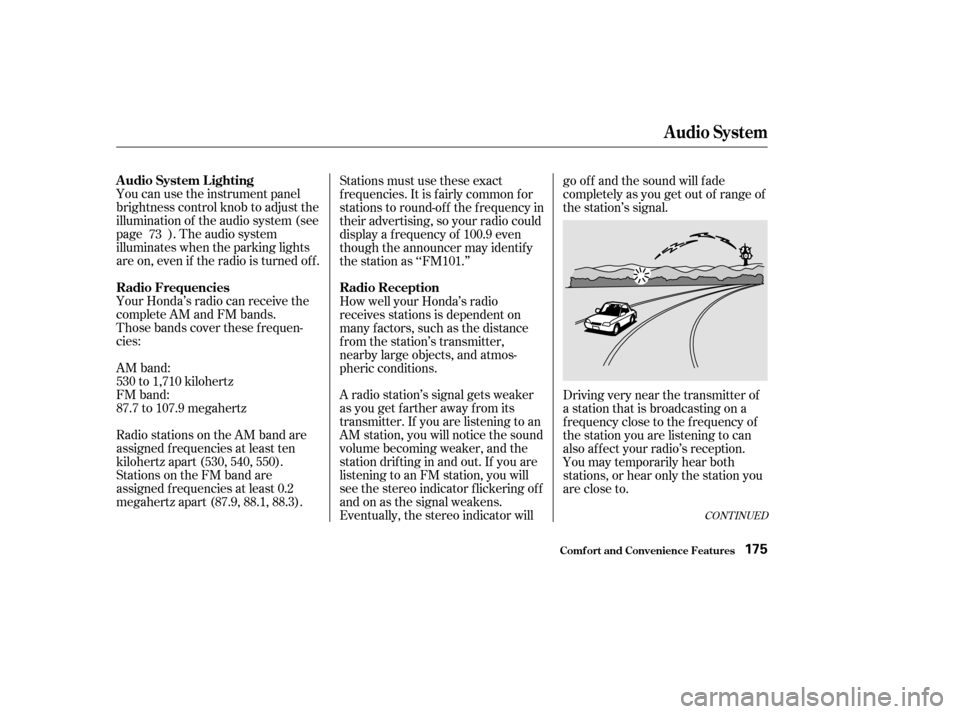
Driving very near the transmitter of
a station that is broadcasting on a
f requency close to the f requency of
the station you are listening to can
also af f ect your radio’s reception.
You may temporarily hear both
stations,orhearonlythestationyou
are close to.
73
Audio System
Comf ort and Convenience Feat ures
A udio System L ighting
Radio Frequencies
Radio Reception
175