Page 120 of 399
Canadian Models
The outside mirrors are heated to re-
move fog and frost. With the ignition
switchON(II),turnontheheaters
by pressing the button. The light in
the button comes on as a reminder.
Press the button again to turn the
heaters off.To apply the parking brake, push the
parking brake pedal down with your
f oot. To release the parking brake,
push on the pedal again. The parking
brake light on the instrument panel
should go out when the parking
brake is f ully released with the
engine running. (see page .)
64
Parking Brake
Mirrors, Parking Brake
Inst rument s and Cont rols117
H H
E
EA
A T
TE
ED
D M
MI
IRRR ROOR R B
BUUT TT
TO
ON N
P
PA
A R
RKKIINNG G B
BRRAA K
KEE P
PE
ED
D A
AL
L
Driving the vehicle with the parking
brake applied can damage the rear
brakes and axles.
Page 127 of 399
A storage compartment is located by
the third seat on the driver’s side. To
open the compartment, pull the lever
and lif t the lid. To close, lower the lid
and push it down until it latches.The coin holder is located in the
f ront beverage holder. To open it,
pull on the bottom edge. Close it
with a firm push.
Open the center pocket by pulling
thehandle.Closeitwithafirmpush.
The light in the pocket comes on
when the instrument panel lights are
on.
On EX and EX-L models
Center Pocket
Rear Compartment Coin Holder
Inst rument s and Cont rols
Rear Compartment, Center Pocket, Coin Holder
124
L LEE V
V E
ER
R
R
RE EA
A R
R C
COOM M P
PA
A R
RTTM
M E
EN
NT T C
CE
EN
NT TE
ER
R
P
P O
OC CKKEET
T C
CO
OI INN
H
H O
OL LDD E
ER
R
Page 165 of 399

�Û�µ�µ
Dolby B noise reduction turns on
when you insert a cassette. If the
tape was not recorded with Dolby B
noise reduction, turn it of f by
pressing the button.
When the system reaches the end of
the tape, it will automatically reverse
direction and play the other side. If
you want to remove the cassette
f rom the drive, press the EJECT
button.
You can use the instrument panel
brightness control knob to adjust the
illumination of the audio system (see
page ). The audio system
illuminates when the parking lights
are on, even if the radio is turned of f .
Turn the audio system ON. Make
sure the tape opening on the cassette
is f acing to the right, then insert the
cassette most of the way into the slot.
The system will pull it in the rest of
the way, and begin to play.
The tape direction indicator will light
to show you which side of the
cassette is playing. The indicates
thesideyouinsertedfacingupward
is now playing. If you want to play
the other side, press the PROG
button.
With a cassette playing, you can use
the FF, REW, SKIP, or REPEAT
f unction to f ind a desired program.
Fast Forward and Re-
wind move the tape rapidly. To re-
wind the tape, push the REW button.
You will see REW in the display. To
fast forward the tape, push the FF
button. You will see FF displayed.
Press the PLAY button to take the
system out of rewind or f ast f orward. If the system reaches the end of the
tape while in f ast f orward or rewind,
it automatically stops that function,
reverses direction, and begins to play.
The Skip Function allows
youtofindthebeginningof asong
or passage. To f ind the beginning of
the song or passage currently
playing, push the SKIP switch down.
You will see REW f lashing in the
display as the tape rewinds. To f ind
the beginning of the next song, push
the SKIP switch up. You will see FF
flashing in the display as the tape
fast forwards. When the system
f inds the beginning of a song or
passage, it goes back to PLAY mode.
73
Audio System
Comf ort and Convenience Feat ures
A udio System L ighting
Operating the Cassette Player
T ape Search Functions
FF/REWSK IP
162
Page 178 of 399

CONT INUED
You can use the instrument panel
brightness control knob to adjust the
illumination of the audio system (see
page ). The audio system
illuminates when the parking lights
are on, even if the radio is turned of f .
Your Honda’s radio can receive the
complete AM and FM bands.
Those bands cover these f requen-
cies:
AM band:
530 to 1,710 kilohertz
FM band:
87.7 to 107.9 megahertz
Radio stations on the AM band are
assigned f requencies at least ten
kilohertz apart (530, 540, 550).
Stations on the FM band are
assigned f requencies at least 0.2
megahertz apart (87.9, 88.1, 88.3).Stations must use these exact
f requencies. It is f airly common f or
stations to round-of f the f requency in
their advertising, so your radio could
display a f requency of 100.9 even
though the announcer may identif y
the station as ‘‘FM101.’’
How well your Honda’s radio
receives stations is dependent on
many f actors, such as the distance
from the station’s transmitter,
nearby large objects, and atmos-
pheric conditions.
A radio station’s signal gets weaker
as you get f arther away f rom its
transmitter. If you are listening to an
AM station, you will notice the sound
volume becoming weaker, and the
stationdriftinginandout.If youare
listening to an FM station, you will
see the stereo indicator f lickering of f
and on as the signal weakens.
Eventually, the stereo indicator willgo of f and the sound will f ade
completely as you get out of range of
the station’s signal.
Driving very near the transmitter of
a station that is broadcasting on a
f requency close to the f requency of
the station you are listening to can
also af f ect your radio’s reception.
You may temporarily hear both
stations,orhearonlythestationyou
are close to.
73
Audio System
Comf ort and Convenience Feat ures
A udio System L ighting
Radio Frequencies
Radio Reception
175
Page 199 of 399
Select BAL or FAD by pressing the
TUNE knob. Adjust the Balance or
Fader to your liking by turning the
TUNE knob.
The displayed number shows you
the current setting.
When the adjustment level reaches
the center, you will see ‘‘ ’’.
The system will automatically return
the display to the selected audio
mode about f ive seconds af ter you
stop adjusting a mode with the
TUNE knob.You can use the instrument panel
brightness control dial to adjust the il-
lumination of the audio system (see
page ). The audio system
illuminates when the parking lights
are on, even if the radio is turned of f .
For inf ormation, see page .
C 73 175
Comf ort and Convenience Feat ures
Audio System
A udio System L ighting
Radio Frequencies and Reception
196
Page 224 of 399

Once the security system is set,
opening any door (without using the
key or the remote transmitter), or
the hood, will cause it to alarm. It
also alarms if the radio is removed
f rom the dashboard or the wiring is
cut.Do not attempt to alter this system
or add other devices to it.
The security system helps to protect
your vehicle and valuables f rom thef t.
The horn sounds and a combination
of headlights, parking lights, side
marker lights and taillights f lashes if
someone attempts to break into your
vehicleorremovetheradio.This
alarm continues f or two minutes,
then the alarm stops. To reset an
alarming system before the two
minutes have elapsed, unlock either
f ront door with the key or the
remote transmitter.
The security system sets auto-
matically fifteen seconds after you
lock the doors, hood, and tailgate.
For the system to activate, you must
lock the doors f rom the outside with
the key, or remote transmitter. The
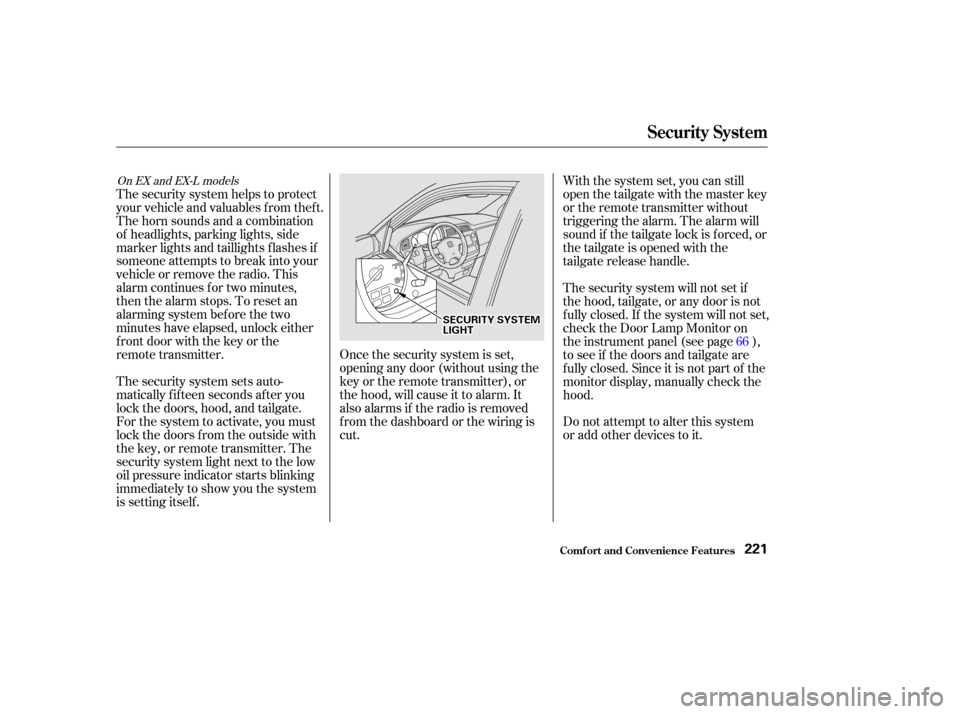
security system light next to the low
oil pressure indicator starts blinking
immediately to show you the system
is setting itself . With the system set, you can still
open the tailgate with the master key
or the remote transmitter without
triggering the alarm. The alarm will
sound if the tailgate lock is f orced, or
the tailgate is opened with the
tailgate release handle.
The security system will not set if
the hood, tailgate, or any door is not
f ully closed. If the system will not set,
check the Door Lamp Monitor on
the instrument panel (see page ),
to see if the doors and tailgate are
f ully closed. Since it is not part of the
monitor display, manually check the
hood.
66
On EX and EX-L models
Security System
Comf ort and Convenience Feat ures221
S SE
EC
CU UR RIITT Y
Y S
SYYSSTTE
EM
M
L
LI IGGH HT
T
Page 225 of 399

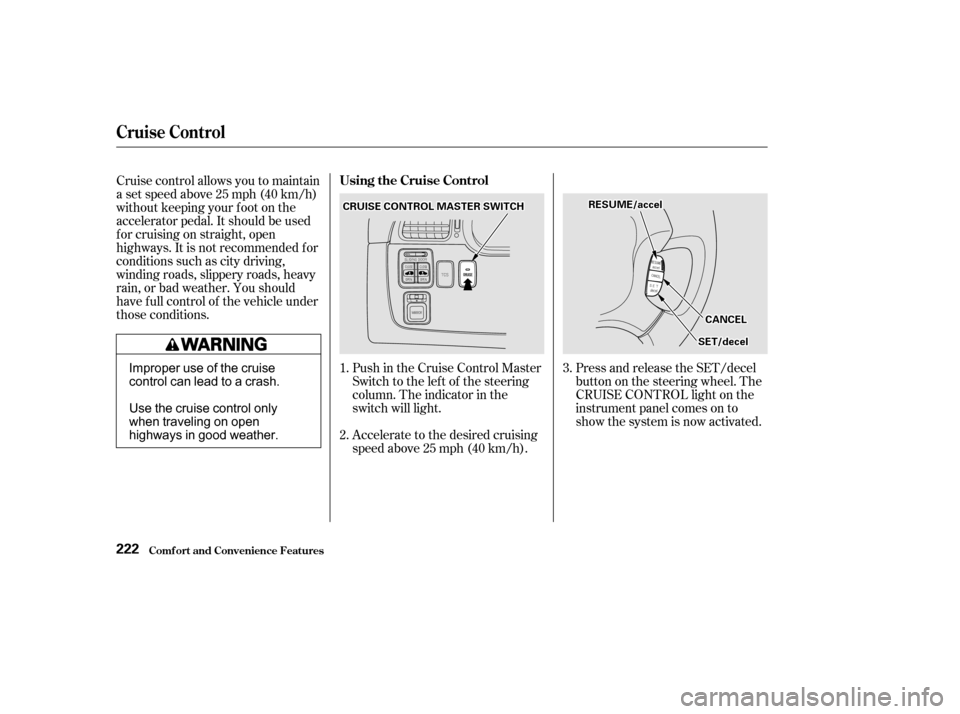
Push in the Cruise Control Master
Switch to the lef t of the steering
column. The indicator in the
switch will light.
Accelerate to the desired cruising
speedabove25mph(40km/h).Press and release the SET/decel
buttononthesteeringwheel.The
CRUISE CONTROL light on the
instrument panel comes on to
show the system is now activated.
Cruise control allows you to maintain
asetspeedabove25mph(40km/h)
without keeping your f oot on the
accelerator pedal. It should be used
f or cruising on straight, open
highways. It is not recommended f or
conditions such as city driving,
winding roads, slippery roads, heavy
rain, or bad weather. You should
have f ull control of the vehicle under
those conditions.
1.
2.3.
Cruise Control
Comf ort and Convenience Feat ures
Using the Cruise Control
222
C CR
RUUI ISSE E C
COON NTTR
RO OL L M
M A
AS
STTE
ER
R S
SWWI ITT C
CH H
C
CAA N
NC CEEL
L
R
RE
ES
SU UM M E
E/
/a
ac ccceel l
S
SEET
T/
/d
d e
ecceel l
Improper use of the cruise
control can lead to a crash.
Use the cruise control only
when traveling on open
highways in good weather.
Page 226 of 399

You can decrease the set cruising
speed in any of these ways:Press and hold the SET/decel
button. The vehicle will decelerate.
Release the button when you
reach the desired speed.
Tap the brake pedal lightly with
your f oot. The CRUISE
CONTROL light on the instru-
ment panel will go out. When the
vehicle slows to the desired speed,
press the SET/decel button. The
vehicle will then maintain the
desired speed.
You can increase the set cruising
speed in any of these ways:
Press and hold the RESUME/
accel button. The vehicle will
accelerate. When you reach the
desired cruising speed, release the
button.
Push on the accelerator pedal. Ac-
celerate to the desired cruising
speed and press the SET/decel
button.
Thecruisecontrolmaynotholdthe
set speed when you are going up and
down hills. If your speed increases
going down a hill, use the brakes to
slow down to the desired speed. This
will cancel the cruise control. To
resume the set speed, press the
RESUME/accel button. The
CRUISE CONTROL light on the
instrument panel comes on.
When climbing a steep hill, the
automatic transmission may
downshif t to hold the set speed.
To increase your speed in very
small amounts, tap the RESUME/
accel button repeatedly. Each time
you do this, your vehicle will speed
up about 1 mph (1.6 km/h).To slow down in very small
amounts, tap the SET/decel
button repeatedly. Each time you
do this, your vehicle will slow
down about 1 mph (1.6 km/h).
CONT INUED
Cruise Control
Comf ort and Convenience Feat ures
Changing the Set Speed
223