Page 2 of 372

T his Owner’s Manual should be considered
a permanent part of the vehicle, and should
remain with the vehicle when it is sold.
T his Owner’s Manual covers all models of
the CR-V. You may f ind descriptions of
equipment and f eatures that are not on your
particular model.
T he inf ormation and specif ications included
in this publication were in ef f ect at the time
of approval f or printing. Honda Motor Co.,
Ltd. reserves the right, however, to
discontinue or change specif ications or
design at any time without notice and
without incurring any obligation whatsoever.
Owner’s Identif ication
Si pref iere este Manual del
Propietario en español,
comuníquese con el concesionario
Honda.
POUR CLIENTS CANADIEN
A VIS IMPORT A NT : Si vous avez
besoin d’un Manuel du Conduct eur
en f rançais, veuillez demander à
votreconcessionnairede
commander le numéro de pièce
33S9AC00
OWNER
ADDRESS
V. I. N.
DELIVERY DATE
DEALER NAMEDEALER NO.
ADDRESS
OWNER’S SIGNATURE
DEALER’S SIGNATURE
STREET
CITY STATE/PROVINCE ZIP CODE/
POSTAL CODE
(Date sold to original retail purchaser)
STREET
CITY STATE/PROVINCE ZIP CODE/
POSTAL CODE
Page 72 of 372
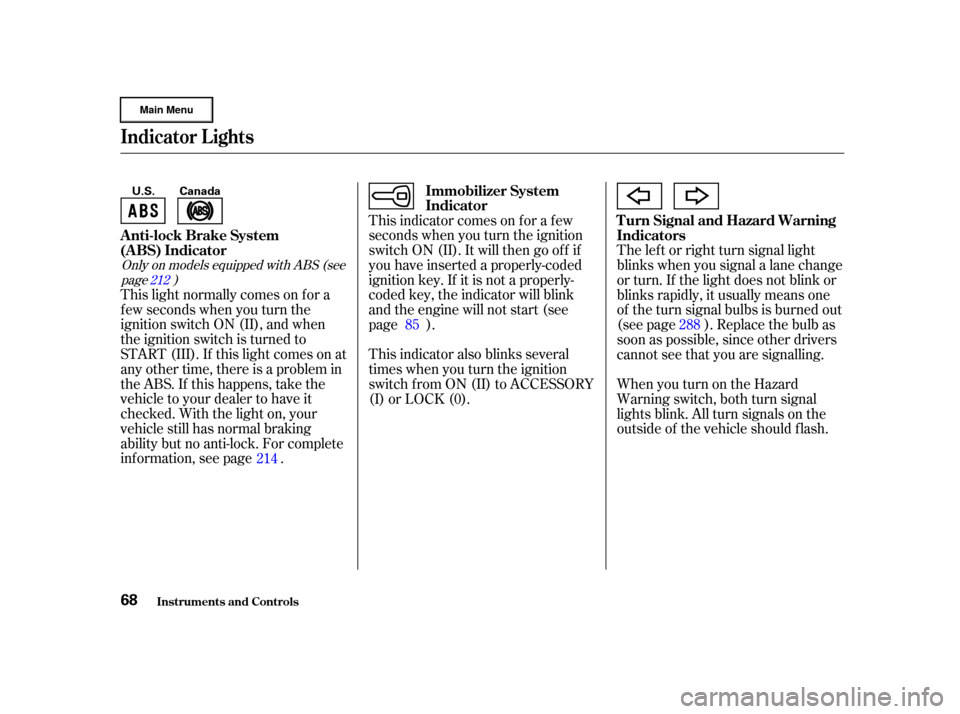
Only on models equipped with ABS (seepage ) 212
This light normally comes on f or a
f ew seconds when you turn the
ignition switch ON (II), and when
the ignition switch is turned to
START (III). If this light comes on at
any other time, there is a problem in
theABS.If thishappens,takethe
vehicle to your dealer to have it
checked. With the light on, your
vehicle still has normal braking
ability but no anti-lock. For complete
inf ormation, see page . This indicator comes on f or a f ew
seconds when you turn the ignition
switch ON (II). It will then go of f if
you have inserted a properly-coded
ignition key. If it is not a properly-
coded key, the indicator will blink
and the engine will not start (see
page ).
This indicator also blinks several
times when you turn the ignition
switch f rom ON (II) to ACCESSORY
(I) or LOCK (0).
The lef t or right turn signal light
blinks when you signal a lane change
or turn. If the light does not blink or
blinks rapidly, it usually means one
of the turn signal bulbs is burned out
(see page ). Replace the bulb as
soon as possible, since other drivers
cannot see that you are signalling.
WhenyouturnontheHazard
Warning switch, both turn signal
lights blink. All turn signals on the
outside of the vehicle should f lash.
214 85
288
Anti-lock Brake System
(A BS) Indicator
Immobilizer System
Indicator
Turn Signal and Hazard Warning
Indicators
Indicator L ights
Inst rument s and Cont rols68
Canada
U.S.
Page 89 of 372

Some models also come with two
remote transmitters; see page for
an explanation of their operation.When you turn the ignition switch to
ON (II), the Immobilizer System
indicator should come on f or a f ew
seconds, then go out. If the indicator
starts to blink, it means the system
does not recognize the coding of the
key. Turn the ignition switch to
LOCK (0), remove the key, reinsert
it, and turn the switch to ON (II)
again.The system may not recognize your
key’s coding if another immobilizer
key or other metal object is near the
ignition switch when you insert the
key. To make sure the system
recognizes the key code:
The Immobilizer System protects
your vehicle f rom thef t. A properly-
coded master or valet key must be
used in the ignition switch f or the
engine to start. If an improperly-
coded key (or other device) is used,
the engine’s f uel system is disabled. Do not keep other immobilizer
keys on the same key ring.
Use a plastic or leather key f ob,
not metal.
Keep other keys away f rom your
vehicle’s key and the ignition
switch while trying to start the
engine.
If the system repeatedly does not
recognize the coding of your key,
contact your Honda dealer.
89
CONT INUED
Remote TransmitterImmobilizer System
Keys and Locks
Inst rument s and Cont rols85
Page 142 of 372
Your Honda’s audio system provides
clear reception on both AM and FM
bands, while the preset buttons allow
you to easily select your f avorite
stations.
The anti-thef t f eature will disable the
system if it is disconnected f rom the
vehicle’s battery. To get the system
working again, you must enter a
code number (see page ).178
On LX model in the U.S. and Canada
Audio System
Comf ort and Convenience Feat ures
A M/FM/Cassette/CD A udio
System
138
Page 148 of 372

You can use the instrument panel
brightness control knob to adjust the
illumination of the audio system (see
page ). The audio system
illuminates when the parking lights
are on, even if the radio is turned of f .
For inf ormation, See page .The audio system display usually
shows the time when the ignition
switch is in ACCESSORY (I) or ON
(II). It shows the operation mode of
the radio, cassette player, CD player,
or optional CD changer when you
operate them, then goes back to the
time display af ter f ive seconds.
If an error occurs while operating
the CD player or optional CD
changer, the display will keep
showing the error code and will not
switch to the time display until the
error is corrected (see pages and
).
You can set the time only when the
clock is displayed. To set the time, press the CLOCK
(SCAN/RPT) button until you hear a
beep. The displayed time begins to
blink.
Press and hold the H (Preset 4)
button until the hour advances to the
desired time.
Press and hold the M (Preset 5)
button until the minutes advance to
the desired time.
Press the CLOCK (SCAN/RPT)
button again to enter the set time.
160
148
150
77
Audio System
Comf ort and Convenience Feat ures
A udio System L ighting
Radio Frequencies and Reception
Digital Clock
144
Page 159 of 372

�µ
�µ �Ó�Ó
�µ�´
The ignition switch must be in
ACCESSORY (I) or ON (II) to
operate the audio system. Turn the
system on by pressing the PWR/
VOL knob, or the AM or FM button.
Adjust the volume by turning the
knob.
The band and f requency that the
radio was last tuned to is displayed.
To change bands, press the AM or
FM button. On the FM band, ST will
be displayed if the station is broad-
castinginstereo.Stereo
reproduction on AM is not available. You can use any of f ive methods to
f ind radio stations on the selected
band: TUNE, SEEK, SCAN, AUTO
SELECT, and the Preset buttons.
Use the TUNE knob to
tune the radio to a desired f requency.
Turn the TUNE knob to the right to
tune to a higher f requency, or to the
lef t to tune to a lower f requency.
Turn the knob right or lef t until the
display reaches the desired
f requency.
The SEEK f unction
searches the band for a station with
a strong signal. To activate it, press
either SEEK button ( or ), then
release it. Depending on which
SEEK button you press, the system
scans upward or downward f rom the
current f requency. It stops when it
finds a station with a strong signal.
The anti-thef t f eature will disable the
system if it is disconnected f rom the
vehicle’s battery. To get the system
working again, you must enter a
code number (see page ).
178
CONT INUED
Operating the Radio
TUNE
SEEK
Audio System
Comf ort and Convenience Feat ures155
Page 166 of 372

Radio reception can be af f ected by
atmospheric conditions such as
thunderstorms, high humidity, and
even sunspots. You may be able to
receive a distant radio station one
day and not receive it the next day
because of a change in conditions.
Electrical interf erence f rom passing
vehicles and stationary sources can
cause temporary reception problems.The audio system display usually
shows the time when the ignition
switch is in ACCESSORY (I) or ON
(II). It shows the operation mode of
the radio, cassette player, or CD
changer when you operate them,
then goes back to the time display
af ter f ive seconds.
If an error occurs while operating
the CD changer, the display will
keep showing the error code and will
not switch to the time display until
the error is corrected (see page ).
You can set the time only when the
clock is displayed.
177
As required by the FCC:
Changes or modif ications not expresslyapproved by the party responsible f orcompliance could void the user’sauthority to operate the equipment.
Audio System
Comf ort and Convenience Feat ures
Digital Clock
162
Page 181 of 372
Indication
If you see an error indication in the
display while operating the CD
changer, f ind the cause in the chart
to the right. If you cannot clear the
error indication, take the vehicle to
your Honda dealer. Cause
Solution
FOCUS Error
Mechanical Error
No CD in the CD
changer Press the CD eject button and pull out the CDs,
check f or error indication. Insert the CDs again.
If the code does not disappear or the CD cannot
be pulled out, consult your Honda dealer.
Press the CD eject button and pull out the CDs,
check f or error indication. Insert the CD again.
If the code does not disappear or the CD cannot
be pulled out, consult your Honda dealer.
Insert CD magazine.
CD Changer Error Indications
Audio System
Comf ort and Convenience Feat ures177

