Page 101 of 1139
Cylinder Head
Engine Compression Inspection
1. Warm up the engine to normal operating
temperature (cooling fan comes on).
2. Turn the ignition switch OFF.
3. Remove the intake manifold cover (see step 1 onpage 6-22).
4, Disconnect all four injector connectors.
5. Start the engine, and let it run until it stalls.
6. Remove the iour ignition coils (see page 4-18).
7. Remove the four spark plugs.
8. Attach the compression gauge to the spark plug
note.
6-6
V,
\
9.
10.
Open the throttle fully, then crank the engine with
the starter motor and measure the compression.
Compression Pressure
Above 930 kpa (9.5 kgf/cm', 135 psi)
Measure the compression on the remaining
cylinders,
Maximum vadation
Within 200 kPa (2.0 kgf/cm', 28 psi)
lf the compression is not within specifications,
check these items, then remeasure the
compressron.
. Damaged orworn valves and seats. Damaged cylinder head gasket. Damaged or worn piston rings. Damaged orworn piston and cylinder bore
11.
\-
Page 709 of 1139

4. Remove the headliner.
-1 Remove the socket plug (A).
-2 Remove the remaining door opening trim {B}
from each roof portion.
-3 Detach the clips (C), and release the fasteners
(D) by pulling the front portion ofthe headliner
(E) down.-4 With the help of an assislant, release the clips(F) of the headliner from the moonroof frame
(G), and release the headliner from the clips (H)
by sliding the headliner forward, and lowering
the headliner.-5 Remove the headliner through the passenger's
opening.
Fastener Locations
C>:Clip,3
ao
5.Install the headliner in the reverse order of removal,
and note these items:
. When reinstalling the headliner through the
passenger's door opening, be careful not to fold
or bend it, Also, be careful not to scratch the
DOOy.. Check that both sides of the headliner are
securely attached to the trim.. Replace any clips that remain in the roof during
removal. Reinstallthe clips back in the headliner
before installation.
F>:Clip,2 H>:Clip,2
Carpet Replacement
SRS components are located in this area. Reviewthe
SRS component locations (see page 23-13) and the
precautions and procedures (see page 23-14) in the SRS
section before performing repairs or service.
NOTE:. Put on gloves to protect your hands.. Take care not to damage, wrinkle. or twist the carpet.. Be careful not to damage the dashboard or other
interior trim pieces.
1. Remove these items:
. Front seats, both sides (see page 20-111. Driver's dashboard under cover (see page 20-60). Passenger's dashboard Iower cover (see page
20-631. Rear seat cushion (see page 20-80). Kick panels, both sides (see page 20-50). Door silltrim, both sides (see page 20-50). Consoles, front and rear (see page 20-57)
2. Remove the nut (A), and using a hex wrench,
release the clip (B), then remove the footrest (C).
Fastener Locations
Aa:Nut,1 B):Clip,'l
--'1 I
-- -JrL
tj I ;tt4f=\-/ l[il
A6x1.0mm9.8Nm11.0 kgf m,7.2 lbf.ft)
-o
(cont'd)
20-55
Page 738 of 1139
Seats
Rear Seat Cushion Cover Replacement
'1.Remove the rear seat cushion (see page 2O-80).
Release all the clips (A) from under the seat
cushion, and fold back the seat cushion cover (B).
B
Pull back the edge of the seat cushion cover all theway around, and release the clips (A), then remove
the seat cushion cover.
iw F 1., 1L +. ts+'
il1rl-,+ J ,+ l l
20-84
4. Installthe cover in the reverse order of removal,
and note these items;
. To prevent wrinkles, make sure the material is
stretched evenly over the pad before securing
the clips.. Replace any clips {A) you removed with new
ones. Install them with commercially available
upholstery ring pliers (B).
\
Page 1018 of 1139

Seat Belts
Inspection (cont'd)
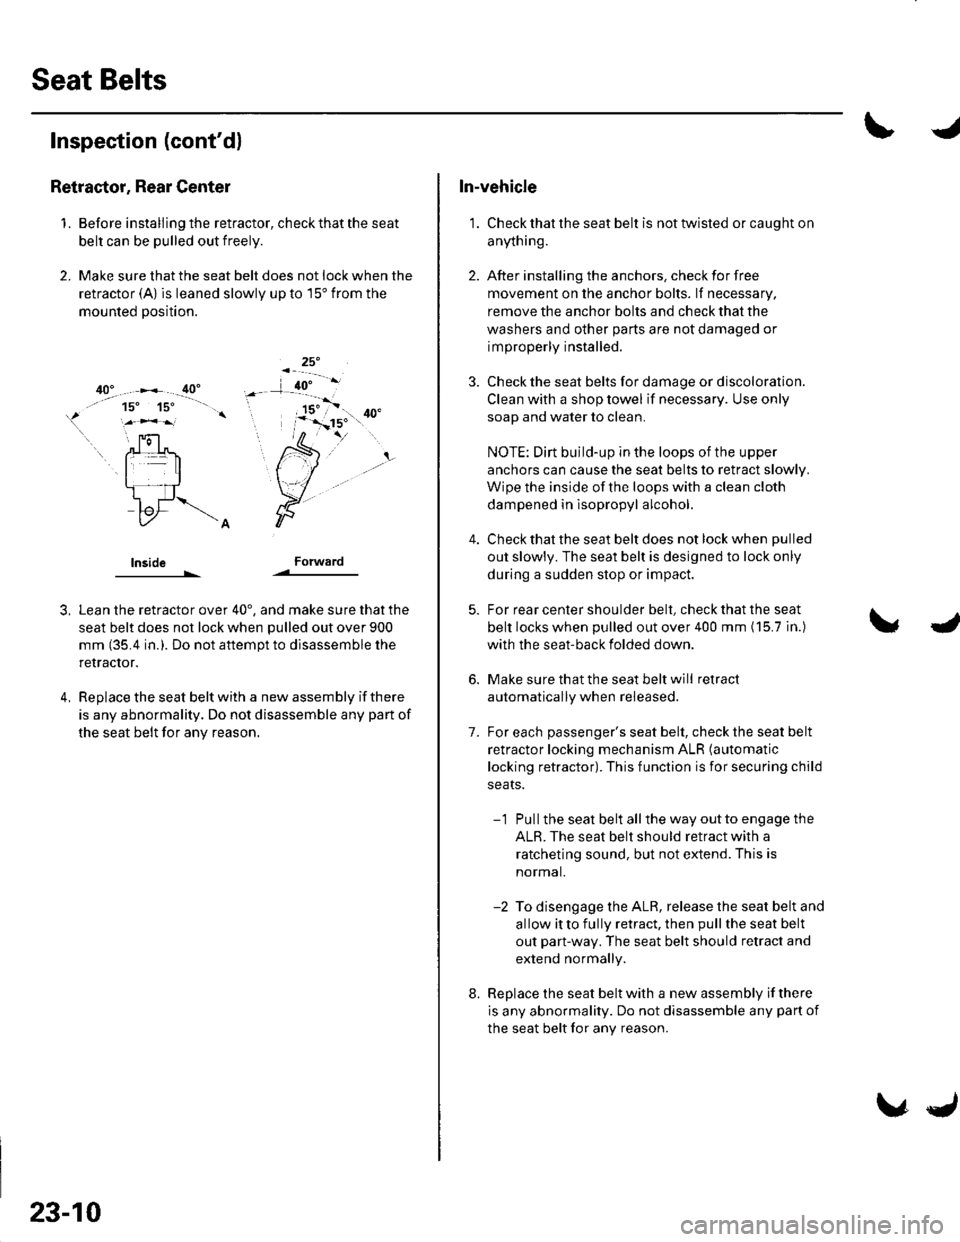
RetraEtor, Rear Center
1. Before installing the retractor, check that the seat
belt can be pulled out freely.
2, Make sure that the seat belt does not lock when the
retractor (A) is leaned slowly up to 15' from the
mounted position.
lnsideForward
3,
4.
Lean the retractor over 40', and make sure that the
seat belt does not lock when pulled out over 900
mm (35.4 in.). Do not aftempt to disassemble the
retractor.
Replace the seat belt with a new assembly if there
is any abnormality. Do not disassemble any part of
the seat belt for any reason.
23-10
\,J
In-vehicle
1. Check that the seat belt is not twisted or caught on
anything.
2. After installing the anchors. check for free
movement on the anchor bolts. lf necessary,
remove the anchor bolts and check that the
washers and other parts are not damaged or
improperly installed.
3. Check the seat belts for damage or discoloration.
Clean with a shop towel if necessary. Use only
soap and water to clean.
NOTE: Dirt build-up in the loops of the upper
anchors can cause the seat belts to retract slowly.
Wipe the inside of the loops with a clean cloth
dampened in lsopropyl alcohol.
Check that the seat belt does not lock when pulled
out slowly. The seat belt is designed to lock only
during a sudden stop or impact.
For rear center shoulder belt, check that the seat
belt locks when pulled out over 400 mm (15.7 in.)
with the seat-back folded down.
Make sure that the seat belt will retract
automatically when released.
For each passenger's seat belt, check the seat belt
retractor locking mechanism ALR (automatic
locking retractor). This function is for securing child
seats.
-1 Pullthe seat belt allthe way outto engage the
ALR. The seat belt should retract with a
ratcheting sound, but not extend. This is
normal.
-2 To disengage the ALR, release the seat belt and
allow itto fully retract, then pullthe seat belt
out part-way. The seat belt should retract and
extend normally.
Replace the seat belt with a new assembly if there
is any abnormality. Do not disassemble any part of
the seat belt for any reason.
7.
8.