Page 142 of 321

The display of your audio system
usually shows the time when the
ignition switch is in ACCESSORY (I)
or ON (II). It shows the operation
mode of the radio, CD player, or
optional CD changer/cassette player
when you operate them, and goes
back to the time display after five
seconds.
You can use the instrument panel
brightness control knob to adjust the
illumination of the audio system (see
page ). The audio system
illuminates when the parking lights
are on, even if the radio is turned of f .
If an error occurs while operating
the CD player or optional CD
changer, the display will show the
error code and will not switch to the
time display until the error is
corrected (see pages and ).
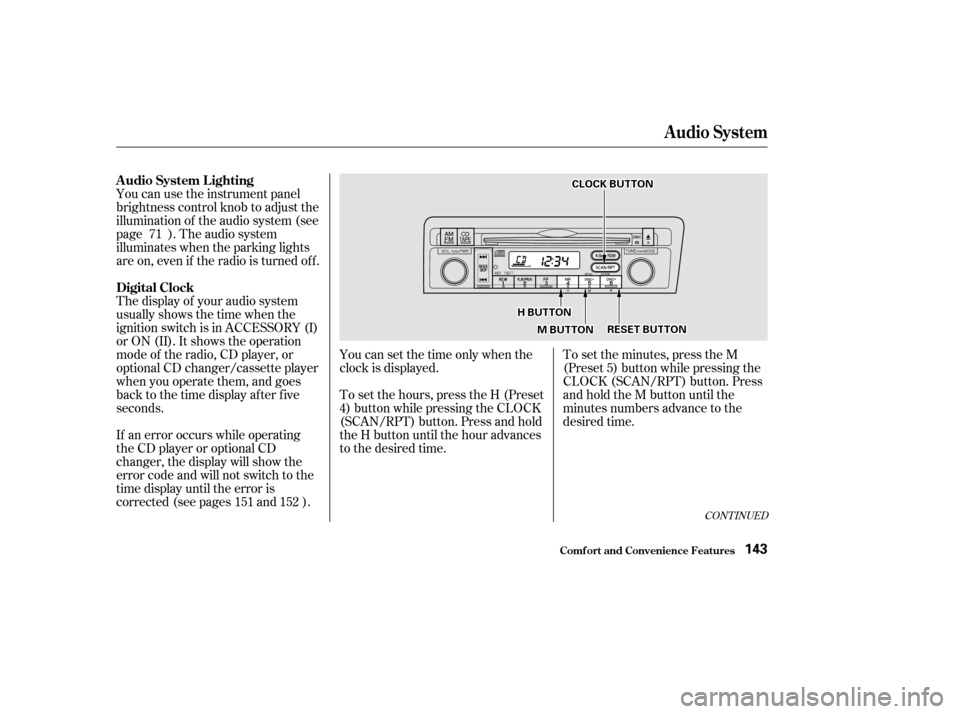
You can set the time only when the
clock is displayed.
To set the hours, press the H (Preset
4) button while pressing the CLOCK
(SCAN/RPT) button. Press and hold
the H button until the hour advances
to the desired time.
To set the minutes, press the M
(Preset 5) button while pressing the
CLOCK (SCAN/RPT) button. Press
andholdtheMbuttonuntilthe
minutes numbers advance to the
desired time.
152
151
71
CONT INUED
A udio System L ighting
Digital Clock
Audio System
Comf ort and Convenience Feat ures143
CCLLOOCCKKBBUUTTTTOONN
HHBBUUTTTTOONN
MMBBUUTTTTOONNRREESSEETTBBUUTTTTOONN
Page 143 of 321

Your Honda’s radio can receive the
complete AM and FM bands.
Those bands cover these f requen-
cies:
AM band:
530 to 1,710 kilohertz
FM band:
87.7 to 107.9 megahertz
Radio stations on the AM band are
assigned f requencies at least ten
kilohertz apart (530, 540, 550).
Stations on the FM band are
assigned f requencies at least 0.2
megahertz apart (87.9, 88.1, 88.3).Stations must use these exact
f requencies. It is f airly common f or
stations to round-of f the f requency in
their advertising, so your radio could
display a f requency of 100.9 even
though the announcer may identif y
the station as ‘‘FM101.’’
For example: 1:06 would RESET to 1:00.
1:52 would RESET to 2:00.
If your car’s battery is disconnected
or goes dead, the time setting will be
lost. To set the time again, f ollow the
setting procedure.
You can quickly set the time to the
nearest hour. If the displayed time is
bef ore the half hour, the clock is set
back to the previous hour by
pressing and holding the CLOCK
(SCAN/RPT) button, then pressing
the RESET (Preset 6) button. If the
displayed time is af ter the half hour,
the clock is set forward to the
beginning of the next hour.
Audio System
Comf ort and Convenience Feat ures
Radio Frequencies
144
Page 213 of 321
Remove the radiator cap by
pushing down and turning
counterclockwise.
Turn the radiator cap counter-
clockwise, without pressing down
on it, until it stops. This relieves
any pressure remaining in the
cooling system.
Pour coolant into the reserve tank.
Fill it to half way between the MAX
and MIN marks. Put the cap back
on the reserve tank.
Put the radiator cap back on.
Tighten it f ully.
The coolant level should be up to
the base of the f iller neck. Add
coolant if it is low. Do not add any rust inhibitors or
other additives to your car’s cooling
system. They may not be compatible
with the coolant or engine compo-
nents.
2. 3. 4. 5. 6.
Cooling Syst em
Maint enance214
RRAADDIIAATTOORRCCAAPPRREESSEERRVVEETTAANNKK
Page 216 of 321

CONT INUED
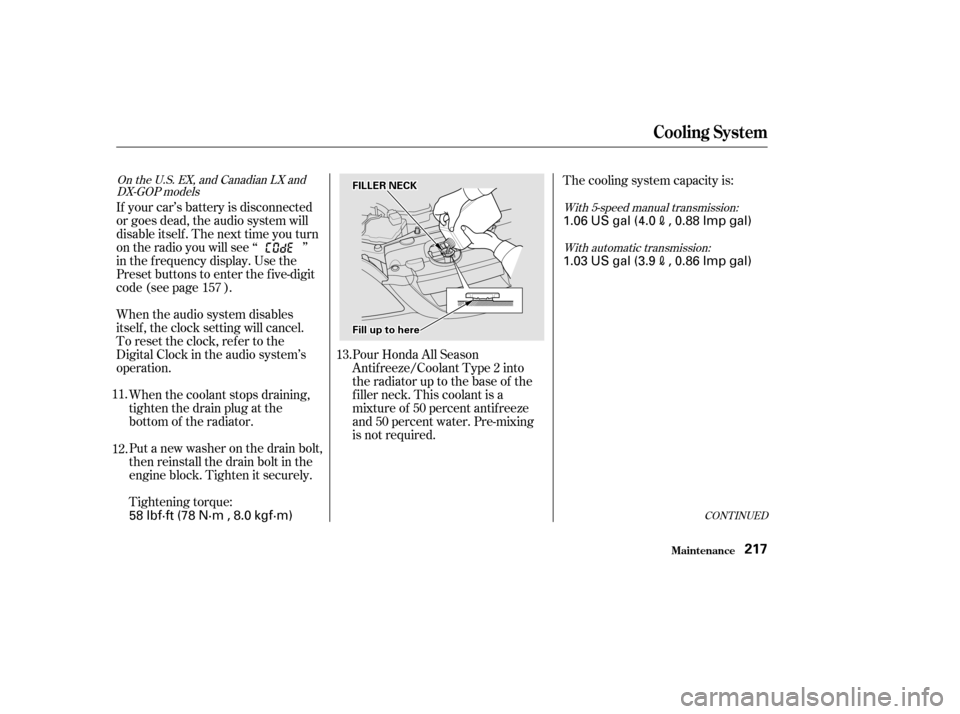
Pour Honda All Season
Antif reeze/Coolant Type 2 into
the radiator up to the base of the
f iller neck. This coolant is a
mixture of 50 percent antif reeze
and 50 percent water. Pre-mixing
is not required.The cooling system capacity is:
Tightening torque:
Put a new washer on the drain bolt,
then reinstall the drain bolt in the
engine block. Tighten it securely.
When the coolant stops draining,
tightenthedrainplugatthe
bottom of the radiator.
When the audio system disables
itself , the clock setting will cancel.
To reset the clock, ref er to the
Digital Clock in the audio system’s
operation.
If your car’s battery is disconnected
or goes dead, the audio system will
disableitself.Thenexttimeyouturn
on the radio you will see ‘‘ ’’
in the f requency display. Use the
Preset buttons to enter the five-digit
code (see page ).
12.
11.
13.
157
With 5-speed manual transmission:
With automatic transmission:
On the U.S. EX, and Canadian LX and
DX-GOP models
Cooling Syst em
Maint enance217
FFIILLLLEERRNNEECCKK
FFiilllluuppttoohheerree
1.06 US gal (4.0, 0.88 Imp gal)
1.03 US gal (3.9
, 0.86 Imp gal)
58 lbf·ft (78 N·m , 8.0 kgf·m)
Page 226 of 321
Disconnect the wire connector
f rom the ignition coil by pushing
on the lock tab and pulling on the
connector. Pull on the plastic
connector, not the wires.
Loosen the two holding clips by
turning the heads one-quarter turn
counterclockwise with a f lat-tipped
screwdriver. Remove the cover by
pulling it straight up.
The spark plugs in your car are a
special platinum-tipped design f or
longer lif e. The spark plugs should
be replaced according to the
distance recommendation in the
maintenance schedule.
Clean up any dirt and oil that have
collected around the ignition coils.
1.
2. 3.
CONT INUED
Maint enance
Spark Plugs
Replacement
227
CCOONNNNEECCTTOORRLLOOCCKKTTAABBHHOOLLDDIINNGGCCLLIIPPSS
IIGGNNIITTIIOONNCCOOIILL
Page 228 of 321
�´ �µSpark Plug Gap:
Push the wire connector onto the
ignition coil. Make sure it locks in
place.
Repeat this procedure f or the
other three spark plugs.
Install the ignition coil. Reinstall
the nut.
Reinstall the cover. Secure the
cover by turning the heads of the
two holding clips one-quarter turn
clockwise with a f lat-tipped
screwdriver. NGK:
DENSO:
8.
11.
10. 9.
Maint enance
Spark Plugs
Specif ications:
229
PZFR6F-11
PKJ20CR-M11
0.04 in (1.1 mm)
0
0.1 mm
Tighten the spark plugs caref ully. A
spark plug that is too loose can
overheat and damage the engine.
Overtightening can cause damage to
the threads in the cylinder head.
Page 230 of 321

�µ
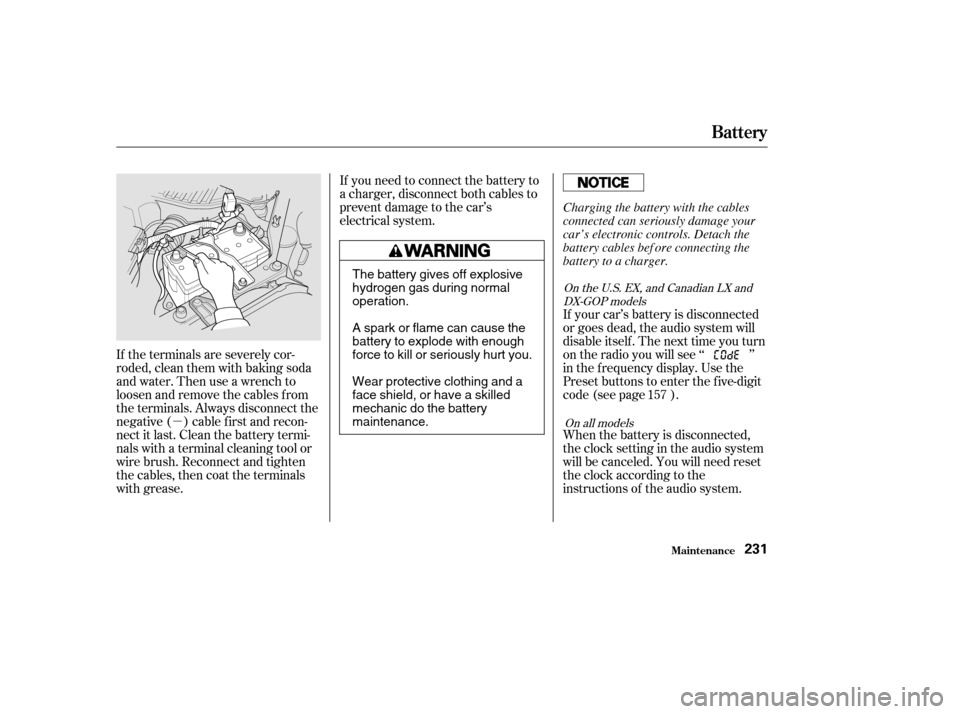
If the terminals are severely cor-
roded, clean them with baking soda
and water. Then use a wrench to
loosen and remove the cables f rom
the terminals. Always disconnect the
negative ( ) cable f irst and recon-
nect it last. Clean the battery termi-
nals with a terminal cleaning tool or
wire brush. Reconnect and tighten
the cables, then coat the terminals
with grease. If you need to connect the battery to
a charger, disconnect both cables to
prevent damage to the car’s
electrical system.
If your car’s battery is disconnected
or goes dead, the audio system will
disableitself.Thenexttimeyouturn
on the radio you will see ‘‘ ’’
in the f requency display. Use the
Preset buttons to enter the five-digit
code (see page ).
When the battery is disconnected,
the clock setting in the audio system
will be canceled. You will need reset
the clock according to the
instructions of the audio system.157On all models
On the U.S. EX, and Canadian LX and
DX-GOP models
Battery
Maint enance231
The battery gives off explosive
hydrogen gas during normaloperation.
A spark or flame can cause the
battery to explode with enough
force to kill or seriously hurt you.
Wear protective clothing and a
face shield, or have a skilled
mechanic do the batterymaintenance. Charging the battery with the cables
connected can seriously damage your
car’s electronic controls. Detach the
battery cables bef ore connecting the
battery to a charger.
Page 248 of 321
Use a f lat-tipped screwdriver to
remove the holding clip f rom the
inner f ender.
Pull the inner f ender cover back.Remove the socket from the
headlight assembly by turning it
one-quarter turn counterclockwise.
Pull the bulb straight out of its
socket.
Push the new bulb straight into
the socket until it bottoms.Insert the socket back into the
headlight assembly. Turn it
clockwise to lock it in place.
Testthelightstomakesurethe
new bulb is working.
Put the inner f ender cover in place.
Install the holding clip. Lock it in
place by pushing on the center.
3.
2.
4. 5.6.7. 8.
Lights
Maint enance249
HHOOLLDDIINNGGCCLLIIPP