Page 62 of 319

This light comes on with the high
beam headlights. See page for
inf ormation on the headlight
controls.
This lights when you set the cruise
control. See page f or inf ormation
on operating the cruise control.
On Canadian models, this indicator
comes on with reduced brightness
when the Daytime Running Lights
(DRL) are on (see page ).
See page .
The lef t or right turn signal light
blinks when you signal a lane change
or turn. If the light does not blink or
blinks rapidly, it usually means one
of the turn signal bulbs is burned out
(see page ). Replace the bulb as
soon as possible, since other drivers
cannot see that you are signalling. This light comes on if the trunk lid is
not closed tightly.
This light comes on as a reminder
that you must ref uel soon.
WhenyouturnontheHazard
Warning switch, both turn signal
lights blink. All turn signals on the
outside of the car should f lash. This light comes on when the
washer f luid level is low. Add washer
f luid when you see this light come on
(see page ).
70
71
280
248 219
76
Only on models equipped with Cruise
Control System Canadian models only
CONT INUED
High Beam Indicator
Cruise Control Indicator
Malf unction Indicator
Lamp
Turn Signal and
Hazard Warning
Indicators Low Fuel Indicator
Washer Level Indicator
Trunk-open Indicator
Indicator L ights
Inst rument s and Cont rols63
Page 77 of 319
�µAs required by the FCC:This device complies with Part 15 of theFCC rules. Operation is subject to thef ollowing two conditions: (1) This devicemay not cause harmf ul interf erence, and (2) this device must accept anyinterf erence received, including
interf erence that may cause undesiredoperation.
Changes or modif ications not expresslyapproved by the party responsible f or
compliance could void the user’sauthority to operate the equipment.
This device complies with IndustryCanada Standard RSS-210.Operation is subject to the f ollowing twoconditions: (1) this device may not cause
interf erence, and (2) this device mustaccept any interf erence that may causeundesired operation of the device.
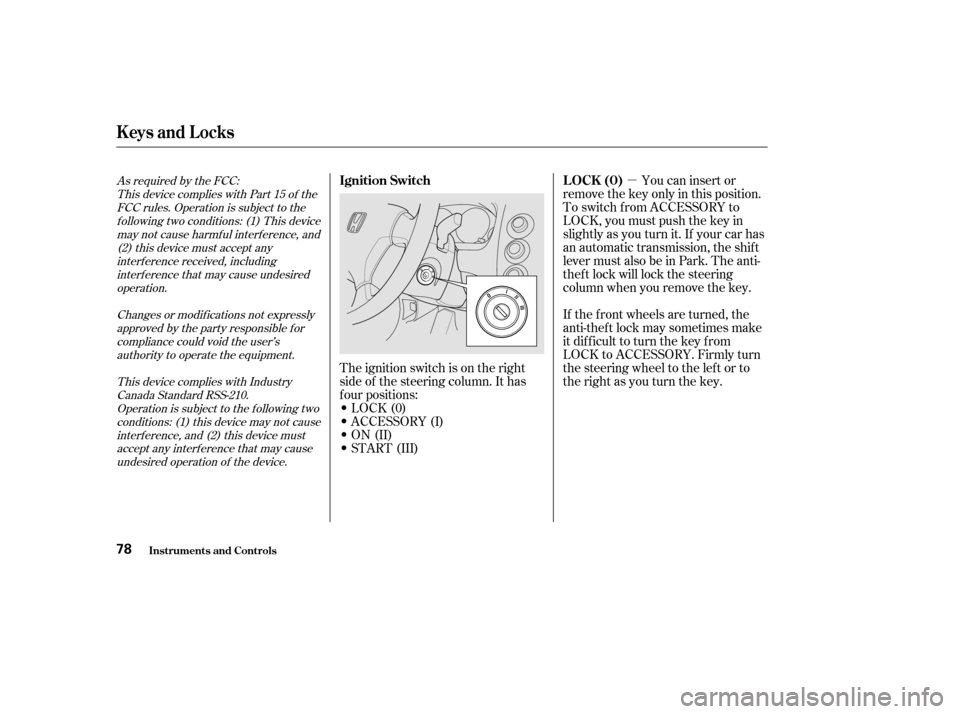
The ignition switch is on the right
side of the steering column. It has
f our positions:
LOCK(0)
ACCESSORY (I)
ON (II)
START (III) You can insert or
remove the key only in this position.
To switch f rom ACCESSORY to
LOCK, you must push the key in
slightly as you turn it. If your car has
an automatic transmission, the shif t
lever must also be in Park. The anti-
thef t lock will lock the steering
column when you remove the key.
If the f ront wheels are turned, the
anti-thef t lock may sometimes make
it difficult to turn the key from
LOCK to ACCESSORY. Firmly turn
the steering wheel to the lef t or to
the right as you turn the key.
Keys and Locks
Inst rument s and Cont rols
Ignition Switch L OCK (0)
78
Page 83 of 319
As required by the FCC:This device complies with Part 15 of theFCC rules. Operation is subject to thef ollowing two conditions: (1) This devicemay not cause harmf ul interf erence, and (2) this device must accept anyinterf erence received, including
interf erence that may cause undesiredoperation.
Changes or modif ications not expresslyapproved by the party responsible f or
compliance could void the user’sauthority to operate the equipment.
This device complies with IndustryCanada Standard RSS-210.Operation is subject to the f ollowing twoconditions: (1) this device may not cause
interf erence, and (2) this device mustaccept any interf erence that may causeundesired operation of the device.
To close the trunk, press down on
the trunk lid.
See page f or cargo loading and
weight limit inf ormation. Keep the
trunk lid closed at all times while
driving to avoid damaging the lid,
and to prevent exhaust gas from
getting into the interior. See on page .
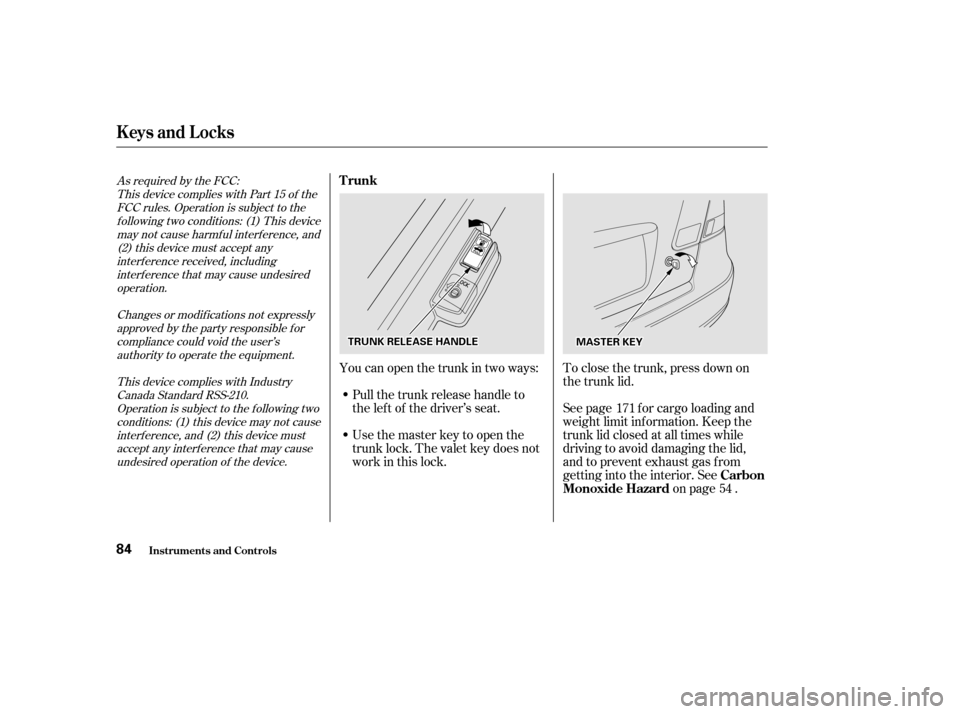
Youcanopenthetrunkintwoways:
Pull the trunk release handle to
the lef t of the driver’s seat.
Usethemasterkeytoopenthe
trunk lock. The valet key does not
work in this lock. 171
54
Keys and Locks
Inst rument s and Cont rols
Trunk
Carbon
Monoxide Hazard
84
MMAASSTTEERRKKEEYYTTRRUUNNKKRREELLEEAASSEEHHAANNDDLLEE
Page 115 of 319
�µ�µ
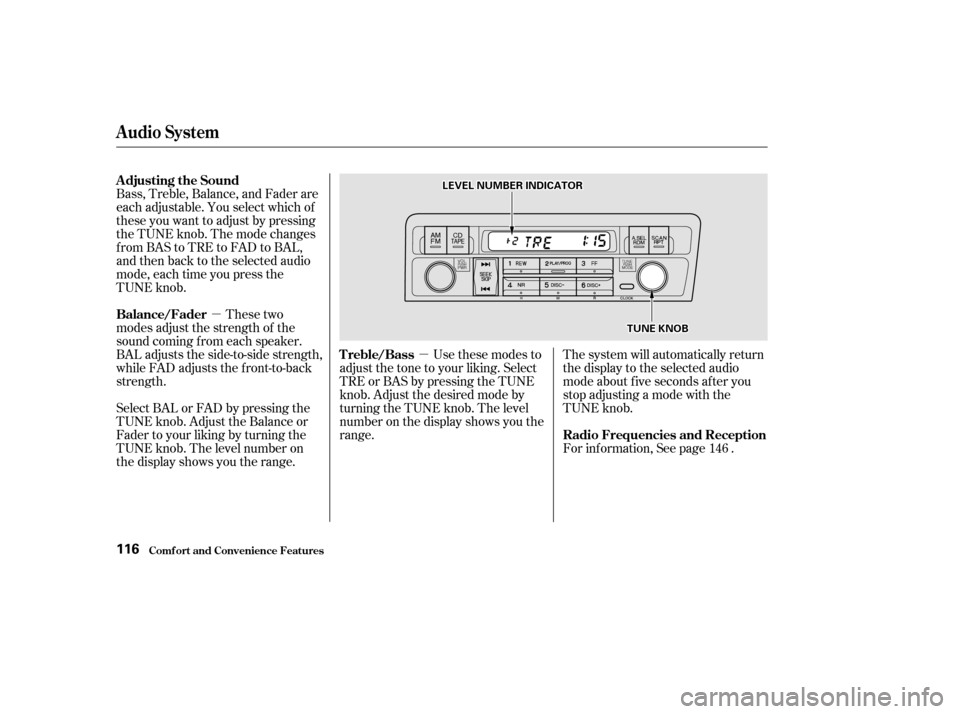
Bass, Treble, Balance, and Fader are
each adjustable. You select which of
these you want to adjust by pressing
the TUNE knob. The mode changes
fromBAStoTREtoFADtoBAL,
and then back to the selected audio
mode, each time you press the
TUNE knob.
These two
modes adjust the strength of the
sound coming f rom each speaker.
BAL adjusts the side-to-side strength,
while FAD adjusts the f ront-to-back
strength.
Select BAL or FAD by pressing the
TUNE knob. Adjust the Balance or
Fader to your liking by turning the
TUNE knob. The level number on
the display shows you the range. Use these modes to
adjust the tone to your liking. Select
TRE or BAS by pressing the TUNE
knob. Adjust the desired mode by
turning the TUNE knob. The level
number on the display shows you the
range. The system will automatically return
the display to the selected audio
mode about f ive seconds af ter you
stop adjusting a mode with the
TUNE knob.
For inf ormation, See page .
146
Comf ort and Convenience Feat ures
Audio System
Adjusting the Sound
Balance/Fader
Treble/Bass
Radio Frequencies and Reception
116
LLEEVVEELLNNUUMMBBEERRIINNDDIICCAATTOORR
TTUUNNEEKKNNOOBB
Page 127 of 319
�µ�µ
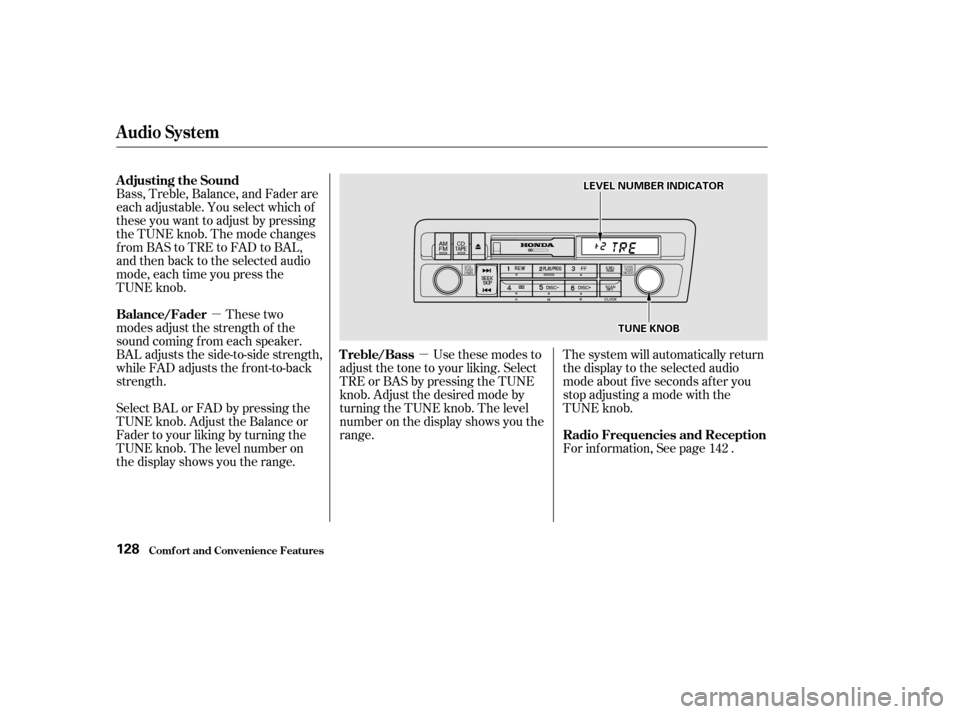
Bass, Treble, Balance, and Fader are
each adjustable. You select which of
these you want to adjust by pressing
the TUNE knob. The mode changes
fromBAStoTREtoFADtoBAL,
and then back to the selected audio
mode, each time you press the
TUNE knob.
These two
modes adjust the strength of the
sound coming f rom each speaker.
BAL adjusts the side-to-side strength,
while FAD adjusts the f ront-to-back
strength.
Select BAL or FAD by pressing the
TUNE knob. Adjust the Balance or
Fader to your liking by turning the
TUNE knob. The level number on
the display shows you the range. Use these modes to
adjust the tone to your liking. Select
TRE or BAS by pressing the TUNE
knob. Adjust the desired mode by
turning the TUNE knob. The level
number on the display shows you the
range. The system will automatically return
the display to the selected audio
mode about f ive seconds af ter you
stop adjusting a mode with the
TUNE knob.
For inf ormation, See page .
142
Comf ort and Convenience Feat ures
Audio System
Adjusting the Sound
Balance/Fader
Treble/Bass
Radio Frequencies and Reception
128
TTUUNNEEKKNNOOBB
LLEEVVEELLNNUUMMBBEERRIINNDDIICCAATTOORR
Page 128 of 319

You can use the instrument panel
brightness control dial to adjust the il-
lumination of the audio system (see
page ). The audio system
illuminates when the parking lights
are on, even if the radio is turned of f .
The audio system usually shows the
time when the ignition switch is in
ACCESSORY (I) or ON (II). It
shows the operation mode of the
radio, cassette player, or optional CD
changer when you operate them,
then goes back to the time display
af ter f ive seconds.Adjust the hours by pressing and
holding the CLOCK button, then
pressing the H (Preset 4) button.
Adjust the minutes by pressing and
holding the CLOCK button, then
pressing the M (Preset 5) button.
You can set the time only when the
clock is displayed.
If an error occurs while operating
the optional CD player or changer,
the display will keep showing the
error code and will not switch to the
time display until the error is
corrected (see pages and ).
71
149 150
CONT INUED
Audio System
Comf ort and Convenience Feat ures
A udio System L ighting
Digital Clock
129
CCLLOOCCKKBBUUTTTTOONN
RREESSEETTBBUUTTTTOONN
MMBBUUTTTTOONN
HHBBUUTTTTOONN
Page 139 of 319
�µ�µ
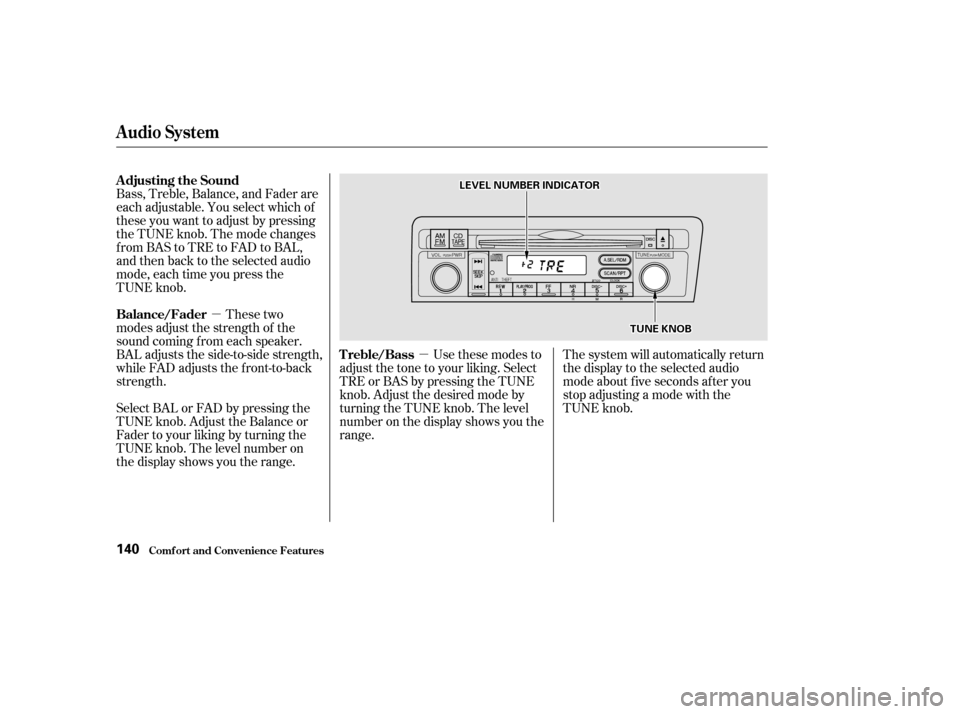
Bass, Treble, Balance, and Fader are
each adjustable. You select which of
these you want to adjust by pressing
the TUNE knob. The mode changes
fromBAStoTREtoFADtoBAL,
and then back to the selected audio
mode, each time you press the
TUNE knob.
These two
modes adjust the strength of the
sound coming f rom each speaker.
BAL adjusts the side-to-side strength,
while FAD adjusts the f ront-to-back
strength.
Select BAL or FAD by pressing the
TUNE knob. Adjust the Balance or
Fader to your liking by turning the
TUNE knob. The level number on
the display shows you the range. Use these modes to
adjust the tone to your liking. Select
TRE or BAS by pressing the TUNE
knob. Adjust the desired mode by
turning the TUNE knob. The level
number on the display shows you the
range. The system will automatically return
the display to the selected audio
mode about f ive seconds af ter you
stop adjusting a mode with the
TUNE knob.
Comf ort and Convenience Feat ures
Audio System
Adjusting the Sound
Balance/Fader
Treble/Bass
140
LLEEVVEELLNNUUMMBBEERRIINNDDIICCAATTOORR
TTUUNNEEKKNNOOBB
Page 140 of 319
You can use the instrument panel
brightness control dial to adjust the il-
lumination of the audio system (see
page ). The audio system
illuminates when the parking lights
are on, even if the radio is turned of f .
The display of your audio system
usually shows the time when the
ignition switch is in ACCESSORY (I)
or ON (II). It shows the operation
mode of the radio, CD player, or
optional CD changer/cassette player
when you operate them, and goes
back to the time display after five
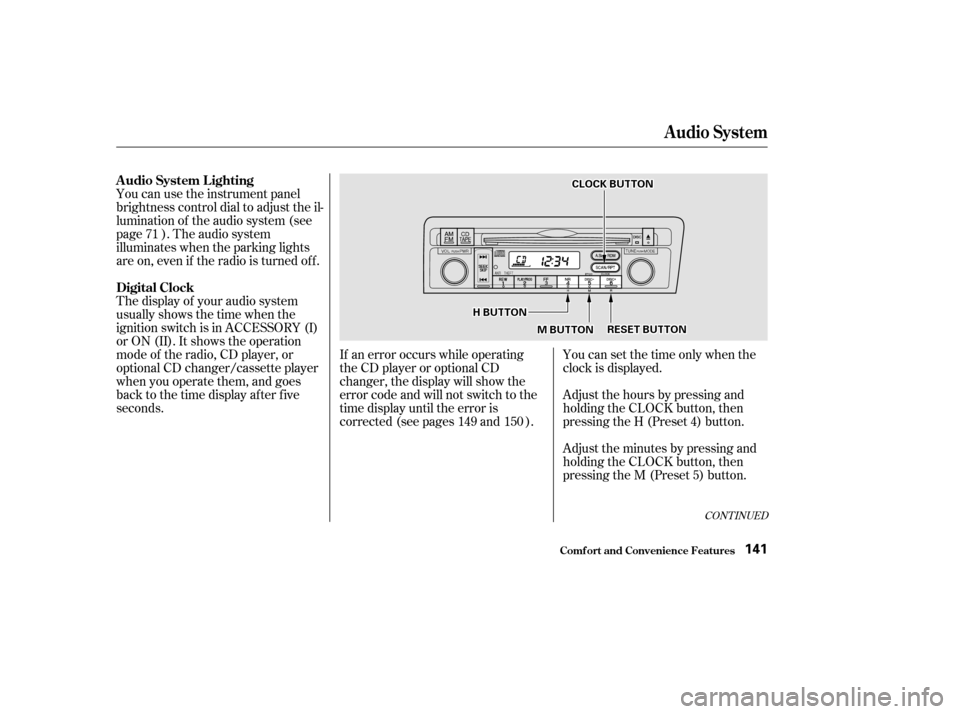
seconds.You can set the time only when the
clock is displayed.
Adjust the hours by pressing and
holding the CLOCK button, then
pressing the H (Preset 4) button.
Adjust the minutes by pressing and
holding the CLOCK button, then
pressing the M (Preset 5) button.
If an error occurs while operating
the CD player or optional CD
changer, the display will show the
error code and will not switch to the
time display until the error is
corrected (see pages and ).
71
149 150
CONT INUED
A udio System L ighting
Digital Clock
Audio System
Comf ort and Convenience Feat ures141
CCLLOOCCKKBBUUTTTTOONN
MMBBUUTTTTOONNRREESSEETTBBUUTTTTOONN
HHBBUUTTTTOONN