Page 73 of 319
Make sure the rear window is clear
and you have good visibility bef ore
starting to drive.
The def ogger and antenna wires on
the inside of the rear window can be
accidentally damaged. When
cleaning the glass, always wipe side
to side.
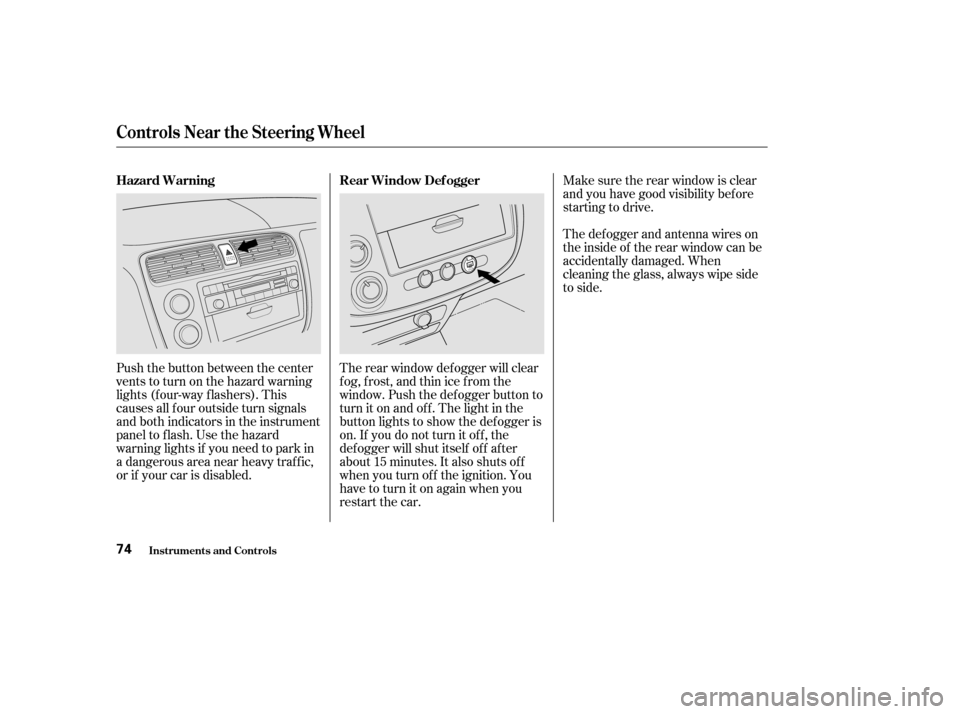
Push the button between the center
vents to turn on the hazard warning
lights (f our-way f lashers). This
causes all f our outside turn signals
and both indicators in the instrument
panel to f lash. Use the hazard
warning lights if you need to park in
a dangerous area near heavy traffic,
or if your car is disabled. The rear window def ogger will clear
fog, frost, and thin ice from the
window. Push the def ogger button to
turn it on and of f . The light in the
button lights to show the def ogger is
on. If you do not turn it of f , the
def ogger will shut itself of f af ter
about15minutes.Italsoshutsoff
when you turn of f the ignition. You
have to turn it on again when you
restart the car.
Controls Near the Steering Wheel
Inst rument s and Cont rols
Rear Window Def ogger
Hazard Warning
74
Page 74 of 319
Push the lever up to lock the
steering wheel in that position.
Make sure you have securely
locked the steering wheel in place
by trying to move it up and down.
Move the steering wheel to the
desired position, making sure the
wheel points toward your chest,
not toward your f ace. Make sure
you can see the instrument panel
gauges and the indicator lights.
Push the lever under the steering
column all the way down.
To adjust the steering wheel upward
or downward:
Make any steering wheel adjustment
bef ore you start driving.
1.4.
3.
2.
See page f or important saf ety inf ormation about how to properlyposition the steering wheel. 17
Inst rument s and Cont rols
Controls Near the Steering Wheel
Steering Wheel A djustment
75
Adjusting the steering wheel
position while driving may
cause you to lose control of the
car and be seriously injured in acrash.
Adjust the steering wheel only
when the car is stopped.
Page 77 of 319
�µAs required by the FCC:This device complies with Part 15 of theFCC rules. Operation is subject to thef ollowing two conditions: (1) This devicemay not cause harmf ul interf erence, and (2) this device must accept anyinterf erence received, including
interf erence that may cause undesiredoperation.
Changes or modif ications not expresslyapproved by the party responsible f or
compliance could void the user’sauthority to operate the equipment.
This device complies with IndustryCanada Standard RSS-210.Operation is subject to the f ollowing twoconditions: (1) this device may not cause
interf erence, and (2) this device mustaccept any interf erence that may causeundesired operation of the device.
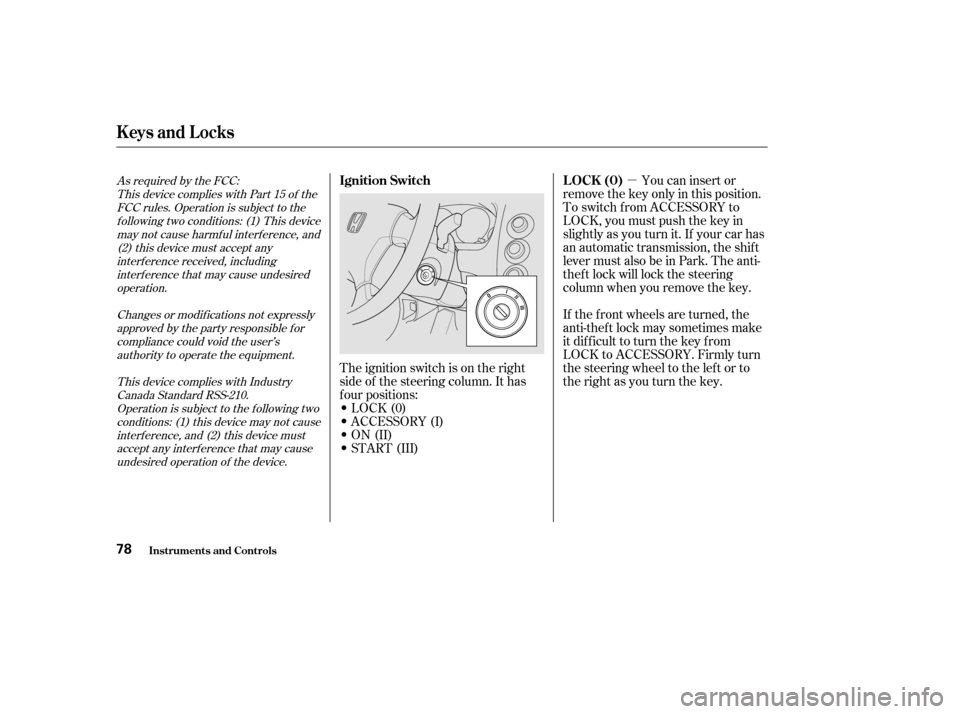
The ignition switch is on the right
side of the steering column. It has
f our positions:
LOCK(0)
ACCESSORY (I)
ON (II)
START (III) You can insert or
remove the key only in this position.
To switch f rom ACCESSORY to
LOCK, you must push the key in
slightly as you turn it. If your car has
an automatic transmission, the shif t
lever must also be in Park. The anti-
thef t lock will lock the steering
column when you remove the key.
If the f ront wheels are turned, the
anti-thef t lock may sometimes make
it difficult to turn the key from
LOCK to ACCESSORY. Firmly turn
the steering wheel to the lef t or to
the right as you turn the key.
Keys and Locks
Inst rument s and Cont rols
Ignition Switch L OCK (0)
78
Page 156 of 319
CONT INUED
You can increase the set cruising
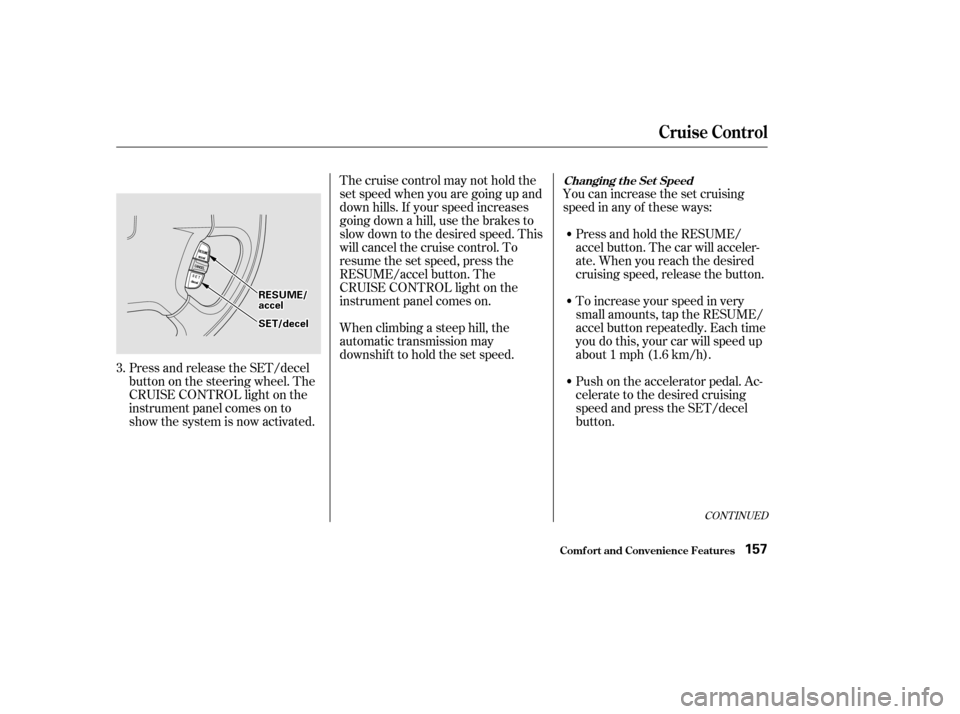
speed in any of these ways:Press and hold the RESUME/
accel button. The car will acceler-
ate. When you reach the desired
cruising speed, release the button.
Press and release the SET/decel
buttononthesteeringwheel.The
CRUISE CONTROL light on the
instrument panel comes on to
show the system is now activated. Thecruisecontrolmaynotholdthe
set speed when you are going up and
down hills. If your speed increases
going down a hill, use the brakes to
slow down to the desired speed. This
will cancel the cruise control. To
resume the set speed, press the
RESUME/accel button. The
CRUISE CONTROL light on the
instrument panel comes on.
When climbing a steep hill, the
automatic transmission may
downshif t to hold the set speed.
To increase your speed in very
small amounts, tap the RESUME/
accel button repeatedly. Each time
you do this, your car will speed up
about 1 mph (1.6 km/h).
Push on the accelerator pedal. Ac-
celerate to the desired cruising
speed and press the SET/decel
button.
3.
Changing t he Set Speed
Cruise Control
Comf ort and Convenience Feat ures157
RREESSUUMMEE//aacccceell
SSEETT//ddeecceell
Page 157 of 319
Even with the cruise control turned
on, you can still use the accelerator
pedal to speed up f or passing. Af ter
completing the pass, take your foot
of f the accelerator pedal. The car
will return to the set cruising speed.
Resting your f oot on the brake or
clutch pedal will cause the cruise
control to cancel.
You can decrease the set cruising
speed in any of these ways:
Press and hold the SET/decel
button. The car will decelerate.
Release the button when you
reach the desired speed.
To slow down in very small
amounts, tap the SET/decel
button repeatedly. Each time you
do this, your car will slow down
about 1 mph (1.6 km/h).
Tap the brake or clutch pedal
lightly with your f oot. The
CRUISE CONTROL light on the
instrument panel will go out.
When the car slows to the desired
speed, press the SET/decel button.
The car will then maintain the
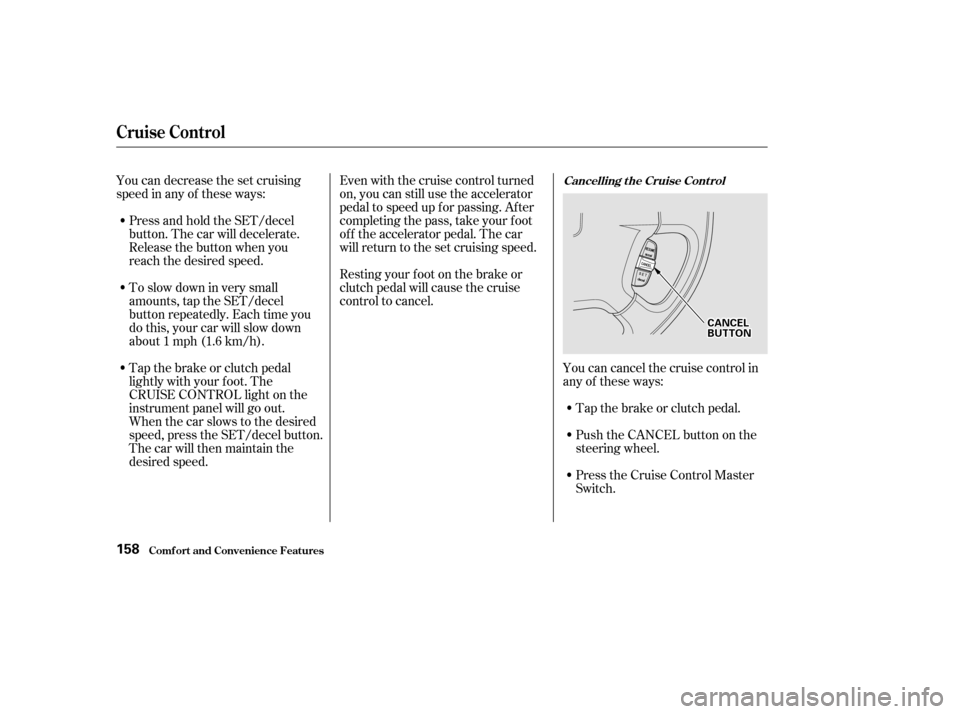
desired speed. Tap the brake or clutch pedal.
Youcancancelthecruisecontrolin
any of these ways:
Push the CANCEL button on the
steering wheel.
Press the Cruise Control Master
Switch.Cancelling t he Cruise Cont rol
Cruise Control
Comf ort and Convenience Feat ures158
CCAANNCCEELLBBUUTTTTOONN
Page 169 of 319

In addition, any modif ications that
decrease ground clearance increase
the chance of undercarriage parts
striking a curb, speed bump, or other
raised object, which could cause
your airbags to deploy.
Do not modif y your steering wheel
or any other part of your
Supplemental Restraint System.
Modif ications could make the
system inef f ective.
Do not remove any original
equipment or modif y your car in any
way that would alter its design or
operation. This could make your car
unsaf e and illegal to drive.
For example, do not make any
modif ications that would change the
ride height of your car, or install
wheels and tires with a dif f erent
overall diameter.
Such modif ications can adversely
af f ect handling, and interf ere with
the operation of the car’s anti-lock
brakes and other systems.
Do not attach or place objects on
the airbag covers. Any object
attached to or placed on the covers
marked ‘‘SRS AIRBAG,’’ in the
center of the steering wheel and
on top of the dashboard, could
interf ere with the proper operation
of the airbags. Or, if the airbags
inf late, the objects could be
propelled inside the car and hurt
someone. If a side airbag
inflates,acupholderorotherhard
object attached on or near the
door could be propelled inside the
car and hurt someone.
Covering the outside edge of a
f ront seat-back, with a non-Honda
seat cover for example, could
prevent the airbag from inflating
properly.Only on models equipped with side
airbagsModif ications
Additional Saf ety Precautions
A ccessories and Modif ications
Bef ore Driving
Do not at t ach hard object s on ornear a f ront door.
Do not place any object s over t heoutsideedgeof afront seat-back.
170
Page 175 of 319

Make sure all windows, mirrors,
and outside lights are clean and
unobstructed. Remove f rost, snow,
or ice.
Check that the hood and trunk are
f ully closed.Make sure the doors are securely
closed and locked.
Check that any items you may be
carrying with you inside are stored
properly or f astened down
securely.
Visually check the tires. If a tire
looks low, use a gauge to check its
pressure. Check the adjustment of the seat
(see page ).
Check the adjustment of the
inside and outside mirrors (see
page ).
Check the adjustment of the
steering wheel (see page ).Turn the ignition switch ON (II).
Check the indicator lights in the
instrument panel.
Start the engine (see page ).
Check the gauges and indicator
lights in the instrument panel (see
page ).
Fasten your seat belt. Check that
your passengers have f astened
their seat belts (see page ).
Youshoulddothefollowingchecks
and adjustments every day bef ore
you drive your car. 1. 2. 3. 4.
9.
10.
8.
7.
6.
5.
11.
12.
75 16
59 177
86
95
Preparing to Drive
Driving176
Page 189 of 319
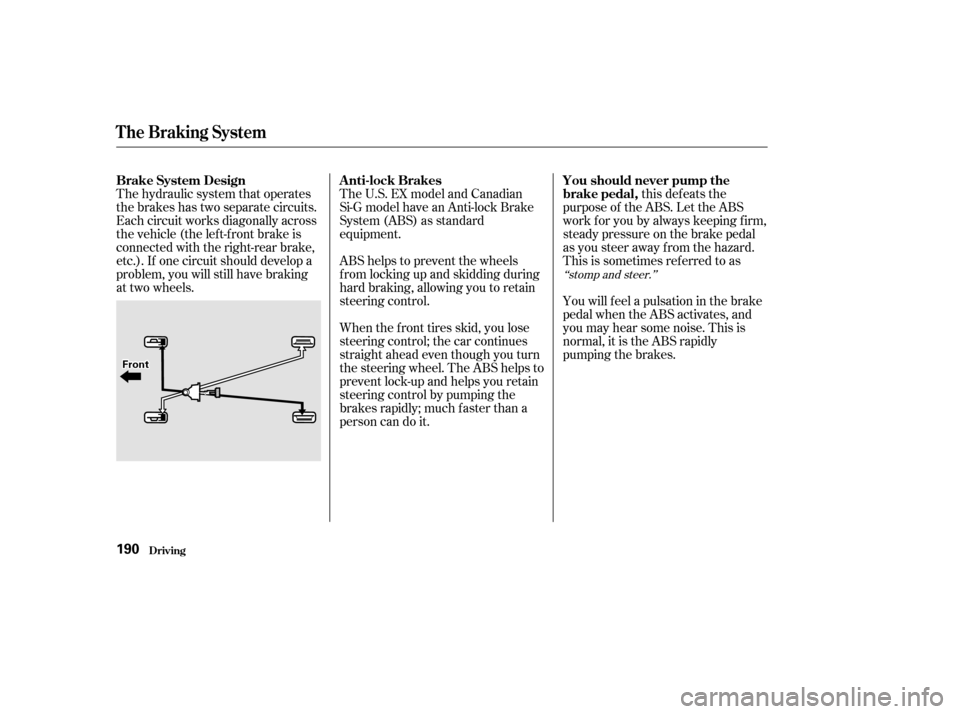
The hydraulic system that operates
the brakes has two separate circuits.
Each circuit works diagonally across
the vehicle (the lef t-f ront brake is
connected with the right-rear brake,
etc.). If one circuit should develop a
problem, you will still have braking
at two wheels.this defeats the
purpose of the ABS. Let the ABS
work f or you by always keeping f irm,
steady pressure on the brake pedal
as you steer away from the hazard.
This is sometimes ref erred to as
You will f eel a pulsation in the brake
pedal when the ABS activates, and
you may hear some noise. This is
normal, it is the ABS rapidly
pumping the brakes.
The U.S. EX model and Canadian
Si-G model have an Anti-lock Brake
System (ABS) as standard
equipment.
When the f ront tires skid, you lose
steering control; the car continues
straightaheadeventhoughyouturn
the steering wheel. The ABS helps to
prevent lock-up and helps you retain
steering control by pumping the
brakes rapidly; much f aster than a
person can do it.
ABS helps to prevent the wheels
f rom locking up and skidding during
hard braking, allowing you to retain
steering control.
‘‘stomp and steer.’’
Brake System Design A nti-lock Brakes You should never pump the
brake pedal,
The Braking System
Driving190
FFrroonntt