Page 2 of 264
Driving 101
Starting 101
Brakes 105
Transmission operation 109
Trailer towing 130
Roadside Emergencies 158
Getting roadside assistance 158
Fuses and relays 160
Changing tires 165
Jump starting 174
Wrecker towing 179
Customer Assistance 181
Reporting safety defects (U.S. only) 189
Cleaning 190
Maintenance and Specifications 196
Engine compartment 198
Engine oil 199
Battery 202
Fuel information 210
Air filter(s) 227
Part numbers 234
Refill capacities 234
Lubricant specifications 237
Accessories 251
Index 255
All rights reserved. Reproduction by any means, electronic or mechanical
including photocopying, recording or by any information storage and retrieval
system or translation in whole or part is not permitted without written
authorization from Ford Motor Company. Ford may change the contents without
notice and without incurring obligation.
Copyright © 2002 Ford Motor Company
Table of Contents
2
ProCarManuals.com
Page 4 of 264

SAFETY AND ENVIRONMENT PROTECTION
Warning symbols in this guide
How can you reduce the risk of personal injury and prevent possible
damage to others, your vehicle and its equipment? In this guide, answers
to such questions are contained in comments highlighted by the warning
triangle symbol. These comments should be read and observed.
Warning symbols on your vehicle
When you see this symbol, it is
imperative that you consult the
relevant section of this guide before
touching or attempting adjustment
of any kind.
Protecting the environment
We must all play our part in
protecting the environment. Correct
vehicle usage and the authorized
disposal of waste cleaning and
lubrication materials are significant
steps towards this aim. Information in this respect is highlighted in this
guide with the tree symbol.
BREAKING-IN YOUR VEHICLE
There are no particular guidelines for breaking-in your vehicle. During
the first 1,600 km (1,000 miles) of driving, vary speeds frequently. This is
recommended to give the moving parts a chance to break in.
Introduction
4
ProCarManuals.com
Page 15 of 264
Fuel gauge:Indicates
approximately how much fuel is left
in the fuel tank (when the ignition
is in the ON position).
Transmission fluid temperature gauge
(automatic transmission only):
If the gauge is in the:
White area(normal) - the
transmission fluid is within the
normal operating temperature
(between “H” and “C”).
Yellow area(warning) — the
transmission fluid is higher than
normal operating temperature. This
can be caused by special operation
conditions (i.e. snowplowing, towing
or off road use). Refer toSpecial
Operating Conditionsin the
scheduled maintenance guide for
instructions. Operating the
transmission for extended periods of
time with the gauge in the yellow
area may cause internal transmission damage.
Altering the severity of the driving conditions is recommended to lower
the transmission temperature into the normal range.
Instrument Cluster
15
ProCarManuals.com
Page 28 of 264

are filled, the station stored in preset 1 will begin playing. If there are
less than six strong stations, the system will store the last one in the
remaining presets. Press again to disengage.
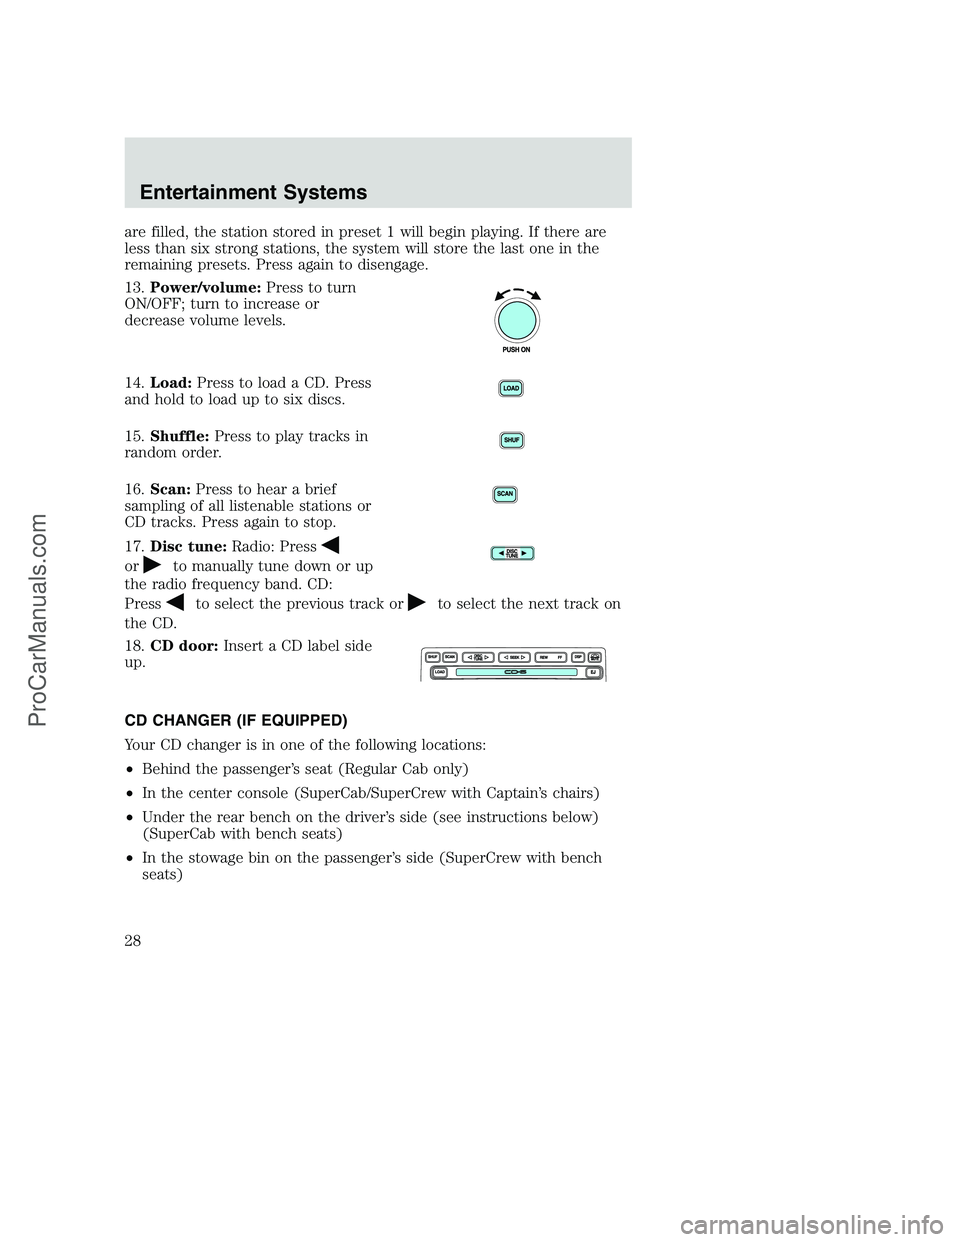
13.Power/volume:Press to turn
ON/OFF; turn to increase or
decrease volume levels.
14.Load:Press to load a CD. Press
and hold to load up to six discs.
15.Shuffle:Press to play tracks in
random order.
16.Scan:Press to hear a brief
sampling of all listenable stations or
CD tracks. Press again to stop.
17.Disc tune:Radio: Press
orto manually tune down or up
the radio frequency band. CD:
Press
to select the previous track orto select the next track on
the CD.
18.CD door:Insert a CD label side
up.
CD CHANGER (IF EQUIPPED)
Your CD changer is in one of the following locations:
•Behind the passenger’s seat (Regular Cab only)
•In the center console (SuperCab/SuperCrew with Captain’s chairs)
•Under the rear bench on the driver’s side (see instructions below)
(SuperCab with bench seats)
•In the stowage bin on the passenger’s side (SuperCrew with bench
seats)
Entertainment Systems
28
ProCarManuals.com
Page 30 of 264

Ensure that the disc holder is
evenly inserted and at the same
level as the magazine (A). The unit
will not operate if the disc holder is
not inserted at the same level (B).
If your CD changer is located under the rear bench, the following
instructions apply to load discs:
1. Load the discs into the magazine
slots (numbered 1 through 6 on the
window) one at a time with labeled
surfaces upward. (The holders DO
NOT pull out. )
2. Begin with the bottom slot number 1.
3. Insert the loaded magazine into the CD changer with the arrow
pointing toward the changer.
To remove discs:
1. Slide the corresponding lever on the opposite side of the magazine
window. The disc will partially eject.
2. Remove the disc.
Radio power must be turned on to play the CDs in the changer. The
magazine may be stored in the glove box when not being used.
The CD magazine may be inserted or ejected with the radio power off.
ONLY use the magazine supplied with the CD changer, other types will
damage the unit.
Keep the CD changer door closed. Coins and foreign objects will damage
the CD player and void your audio system warranty.
RADIO FREQUENCIES
AM and FM frequencies are established by the Federal Communications
Commission (FCC) and the Canadian Radio and Telecommunications
Commission (CRTC). Those frequencies are:
AM - 530, 540–1600, 1610 kHz
FM- 87.7, 87.9–107.7, 107.9 MHz
A
B
6 COMPACT DISC MAGAZINE1 2 3 4 5
6
Entertainment Systems
30
ProCarManuals.com
Page 31 of 264

RADIO RECEPTION FACTORS
There are three factors that can effect radio reception:
•Distance/strength: The further you travel from an FM station, the
weaker the signal and the weaker the reception.
•Terrain: Hills, mountains, tall buildings, power lines, electric fences,
traffic lights and thunderstorms can interfere with your reception.
•Station overload: When you pass a broadcast tower, a stronger signal
may overtake a weaker one and play while the weak station frequency
is displayed.
CASSETTE/PLAYER CARE
Do:
•Use only cassettes that are 90 minutes long or less.
•Tighten very loose tapes by inserting a finger or pencil into the hole
and turning the hub.
•Remove loose labels before inserting tapes.
•Allow tapes which have been subjected to extreme heat, humidity or
cold to reach a moderate temperature before playing.
•Clean the cassette player head with a cassette cleaning cartridge after
10–12 hours of play to maintain good sound/operation.
Don’t:
•Expose tapes to direct sunlight, extreme humidity, heat or cold.
•Leave tapes in the cassette player for a long time when not being
played.
CD/CD PLAYER CARE
Do:
•Handle discs by their edges only. Never touch the playing surface.
•Inspect discs before playing. Clean only with an approved CD cleaner
and wipe from the center out.
Don’t:
•Expose discs to direct sunlight or heat sources for extended periods
of time.
•Insert more than one disc into each slot of the CD changer magazine.
•Clean using a circular motion.
Entertainment Systems
31
ProCarManuals.com
Page 34 of 264

4. Direct the outer instrument panel vents towards the side windows
To increase airflow to the outer instrument panel vents, close the vents
located in the middle of the instrument panel.
Do not place objects on top of the instrument panel as these
objects may become projectiles in a collision or sudden stop.
MANUAL HEATING AND AIR
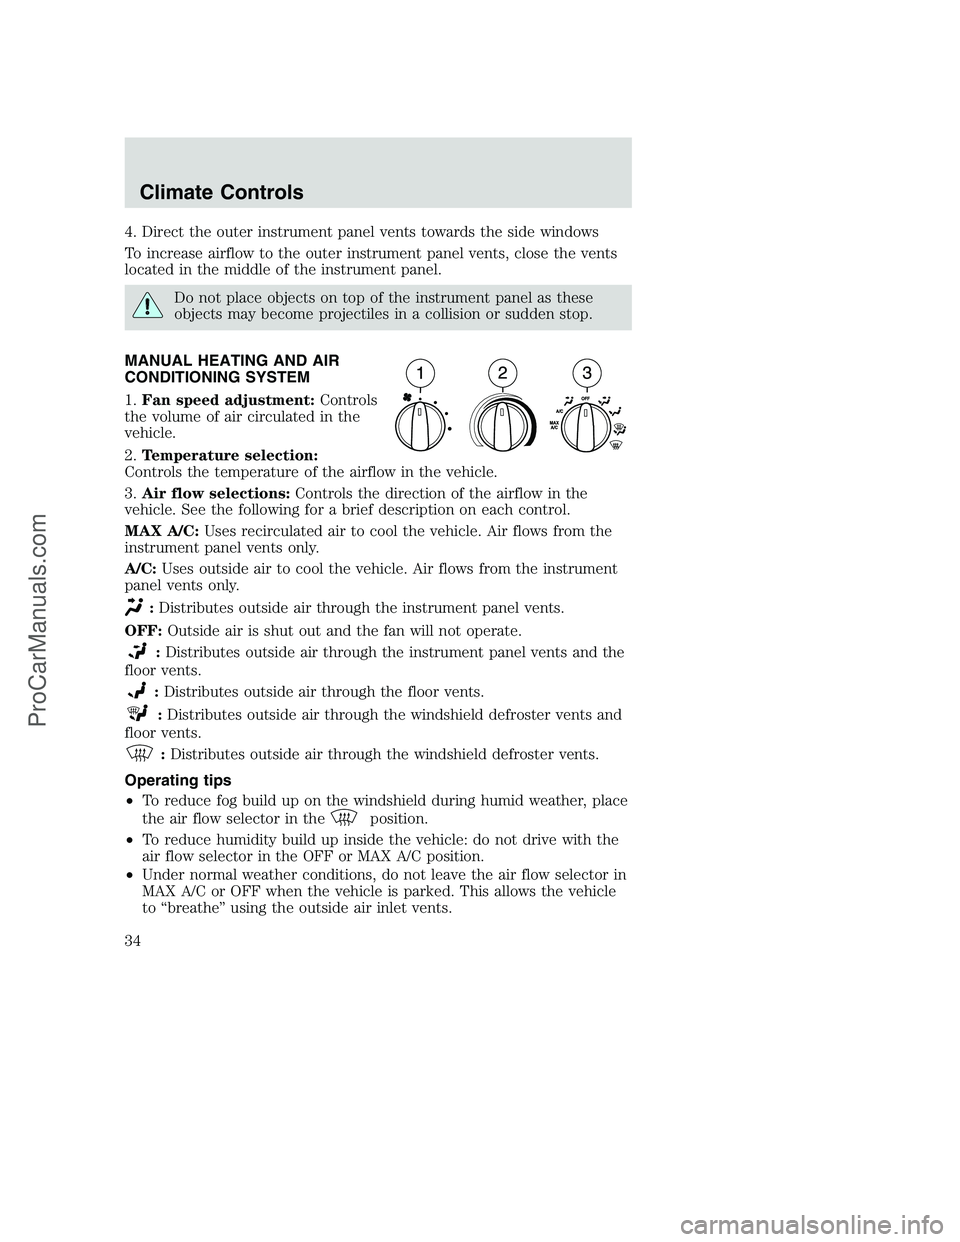
CONDITIONING SYSTEM
1.Fan speed adjustment:Controls
the volume of air circulated in the
vehicle.
2.Temperature selection:
Controls the temperature of the airflow in the vehicle.
3.Air flow selections:Controls the direction of the airflow in the
vehicle. See the following for a brief description on each control.
MAX A/C:Uses recirculated air to cool the vehicle. Air flows from the
instrument panel vents only.
A/C:Uses outside air to cool the vehicle. Air flows from the instrument
panel vents only.
:Distributes outside air through the instrument panel vents.
OFF:Outside air is shut out and the fan will not operate.
:Distributes outside air through the instrument panel vents and the
floor vents.
:Distributes outside air through the floor vents.
:Distributes outside air through the windshield defroster vents and
floor vents.
:Distributes outside air through the windshield defroster vents.
Operating tips
•To reduce fog build up on the windshield during humid weather, place
the air flow selector in the
position.
•To reduce humidity build up inside the vehicle: do not drive with the
air flow selector in the OFF or MAX A/C position.
•Under normal weather conditions, do not leave the air flow selector in
MAX A/C or OFF when the vehicle is parked. This allows the vehicle
to “breathe” using the outside air inlet vents.
Climate Controls
34
ProCarManuals.com
Page 35 of 264
•Do not put objects under the front seats that will interfere with the
airflow to the back seats.
•Remove any snow, ice or leaves from the air intake area at the base of
the windshield.
To aid in side window defogging/demisting in cold weather:
1. Select
2. Select A/C
3. Modulate the temperature control to maintain comfort.
4. Set the fan speed to HI
5. Direct the outer instrument panel vents towards the side windows
To increase airflow to the outer instrument panel vents, close the vents
located in the middle of the instrument panel.
Do not place objects on top of the instrument panel as these
objects may become projectiles in a collision or sudden stop.
Climate Controls
35
ProCarManuals.com