Page 73 of 320

6. Align top and bottom ribs of
parking lamp assembly with
corresponding slots on front of
vehicle.
7. Push gently until parking lamp
assembly seats (you will hear a
snap).
8. Install screw on lamp assembly.
Replacing tail/brake/turn signal/backup lamp bulbs
The tail/brake/turn signal and
backup lamp bulbs are located in
the tail lamp assembly, one just
below the other. Follow the same
steps to replace either bulb:
1. If equipped, remove tail lamp
covers.
2. Open the liftgate to expose the
lamp assembly screws.
3. Remove the two bolts from the
tail lamp assembly.
4. Carefully pull the lamp assembly
from the tailgate pillar to disengage two hidden snap-in retainers. (Flare
side and Super Crewtail lamps are not equipped with snap-in retainers.)
5. Remove bulb socket from the lamp assembly by turning it
counterclockwise.
6. Pull bulb straight out of socket and press in the new bulb.
7. Install the bulb socket into the lamp assembly by turning clockwise.
8. Carefully install the tail lamp assembly on tailgate pillar snapping the
two snap-in retainers into place. (Flare side and Super Crewtail lamps do
not snap into place but have two tabs which fit into slots.)
9. Secure the tail lamp on the vehicle with two bolts.
Lights
73
Page 98 of 320
TAILGATE LOCK (IF EQUIPPED)
Your vehicle may be equipped with a
tailgate lock designed to prevent
theft of the tailgate.
²Insert ignition key and turn to the
right to engage lock.
²Turn ignition key to the left to
unlock.
TAILGATE REMOVAL
Your tailgate is removable to allow
more room for loading.
1. Lower the tailgate.
2. Use a screwdriver to pry the
spring clip (on each connector) past
the head of the support screw.
Disconnect cable.
3. Disconnect the other cable.
4. Lift tailgate to a 45 degree angle.
5. Lift right side off of its hinge.
6. Lift left side off of its hinge.
To install, follow the removal
procedures in reverse order.
Driver Controls
98
Page 99 of 320
BED EXTENDER (IF EQUIPPED)
Your vehicle may be equipped with a bed extender designed to extend
the pickup box for longer loads.
To extend the bed extender:
1. Lower tailgate.
2. Pull the round knobs on each side
of the extender to release it from
the pickup box.
3. Pivot extender on to the tailgate.
Driver Controls
99
Page 100 of 320
4. Evenly push down on the
extender and push the round knobs
in on each side locking it in place.
Green markings on the shaft
indicate the locked position. The
locking clip screws below the middle
bar can be tightened
counterclockwise for extra security.
To stow the bed extender, follow
steps one through four in reverse
order.
The bed extender may be used to
secure a load of up to 46 kg (100 lbs.)
on the tailgate.
The bed extender should always
be kept in the stowed position
with the tailgate closed when
not in use.
Driver Controls
100
Page 101 of 320

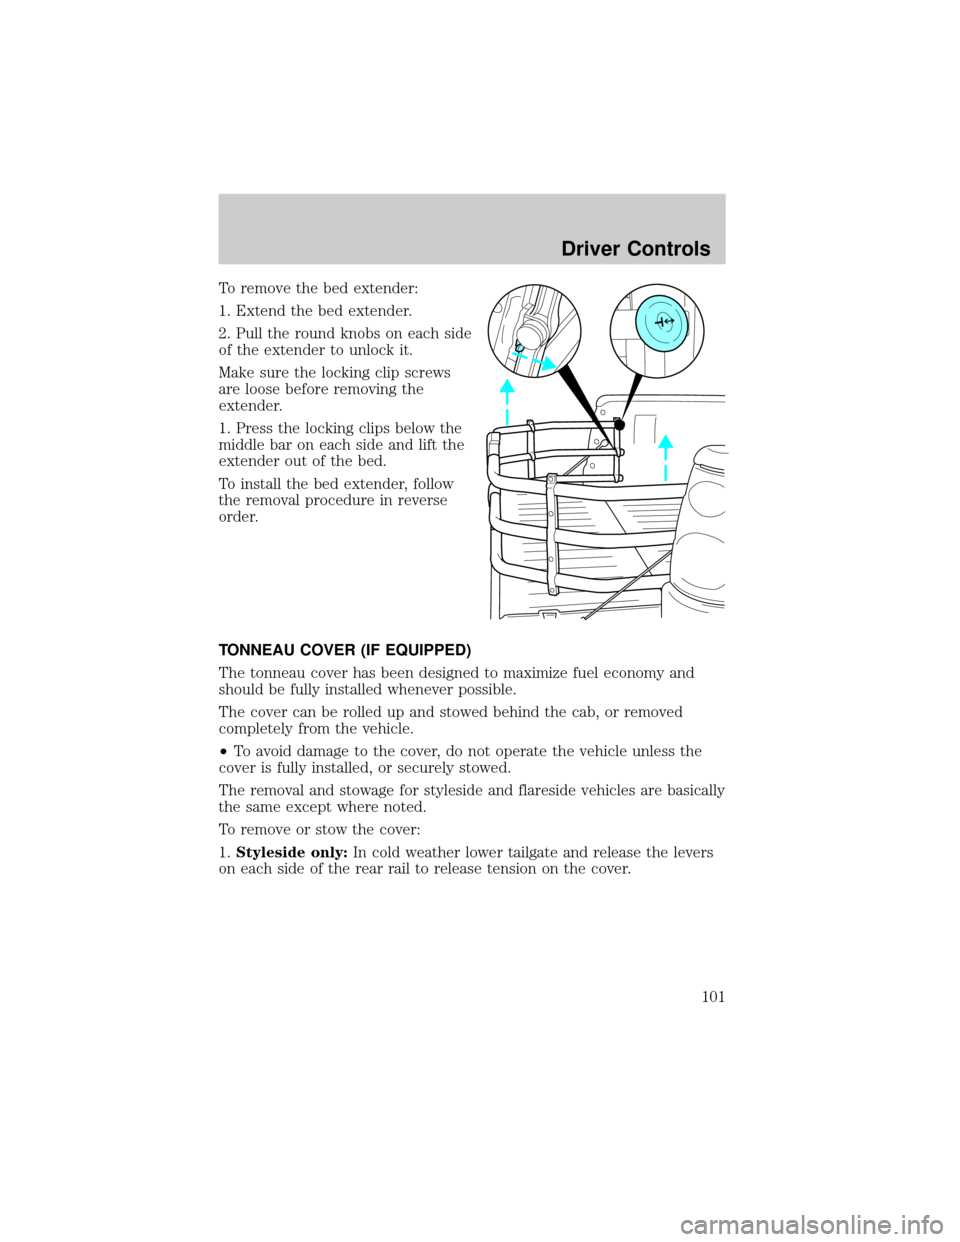
To remove the bed extender:
1. Extend the bed extender.
2. Pull the round knobs on each side
of the extender to unlock it.
Make sure the locking clip screws
are loose before removing the
extender.
1. Press the locking clips below the
middle bar on each side and lift the
extender out of the bed.
To install the bed extender, follow
the removal procedure in reverse
order.
TONNEAU COVER (IF EQUIPPED)
The tonneau cover has been designed to maximize fuel economy and
should be fully installed whenever possible.
The cover can be rolled up and stowed behind the cab, or removed
completely from the vehicle.
²To avoid damage to the cover, do not operate the vehicle unless the
cover is fully installed, or securely stowed.
The removal and stowage for styleside and flareside vehicles are basically
the same except where noted.
To remove or stow the cover:
1.Styleside only:In cold weather lower tailgate and release the levers
on each side of the rear rail to release tension on the cover.
Driver Controls
101
Page 103 of 320
Flareside only:
²Remove two cross bars from pickup box by pushing towards either
side to release tension.
²Lower tailgate, depress the levers on each side of the rear rail and
remove rear rail from pickup box.
Driver Controls
103
Page 104 of 320
Styleside only:
²Remove three cross bars from pickup box by pushing towards either
side to release tension. Stow the cross bars in the notches behind the
rolled cover in the pickup box.
²Lower tailgate, depress the levers on each side of the rear rail and
push rear rail towards the front of the pickup box securing it behind
the cross bars and cover.
For installation of the cover, follow the removal procedure in reverse
order.
Make sure the crossbows are locked in the notches in the side rails and
the rear rails are locked in position prior to cover installation.
Driver Controls
104
Page 310 of 320
Power sliding rear window
Remote start system
Tire step
Travel equipment
Cargo cage (SuperCrew only)
Bed mount bike carrier
Bed tent
Daytime running lights (DRL)
Fog lights
Hitch mount bike carrier
Inside mirror with compass display
Inside mirror with compass and temperature display
Off road lights
Outside signal mirror (available only with power mirrors)
Pickup box rails
Retractable bed hooks
Running boards (molded, diamond plate, tubular and stirrup step)
Seatback organizer
Speed control
Towing mirrors
Trailer hitch (Class III)
Trailer hitch bars and balls
Trailer hitch wiring adaptor
Trailer swivel hitch
Protection and appearance equipment
Air bag anti-theft locks
Battery warmer/blanket
Bed mat/bedliner tailgate covers
Bed mats
Bedliners
Accessories
310