Page 68 of 320
INTERIOR LAMPS
Map lamps
To turn on the map lamps, press the
control next to each lamp.
If equipped with a moon roof, the
map lamps are located on the moon
roof control panel. Press the control
next to the map lamp to illuminate
the lamp.
Rear dome lamp (if equipped)
The dome lamp lights when the
control is in the DOOR (left)
position and:
²any door is opened.
²the instrument panel dimmer
switch is held up until the
courtesy lamps come on.
²any of the remote entry controls are pressed and the ignition is OFF.
The rear dome lamp can be turned ON (center) or OFF (right) by
sliding the control.
AUTO
ROOF
Lights
68
Page 69 of 320
Courtesy/reading lamps
The courtesy lamp lights when:
²any door is opened.
²the instrument panel dimmer
switch is held up until the
courtesy lamps come on.
²the remote entry controls are
pressed and the ignition is OFF.
The reading lamps can be turned on
by pressing the rocker controls next to each lamp.
Rear door lamps (if equipped)
The rear door lamps lights when:
²any door is opened.
²the instrument panel dimmer
switch is held up until the
courtesy lamps come on.
²the remote entry controls are
pressed and the ignition is OFF.
The rear door lamps can be turned
on by pressing the rocker controls next to each lamp.
BULBS
Replacing exterior bulbs
Check the operation of the following lamps frequently:
²Headlamps
²Foglamps (if equipped)
²High-mount brakelamp
²Brakelamps
²Turn signals
²License plate lamp
²Tail lamps
²Back-up lamps
Lights
69
Page 70 of 320

Do not remove lamp bulbs unless they can be replaced immediately with
new ones. If a bulb is removed for an extended period of time,
contaminants may enter the lamp housings and affect lamp performance.
Using the right bulbs
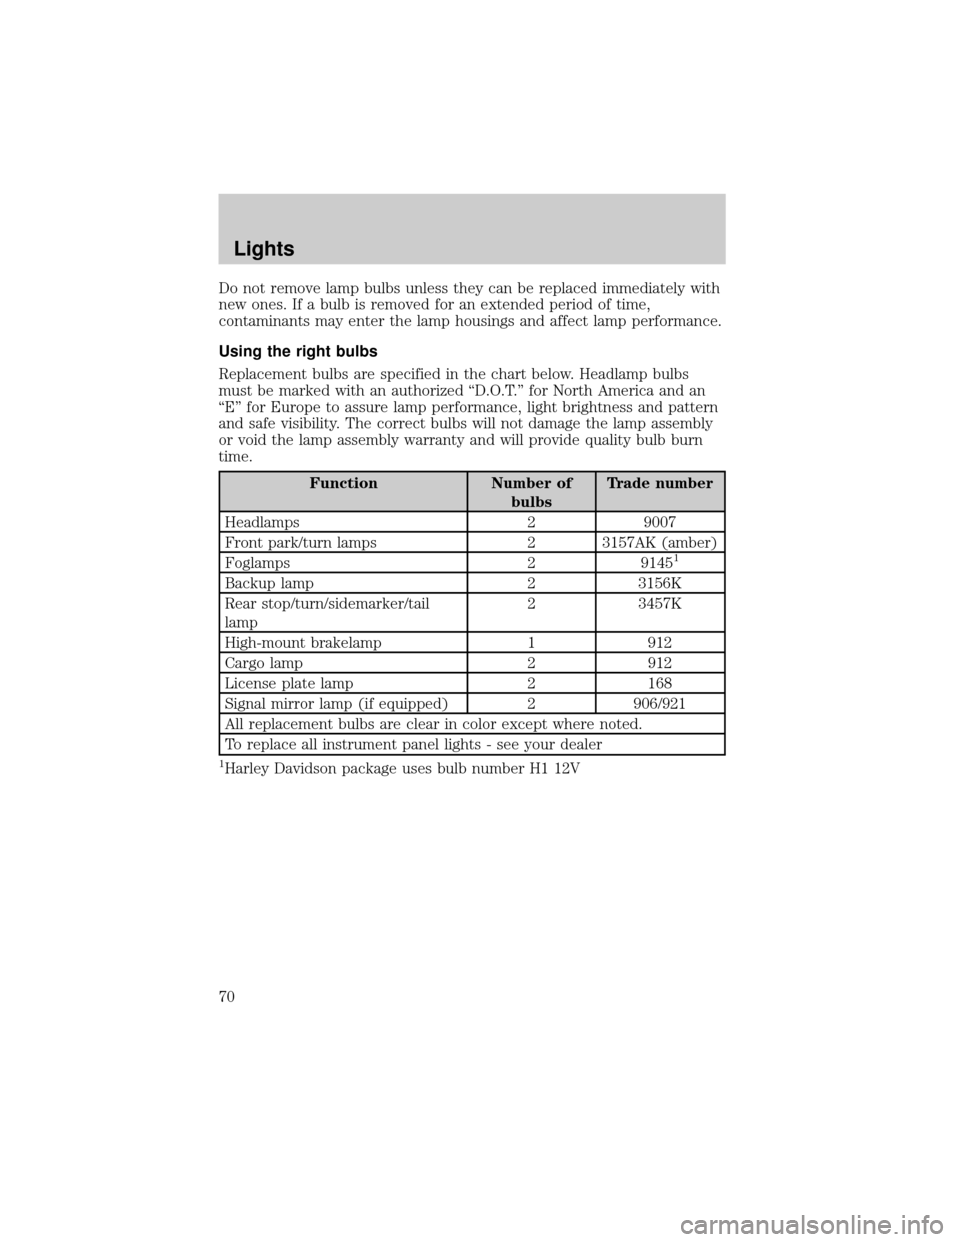
Replacement bulbs are specified in the chart below. Headlamp bulbs
must be marked with an authorized ªD.O.T.º for North America and an
ªEº for Europe to assure lamp performance, light brightness and pattern
and safe visibility. The correct bulbs will not damage the lamp assembly
or void the lamp assembly warranty and will provide quality bulb burn
time.
Function Number of
bulbsTrade number
Headlamps 2 9007
Front park/turn lamps 2 3157AK (amber)
Foglamps 2 9145
1
Backup lamp 2 3156K
Rear stop/turn/sidemarker/tail
lamp2 3457K
High-mount brakelamp 1 912
Cargo lamp 2 912
License plate lamp 2 168
Signal mirror lamp (if equipped) 2 906/921
All replacement bulbs are clear in color except where noted.
To replace all instrument panel lights - see your dealer
1Harley Davidson package uses bulb number H1 12V
Lights
70
Page 82 of 320
Compass calibration adjustment
Perform this adjustment in an open
area free from steel structures and
high voltage lines:
²Press and hold the SELECT
control until CAL appears in the
display (approximately eight
seconds) and release.
²Drive the vehicle slowly (less
than 5 km/h [3 mph]) in circles
until CAL indicator turns off in
about 2±3 complete circles.
²The compass is now calibrated.
AUXILIARY POWER POINT
Power outlets are designed for
accessory plugs only. Do not
hang any type of accessory or
accessory bracket from the plug.
Improper use of the power
outlet can cause damage not
covered by your warranty.
The auxiliary power point is located
on the instrument panel.
Do not plug optional electrical
accessories into the cigarette lighter. Use the power point.
CAL
Driver Controls
82
Page 184 of 320

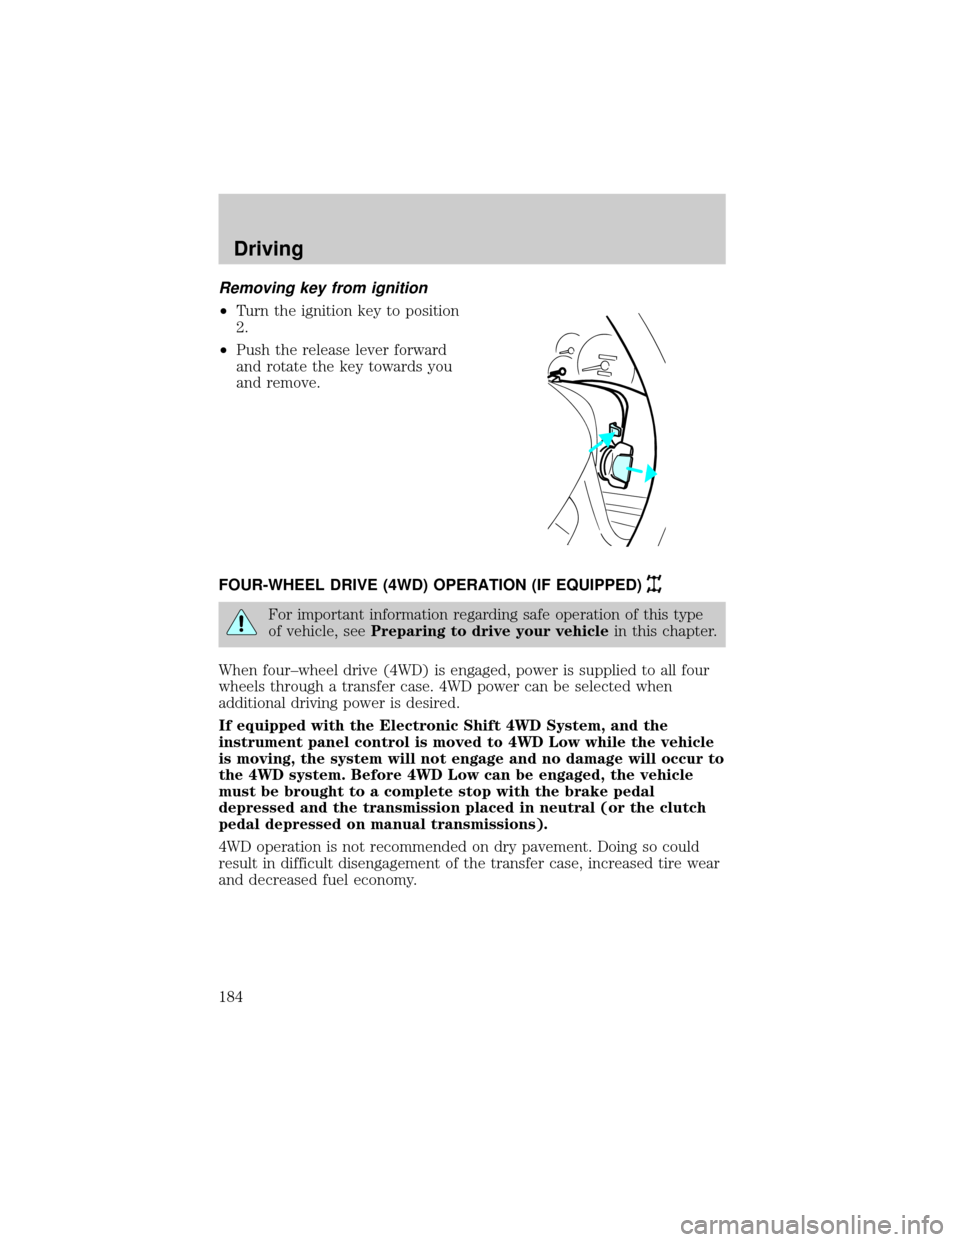
Removing key from ignition
²Turn the ignition key to position
2.
²Push the release lever forward
and rotate the key towards you
and remove.
FOUR-WHEEL DRIVE (4WD) OPERATION (IF EQUIPPED)
For important information regarding safe operation of this type
of vehicle, seePreparing to drive your vehiclein this chapter.
When four±wheel drive (4WD) is engaged, power is supplied to all four
wheels through a transfer case. 4WD power can be selected when
additional driving power is desired.
If equipped with the Electronic Shift 4WD System, and the
instrument panel control is moved to 4WD Low while the vehicle
is moving, the system will not engage and no damage will occur to
the 4WD system. Before 4WD Low can be engaged, the vehicle
must be brought to a complete stop with the brake pedal
depressed and the transmission placed in neutral (or the clutch
pedal depressed on manual transmissions).
4WD operation is not recommended on dry pavement. Doing so could
result in difficult disengagement of the transfer case, increased tire wear
and decreased fuel economy.
Driving
184
Page 215 of 320
Fuse/Relay
LocationFuse Amp
RatingPassenger Compartment Fuse
Panel Description
5 15A Speed Control Module, Reverse
Lamp, Climate Mode Switch,
Daytime Running Lamp Relay,
Digital Transmission Range (DTR)
Sensor
6 5A Cluster, Brake Shift Interlock
Solenoid, GEM Module
7 Ð Not Used
8 5A Radio, Remote Entry Module,
GEM Module, In-vehicle
entertainment system (SuperCrew
only)
9 Ð Not Used
10 Ð Not Used
11 30A Front Washer Pump Relay, Wiper
Run/Park Relay, Wiper Hi/LO
Relay, Windshield Wiper Motor
12 Ð Not Used
13 20A Stop Lamp Switch (Lamps),
Turn/Hazard Flasher
14 15A Battery Saver Relay, Interior
Lamp Relay
15 5A Stop Lamp Switch, (Speed
Control, Brake Shift Interlock),
GEM Module, RABS Module
16 20A Headlamps (Hi Beams), Cluster
(Hi Beam Indicator)
17 Ð Not Used
18 5A Instrument Illumination (Dimmer
Switch Power)
19 Ð Not Used
20 5A Audio, GEM Module, Powertrain
Control Module (PCM),
Transmission Range Sensor
Roadside Emergencies
215
Page 248 of 320

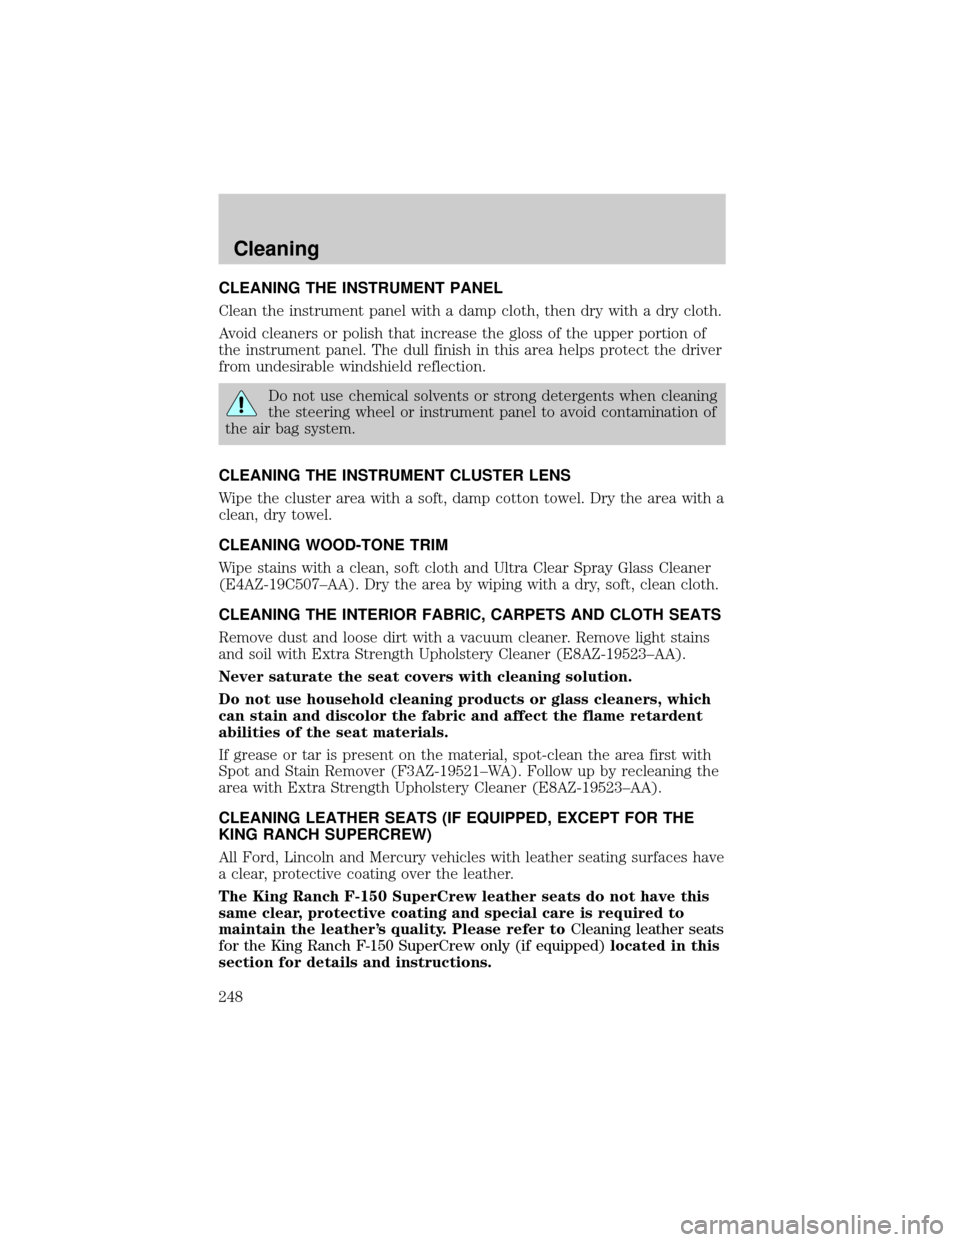
CLEANING THE INSTRUMENT PANEL
Clean the instrument panel with a damp cloth, then dry with a dry cloth.
Avoid cleaners or polish that increase the gloss of the upper portion of
the instrument panel. The dull finish in this area helps protect the driver
from undesirable windshield reflection.
Do not use chemical solvents or strong detergents when cleaning
the steering wheel or instrument panel to avoid contamination of
the air bag system.
CLEANING THE INSTRUMENT CLUSTER LENS
Wipe the cluster area with a soft, damp cotton towel. Dry the area with a
clean, dry towel.
CLEANING WOOD-TONE TRIM
Wipe stains with a clean, soft cloth and Ultra Clear Spray Glass Cleaner
(E4AZ-19C507±AA). Dry the area by wiping with a dry, soft, clean cloth.
CLEANING THE INTERIOR FABRIC, CARPETS AND CLOTH SEATS
Remove dust and loose dirt with a vacuum cleaner. Remove light stains
and soil with Extra Strength Upholstery Cleaner (E8AZ-19523±AA).
Never saturate the seat covers with cleaning solution.
Do not use household cleaning products or glass cleaners, which
can stain and discolor the fabric and affect the flame retardent
abilities of the seat materials.
If grease or tar is present on the material, spot-clean the area first with
Spot and Stain Remover (F3AZ-19521±WA). Follow up by recleaning the
area with Extra Strength Upholstery Cleaner (E8AZ-19523±AA).
CLEANING LEATHER SEATS (IF EQUIPPED, EXCEPT FOR THE
KING RANCH SUPERCREW)
All Ford, Lincoln and Mercury vehicles with leather seating surfaces have
a clear, protective coating over the leather.
The King Ranch F-150 SuperCrew leather seats do not have this
same clear, protective coating and special care is required to
maintain the leather's quality. Please refer toCleaning leather seats
for the King Ranch F-150 SuperCrew only (if equipped)located in this
section for details and instructions.
Cleaning
248
Page 254 of 320

3. Turn off the engine and remove the key.
4. Block the wheels to prevent the vehicle from moving unexpectedly.
Working with the engine on
²Automatic transmission:
1. Set the parking brake and ensure the gearshift is securely latched in P
(Park).
2. Block the wheels to prevent the vehicle from moving unexpectedly.
Note:Do not start your engine with the air cleaner removed and do not
remove it while the engine is running.
²Manual transmission:
1. Set the parking brake, depress the clutch and place the gearshift in
neutral.
2. Block the wheels to prevent the vehicle from moving unexpectedly.
Note:Do not start your engine with the air cleaner removed and do not
remove it while the engine is running.
The cooling fan is automatic and may come on at any time.
Always disconnect the negative terminal of the battery before
working near the fan.
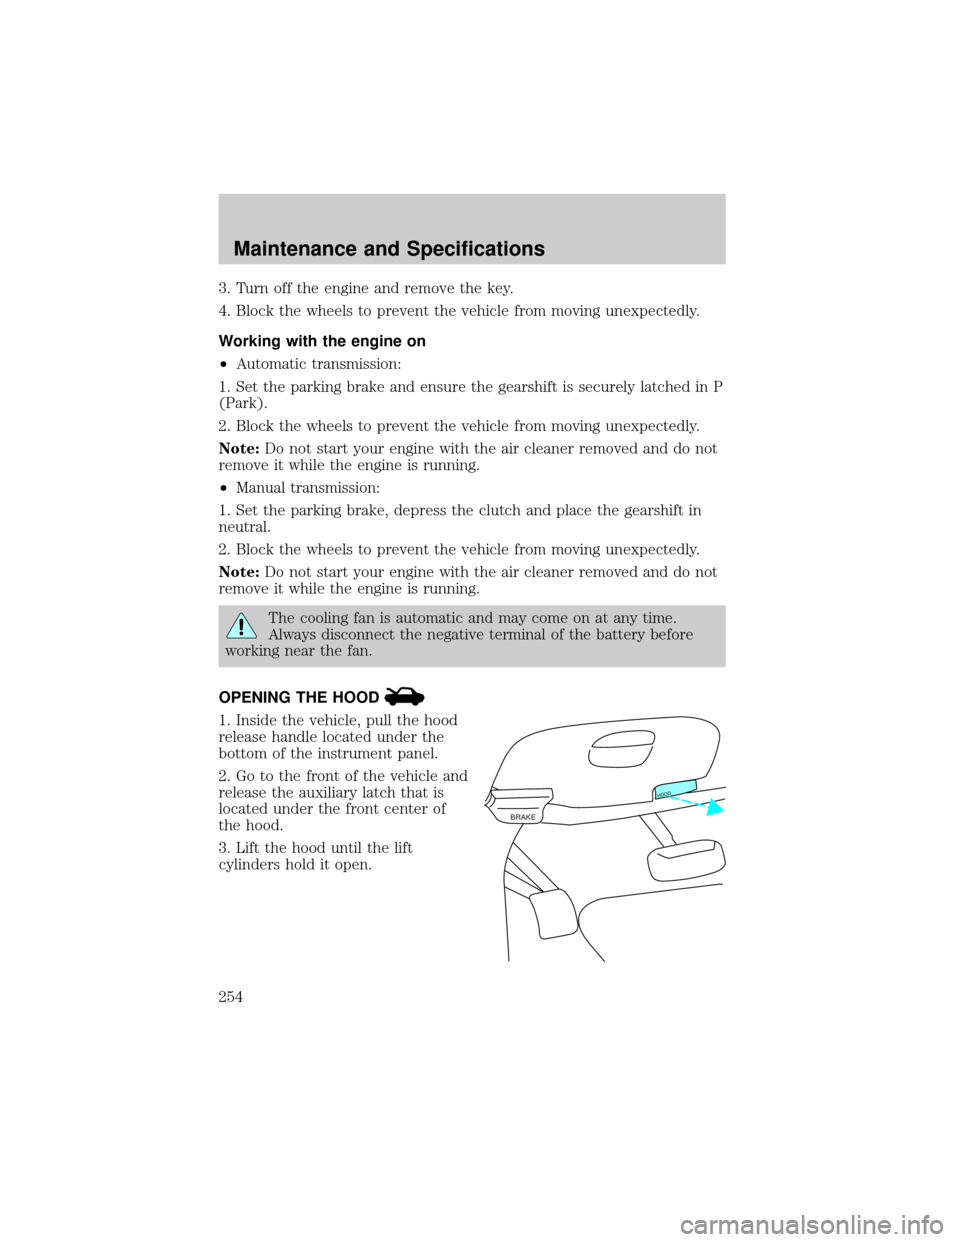
OPENING THE HOOD
1. Inside the vehicle, pull the hood
release handle located under the
bottom of the instrument panel.
2. Go to the front of the vehicle and
release the auxiliary latch that is
located under the front center of
the hood.
3. Lift the hood until the lift
cylinders hold it open.
BRAKE
HOOD
Maintenance and Specifications
254