Page 110 of 320

Power door lock disable feature
This feature will help protect your vehicle from unauthorized entry.
The UNLOCK function on the power door switch will not operate with
the ignition OFF and twenty seconds after the doors are closed and
electronically locked by the key fob, key pad, or power door switch (if
pressed while the door was open).
The UNLOCK function will operate again after you unlock the vehicle
using the key fob or key pad, turn the ignition to ON, or open the door
from inside of the vehicle.
Deactivating/activating power door lock disable feature
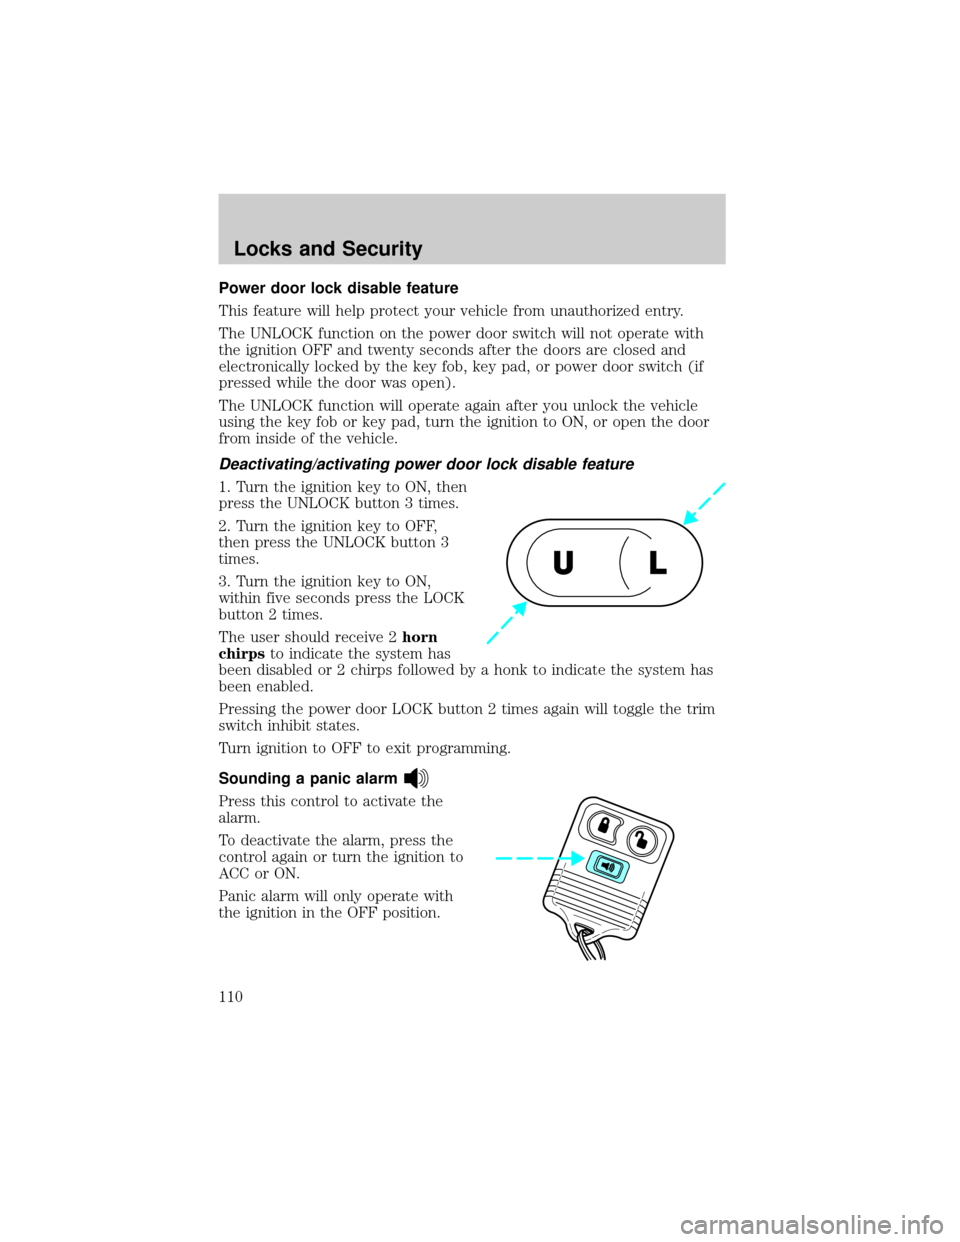
1. Turn the ignition key to ON, then
press the UNLOCK button 3 times.
2. Turn the ignition key to OFF,
then press the UNLOCK button 3
times.
3. Turn the ignition key to ON,
within five seconds press the LOCK
button 2 times.
The user should receive 2horn
chirpsto indicate the system has
been disabled or 2 chirps followed by a honk to indicate the system has
been enabled.
Pressing the power door LOCK button 2 times again will toggle the trim
switch inhibit states.
Turn ignition to OFF to exit programming.
Sounding a panic alarm
Press this control to activate the
alarm.
To deactivate the alarm, press the
control again or turn the ignition to
ACC or ON.
Panic alarm will only operate with
the ignition in the OFF position.
UL
Locks and Security
110
Page 112 of 320

Programming remote transmitters
It is necessary to haveall(maximum of four Ð original and/or new) of
your remote transmitters available prior to beginning this procedure.
To program the transmitters yourself:
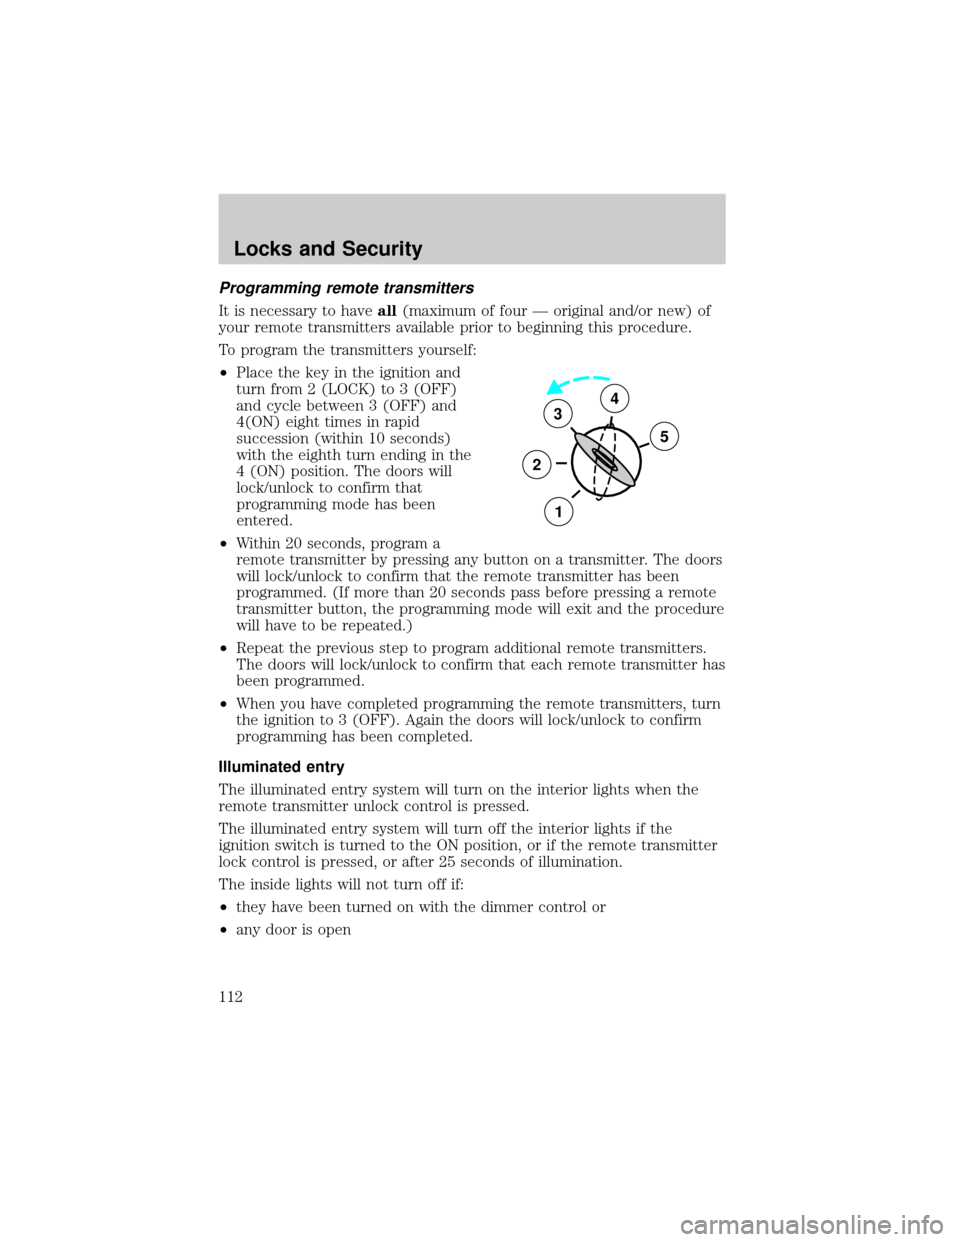
²Place the key in the ignition and
turn from 2 (LOCK) to 3 (OFF)
and cycle between 3 (OFF) and
4(ON) eight times in rapid
succession (within 10 seconds)
with the eighth turn ending in the
4 (ON) position. The doors will
lock/unlock to confirm that
programming mode has been
entered.
²Within 20 seconds, program a
remote transmitter by pressing any button on a transmitter. The doors
will lock/unlock to confirm that the remote transmitter has been
programmed. (If more than 20 seconds pass before pressing a remote
transmitter button, the programming mode will exit and the procedure
will have to be repeated.)
²Repeat the previous step to program additional remote transmitters.
The doors will lock/unlock to confirm that each remote transmitter has
been programmed.
²When you have completed programming the remote transmitters, turn
the ignition to 3 (OFF). Again the doors will lock/unlock to confirm
programming has been completed.
Illuminated entry
The illuminated entry system will turn on the interior lights when the
remote transmitter unlock control is pressed.
The illuminated entry system will turn off the interior lights if the
ignition switch is turned to the ON position, or if the remote transmitter
lock control is pressed, or after 25 seconds of illumination.
The inside lights will not turn off if:
²they have been turned on with the dimmer control or
²any door is open
3
2
1
5
4
Locks and Security
112
Page 113 of 320

The battery save feature will turn off the interior lights 45 minutes after
the last door is closed, even if the dimmer control is on.
Autolock (if equipped)
This feature automatically locks all vehicle doors when:
²all doors are closed
²the engine is running
²you shift into any gear putting the vehicle in motion.
Relock
The autolock feature repeats when:
²any door is opened then closed while the engine is running and
²you put the vehicle in motion.
Deactivating/activating the autolock feature
Before following the procedure, make sure that the ignition is OFF and
all vehicle doors are closed.
You must complete steps 1-7 within 30 seconds or the procedure will
have to be repeated. If the procedure needs to be repeated, you must
wait 30 seconds.
1. Turn the ignition key to ON.
2. Press the power door unlock control three times.
3. Turn the ignition key from ON to OFF.
4. Press the power door unlock control three times.
5. Turn the ignition back to ON. The horn will chirp.
6. Press the unlock control, then press the lock control. The horn will
chirp once if autolock was deactivated or twice (one short and one long
chirp) if autolock was activated.
7. Turn the ignition to OFF. The horn will chirp once to confirm the
procedure is complete.
Keyless entry system (if equipped)
With the keyless entry keypad, you can:
²lock or unlock the vehicle doors without using the key.
Locks and Security
113
Page 114 of 320

Your vehicle has a factory set 5 digit code that operates the keyless entry
system. You can also program your own 5 digit personal entry code. The
factory-set code is located:
²on the owner's wallet card in the glove compartment
²taped to the computer module
²or at your dealer.
When pressing the controls on the keyless entry keypad, press the
middle of the controls to ensure a good activation.
This system will disable the power door lock controls. These will not
work until the vehicle is disarmed.
Programming your own personal entry code
To program your own code:
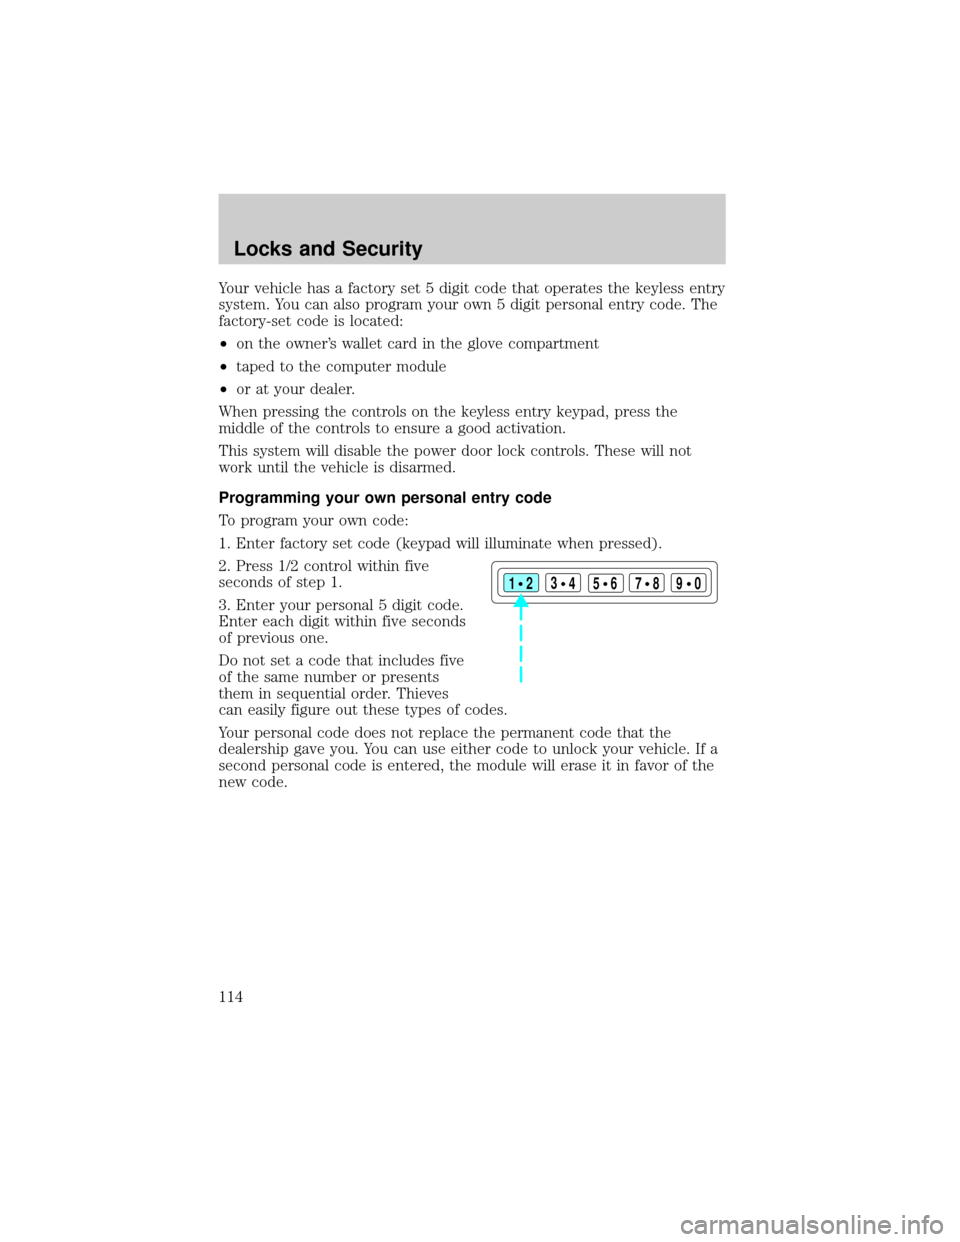
1. Enter factory set code (keypad will illuminate when pressed).
2. Press 1/2 control within five
seconds of step 1.
3. Enter your personal 5 digit code.
Enter each digit within five seconds
of previous one.
Do not set a code that includes five
of the same number or presents
them in sequential order. Thieves
can easily figure out these types of codes.
Your personal code does not replace the permanent code that the
dealership gave you. You can use either code to unlock your vehicle. If a
second personal code is entered, the module will erase it in favor of the
new code.
123
45678
90
Locks and Security
114
Page 115 of 320

If you wish to erase your personal code, use the following instructions:
Erasing personal code
1. Enter factory set code.
2. Press 1/2 control within five
seconds of step one.
3. Press 7/8 control and 9/0 control
at the same time within five seconds
of step 2.
The system will now only respond
to the factory set code.
Anti-scan feature
The keyless entry pad is disabled for
1 minute after 7 unsuccessful
attempts at entering a valid key
code. The keypad will flash during
this 1 minute mode. However, the 7/8 and 9/0 controls will still lock the
vehicle.
Anti-scan will turned off after:
²one minute of keypad inactivity
²the keyfob UNLOCK button is pressed.
²the ignition is turned to the ON position
Unlocking the doors with the keyless entry system
To unlock the driver door, enter either the factory set code or the
personal code (each digit must be pressed within five seconds of the
prior digit). The interior lamps will also illuminate.
To unlock all doors, enter the factory set code or personal code (driver
door unlocks) and press the 3/4 control within five seconds.
Locking the doors with the keyless entry system
It is not necessary to enter the factory or personal code prior to locking
all doors. To lock the doors:
²Press the 7/8 control and the 9/0 control at the same time.
123
45678
90
123
45678
90
Locks and Security
115
Page 116 of 320

Activating/deactivating autolock with the keyless entry system
Before following the activation or deactivation procedures, make sure
that the anti-theft system (if equipped) is not armed, ignition is off, and
all vehicle doors and liftgate window are closed.
1. Enter 5 digit entry code
2. Press and hold 7/8 control
3. Press and release 3/4 control while holding 7/8 control
4. Release 7/8 control.
The horn will chirp once if autolock was deactivated or twice (one short
and one long chirp) if autolock was activated.
To re-activate autolock, repeat steps 1±4.
SECURILOCKYPASSIVE ANTI-THEFT SYSTEM
SecuriLockypassive anti-theft system is an engine immobilization
system. This system prevents the engine from being started unless a
coded key programmed to your vehicleis used.
The SecuriLockypassive anti-theft system is not compatible with
non-Ford aftermarket remote start systems. Use of these systems may
result in vehicle starting problems and a loss of security protection.
Automatic arming
The vehicle is armed immediately
after switching the ignition to the 3
(OFF) position. The
THEFTlight in
the instrument cluster will flash
every two seconds when the vehicle
is armed.3
2
1
5
4
Locks and Security
116
Page 195 of 320

Never drive with chains on the front tires of 4WD vehicles without also
putting them on the rear tires. This could cause the rear to slide and
swing around during braking.
Tires, Replacement Requirements
4WD vehicles are equipped with tires designed to provide for safe ride
and handling capability.
Do not use a size and type of tire and wheel other than that originally
provided by Ford because it can affect the safety and performance of
your vehicle, which could lead to loss of vehicle control or roll over and
serious injury. Make sure all tires and wheels on the vehicle are of the
same size, type, tread design, brand and load-carrying capacity. If you
have questions regarding tire replacement, see an authorized Ford or
Lincoln/Mercury dealer.
If you nevertheless decide to equip your 4WD for off-road use with tires
larger than what Ford recommends, you should not use these tires for
highway driving.
If you use any tire/wheel combination not recommended by Ford, it may
adversely affect vehicle handling and could cause steering, suspension,
axle or transfer case failure.
Do not useºaftermarket lift kitsº or other suspension modifications,
whether or not they are used with larger tires and wheels.
These ªaftermarket lift kitsº could adversely affect the vehicle's handling
characteristics, which could lead to loss of vehicle control or roll over
and serious injury.
Tires can be damaged during off-road use. For your safety, tires that are
damaged should not be used for highway driving because they are more
likely to blow out or fail.
You should carefully observe the recommended tire inflation pressure
found on the safety compliance certification label attached to the left
front door lock facing or door latch post pillar. Failure to follow tire
pressure recommendations can adversely affect the way your vehicle
handles. Do not exceed the Ford recommended pressure even if it is less
than the maximum pressure allowed for the tire.
Driving
195
Page 218 of 320
Fuse/Relay
LocationFuse Amp
RatingPower Distribution Box
Description
3 30A* Main Light Switch, Headlamp
Relay, Multifunction Switch
4 Ð Not Used
5 20A* Trailer Tow Backup/Park Lamps
6 15A* Main Light Switch, Park Lamp
Relay
7 20A* Horn
8 15A* Power Door Locks, CSM, Lock
Relays
9 15A* Daytime Running Lamps (DRL),
Fog Lamps
10 20A* Fuel Pump
11 20A* Alternator Field
12 20A* Rear Auxiliary Power Point
13 15A* A/C Clutch
14 Ð Not Used
15 10A Running Board Lamps
16 Ð Not Used
17 Ð Not Used
18 15A* Powertrain Control Module, Fuel
Injectors, Fuel Pump Relay, Mass
Air Flow Sensor
19 10A* Trailer/Camper Adapter (Right
Stop and Right Turn Lamp)
20 10A* Trailer/Camper Adapter (Left Stop
and Left Turn Lamp)
21 Ð Not Used
22 Ð Not Used
23 15A* HEGO Sensor, Automatic
Transmission
24 Ð Not Used
101 30A** Trailer Tow Battery Charge
Roadside Emergencies
218