Page 115 of 200

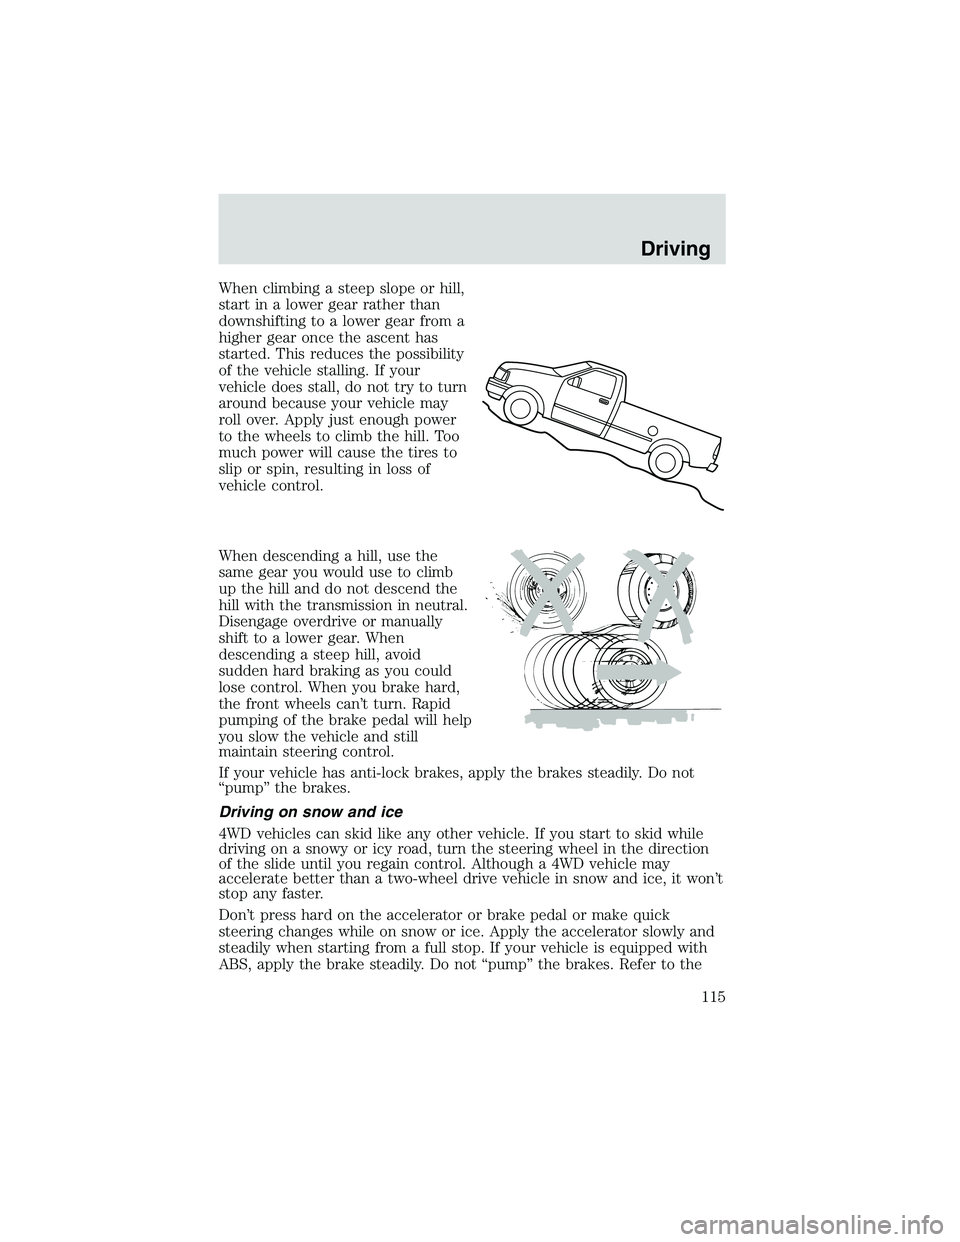
When climbing a steep slope or hill,
start in a lower gear rather than
downshifting to a lower gear from a
higher gear once the ascent has
started. This reduces the possibility
of the vehicle stalling. If your
vehicle does stall, do not try to turn
around because your vehicle may
roll over. Apply just enough power
to the wheels to climb the hill. Too
much power will cause the tires to
slip or spin, resulting in loss of
vehicle control.
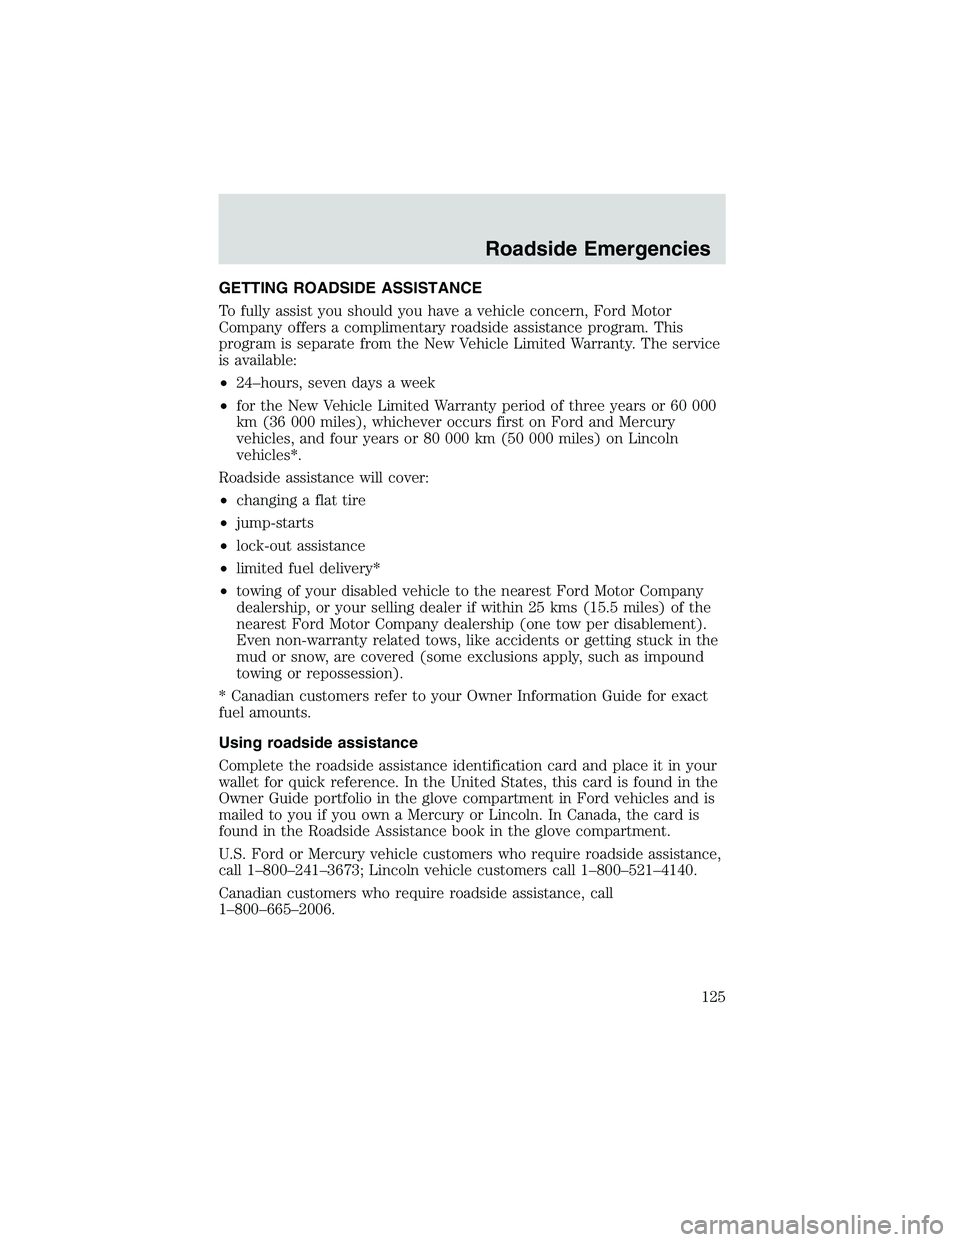
When descending a hill, use the
same gear you would use to climb
up the hill and do not descend the
hill with the transmission in neutral.
Disengage overdrive or manually
shift to a lower gear. When
descending a steep hill, avoid
sudden hard braking as you could
lose control. When you brake hard,
the front wheels can’t turn. Rapid
pumping of the brake pedal will help
you slow the vehicle and still
maintain steering control.
If your vehicle has anti-lock brakes, apply the brakes steadily. Do not
“pump”the brakes.
Driving on snow and ice
4WD vehicles can skid like any other vehicle. If you start to skid while
driving on a snowy or icy road, turn the steering wheel in the direction
of the slide until you regain control. Although a 4WD vehicle may
accelerate better than a two-wheel drive vehicle in snow and ice, it won’t
stop any faster.
Don’t press hard on the accelerator or brake pedal or make quick
steering changes while on snow or ice. Apply the accelerator slowly and
steadily when starting from a full stop. If your vehicle is equipped with
ABS, apply the brake steadily. Do not“pump”the brakes. Refer to the
Driving
115
Page 116 of 200

Brakessection of this chapter for additional information on the
operation of the anti-lock brake system. If your vehicle is not equipped
with ABS, use a“squeeze”braking technique. Push on the brake pedal
with a steadily increasing force which allows the wheels to brake yet
continue to roll so that you may steer in the direction you want to travel.
If you lock the wheels, release the brake pedal and repeat the squeeze
technique.
Never drive with chains on the front tires of 4WD vehicles without also
putting them on the rear tires. This could cause the rear to slide and
swing around during braking.
Maintenance and Modifications
Ford strongly recommends that you do not add or removing steering or
suspension parts (such as lift kits or stabilizer bars) or by using
replacement parts not equivalent to the original factory equipment. Do
not use aftermarket“lift kits”or other suspension modifications. These
could adversely affect the vehicle’s handling characteristics, which could
lead to loss of vehicle control or roll over and serious injury. Frequent
inspection of vehicle chassis components is recommended if the vehicle
is subjected to heavy off-road usage.
DRIVING THROUGH WATER
If driving through deep or standing water is unavoidable, proceed very
slowly especially if the depth is not known. Never drive through water
that is higher than the bottom of the hubs (for trucks) or the bottom of
the wheel rims (for cars). Traction or brake capability may be limited
and your vehicle may stall. Water may also enter your engine’s air intake
and severely damage your engine.
Once through the water, always dry the brakes by moving your vehicle
slowly while applying light pressure on the brake pedal. Wet brakes do
not stop the vehicle as quickly as dry brakes.Driving through deep
water where the transmission vent tube is submerged may allow
water into the transmission and cause internal transmission
damage.
VEHICLE LOADING
Before loading a vehicle, familiarize yourself with the following terms:
•Base Curb Weight:Weight of the vehicle including any standard
equipment, fluids, lubricants, etc. It does not include occupants or
aftermarket equipment.
•Payload:Combined maximum allowable weight of cargo, occupants
and optional equipment. The payload equals the gross vehicle weight
rating minus base curb weight.
Driving
116
Page 125 of 200

GETTING ROADSIDE ASSISTANCE
To fully assist you should you have a vehicle concern, Ford Motor
Company offers a complimentary roadside assistance program. This
program is separate from the New Vehicle Limited Warranty. The service
is available:
•24–hours, seven days a week
•for the New Vehicle Limited Warranty period of three years or 60 000
km (36 000 miles), whichever occurs first on Ford and Mercury
vehicles, and four years or 80 000 km (50 000 miles) on Lincoln
vehicles*.
Roadside assistance will cover:
•changing a flat tire
•jump-starts
•lock-out assistance
•limited fuel delivery*
•towing of your disabled vehicle to the nearest Ford Motor Company
dealership, or your selling dealer if within 25 kms (15.5 miles) of the
nearest Ford Motor Company dealership (one tow per disablement).
Even non-warranty related tows, like accidents or getting stuck in the
mud or snow, are covered (some exclusions apply, such as impound
towing or repossession).
* Canadian customers refer to your Owner Information Guide for exact
fuel amounts.
Using roadside assistance
Complete the roadside assistance identification card and place it in your
wallet for quick reference. In the United States, this card is found in the
Owner Guide portfolio in the glove compartment in Ford vehicles and is
mailed to you if you own a Mercury or Lincoln. In Canada, the card is
found in the Roadside Assistance book in the glove compartment.
U.S. Ford or Mercury vehicle customers who require roadside assistance,
call 1–800–241–3673; Lincoln vehicle customers call 1–800–521–4140.
Canadian customers who require roadside assistance, call
1–800–665–2006.
Roadside Emergencies
125
Page 130 of 200
Fuse/Relay
LocationFuse Amp
RatingPassenger Compartment Fuse
Panel Description
9 7.5A Speed control, Anti-lock Brake
System (ABS), 4x4, Powertrain
Control Module (PCM), Park
interlock, Keyless entry
10 15A Ignition, IPATS
11 15A Subwoofer
12 15A Air bags, Climate control, Rear
climate control
13 15A Stop lamps, Speed control,
Auxiliary Center High-Mounted
Stop Lamp (CHMSL)
14—Not used
15 15A 4x4 module
16 7.5A Turn signals, Park interlock,
Overhead console, Climate
control, 4x4, Speed control
17 20A Cigar lighter, On-Board
Diagnostics (OBD) II
18 20A Power locks, Keyless entry
19 15A Trailer tow park lamps
20 15A Daytime Running Lamps (DRL),
Reverse lamps, PCM
21 15A Flashers
22 20A I/P power point
23 10A Front washers
24 30A Front wiper
25 7.5A Cluster, GEM
26 10A Interior illumination, Battery saver
27 7.5A Audio, Windows, GEM, Moonroof,
Rear window
28 15A Rear wiper (on glass)
29 20A Audio, Rear audio
Roadside Emergencies
130
Page 136 of 200
Removing the jack
To remove the jack, turn the
thumbwheel (1) counterclockwise,
then remove the jack (2), lug
wrench (3) and jack handles (4)
from the bracket.
Installing the jack
To install the jack, place the jack handles (4) in the clips, then replace
the lug wrench (3).Note:The square hole fits over the peg (5) on the
jack stowage bracket. Fully lower the jack (2) by turning the
thumbwheel (1) clockwise, then install the jack (2) by placing the base
of the jack onto the stands (6). Turn the thumbwheel (1) clockwise to
raise the jack between the stands (6) and the top of the lug wrench (3).
Removing the spare tire
1. Assemble the jack handle with the spade end to the lug wrench as
shown in the illustration.
•To assemble, depress button and
slide together.
Roadside Emergencies
136
Page 137 of 200

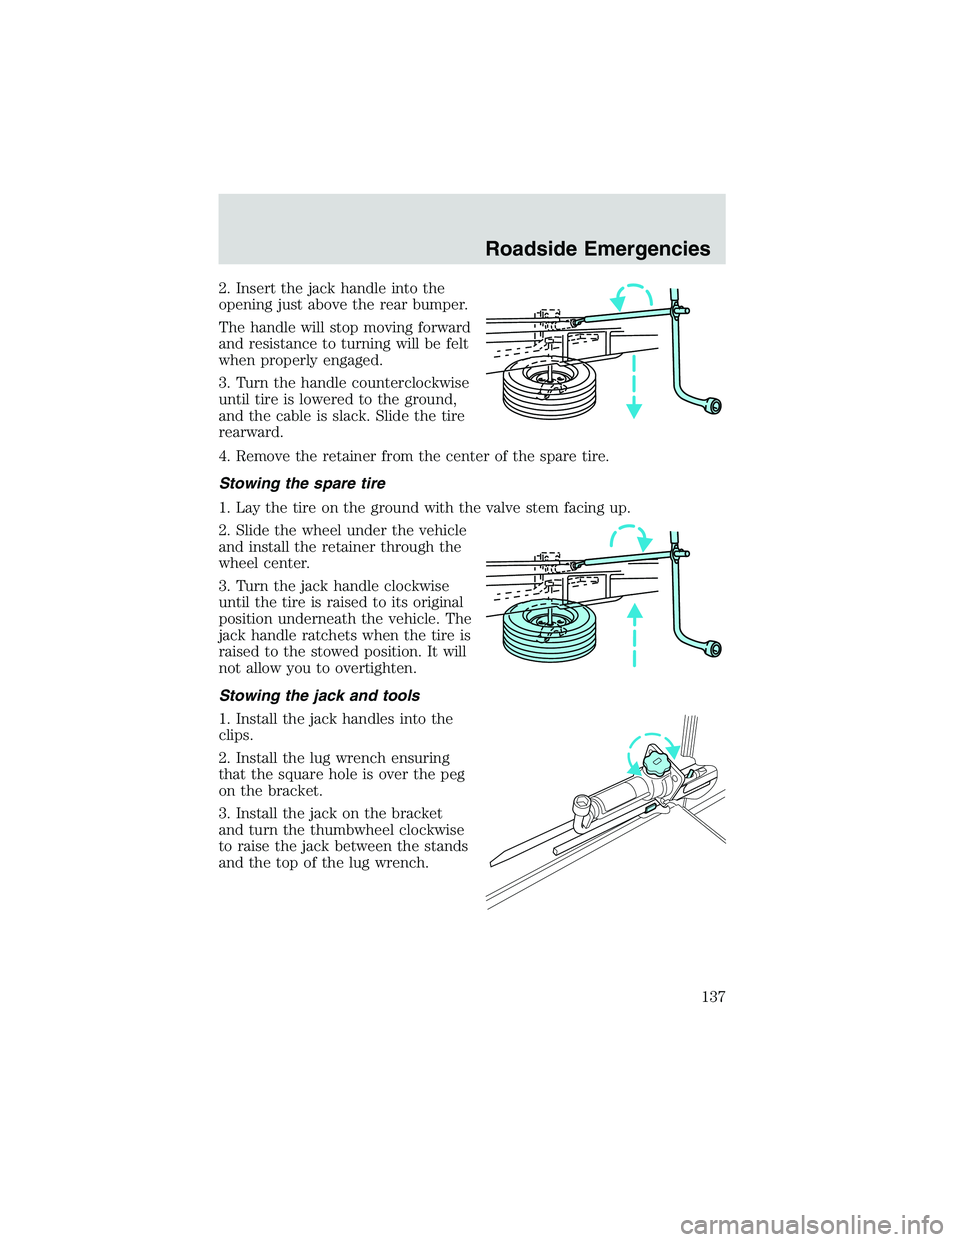
2. Insert the jack handle into the
opening just above the rear bumper.
The handle will stop moving forward
and resistance to turning will be felt
when properly engaged.
3. Turn the handle counterclockwise
until tire is lowered to the ground,
and the cable is slack. Slide the tire
rearward.
4. Remove the retainer from the center of the spare tire.
Stowing the spare tire
1. Lay the tire on the ground with the valve stem facing up.
2. Slide the wheel under the vehicle
and install the retainer through the
wheel center.
3. Turn the jack handle clockwise
until the tire is raised to its original
position underneath the vehicle. The
jack handle ratchets when the tire is
raised to the stowed position. It will
not allow you to overtighten.
Stowing the jack and tools
1. Install the jack handles into the
clips.
2. Install the lug wrench ensuring
that the square hole is over the peg
on the bracket.
3. Install the jack on the bracket
and turn the thumbwheel clockwise
to raise the jack between the stands
and the top of the lug wrench.
Roadside Emergencies
137
Page 138 of 200

How to change a flat tire
When one of the front wheels is off the ground, the transmission
alone will not prevent the vehicle from moving or slipping off the
jack, even if the vehicle is in P (Park) (automatic transmission) or R
(Reverse) (manual transmission).
To prevent the vehicle from moving when you change a tire, be
sure the parking brake is set, then block (in both directions) the
wheel that is diagonally opposite (other side and end of the vehicle) to
the tire being changed.
If the vehicle slips off the jack, you or someone else could be
seriously injured.
Do not attempt to change a tire on the side of the vehicle close
to moving traffic. Pull far enough off the road to avoid the
danger of being hit when operating the jack or changing the wheel.
Before changing the tire:
1. Park on a level surface.
2. Activate the hazard flashers.
3. Place the gearshift lever in P (Park) (automatic transmission) or R
(Reverse) (manual transmission).
4. Set the parking brake.
5. Turn off the ignition.
To change the tire:
Note:Passengers should not remain in the vehicle when the vehicle is
being jacked.
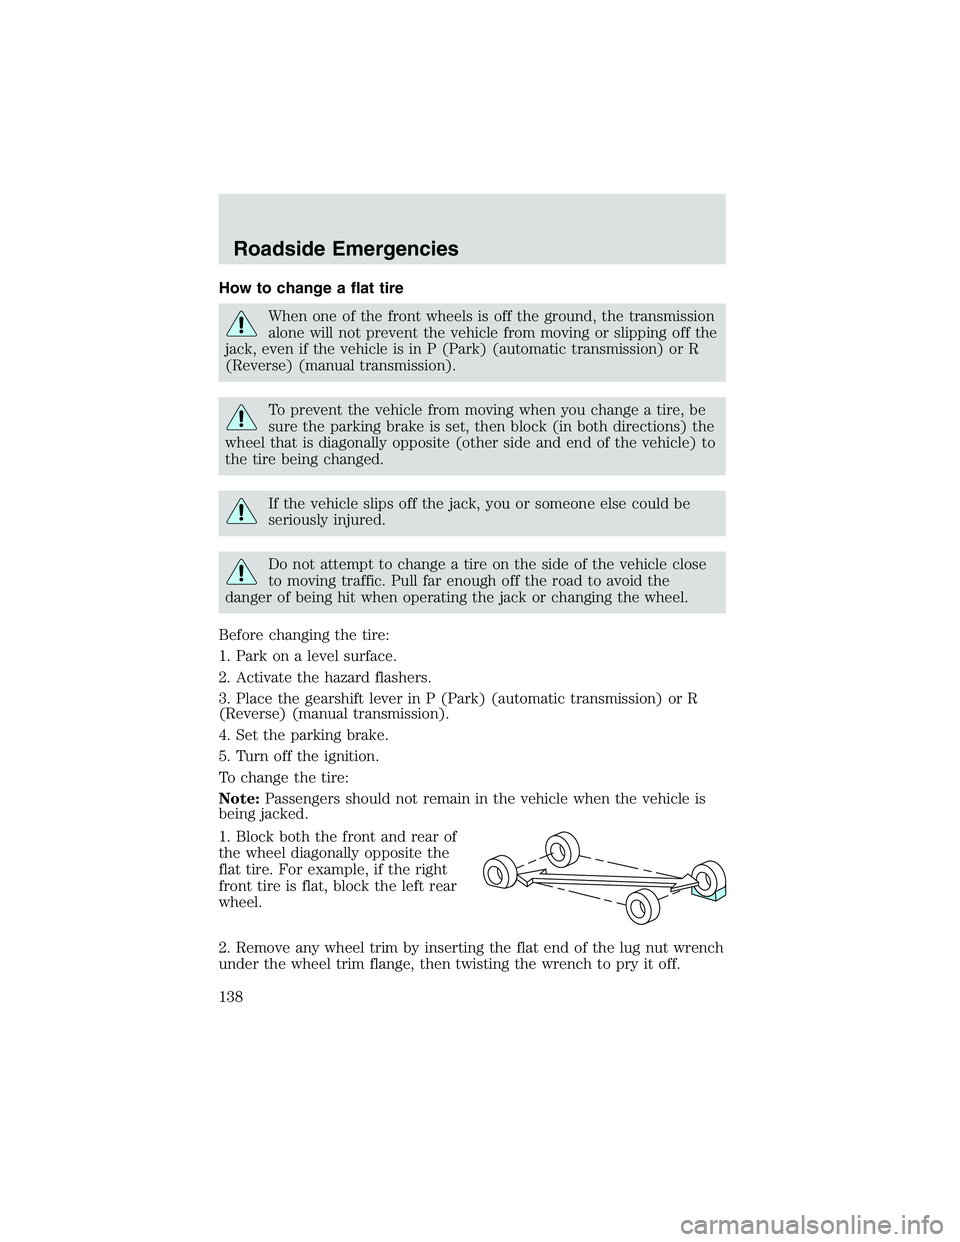
1. Block both the front and rear of
the wheel diagonally opposite the
flat tire. For example, if the right
front tire is flat, block the left rear
wheel.
2. Remove any wheel trim by inserting the flat end of the lug nut wrench
under the wheel trim flange, then twisting the wrench to pry it off.
Roadside Emergencies
138
Page 139 of 200
3. Loosen, but do not remove, the
wheel lug nuts by turning them
one-half turn counterclockwise.
Slide the jack handle extension into
the end of the lug nut wrench. To
disconnect, depress the button and
pull apart.
4. Position the jack properly and turn the handle clockwise until the tire
is a maximum of 25 mm (1 inch) off the ground.
To lessen the risk of personal injury, do not put any part of your
body under the vehicle while changing a tire. Do not start the
engine when your vehicle is on the jack. The jack is only meant for
changing the tire.
•Front
Roadside Emergencies
139