2002 FORD EXPLORER brake light
[x] Cancel search: brake lightPage 201 of 312

Trailer lamps
Trailer lamps are required on most towed vehicles. Make sure your
trailer lamps conform to local and Federal regulations. See your dealer or
trailer rental agency for proper instructions and equipment for hooking
up trailer lamps.
Never connect any trailer lighting to the vehicle's taillamp
circuits, because it may damage the electrical system resulting in
fire. Contact your local Ford dealership for assistance in proper trailer
tow wiring installation. Additional electrical equipment may be
required.
Driving while you tow
When towing a trailer:
²Ensure that you turn off your speed control. The speed control may
shut off automatically when you are towing on long, steep grades.
²Consult your local motor vehicle speed regulations for towing a trailer.
²Use a lower gear when towing up or down steep hills. This will
eliminate excessive downshifting and upshifting for optimum fuel
economy and transmission cooling.
²Anticipate stops and brake gradually.
Exceeding the GCWR rating may cause internal transmission
damage and void your warranty coverage.
Servicing after towing
If you tow a trailer for long distances, your vehicle will require more
frequent service intervals. Refer to your scheduled maintenance guide for
more information.
Trailer towing tips
²Practice turning, stopping and backing up before starting on a trip to
get the feel of the vehicle trailer combination. When turning, make
wider turns so the trailer wheels will clear curbs and other obstacles.
²Allow more distance for stopping with a trailer attached.
²The trailer tongue weight should be no more than 10±15% of the
loaded trailer weight.
Driving
201
Page 210 of 312

The fuses are coded as follows:
Fuse/Relay
LocationFuse Amp
RatingPassenger Compartment Fuse
Panel Description
1 30A Radio Sense, 4x4, ABS Control
Module
2 20A Folding Mirror, Moon Roof,
Heated Seats, Moon roof
3 20A Radio, Amplifier, Power Antenna
4 5A Digital Transmission Range Sensor
5 15A Flasher Relay (Turn, Hazards)
6 10A Right Horn
7 15A Heated Mirrors
8 30A Washer Pump Relays (Front and
Rear), Front Wiper Control
9 15A Rear Wiper Coil and Contact
10 10A Heated Backlight Relay Coil,
Heated Seat Module, Temp Blend
Actuator, A/C Clutch Contact
11 Ð Not Used
12 5A Foglamp Switch,4x4module
13 5A Over Drive Cancel Switch, GEM
Start, Flex Fuel Sender
14 5A PATS Module
15 5A 4 x 4, Memory Seat Disable
16 5A Power Mirror, Security Module
(turn), Manual Climate Control
17 15A Delayed Acc. Coil, Battery Saver,
Interior Lamps
18 10A Left Horn
19 Ð Not Used
20 5A Memory Module, GEM Module
21 5A Instrument Cluster, Compass,
Flasher Coil
22 Ð Not Used
23 15A Brake Pedal Position Switch
24 15A Cigar Lighter, OBD II
Roadside emergencies
210
Page 214 of 312

The high-current fuses are coded as follows:
Fuse/Relay
LocationFuse Amp
RatingPower Distribution Box
Description
1 60A** PJB
2 20A** Door Locks
3 20A** GCC Pusher Fan (export only)
4 30A** Heated Backlight
5 40A** ABS
6 60A** Circuit Breaker
7 20A** Power Point #2
8 Ð Not Used
9 20A** Power Point #1
10 20A** ABS Module
11 40A** PTEC
12 50A** Ignition Relay
13 30A** Trailer Tow Battery
14 10A* Fog Lamps
15 5A* Memory
16 15A* Headlamp Switch
17 20A*4 x 4 (v-batt 2)
18 20A*4 x 4 (v-batt 1)
19 20A** High Beam Relay
20 30A** Electric Brake
21 Ð Not Used
22 20A** Autolmap; Low Beam
23 30A** Ignition Switch
24 10A* Rear Fog Lamps
25 20A* Security Module (horns)
26 15A* Fuel Pump
27 20A* Trailer Tow Lamps
28 10A* Daytime Running Lamps (DRL)
29 60A** PJB
30 Ð Not Used
31 Ð Not Used
32 Ð Not Used
33 30A** Auxiliary Blower Motor
Roadside emergencies
214
Page 219 of 312

3. Turn the wrench
counterclockwise until tire is
lowered to the ground making sure
the other end of the wrench does
not scuff kick plate, the tire can be
slid rearward and the cable is
slightly slack.
4. Lift tire on one side and remove
the retainer from the spare tire.
Tire change procedure
To prevent the vehicle from moving when you change a tire, be
sure the parking brake is set, then block (in both directions) the
wheel that is diagonally opposite (other side and end of the vehicle) to
the tire being changed.
If the vehicle slips off the jack, you or someone else could be
seriously injured.
Refer to the tire changing instruction sheet for detailed tire change
instructions.
1. Park on a level surface, activate
hazard flashers and set the parking
brake.
2. Place gearshift lever in P (Park)
or in the reverse gear (manual
transmission) and turn engine OFF.
Roadside emergencies
219
Page 223 of 312

Do not attempt to push start your vehicle. Automatic
transmissions do not have push-start capability.
Preparing your vehicle
When the battery is disconnected or a new battery is installed, the
transmission must relearn its adaptive strategy. As a result of this, the
transmission may shift firmly. This operation is considered normal and
will not effect function or durability of the transmission. Over time, the
adaptive learning process will fully update transmission operation to its
optimum shift feel.
1.Use only a 12±volt supply to start your vehicle.
2. Do not disconnect the battery of the disabled vehicle as this could
damage the vehicle's electrical system.
3.
Park the booster vehicle close to the hood of the disabled vehicle
making sure the two vehiclesdo nottouch. Set the parking brake on both
vehicles and stay clear of the engine cooling fan and other moving parts.
4. Check all battery terminals and remove any excessive corrosion before
you attach the battery cables. Ensure that vent caps are tight and level.
5. Turn the heater fan on in both vehicles to protect any electrical
surges. Turn all other accessories off.
Connecting the jumper cables
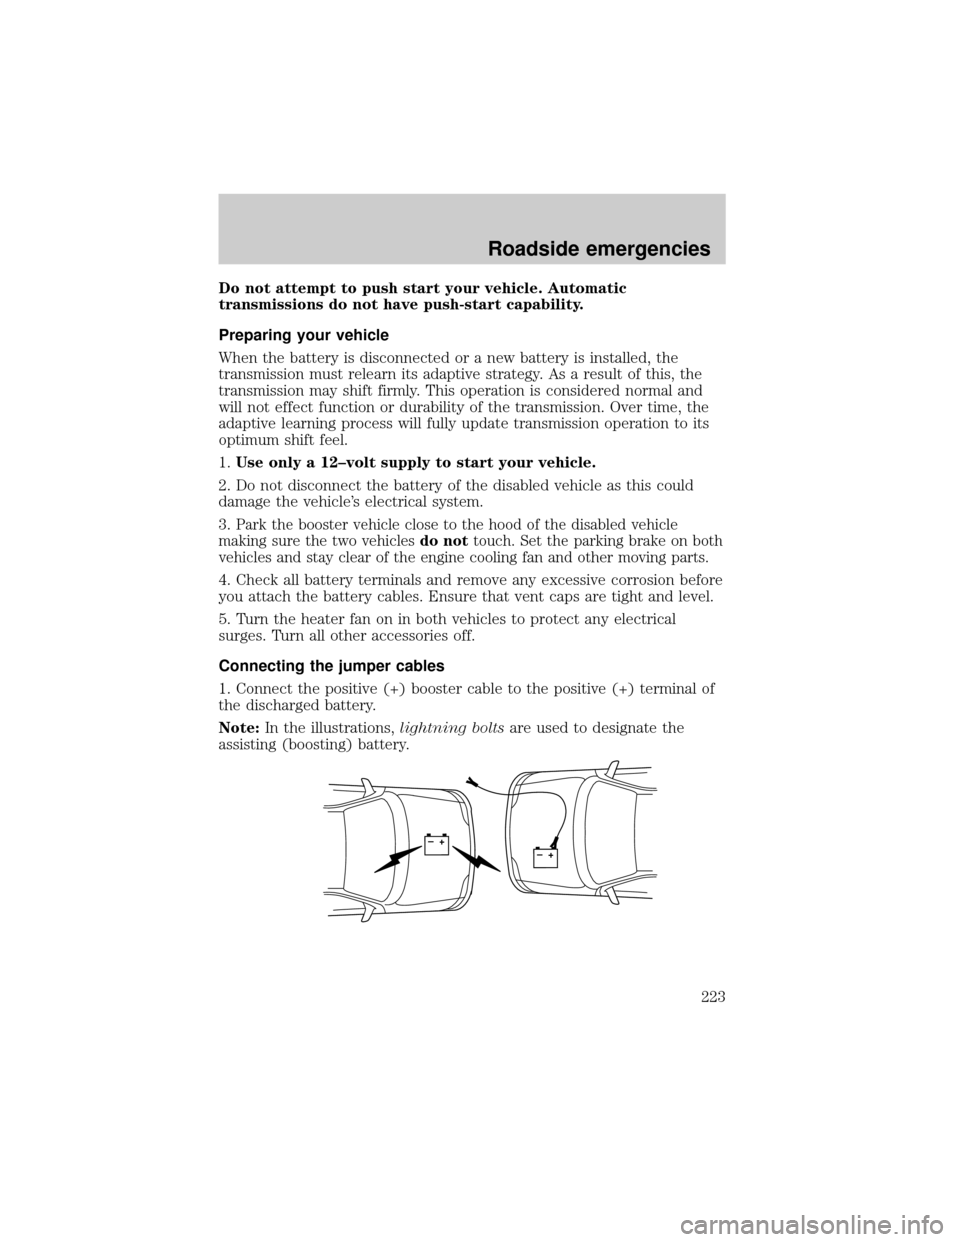
1. Connect the positive (+) booster cable to the positive (+) terminal of
the discharged battery.
Note:In the illustrations,lightning boltsare used to designate the
assisting (boosting) battery.
+–+–
Roadside emergencies
223
Page 252 of 312

Batteries normally produce explosive gases which can cause
personal injury. Therefore, do not allow flames, sparks or lighted
substances to come near the battery. When working near the battery,
always shield your face and protect your eyes. Always provide proper
ventilation.
When lifting a plastic-cased battery, excessive pressure on the
end walls could cause acid to flow through the vent caps,
resulting in personal injury and/or damage to the vehicle or battery.
Lift the battery with a battery carrier or with your hands on opposite
corners.
Keep batteries out of reach of children. Batteries contain sulfuric
acid. Avoid contact with skin, eyes or clothing. Shield your eyes
when working near the battery to protect against possible splashing of
acid solution. In case of acid contact with skin or eyes, flush
immediately with water for a minimum of 15 minutes and get prompt
medical attention. If acid is swallowed, call a physician immediately.
Battery posts, terminals and related accessories contain lead and
lead compounds.Wash hands after handling.
Because your vehicle's engine is electronically controlled by a computer,
some control conditions are maintained by power from the battery. When
the battery is disconnected or a new battery is installed, the engine must
relearn its idle and fuel trim strategy for optimum driveability and
performance. To begin this process:
1. With the vehicle at a complete stop, set the parking brake.
2. Put the gearshift in P (Park), turn off all accessories and start the
engine.
3. Run the engine until it reaches normal operating temperature.
4. Allow the engine to idle for at least one minute.
5. Turn the A/C on and allow the engine to idle for at least one minute.
6. Drive the vehicle to complete the relearning process.
²The vehicle may need to be driven to relearn the idle and fuel trim
strategy.
Maintenance and care
252
Page 267 of 312

²Idling for long periods of time (greater than one minute) may waste
fuel.
²Anticipate stopping; slowing down may eliminate the need to stop.
²Sudden or hard accelerations may reduce fuel economy.
²Slow down gradually.
²Driving at reasonable speeds (traveling at 88 km/h [55 mph] uses 15%
less fuel than traveling at 105 km/h [65 mph]).
²Revving the engine before turning it off may reduce fuel economy.
²Using the air conditioner or defroster may reduce fuel economy.
²You may want to turn off the speed control in hilly terrain if
unnecessary shifting between third and fourth gear occurs.
Unnecessary shifting of this type could result in reduced fuel
economy.
²Warming up a vehicle on cold mornings is not required and may
reduce fuel economy.
²Resting your foot on the brake pedal while driving may reduce fuel
economy.
²Combine errands and minimize stop-and-go driving.
Maintenance
²Keep tires properly inflated and use only recommended size.
²Operating a vehicle with the wheels out of alignment will reduce fuel
economy.
²Use recommended engine oil. Refer toLubricant Specifications.
²Perform all regularly scheduled maintenance items. Follow the
recommended maintenance schedule and owner maintenance checks
found in your vehicle scheduled maintenance guide.
Conditions
²Heavily loading a vehicle or towing a trailer may reduce fuel economy
at any speed.
²Carrying unnecessary weight may reduce fuel economy (approximately
0.4 km/L [1 mpg] is lost for every 180 kg [400 lb] of weight carried).
²Adding certain accessories to your vehicle (for example bug
deflectors, rollbars/light bars, running boards, ski/luggage racks) may
reduce fuel economy.
Maintenance and care
267
Page 270 of 312

Readiness for Inspection/Maintenance (I/M) testing
In some localities, it may be a legal requirement to pass an I/M test of
the on-board diagnostics system. If your ªCheck Engine/Service Engine
Soonº light is on, refer to the description in theWarning Lights and
Chimessection of theInstrumentationchapter. Your vehicle may not
pass the I/M test with the ªCheck Engine/Service Engine Soonº light on.
If the vehicle's powertrain system or its battery has just been serviced,
the on-board diagnostics system is reset to a ªnot ready for I/M testº
condition. To ready the on-board diagnostics system for I/M testing, a
minimum of 30 minutes of city and highway driving is necessary as
described below:
²First, at least 10 minutes of driving on an expressway or highway.
²Next, at least 20 minutes driving in stop-and-go, city-type traffic with
at least four idle periods.
Allow the vehicle to sit for at least eight hours without starting the
engine. Then, start the engine and complete the above driving cycle. The
engine must warm up to its normal operating temperature. Once started,
do not turn off the engine until the above driving cycle is complete.
BULBS
Replacing exterior bulbs
Check the operation of the following lamps frequently:
²Headlamps
²Foglamps
²High-mount brakelamp
²Brakelamps
²Turn signals
²License plate lamp
²Tail lamps
²Back-up lamps
Do not remove lamp bulbs unless they can be replaced immediately with
new ones. If a bulb is removed for an extended period of time,
contaminants may enter the lamp housings and affect lamp performance.
Maintenance and care
270