Page 2 of 216
Seating and Safety Restraints 72
Seating 72
Safety restraints 75
Air bags 85
Child restraints 89
Driving 97
Starting 97
Brakes 102
Transmission operation 105
Vehicle loading 113
Trailer towing 115
Roadside Emergencies 118
Hazard flasher switch 119
Fuses and relays 121
Changing tires 128
Jump starting 132
Wrecker towing 137
Customer Assistance 138
The dispute settlement board 141
Utilizing the mediation/arbitration 144
Getting assistance outside the U.S. and Canada 144
Ordering additional owner's literature 145
Reporting safety defects (U.S. only) 147
Cleaning 148
Cleaning your vehicle 148
Underbody preservation 154
Table of Contents
2
Page 83 of 216

The BeltMinder feature can be deactivated/activated by performing the
following procedure:
Before following the procedure, make sure that:
²The parking brake is set.
²The gearshift is in P (Park) (automatic transmission) or the neutral
position (manual transmission).
²The ignition switch is in the OFF position.
²All vehicle doors are closed.
²The driver's safety belt is unbuckled.
²The parklamps/headlamps are in OFF position (If vehicle is equipped
with Autolamps, this will not affect the procedure).
To reduce the risk of injury, do not deactivate/activate the Belt
Minder feature while driving the vehicle.
1. Turn the ignition switch to the RUN (or ON) position. (DO NOT
START THE ENGINE.)
2. Wait until the safety belt warning light turns off. (Approximately 1±2
minutes.)
²Steps 3±5 must be completed within 60 seconds or the procedure will
have to be repeated.
3. Buckle then unbuckle the safety belt three times, ending with the
safety belt unbuckled. This can be done before or during BeltMinder
warning activation.
4. Turn on the parklamps/headlamps, turn off the parklamps/headlamps.
5. Buckle then unbuckle the safety belt three times, ending with the
safety belt unbuckled.
²After step 5 the safety belt warning light will be turned on for three
seconds.
6. Within seven seconds of the safety belt warning light turning off,
buckle then unbuckle the safety belt.
²This will disable BeltMinder if it is currently enabled, or enable
BeltMinder if it is currently disabled.
7. Confirmation of disabling BeltMinder is provided by the safety belt
warning light flashing four times per second for three seconds.
Seating and Safety Restraints
83
Page 113 of 216

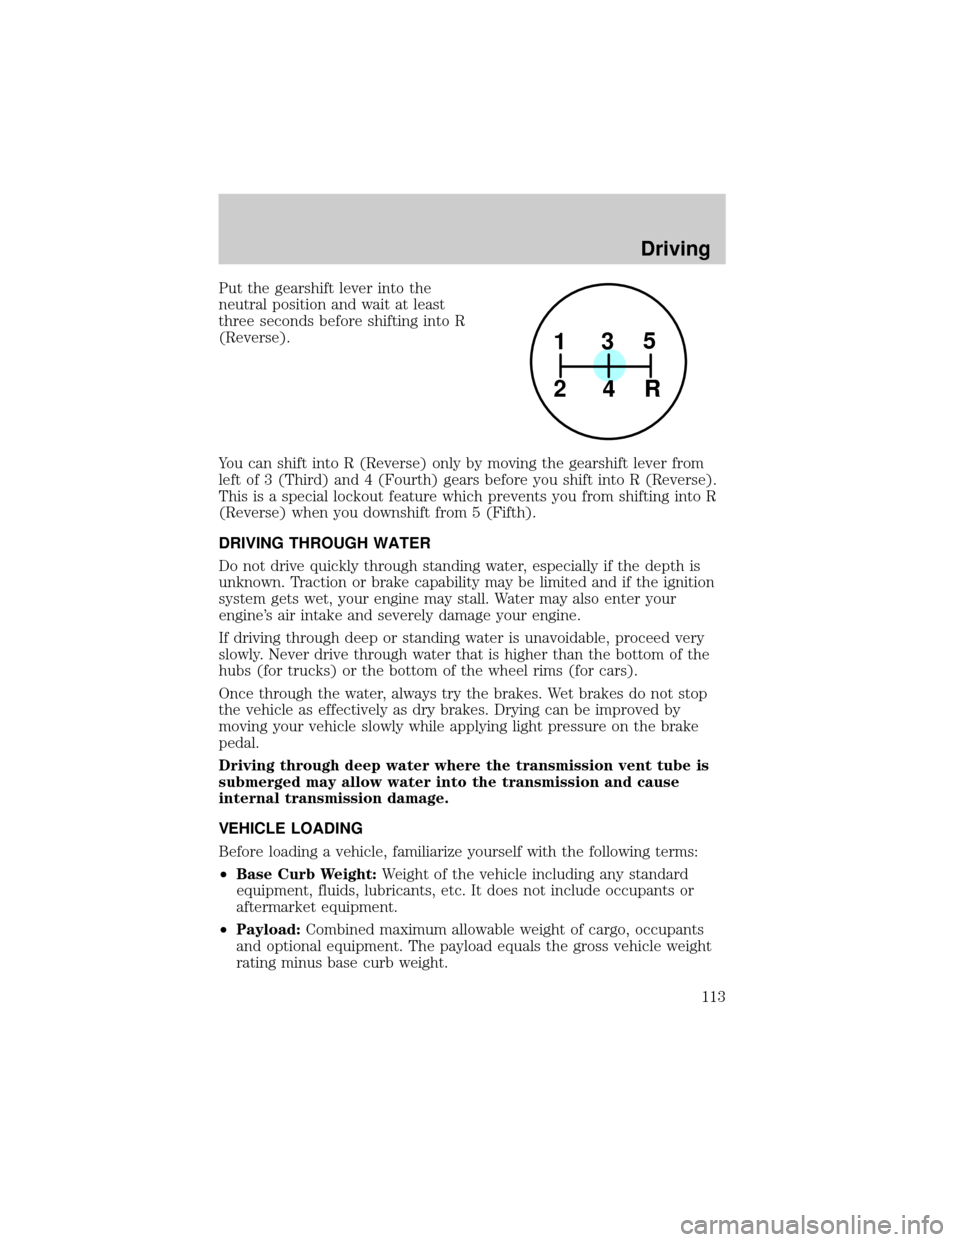
Put the gearshift lever into the
neutral position and wait at least
three seconds before shifting into R
(Reverse).
You can shift into R (Reverse) only by moving the gearshift lever from
left of 3 (Third) and 4 (Fourth) gears before you shift into R (Reverse).
This is a special lockout feature which prevents you from shifting into R
(Reverse) when you downshift from 5 (Fifth).
DRIVING THROUGH WATER
Do not drive quickly through standing water, especially if the depth is
unknown. Traction or brake capability may be limited and if the ignition
system gets wet, your engine may stall. Water may also enter your
engine's air intake and severely damage your engine.
If driving through deep or standing water is unavoidable, proceed very
slowly. Never drive through water that is higher than the bottom of the
hubs (for trucks) or the bottom of the wheel rims (for cars).
Once through the water, always try the brakes. Wet brakes do not stop
the vehicle as effectively as dry brakes. Drying can be improved by
moving your vehicle slowly while applying light pressure on the brake
pedal.
Driving through deep water where the transmission vent tube is
submerged may allow water into the transmission and cause
internal transmission damage.
VEHICLE LOADING
Before loading a vehicle, familiarize yourself with the following terms:
²Base Curb Weight:Weight of the vehicle including any standard
equipment, fluids, lubricants, etc. It does not include occupants or
aftermarket equipment.
²Payload:Combined maximum allowable weight of cargo, occupants
and optional equipment. The payload equals the gross vehicle weight
rating minus base curb weight.
1
24R35
Driving
113
Page 114 of 216

²GVW (Gross Vehicle Weight):Base curb weight plus payload
weight. The GVW is not a limit or a specification.
²GVWR (Gross Vehicle Weight Rating):Maximum permissable total
weight of the base vehicle, occupants, optional equipment and cargo.
The GVWR is specific to each vehicle and is listed on the Safety
Certification Label on the driver's door pillar.
²GAWR (Gross Axle Weight Rating):Carrying capacity for each axle
system. The GAWR is specific to each vehicle and is listed on the
Safety Certification Label on the driver's door pillar.
²GCW (Gross Combined Weight):The combined weight of the
towing vehicle (including occupants and cargo) and the loaded trailer.
²GCWR (Gross Combined Weight Rating):Maximum permissable
combined weight of towing vehicle (including occupants and cargo)
and the loaded trailer
²Maximum Trailer Weight Rating:Maximum weight of a trailer the
vehicle is permitted to tow. The maximum trailer weight rating is
determined by subtracting the vehicle curb weight for each
engine/transmission combination, any required option weight for trailer
towing and the weight of the driver from the GCWR for the towing
vehicle.
²Maximum Trailer Weight:Maximum weight of a trailer the loaded
vehicle (including occupants and cargo) is permitted to tow. It is
determined by subtracting the weight of the loaded trailer towing
vehicle from the GCWR for the towing vehicle.
²Trailer Weight Range:Specified weight range that the trailer must
fall within that ranges from zero to the maximum trailer weight rating.
Remember to figure in the tongue load of your loaded trailer when
figuring the total weight.
Do not exceed the GVWR or the GAWR specified on the
certification label.
Do not use replacement tires with lower load carrying capacities than the
originals because they may lower the vehicle's GVWR and GAWR
limitations. Replacement tires with a higher limit than the originals do
not increase the GVWR and GAWR limitations.
The Safety Certification Label, found on the driver's door pillar, lists
several important vehicle weight rating limitations. Before adding any
Driving
114
Page 132 of 216

JUMP STARTING YOUR VEHICLE
The gases around the battery can explode if exposed to flames,
sparks, or lit cigarettes. An explosion could result in injury or
vehicle damage.
Batteries contain sulfuric acid which can burn skin, eyes, and
clothing, if contacted.
Do not attempt to push-start your vehicle. Automatic
transmissions do not have push-start capability; also, the
catalytic conveter may become damaged.
Preparing your vehicle
When the battery is disconnected or a new battery is installed, the
transmission must relearn its adaptive strategy. As a result of this, the
transmission may shift firmly. This operation is considered normal and
will not affect function or durability of the transmission. Over time, the
adaptive learning process will fully update transmission operation to its
optimum shift feel.
1.Use only a 12±volt supply to start your vehicle.
2. Do not disconnect the battery of the disabled vehicle as this could
damage the vehicle's electrical system.
3. Park the booster vehicle close to the hood of the disabled vehicle
making sure the two vehiclesdo nottouch. Set the parking brake on
both vehicles and stay clear of the engine cooling fan and other moving
parts.
4. Check all battery terminals and remove any excessive corrosion before
you attach the battery cables. Ensure that vent caps are tight and level.
5. Turn the heater fan on in both vehicles to protect any electrical
surges. Turn all other accessories off.
Roadside Emergencies
132
Page 137 of 216
WRECKER TOWING
If you need to have your vehicle towed, contact a professional towing
service or, if you are a member, your roadside assistance center.
It is recommended that your vehicle be towed with a wheel lift or flatbed
equipment. Do not tow with a slingbelt. Ford Motor Company has not
approved a slingbelt towing procedure.
If your vehicle is to be towed from the rear using wheel lift equipment,
the front wheels (drive wheels) must be placed on a dolly to prevent
damage to the transmission.
If the vehicle is towed by other means or incorrectly, vehicle
damage may occur.
Ford Motor Company provides a towing manual for all authorized tow
truck operators. Have your tow truck operator refer to this manual for
proper hook-up and towing procedures for your vehicle.
Roadside Emergencies
137
Page 161 of 216
IDENTIFYING COMPONENTS IN THE ENGINE COMPARTMENT
2.0L SOHC I4 engine
1. Engine oil dipstick
2. Brake fluid reservoir
3. Transmission fluid dipstick (automatic transaxle)
4. Battery
5. Air filter assembly
6. Engine oil filler cap
7. Power steering fluid reservoir
8. Engine coolant reservoir
9. Windshield washer fluid reservoir
91234
8756
Maintenance and Specifications
161
Page 162 of 216
2.0L DOHC Zetec engine
1. Transmission fluid dipstick (automatic transaxle)
2. Battery
3. Air filter assembly
4. Engine oil filler cap
5. Engine oil dipstick
6. Power steering fluid reservoir
7. Engine coolant reservoir
8. Windshield washer fluid reservoir
9. Brake fluid reservoir
98712
3
4
65
Maintenance and Specifications
162