2002 FORD ESCORT change time
[x] Cancel search: change timePage 35 of 216
CLEANING COMPACT DISCS
Inspect all discs for contamination before playing. If necessary, clean
discs only with an approved CD cleaner and wipe from the center out to
the edge. Do not use circular motion.
CD AND CD CHANGER CARE
²Handle discs by their edges only. Never touch the playing surface.
²Do not expose discs to direct sunlight or heat sources for extended
periods of time.
²Do not insert more than one disc into each slot of the CD changer
magazine.
Do not insert any promotional (odd shaped or sized) discs, or
discs with removable labels into the CD player as jamming may
occur.
CLEANING CASSETTE PLAYER (IF EQUIPPED)
Clean the tape player head with a cassette cleaning cartridge after 10 to
12 hours of play in order to maintain the best sound and operation.
CASSETTE AND CASSETTE PLAYER CARE
²Use only cassettes that are 90 minutes long or less.
²Do not expose tapes to direct sunlight, high humidity, extreme heat or
extreme cold. Allow tapes that may have been exposed to extreme
temperatures to reach a moderate temperature before playing.
²Tighten very loose tapes by inserting a finger or pencil into the hole
and turning the hub.
²Remove loose labels before inserting tapes.
²Do not leave tapes in the cassette player for a long time when not
being played.
RADIO FREQUENCY INFORMATION
The Federal Communications Commission (FCC) and the Canadian Radio
and Telecommunications Commission(CRTC) establish the frequencies AM
and FM stations may use for their broadcasts. Allowable frequencies are:
AM 530, 540±1600, 1610 kHz
FM 87.7, 87.9±107.7, 107.9 MHz
Not all frequencies are used in a given area.
Entertainment Systems
35
Page 49 of 216
Map lamps
For bulb replacement, see a qualified service technician or your dealer.
Replacing headlamp bulbs
1. Make sure that the headlamps are turned OFF.
2. Open the hood and disconnect the headlamp wiring socket from the
in-line connector. This will make it easier to change the bulb.
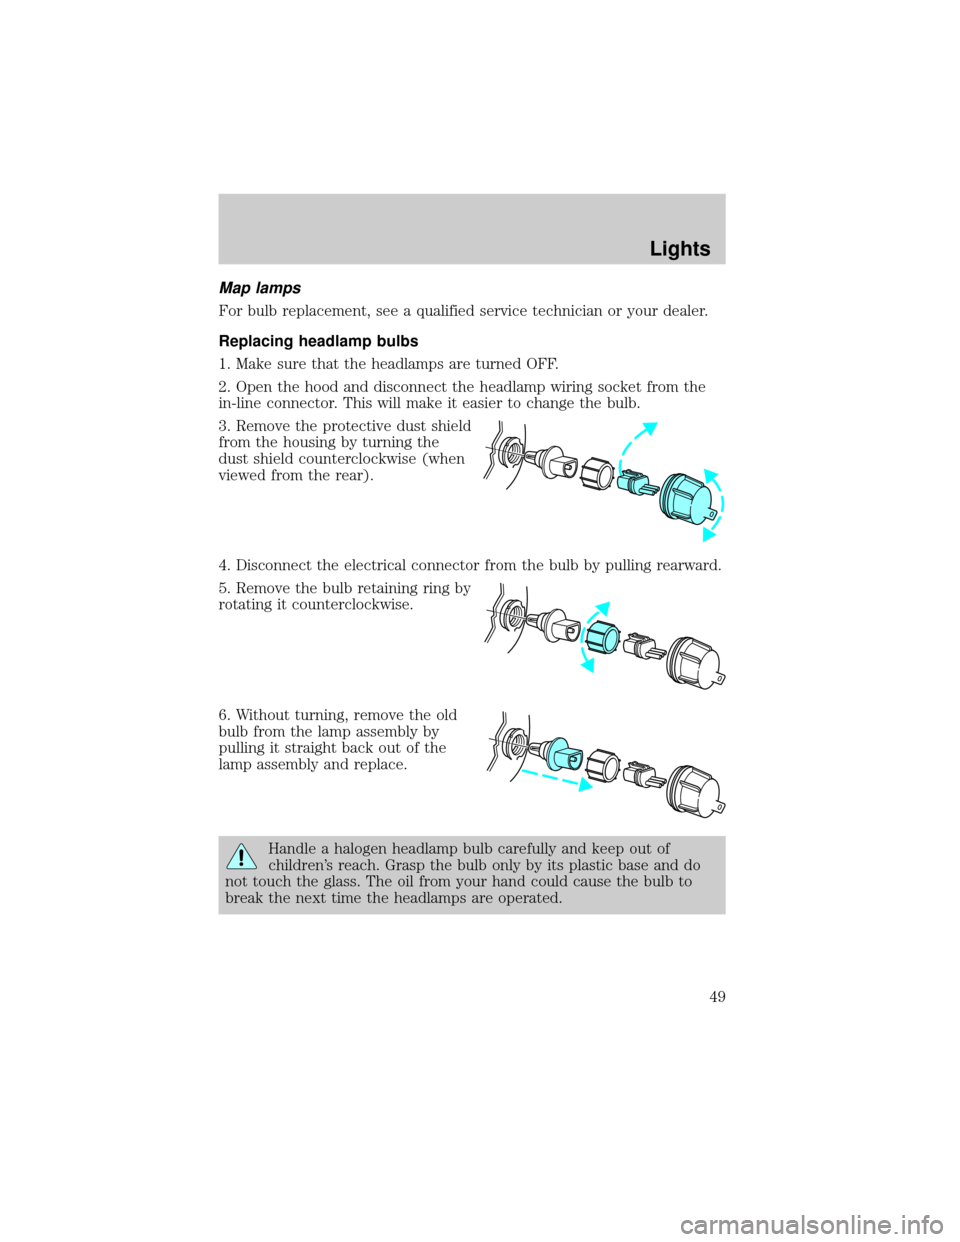
3. Remove the protective dust shield
from the housing by turning the
dust shield counterclockwise (when
viewed from the rear).
4. Disconnect the electrical connector from the bulb by pulling rearward.
5. Remove the bulb retaining ring by
rotating it counterclockwise.
6. Without turning, remove the old
bulb from the lamp assembly by
pulling it straight back out of the
lamp assembly and replace.
Handle a halogen headlamp bulb carefully and keep out of
children's reach. Grasp the bulb only by its plastic base and do
not touch the glass. The oil from your hand could cause the bulb to
break the next time the headlamps are operated.
Lights
49
Page 65 of 216
On hot days, the temperature in the trunk or vehicle interior can
rise very quickly. Exposure of people or animals to these high
temperatures for even a short time can cause death or serious
heat-related injuries, including brain damage. Small children are
particularly at risk.
REMOTE ENTRY SYSTEM
This device complies with part 15 of the FCC rules and with RS-210 of
Industry Canada. Operation is subject to the following two conditions:
(1) This device may not cause harmful interference, and (2) This device
must accept any interference received, including interference that may
cause undesired operation.
Changes or modifications not expressly approved by the party
responsible for compliance could void the user's authority to
operate the equipment.
Your vehicle may have an all-door remote entry system or a driver's door
only remote entry system.
The all-door remote entry system allows you to:
²lock or unlock all vehicle doors without a key.
²arm and disarm the anti-theft system. (For more information on the
anti-theft system, refer toAnti-theft systemin this chapter.)
²open the trunk.
²activate the panic alarm.
The driver's door only entry system allows you to:
²lock the driver's door
²unlock the driver's door only without a key.
²activate the panic alarm.
²open the trunk
The remote entry features only operate with the ignition in the LOCK
position.
If there is any potential remote keyless entry problem with your vehicle,
ensureALL key fobs(remote entry transmitters) are brought to the
dealership, to aid in troubleshooting.
Locks and Security
65
Page 123 of 216

Fuse/Relay
LocationFuse Amp
RatingPassenger Compartment Fuse
Panel Description
METER 10A Backup Lamps, Engine Coolant
Level Switch, Instrument Cluster,
Rear Window Defrost, Shift Lock,
Warning Chime, Turn Signal
Switch
WIPER 20A Wiper/Washer, Blower Motor Relay
STOP 20A Stop Lamps, Brake Pressure
Switch
TAIL 15A Exterior Lamps, Instrument
Illumination
SUN ROOF 15A Power Moonroof
ASC 10A Speed Control
P. WINDOW 30A CB Power Windows
CIGAR 20A Cigar Lighter
AIR BAG 10A Air Bags
FOG 10A Fog Lamps, Daytime Running
Lamps (DRL)
AUDIO 15A Premium Sound Amplifier, CD
Changer
FUEL INJ. 10A H02S, Evaporative Emission
Purge Flow Sensor
BLOWER 30A CB Blower Motor Relay
Roadside Emergencies
123
Page 138 of 216
FORD EXTENDED SERVICE PLAN
You can get more protection for your new car or light truck by
purchasing Ford Extended Service Plan (Ford ESP) coverage. Ford ESP
is an optional service contract which is backed by Ford Motor Company
or Ford Motor Service Company (in the U.S.) and Ford of Canada (in
Canada). It provides the following:
²Benefits during the warranty period depending on the plan you
purchase (such as: reimbursement for rentals; coverage for certain
maintenance and wear items).
²Protection against covered repair costs after your Bumper-to-Bumper
Warranty expires.
You may purchase Ford ESP from any participating Ford and Lincoln
Mercury and Ford of Canada dealer. There are several plans available in
various time, distance and deductible combinations which can be tailored
to fit your own driving needs. Ford ESP also offers reimbursement
benefits for towing and rental coverage.
When you buy Ford ESP, you receive Peace-of-Mind protection
throughout the United States and Canada, provided by a network of
more than 5,000 participating Ford or Lincoln Mercury and Ford of
Canada dealers.
If you did not take advantage of the Ford Extended Service Plan at the
time of purchasing your vehicle, you may still be eligible. Please contact
your dealer for further information. Since this information is subject to
change, please ask your dealer for complete details about Ford Extended
Service Plan coverage options, or visit the Ford ESP website at
www.ford-esp.com.
GETTING THE SERVICES YOU NEED
At home
Ford Motor Company and Ford of Canada have authorized dealerships to
service your vehicle. It is preferred that you return to the Ford dealer
where your vehicle was purchased when warranty repairs are needed.
However, you may also take your vehicle to another Ford Motor
Company or Ford of Canada dealership authorized for warranty repairs.
Certain warranty repairs require special training though, so not all
dealers are authorized to perform all warranty repairs. That means that
depending on the warranty repair needed, the vehicle may need to be
Customer Assistance
138
Page 181 of 216
²Use the same side of the same pump and have the vehicle facing the
same direction each time you fill up.
²Have the vehicle loading and distribution the same every time.
Your results will be most accurate if your filling method is consistent.
Calculating fuel economy
1. Fill the fuel tank completely and record the initial odometer reading
(in kilometers or miles).
2. Each time you fill the tank, record the amount of fuel added (in liters
or gallons).
3. After at least three to five tank fill-ups, fill the fuel tank and record
the current odometer reading.
4. Subtract your initial odometer reading from the current odometer
reading.
5. Follow one of the simple calculations in order to determine fuel
economy:
Multiply liters used by 100, then divide by total kilometers
traveled.
Divide total miles traveled by total gallons used.
Keep a record for at least one month and record the type of driving (city
or highway). This will provide an accurate estimate of the vehicle's fuel
economy under current driving conditions. Additionally, keeping records
during summer and winter will show how temperature impacts fuel
economy. In general, lower temperatures give lower fuel economy.
Driving style Ð good driving and fuel economy habits
Give consideration to the lists that follow and you may be able to change
a number of variables and improve your fuel economy.
Habits
²Smooth, moderate operation can yield up to 10% savings in fuel.
²Steady speeds without stopping will usually give the best fuel
economy.
²Idling for long periods of time (greater than one minute) may waste
fuel.
²Anticipate stopping; slowing down may eliminate the need to stop.
²Sudden or hard accelerations may reduce fuel economy.
Maintenance and Specifications
181
Page 187 of 216
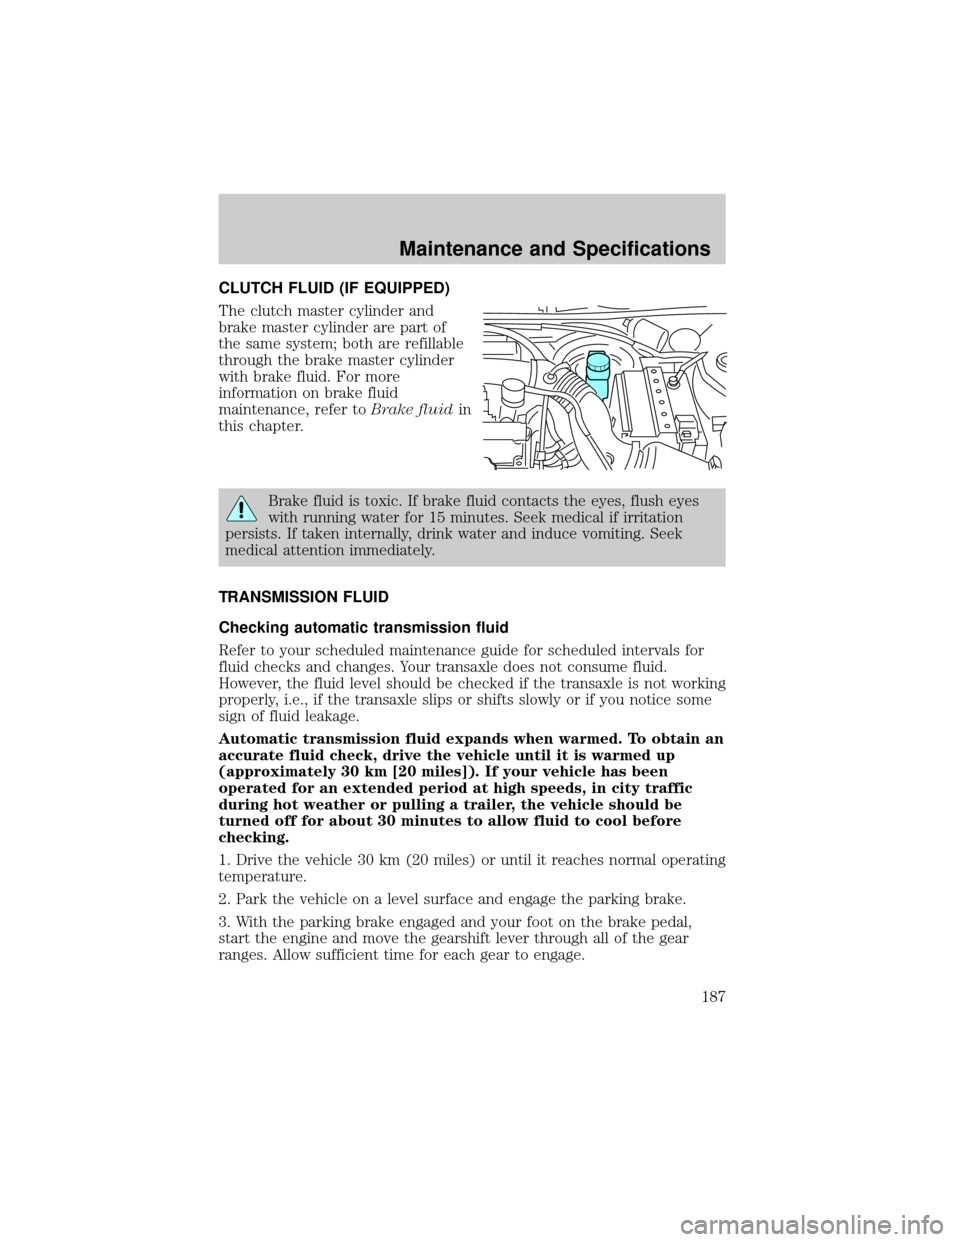
CLUTCH FLUID (IF EQUIPPED)
The clutch master cylinder and
brake master cylinder are part of
the same system; both are refillable
through the brake master cylinder
with brake fluid. For more
information on brake fluid
maintenance, refer toBrake fluidin
this chapter.
Brake fluid is toxic. If brake fluid contacts the eyes, flush eyes
with running water for 15 minutes. Seek medical if irritation
persists. If taken internally, drink water and induce vomiting. Seek
medical attention immediately.
TRANSMISSION FLUID
Checking automatic transmission fluid
Refer to your scheduled maintenance guide for scheduled intervals for
fluid checks and changes. Your transaxle does not consume fluid.
However, the fluid level should be checked if the transaxle is not working
properly, i.e., if the transaxle slips or shifts slowly or if you notice some
sign of fluid leakage.
Automatic transmission fluid expands when warmed. To obtain an
accurate fluid check, drive the vehicle until it is warmed up
(approximately 30 km [20 miles]). If your vehicle has been
operated for an extended period at high speeds, in city traffic
during hot weather or pulling a trailer, the vehicle should be
turned off for about 30 minutes to allow fluid to cool before
checking.
1. Drive the vehicle 30 km (20 miles) or until it reaches normal operating
temperature.
2. Park the vehicle on a level surface and engage the parking brake.
3. With the parking brake engaged and your foot on the brake pedal,
start the engine and move the gearshift lever through all of the gear
ranges. Allow sufficient time for each gear to engage.
Maintenance and Specifications
187
Page 208 of 216

J
Jack ............................................128
positioning ...............................128
storage .....................................128
Jump-starting your vehicle ......132
K
Keys
key in ignition chime ...............14
positions of the ignition ...........97
L
Lamps
bulb replacement
specifications chart ..................48
cargo lamps ...............................43
daytime running light ...............42
fog lamps ...................................42
headlamps ...........................42, 49
headlamps, flash to pass ..........43
instrument panel, dimming .....43
interior lamps .....................46±49
replacing bulbs .............47, 50±52
Lane change indicator
(see Turn signal) ........................46
Lights, warning and indicator ....10
air bag ........................................12
anti-lock brakes (ABS) ....12, 103
anti-theft ...................................14
brake ..........................................12
charging system ........................12
fuel cap light .............................13
high beam .................................14
low fuel ......................................13
oil pressure ...............................13
safety belt .................................12
service engine soon ..................11
turn signal indicator .................13
Load limits .................................113GAWR ......................................113
GVWR ......................................113
trailer towing ..........................113
Locks
childproof ..................................63
Lubricant specifications ...196, 198
M
Manual transaxle
fluid capacities ........................195
lubricant specifications ..........198
reverse .....................................112
Mirrors
side view mirrors (power) .......56
Moon roof ....................................61
Motorcraft parts ................179, 195
O
Octane rating ............................178
Odometer .....................................17
Oil (see Engine oil) ..................164
P
Panic alarm feature, remote
entry system ................................67
Parking brake ............................104
Parts (see Motorcraft parts) ....195
Power distribution box
(see Fuses) ...............................125
Power door locks ........................63
Power steering ..........................104
fluid, checking and adding ....185
fluid, refill capacity ................195
fluid,
specifications ..................196, 198
Index
208