Page 2 of 216
Seating and Safety Restraints 72
Seating 72
Safety restraints 75
Air bags 85
Child restraints 89
Driving 97
Starting 97
Brakes 102
Transmission operation 105
Vehicle loading 113
Trailer towing 115
Roadside Emergencies 118
Hazard flasher switch 119
Fuses and relays 121
Changing tires 128
Jump starting 132
Wrecker towing 137
Customer Assistance 138
The dispute settlement board 141
Utilizing the mediation/arbitration 144
Getting assistance outside the U.S. and Canada 144
Ordering additional owner's literature 145
Reporting safety defects (U.S. only) 147
Cleaning 148
Cleaning your vehicle 148
Underbody preservation 154
Table of Contents
2
Page 8 of 216
These are some of the symbols you may see on your vehicle.
Vehicle Symbol Glossary
Safety Alert
See Owner's Guide
Fasten Safety BeltAir Bag-Front
Air Bag-SideChild Seat
Child Seat Installation
WarningChild Seat Tether
Anchorage
Brake SystemAnti-Lock Brake System
Brake Fluid -
Non-Petroleum BasedTraction Control
Master Lighting SwitchHazard Warning Flasher
Fog Lamps-FrontFuse Compartment
Fuel Pump ResetWindshield Wash/Wipe
Windshield
Defrost/DemistRear Window
Defrost/Demist
Power Windows
Front/RearPower Window Lockout
Introduction
8
Page 10 of 216
WARNING LIGHTS AND CHIMES
Warning lights and gauges can alert you to a vehicle condition that may
become serious enough to cause expensive repairs. A warning light may
illuminate when a problem exists with one of your vehicle's functions.
Many lights will illuminate when you start your vehicle to make sure the
bulb works.If any light remains on after starting the vehicle, have
the respective system inspected immediately.
Base instrument cluster
ZX2 coupe instrument cluster
!
THEFT
LOW
FUEL
SERVICE
ENGINE
SOON CHECK
FUEL
CAP
PBRAKEABS+ –MPH
205060 70FUEL
FILLEF
CH1
2 /RPMx1000
1234
5
6
7
8
304080
90
100
110
120
10
20 406080100120
140
160
180km/h
0
000000
00 0
Instrument Cluster
10
Page 12 of 216

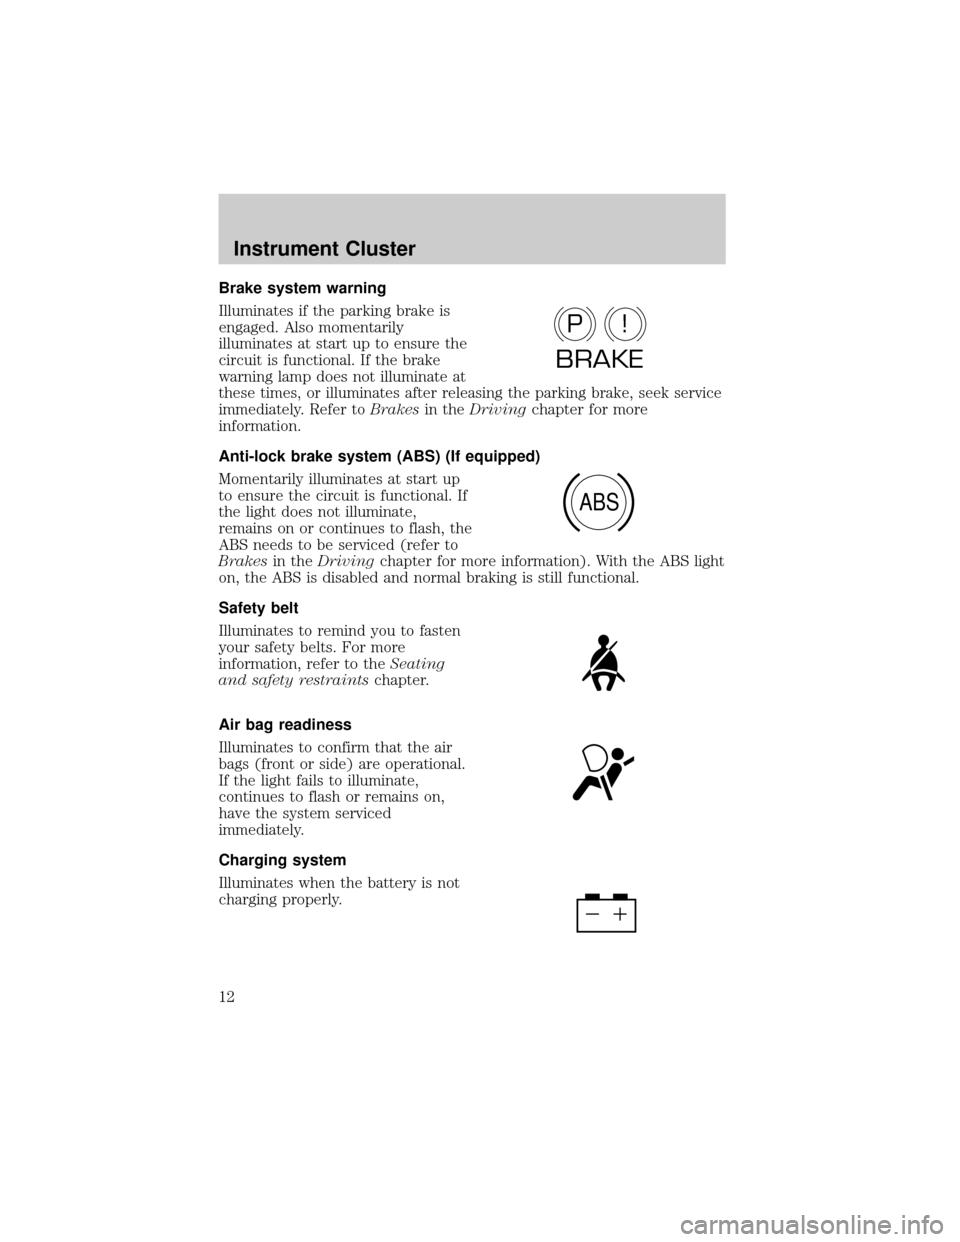
Brake system warning
Illuminates if the parking brake is
engaged. Also momentarily
illuminates at start up to ensure the
circuit is functional. If the brake
warning lamp does not illuminate at
these times, or illuminates after releasing the parking brake, seek service
immediately. Refer toBrakesin theDrivingchapter for more
information.
Anti-lock brake system (ABS) (If equipped)
Momentarily illuminates at start up
to ensure the circuit is functional. If
the light does not illuminate,
remains on or continues to flash, the
ABS needs to be serviced (refer to
Brakesin theDrivingchapter for more information). With the ABS light
on, the ABS is disabled and normal braking is still functional.
Safety belt
Illuminates to remind you to fasten
your safety belts. For more
information, refer to theSeating
and safety restraintschapter.
Air bag readiness
Illuminates to confirm that the air
bags (front or side) are operational.
If the light fails to illuminate,
continues to flash or remains on,
have the system serviced
immediately.
Charging system
Illuminates when the battery is not
charging properly.
P!
BRAKE
ABS
Instrument Cluster
12
Page 15 of 216
GAUGES
Base instrument cluster gauges
ZX2 coupe instrument cluster gauges
!THEFT SERVICE
ENGINE
SOONCHECK
FUEL
CAPPBRAKEABS+ –MPH
205060
70FUEL FILL
EF
CH1
2 /304080
90
100
110
120 10
20406080100
120
140
160
180200km/h
0
000000
00 0 LOW
FUEL
THEFT
LOW
FUEL
SERVICE
ENGINE
SOON CHECK
FUEL
CAP
ABS+ –MPH
205060 70FUEL
FILLEF
CH1
2 /RPMx1000
1234
5
6
7
8
304080
90
100
110
120
10
20 406080100120
140
160
180km/h
0
000000
000! PBRAKE
Instrument Cluster
15
Page 47 of 216
Map lamps (if equipped)
The map lamps and controls are located on the dome lamp. Press the
controls on either side of the dome lamp to activate the map lamps.
If equipped with a moon roof, the
map lamps are located on the moon
roof control panel. Press the control
next to the map lamp to illuminate
the lamp.
BULBS
Replacing exterior bulbs
It is a good idea to check the operation of the following lights frequently:
²Headlamps
²Turn signals
²Foglamps (if equipped)
²High-mount brakelamp
²Tail lamps
²Brakelamps
²Backup lamps
²License plate lamp
²Hazard flashers
Do not remove lamp bulbs unless they will be replaced immediately. If a
bulb is removed for an extended period of time, contaminants may enter
the lamp housings and affect performance.
OPEN
Lights
47
Page 48 of 216

Using the right bulbs
Replacement bulbs are specified in the chart below. Headlamp bulbs
must be marked with an authorized ªD.O.T.º for North America and an
ªEº for Europe to assure lamp performance, light brightness and pattern
and safe visibility. The correct bulbs will not damage the lamp assembly
or void the lamp assembly warranty and will provide quality bulb burn
time.
Function Trade Number
Front park/turn lamps 3457 AK (amber)
Foglamps (if equipped) 881
Headlamps-aero high and low beam 9007
Rear license plate lamps 168
High-mount brake lamp 921
Backup lamps 3156K
Brake lamps 3157K
Interior overhead lamp 12V/10W
All replacement bulbs are clear in color except where noted.
To replace all instrument panel lights - see your dealer
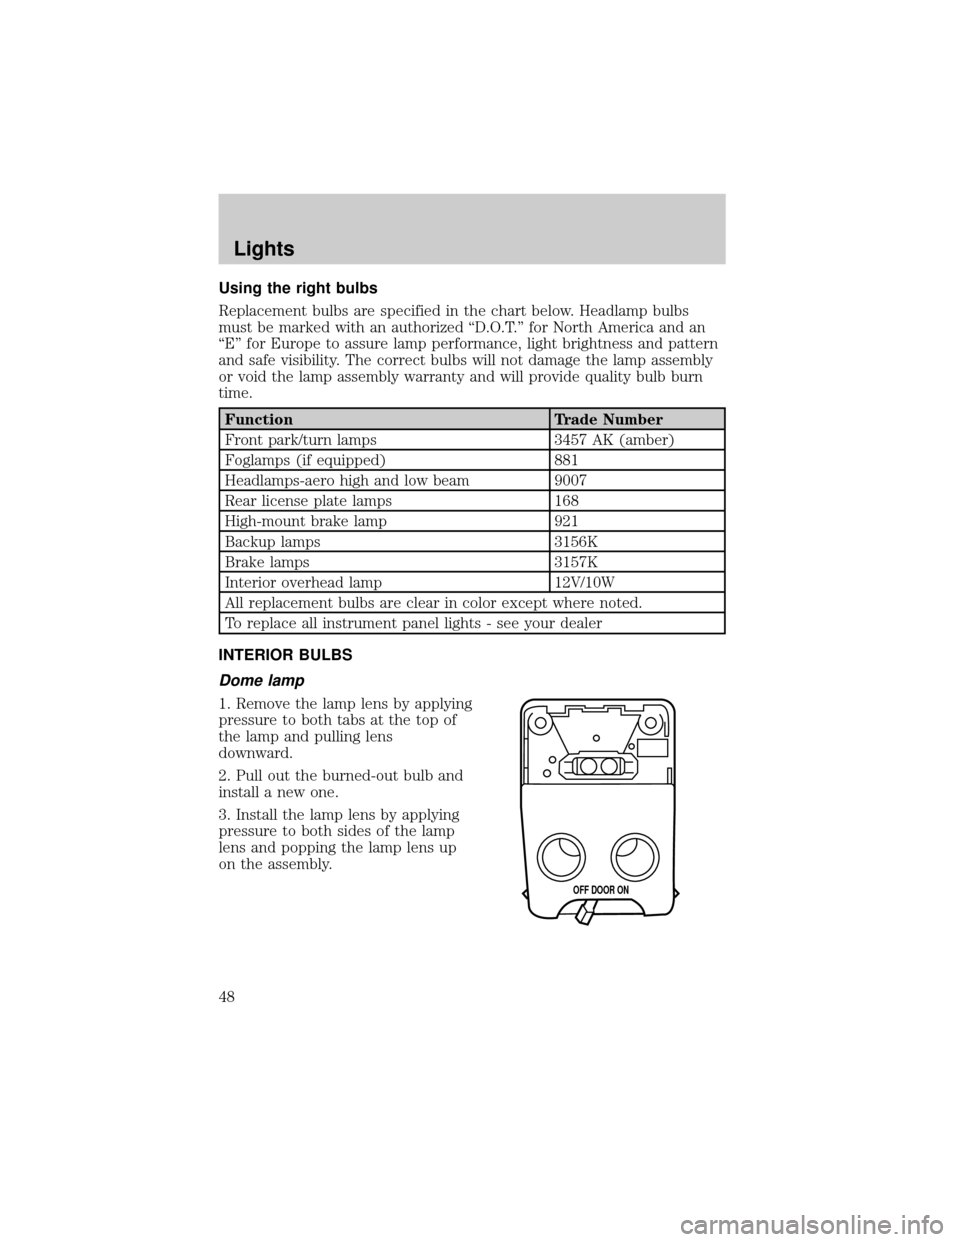
INTERIOR BULBS
Dome lamp
1. Remove the lamp lens by applying
pressure to both tabs at the top of
the lamp and pulling lens
downward.
2. Pull out the burned-out bulb and
install a new one.
3. Install the lamp lens by applying
pressure to both sides of the lamp
lens and popping the lamp lens up
on the assembly.
OFF DOOR ON
Lights
48
Page 51 of 216

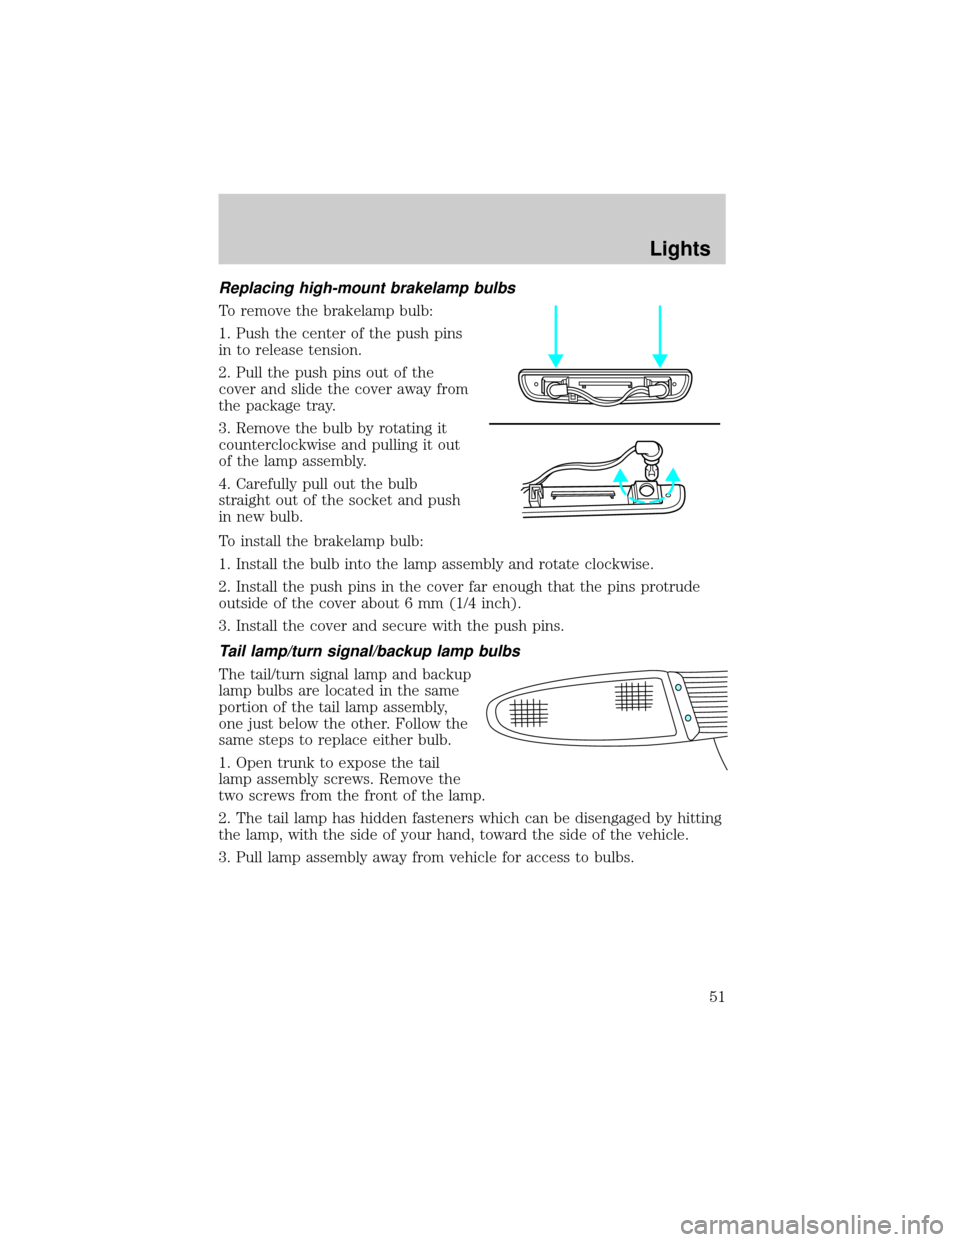
Replacing high-mount brakelamp bulbs
To remove the brakelamp bulb:
1. Push the center of the push pins
in to release tension.
2. Pull the push pins out of the
cover and slide the cover away from
the package tray.
3. Remove the bulb by rotating it
counterclockwise and pulling it out
of the lamp assembly.
4. Carefully pull out the bulb
straight out of the socket and push
in new bulb.
To install the brakelamp bulb:
1. Install the bulb into the lamp assembly and rotate clockwise.
2. Install the push pins in the cover far enough that the pins protrude
outside of the cover about 6 mm (1/4 inch).
3. Install the cover and secure with the push pins.
Tail lamp/turn signal/backup lamp bulbs
The tail/turn signal lamp and backup
lamp bulbs are located in the same
portion of the tail lamp assembly,
one just below the other. Follow the
same steps to replace either bulb.
1. Open trunk to expose the tail
lamp assembly screws. Remove the
two screws from the front of the lamp.
2. The tail lamp has hidden fasteners which can be disengaged by hitting
the lamp, with the side of your hand, toward the side of the vehicle.
3. Pull lamp assembly away from vehicle for access to bulbs.
Lights
51