Page 46 of 256
With RDS activated, press the
MENU control until SHOW is
displayed.
Use the SEL control to select TYPE
(displays the RDS program type:
rock, jazz, etc), NAME (displays the name of the radio station) or NONE
(deactivates the RDS display).
Mute mode
Press the control to mute the
playing media. Press the control
again to return to the playing media.
REAR SEAT ENTERTAINMENT SYSTEM (IF EQUIPPED)
Quick Start — How to get going
To operate the system:
1. Your AutoVision�system is automatically activated when the vehicle
ignition and the audio system are ON.
2. If a movie is desired, insert a VHS cassette into the VCP and the video
should start playing.
3. Press the MEDIA control to toggle to any other desired media source.
SEL+MENU
Entertainment Systems
46
ProCarManuals.com
Page 55 of 256
If you will not be using the remote control for a considerably long time,
remove the batteries.
AutoVision�controls
The AutoVision�controls allow the rear seat passengers to operate the
radio, tape, CD or CD DJ(if equipped).
Parental control
Your AutoVision�system allows you to have control over the rear seat
controls. The system is automatically activated when the ignition is ON.
This enables rear seat passengers to play a videocassette or listen to any
of the available media sources. Once the headphone mode is activated,
the
symbol will appear in the radio display.
Press the memory preset controls 3
and 5 simultaneously on the front
audio controls to disable the
AutoVision�controls. They will
remain disabled until the front seat
passengers“enable”them again by
simultaneously pressing the 3 and 5 preset controls. The settings of the
front seat controls will always override those of the rear seat controls.
123456
Entertainment Systems
55
ProCarManuals.com
Page 59 of 256
Flip-down screens
The screens rotate down to view and up into the housing to store when
not in use. Ensure that the screens are latched into the housing when
being stored.
1. 6.4”(diagonal) color liquid crystal display (LCD) screen.
2. Screen housing.
3. Dimmer switch. Rotate to increase/decrease the brightness of the
screen.
General operation
•When the engine is not running, use the system sparingly otherwise it
will run the battery down.
•Do not leave the videocassette in the VCP overnight or for long
periods of time.
•When the ignition is turned ON, audio is through the headphones as
LOW volume. Press the (+) control to increase volume. To listen
through the vehicle’s speaker system, press the speaker button (
)
on the media control panel.
13
2
Entertainment Systems
59
ProCarManuals.com
Page 63 of 256

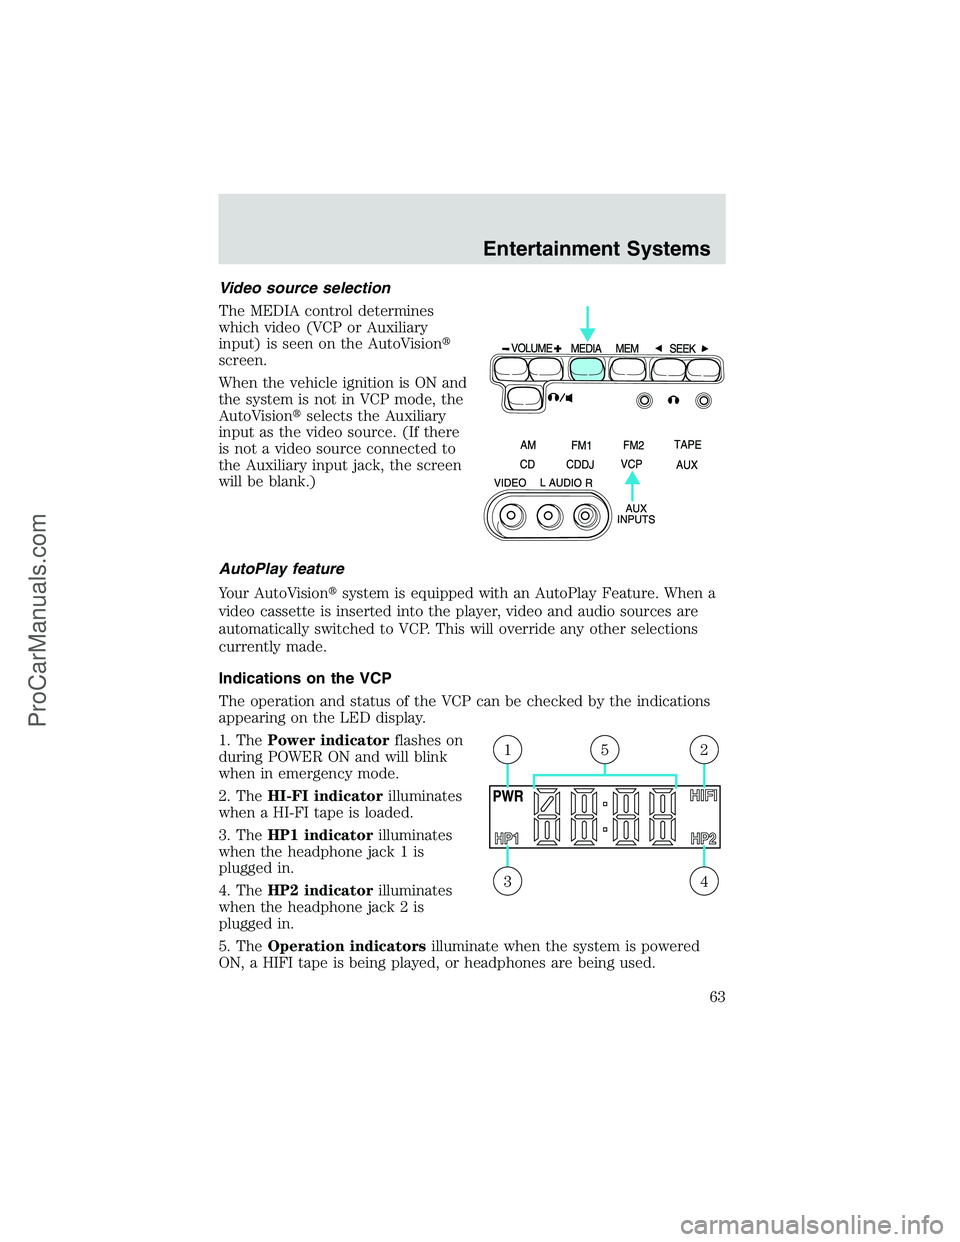
Video source selection
The MEDIA control determines
which video (VCP or Auxiliary
input) is seen on the AutoVision�
screen.
When the vehicle ignition is ON and
the system is not in VCP mode, the
AutoVision�selects the Auxiliary
input as the video source. (If there
is not a video source connected to
the Auxiliary input jack, the screen
will be blank.)
AutoPlay feature
Your AutoVision�system is equipped with an AutoPlay Feature. When a
video cassette is inserted into the player, video and audio sources are
automatically switched to VCP. This will override any other selections
currently made.
Indications on the VCP
The operation and status of the VCP can be checked by the indications
appearing on the LED display.
1. ThePower indicatorflashes on
during POWER ON and will blink
when in emergency mode.
2. TheHI-FI indicatorilluminates
when a HI-FI tape is loaded.
3. TheHP1 indicatorilluminates
when the headphone jack 1 is
plugged in.
4. TheHP2 indicatorilluminates
when the headphone jack 2 is
plugged in.
5. TheOperation indicatorsilluminate when the system is powered
ON, a HIFI tape is being played, or headphones are being used.
43
215
Entertainment Systems
63
ProCarManuals.com
Page 76 of 256
HEADLAMP CONTROL
•Pull the headlamp control toward
you to the first position to turn
on the parking lamps, tail lamps,
license plate lamps and marker
lamps.
•Pull the headlamp control toward
you to the outer position to turn
on the headlamps (in addition to
the previous lamps).
Daytime running lamps (DRL) (if equipped)
Turns the headlamps on with a reduced output.
To activate:
•the ignition must be in the ON position and
•the headlamp control is in the OFF, parking lamp or autolamp
position.
Always remember to turn on your headlamps at dusk or during
inclement weather. The Daytime Running Lamp (DRL) system
does not activate with your tail lamps and generally may not provide
adequate lighting during these conditions. Failure to activate your
headlamps under these conditions may result in a collision.
High beams
Push the lever toward the
instrument panel to activate. Pull
the lever towards you to deactivate.
Lights
76
ProCarManuals.com
Page 87 of 256
POWER SIDE VIEW MIRRORS (IF EQUIPPED)
The ignition may be in any position to adjust the power side view
mirrors.
To adjust your mirrors:
1. Select
to adjust the left
mirror or
to adjust the right
mirror.
2. Move the control in the direction
you wish to tilt the mirror.
3. Return to the center position to lock mirrors in place.
Driver Controls
87
ProCarManuals.com
Page 89 of 256

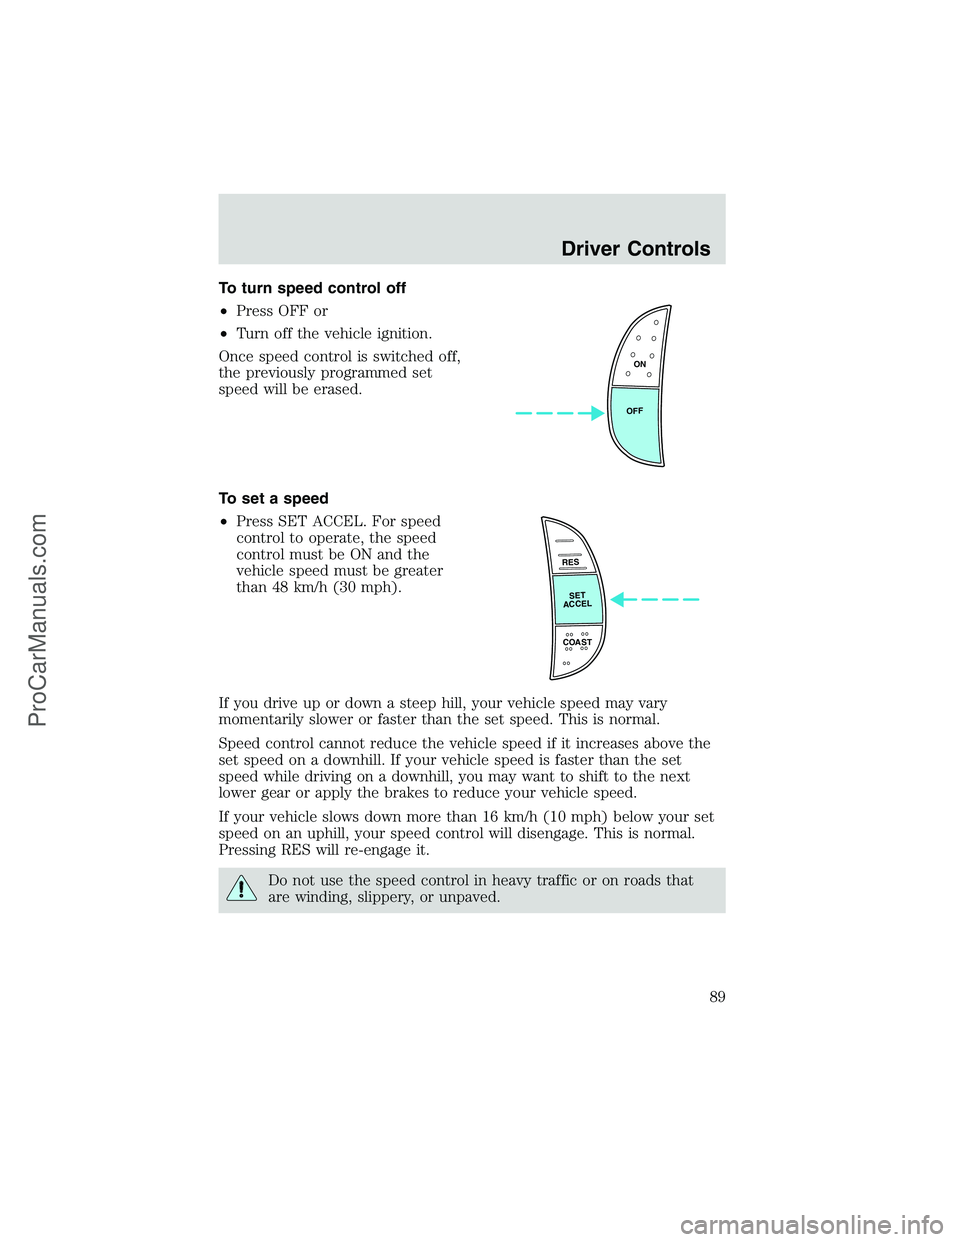
To turn speed control off
•Press OFF or
•Turn off the vehicle ignition.
Once speed control is switched off,
the previously programmed set
speed will be erased.
To set a speed
•Press SET ACCEL. For speed
control to operate, the speed
control must be ON and the
vehicle speed must be greater
than 48 km/h (30 mph).
If you drive up or down a steep hill, your vehicle speed may vary
momentarily slower or faster than the set speed. This is normal.
Speed control cannot reduce the vehicle speed if it increases above the
set speed on a downhill. If your vehicle speed is faster than the set
speed while driving on a downhill, you may want to shift to the next
lower gear or apply the brakes to reduce your vehicle speed.
If your vehicle slows down more than 16 km/h (10 mph) below your set
speed on an uphill, your speed control will disengage. This is normal.
Pressing RES will re-engage it.
Do not use the speed control in heavy traffic or on roads that
are winding, slippery, or unpaved.
ON
OFF
RES
SET
ACCEL
COAST
Driver Controls
89
ProCarManuals.com
Page 92 of 256

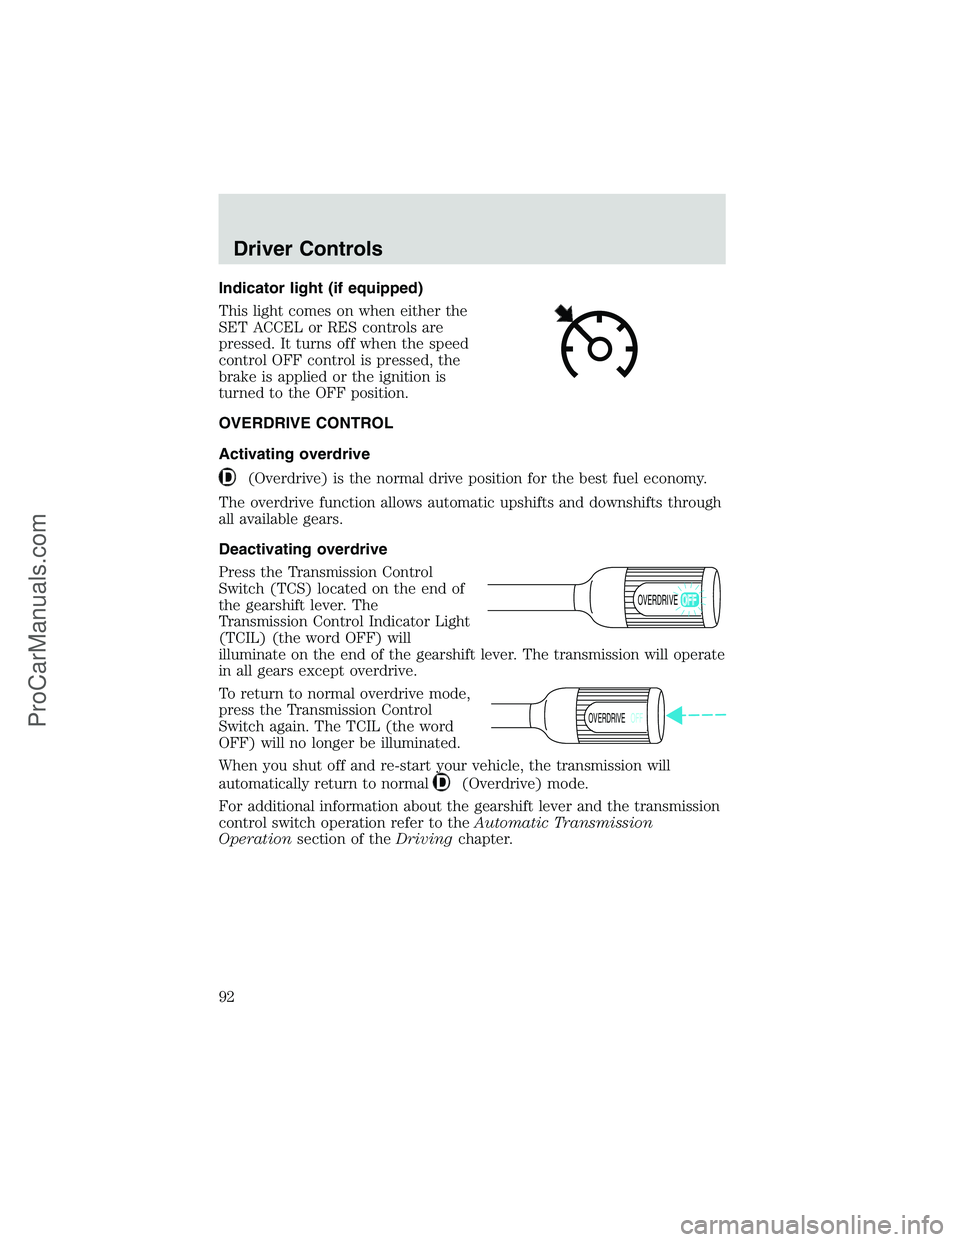
Indicator light (if equipped)
This light comes on when either the
SET ACCEL or RES controls are
pressed. It turns off when the speed
control OFF control is pressed, the
brake is applied or the ignition is
turned to the OFF position.
OVERDRIVE CONTROL
Activating overdrive
(Overdrive) is the normal drive position for the best fuel economy.
The overdrive function allows automatic upshifts and downshifts through
all available gears.
Deactivating overdrive
Press the Transmission Control
Switch (TCS) located on the end of
the gearshift lever. The
Transmission Control Indicator Light
(TCIL) (the word OFF) will
illuminate on the end of the gearshift lever. The transmission will operate
in all gears except overdrive.
To return to normal overdrive mode,
press the Transmission Control
Switch again. The TCIL (the word
OFF) will no longer be illuminated.
When you shut off and re-start your vehicle, the transmission will
automatically return to normal
(Overdrive) mode.
For additional information about the gearshift lever and the transmission
control switch operation refer to theAutomatic Transmission
Operationsection of theDrivingchapter.
OVERDRIVE
OVERDRIVEOFF
Driver Controls
92
ProCarManuals.com