Page 57 of 240
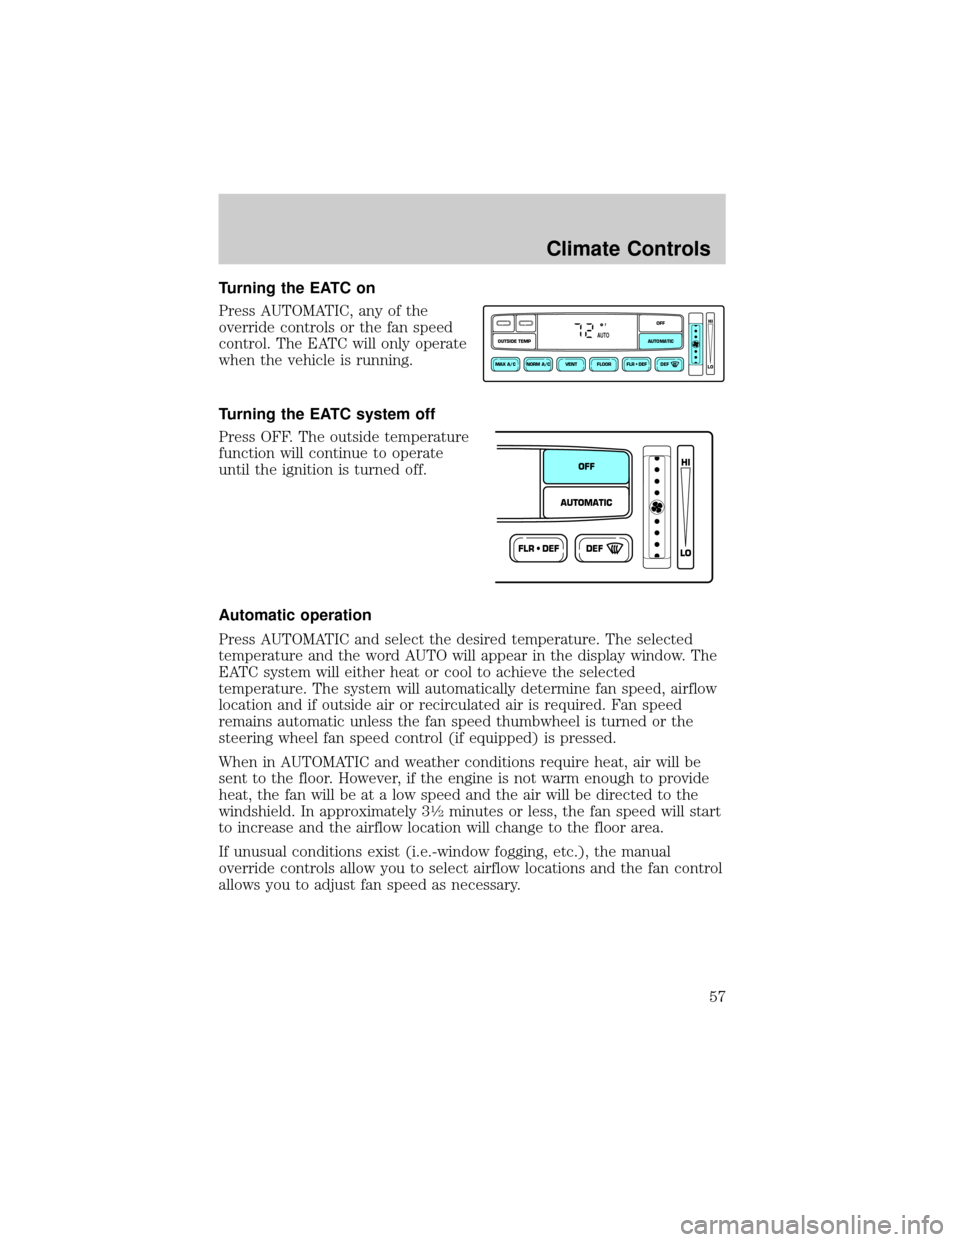
Turning the EATC on
Press AUTOMATIC, any of the
override controls or the fan speed
control. The EATC will only operate
when the vehicle is running.
Turning the EATC system off
Press OFF. The outside temperature
function will continue to operate
until the ignition is turned off.
Automatic operation
Press AUTOMATIC and select the desired temperature. The selected
temperature and the word AUTO will appear in the display window. The
EATC system will either heat or cool to achieve the selected
temperature. The system will automatically determine fan speed, airflow
location and if outside air or recirculated air is required. Fan speed
remains automatic unless the fan speed thumbwheel is turned or the
steering wheel fan speed control (if equipped) is pressed.
When in AUTOMATIC and weather conditions require heat, air will be
sent to the floor. However, if the engine is not warm enough to provide
heat, the fan will be at a low speed and the air will be directed to the
windshield. In approximately 3
1¤2minutes or less, the fan speed will start
to increase and the airflow location will change to the floor area.
If unusual conditions exist (i.e.-window fogging, etc.), the manual
override controls allow you to select airflow locations and the fan control
allows you to adjust fan speed as necessary.
NORM A/CVENT FLOOR FLR • DEF DEF
HI
LO
MAX A/C
OUTSIDE TEMP AUTOMATICOFF
FAUTO
FLR • DEFDEF
HI
LO
AUTOMATICOFF
Climate Controls
57
Page 62 of 240
²Remove any snow, ice or leaves from the air intake area at the area at
the base of the windshield.
²Do not place objects over the defroster outlets. These objects can
block airflow and reduce your ability to see through your windshield.
Avoid placing small objects on top of the instrument panel. These
objects may fall down into the defroster outlets and block airflow, in
addition to damaging the climate control system.
To aid in side window defogging/demisting in cold weather conditions:
1. Select VENT
2. Set the temperature control to full heat
3. Set the fan speed to HI
4. Direct the outer panel vents towards to side windows
To increase airflow to the outer panel vents, close the central panel
vents.
Do not place objects on top of the instrument panel, as these
objects may become projectiles in a collision or sudden stop.
REAR WINDOW DEFROSTER
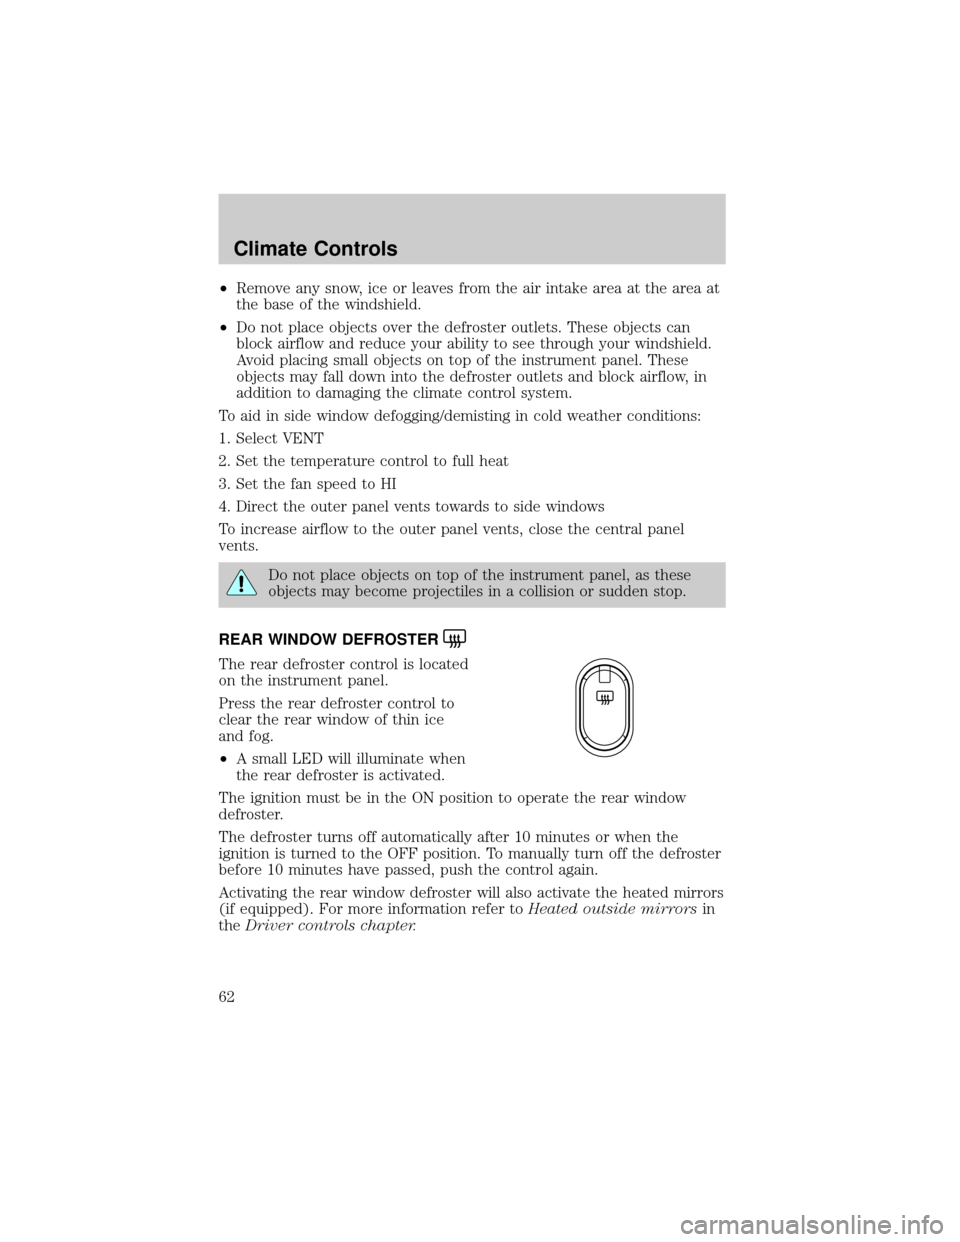
The rear defroster control is located
on the instrument panel.
Press the rear defroster control to
clear the rear window of thin ice
and fog.
²A small LED will illuminate when
the rear defroster is activated.
The ignition must be in the ON position to operate the rear window
defroster.
The defroster turns off automatically after 10 minutes or when the
ignition is turned to the OFF position. To manually turn off the defroster
before 10 minutes have passed, push the control again.
Activating the rear window defroster will also activate the heated mirrors
(if equipped). For more information refer toHeated outside mirrorsin
theDriver controls chapter.
Climate Controls
62
Page 63 of 240
HEADLAMP CONTROL
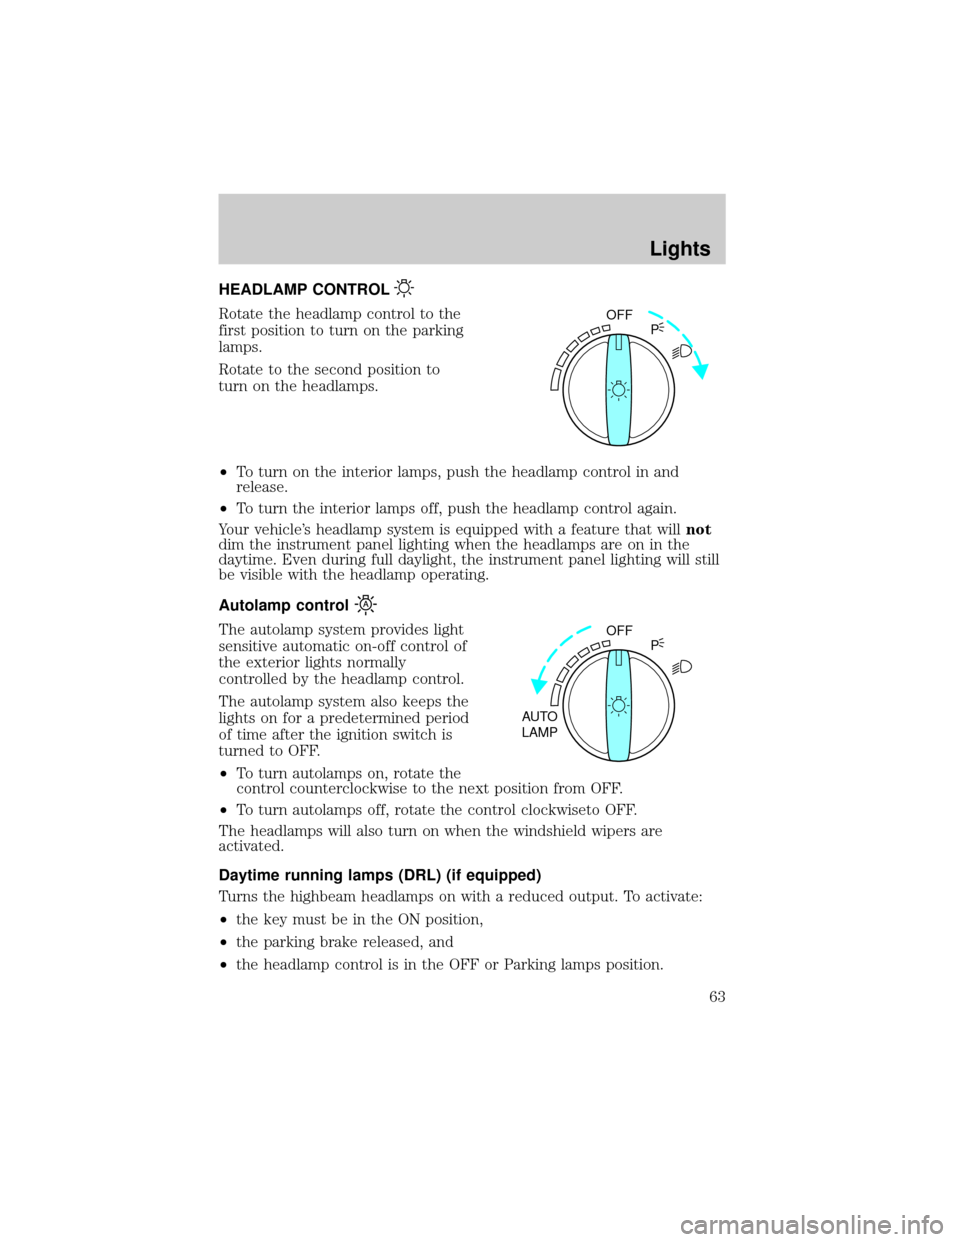
Rotate the headlamp control to the
first position to turn on the parking
lamps.
Rotate to the second position to
turn on the headlamps.
²To turn on the interior lamps, push the headlamp control in and
release.
²To turn the interior lamps off, push the headlamp control again.
Your vehicle's headlamp system is equipped with a feature that willnot
dim the instrument panel lighting when the headlamps are on in the
daytime. Even during full daylight, the instrument panel lighting will still
be visible with the headlamp operating.
Autolamp control
The autolamp system provides light
sensitive automatic on-off control of
the exterior lights normally
controlled by the headlamp control.
The autolamp system also keeps the
lights on for a predetermined period
of time after the ignition switch is
turned to OFF.
²To turn autolamps on, rotate the
control counterclockwise to the next position from OFF.
²To turn autolamps off, rotate the control clockwiseto OFF.
The headlamps will also turn on when the windshield wipers are
activated.
Daytime running lamps (DRL) (if equipped)
Turns the highbeam headlamps on with a reduced output. To activate:
²the key must be in the ON position,
²the parking brake released, and
²the headlamp control is in the OFF or Parking lamps position.
OFF
P
OFF
AUTO
LAMPP
Lights
63
Page 72 of 240
WINDSHIELD WIPER/WASHER CONTROLS
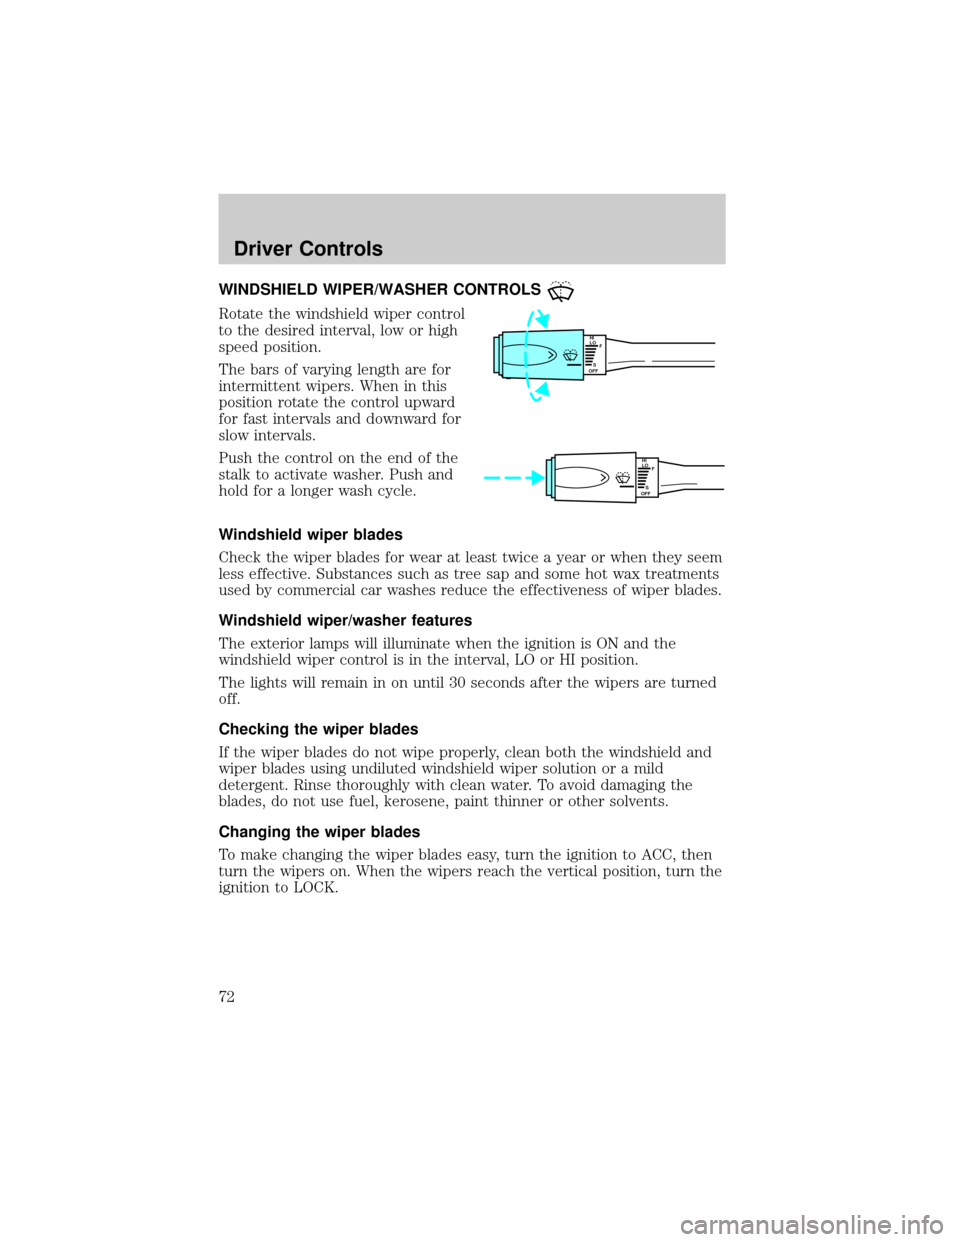
Rotate the windshield wiper control
to the desired interval, low or high
speed position.
The bars of varying length are for
intermittent wipers. When in this
position rotate the control upward
for fast intervals and downward for
slow intervals.
Push the control on the end of the
stalk to activate washer. Push and
hold for a longer wash cycle.
Windshield wiper blades
Check the wiper blades for wear at least twice a year or when they seem
less effective. Substances such as tree sap and some hot wax treatments
used by commercial car washes reduce the effectiveness of wiper blades.
Windshield wiper/washer features
The exterior lamps will illuminate when the ignition is ON and the
windshield wiper control is in the interval, LO or HI position.
The lights will remain in on until 30 seconds after the wipers are turned
off.
Checking the wiper blades
If the wiper blades do not wipe properly, clean both the windshield and
wiper blades using undiluted windshield wiper solution or a mild
detergent. Rinse thoroughly with clean water. To avoid damaging the
blades, do not use fuel, kerosene, paint thinner or other solvents.
Changing the wiper blades
To make changing the wiper blades easy, turn the ignition to ACC, then
turn the wipers on. When the wipers reach the vertical position, turn the
ignition to LOCK.
HI
LO
F
S
OFF
HI
LO
F
S
OFF
Driver Controls
72
Page 77 of 240
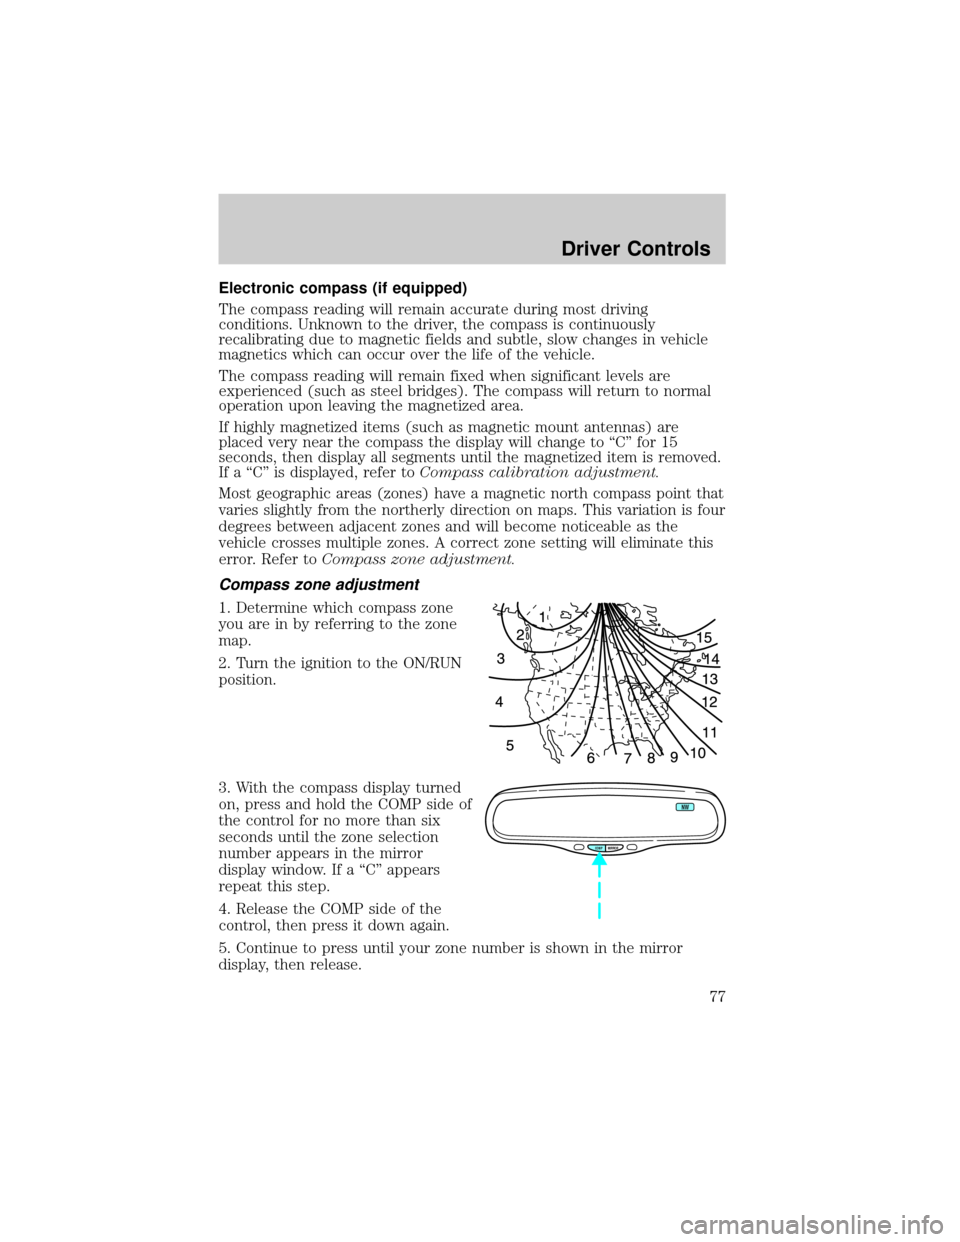
Electronic compass (if equipped)
The compass reading will remain accurate during most driving
conditions. Unknown to the driver, the compass is continuously
recalibrating due to magnetic fields and subtle, slow changes in vehicle
magnetics which can occur over the life of the vehicle.
The compass reading will remain fixed when significant levels are
experienced (such as steel bridges). The compass will return to normal
operation upon leaving the magnetized area.
If highly magnetized items (such as magnetic mount antennas) are
placed very near the compass the display will change to ªCº for 15
seconds, then display all segments until the magnetized item is removed.
If a ªCº is displayed, refer toCompass calibration adjustment.
Most geographic areas (zones) have a magnetic north compass point that
varies slightly from the northerly direction on maps. This variation is four
degrees between adjacent zones and will become noticeable as the
vehicle crosses multiple zones. A correct zone setting will eliminate this
error. Refer toCompass zone adjustment.
Compass zone adjustment
1. Determine which compass zone
you are in by referring to the zone
map.
2. Turn the ignition to the ON/RUN
position.
3. With the compass display turned
on, press and hold the COMP side of
the control for no more than six
seconds until the zone selection
number appears in the mirror
display window. If a ªCº appears
repeat this step.
4. Release the COMP side of the
control, then press it down again.
5. Continue to press until your zone number is shown in the mirror
display, then release.
COMP MIRROR
NW
Driver Controls
77
Page 79 of 240
SPEED CONTROL (IF EQUIPPED)
To turn speed control on
²Press ON.
Vehicle speed cannot be controlled
until the vehicle is traveling at or
above 48 km/h (30 mph).
Do not shift the gearshift lever
into N (Neutral) with the speed
control on.
Do not use the speed
control in heavy traffic or
on roads that are winding,
slippery, or unpaved.
To turn speed control off
²Press OFF or
²Turn off the vehicle ignition.
Once speed control is switched off,
the previously programmed set
speed will be erased.
To set a speed
²Press SET ACCEL. For speed
control to operate, the speed
control must be ON and the
vehicle speed must be greater
than 48 km/h (30 mph).
Driver Controls
79
Page 82 of 240
Pressing OFF will erase the
previously programmed set speed.
To return to a previously set speed
²Press RES. For RESUME to
operate, the vehicle speed must
be faster than 48 km/h (30 mph).
Indicator light (if equipped)
This light comes on when either the
SET ACCEL or RES controls are
pressed. It turns off when the speed
control OFF control is pressed, the brake is applied or the ignition is
turned to the OFF position.
SPEED CONTROL
Driver Controls
82
Page 83 of 240
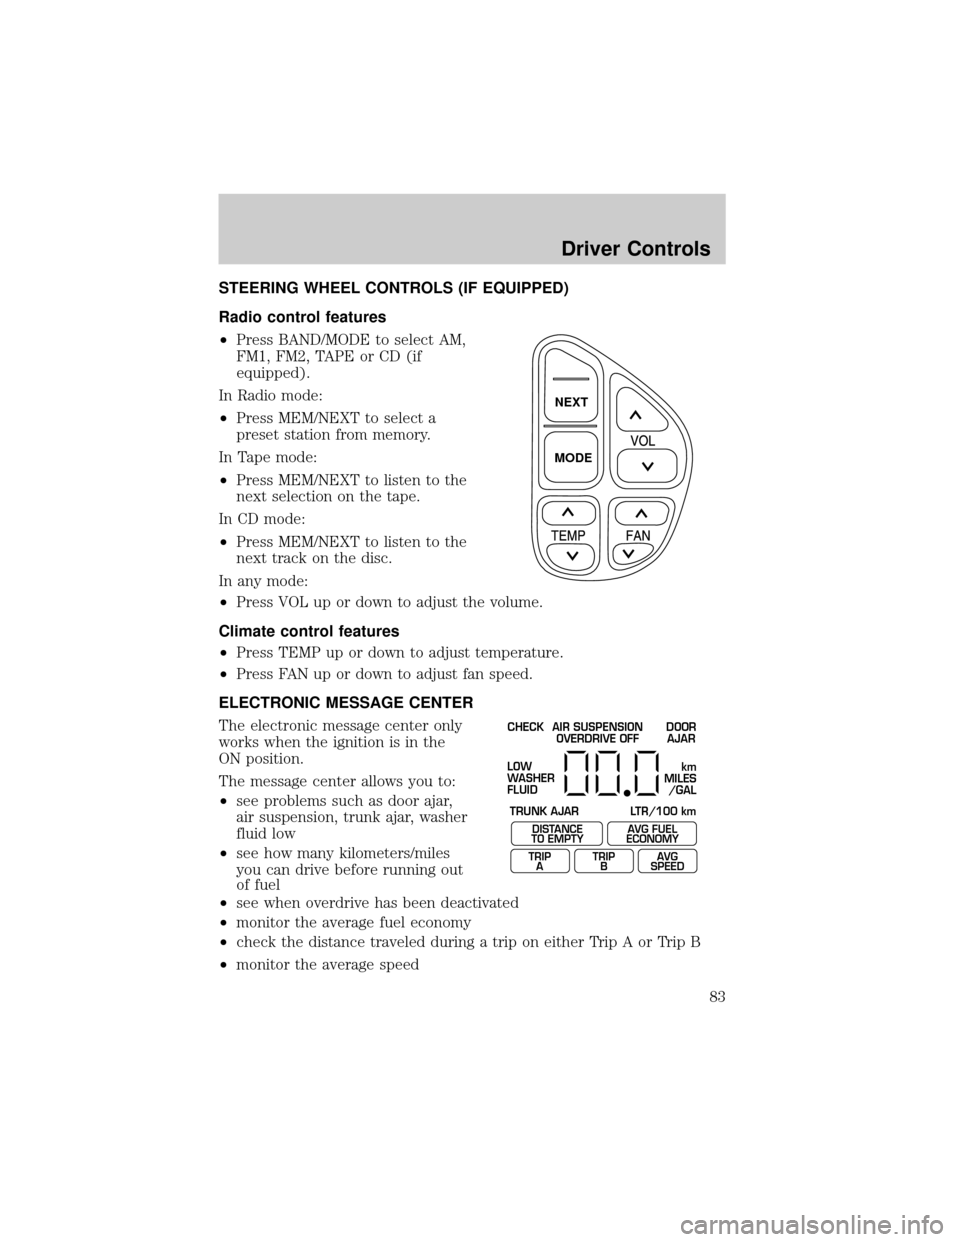
STEERING WHEEL CONTROLS (IF EQUIPPED)
Radio control features
²Press BAND/MODE to select AM,
FM1, FM2, TAPE or CD (if
equipped).
In Radio mode:
²Press MEM/NEXT to select a
preset station from memory.
In Tape mode:
²Press MEM/NEXT to listen to the
next selection on the tape.
In CD mode:
²Press MEM/NEXT to listen to the
next track on the disc.
In any mode:
²Press VOL up or down to adjust the volume.
Climate control features
²Press TEMP up or down to adjust temperature.
²Press FAN up or down to adjust fan speed.
ELECTRONIC MESSAGE CENTER
The electronic message center only
works when the ignition is in the
ON position.
The message center allows you to:
²see problems such as door ajar,
air suspension, trunk ajar, washer
fluid low
²see how many kilometers/miles
you can drive before running out
of fuel
²see when overdrive has been deactivated
²monitor the average fuel economy
²check the distance traveled during a trip on either Trip A or Trip B
²monitor the average speed
NEXT
MODE
CHECK
TRUNK AJAR LTR/100 kmAIR SUSPENSION
OVERDRIVE OFFDOOR
AJAR
LOW
WASHER
FLUID
DISTANCE
TO EMPTY
TRIP
AAVG FUEL
ECONOMY
TRIP
BAVG
SPEED
km
MILES
/GAL
Driver Controls
83