Page 197 of 486

2-89
Accessory Power Outlets
With accessory power outlets you can plug in auxiliary
electrical equipment such as a cellular telephone or
CB radio.
The front accessory power outlets are located below
the cupholders.
Pull the cover down to use the power outlet. When not
in use, keep the cover on.
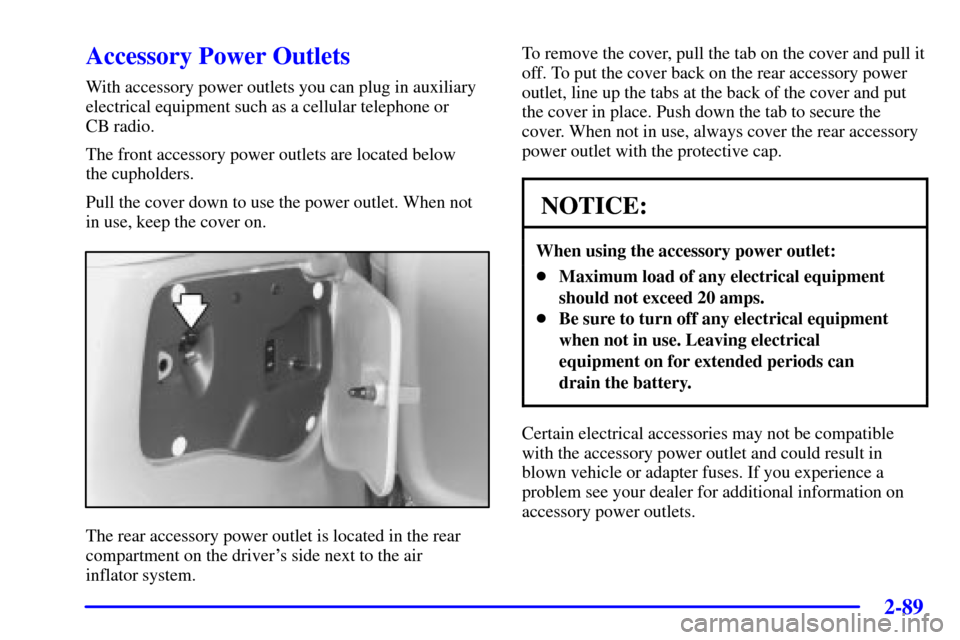
The rear accessory power outlet is located in the rear
compartment on the driver's side next to the air
inflator system.To remove the cover, pull the tab on the cover and pull it
off. To put the cover back on the rear accessory power
outlet, line up the tabs at the back of the cover and put
the cover in place. Push down the tab to secure the
cover. When not in use, always cover the rear accessory
power outlet with the protective cap.
NOTICE:
When using the accessory power outlet:
�Maximum load of any electrical equipment
should not exceed 20 amps.
�Be sure to turn off any electrical equipment
when not in use. Leaving electrical
equipment on for extended periods can
drain the battery.
Certain electrical accessories may not be compatible
with the accessory power outlet and could result in
blown vehicle or adapter fuses. If you experience a
problem see your dealer for additional information on
accessory power outlets.
Page 277 of 486

3-45 Headphones
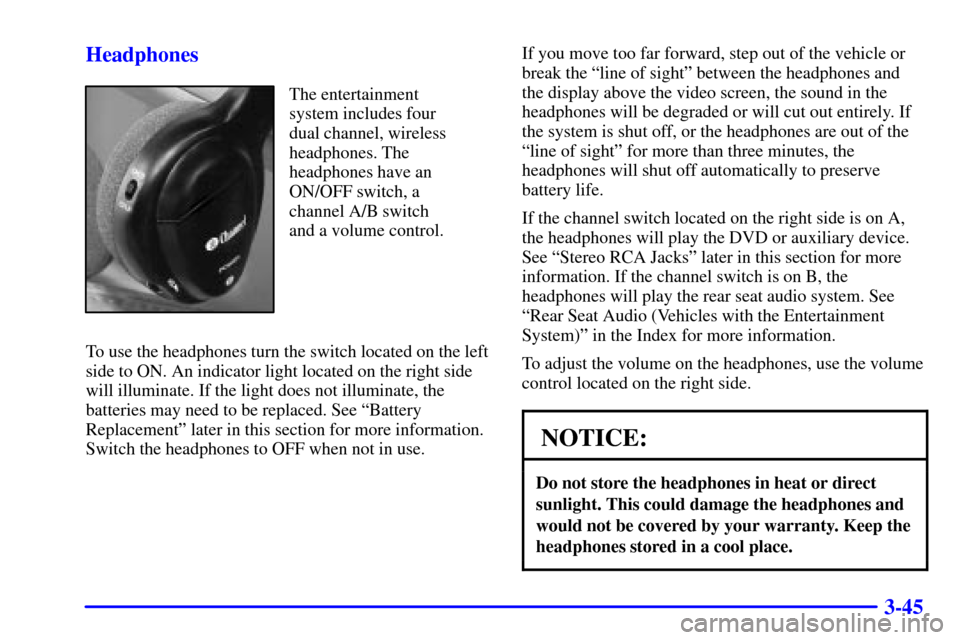
The entertainment
system includes four
dual channel, wireless
headphones. The
headphones have an
ON/OFF switch, a
channel A/B switch
and a volume control.
To use the headphones turn the switch located on the left
side to ON. An indicator light located on the right side
will illuminate. If the light does not illuminate, the
batteries may need to be replaced. See ªBattery
Replacementº later in this section for more information.
Switch the headphones to OFF when not in use.If you move too far forward, step out of the vehicle or
break the ªline of sightº between the headphones and
the display above the video screen, the sound in the
headphones will be degraded or will cut out entirely. If
the system is shut off, or the headphones are out of the
ªline of sightº for more than three minutes, the
headphones will shut off automatically to preserve
battery life.
If the channel switch located on the right side is on A,
the headphones will play the DVD or auxiliary device.
See ªStereo RCA Jacksº later in this section for more
information. If the channel switch is on B, the
headphones will play the rear seat audio system. See
ªRear Seat Audio (Vehicles with the Entertainment
System)º in the Index for more information.
To adjust the volume on the headphones, use the volume
control located on the right side.
NOTICE:
Do not store the headphones in heat or direct
sunlight. This could damage the headphones and
would not be covered by your warranty. Keep the
headphones stored in a cool place.
Page 278 of 486

3-46
Battery Replacement
To change the batteries, do the following:
1. Slide open the battery door located on the left side of
the headphones.
2. Remove the batteries from the compartment.
3. Replace the two AAA batteries. Make sure that they
are installed correctly.
If the headphones are to be stored for a long period
of time, remove the batteries and keep them in a cool,
dry place.
Stereo RCA Jacks
The RCA jacks are located on the faceplate of the DVD
player. They allow you to hook up an auxiliary device
such as a camcorder or a video game unit. You may
require adapter connectors or cables to connect your
auxiliary device to the RCA jacks. Refer to the
manufacturer's instructions for proper usage.
The entertainment system will always start in the
auxiliary mode. To use the auxiliary function, connect a
camcorder or a video game unit to the RCA jacks and
turn on the auxiliary device. If you want to view a DVD,insert the DVD into the DVD player. The system will
automatically switch to DVD and start to play. To return
to the auxiliary device, just press the stop button to stop
the DVD or use the remote control. See ªRemote
Controlº later in this section for more information.
Audio Speakers
Only one audio source can be heard through the
speakers at one time.
Audio from the radio, cassette or CD player will be
heard through all speakers when the front audio system
is being used and the rear seat audio system is off.
Sound from the DVD player or an auxiliary device can
be heard through all speakers when the front audio
system and rear seat audio are off and a DVD or
auxiliary device is playing.
When the front audio system is on, to hear the DVD,
auxiliary device or the rear seat audio system you must
use the headphones. With the rear seat audio system on,
the speaker in the overhead console and the rear
speakers are muted.
The speaker in the overhead console is set at a low level
and is not intended to be heard at a high volume.
Page 283 of 486

3-51
Display: Press this button to access the DVD player
setup menu. The setup menu includes the display menu,
the dimming menu and the source menu. Use the up and
down arrow buttons to navigate between menus. Use the
right and left arrow buttons to select within a menu. To
exit the DVD player setup menu, press the Display
button again, or wait for the menu to time out.
The display menu allows you to choose between the
following screen formats:
�FULL: The system expands the image to fill the
entire screen.
�NORMAL: The picture on the screen is displayed
using the default settings on the disc.
�CINEMA: The system expands the image to fill the
screen in the horizontal direction only. With most
DVDs, this will leave black strips at the top and
bottom of the screen.
�ZOOM: The system takes the central two
-thirds of
the picture and expands this to fill the entire screen.
Some combinations of disc format and display format
may result in image stretching or black strips around
the picture. This is normal. To eliminate excessive
stretching or black strips, change the disc format(using the Menu button) or the screen format (using the
Display button). For most DVDs, the picture will fill the
entire screen if the disc format is set to standard and the
screen format is set to FULL.
The dimming menu allows you to choose between day
and night settings for the video screen.
The source menu allows you to switch to an auxiliary
device (connected to the RCA jacks) as the source for
the system. The DVD player setup menu is not available
when an auxiliary device is the source for the system. To
return to DVD as the source for the system, press the
play/pause button on the remote control or DVD player.
Battery Replacement
To change the batteries, do the following:
1. Slide open the battery door located on the back of
the remote control.
2. Remove the batteries from the compartment.
3. Replace the two AAA batteries. Make sure that they
are installed correctly.
If the remote control is to be stored for a long period
of time, remove the batteries and keep them in a cool,
dry place.