Page 151 of 497
2-71
Cargo Lamp
The cargo lamp button is
located on the left side of
the instrument panel.
Press the button to turn the cargo lamp on. Press the
button again to turn it off.
A message in the instrument
panel cluster will come on
and display CARGO LAMP
ON when the cargo lamp is
turned on and the ignition
key is turned to RUN.
Interior Lamps
Instrument Panel Brightness Control
This feature controls the brightness of the instrument
panel lights.
The thumbwheel for this feature is located next to the
headlamp control.
Turn the thumbwheel up to adjust the instrument panel
lights. Turn the thumbwheel up to return the radio
display to full brightness when the headlamps or parking
lamps are on. To turn on the dome lamps, turn the
thumbwheel all the way up.
Exit Lighting
With exit lighting, the interior lamps will come on when
you remove the key from the ignition. The lights will
not come on if the DOME OVERRIDE button is
pressed in.
Page 153 of 497
2-73
Mirrors
Inside Day/Night Rearview Mirror
Pull the tab under the mirror toward you to reduce glare
from headlamps behind you after dark. Push the tab
away from you for normal daytime operation.
Electrochromic Inside Rearview Mirror
with Compass and Temperature Display
(If Equipped)
When on, an electrochromic mirror automatically dims
to the proper level to minimize glare from lights behind
you after dark.
The mirror also includes a display in the upper right
corner of the mirror face. The compass reading and the
outside temperature will both appear in the display at the
same time. The dual display can be turned on or off by
briefly pressing either the TEMP or the COMP button.
Page 155 of 497

2-75
Electrochromic Mirror Operation
The time period you need to press and hold the TEMP
button to turn the electrochromic feature on or off is
six seconds. The indicator light to the right of the TEMP
button will still turn on or off to show you when the
electrochromic feature is activated. Once the mirror is
turned off, it will remain off until it is turned back on, or
until the vehicle is restarted.
Compass Operation
Press the COMP button once briefly to turn the compass
on or off.
When the ignition and the compass feature are on, the
compass will show two character boxes for
approximately two seconds. After two seconds, the
mirror will display the compass heading.
When cleaning the mirror, use a paper towel or similar
material dampened with glass cleaner. Do not spray
glass cleaner directly on the mirror as that may cause the
liquid cleaner to enter the mirror housing.Compass Calibration
The compass may need calibration if one of the
following occurs:
�After five seconds, the display does not show a
compass heading (N for North, for example), there
may be a strong magnetic field interfering with the
compass. Such interference may be caused by a
magnetic antenna mount, magnetic note pad holder
or a similar magnetic item.
�The compass does not display the correct heading
and the compass zone variance is set correctly.
In order to calibrate, CAL must be displayed in the
mirror compass windows. If CAL is not displayed, push
in the COMP button for approximately eight seconds or
until CAL is displayed.
The compass can be calibrated in one of two ways:
�Drive the vehicle in circles at five mph (8 km/h) or
less until the display reads a direction, or
�drive the vehicle on your everyday routine and after
several turns the compass will become calibrated and
will display a direction.
Page 157 of 497

2-77
Electrochromic Inside Rearview Mirror
with Compass, Temperature Display and
OnStar Controls (If Equipped)
When on, an electrochromic mirror automatically dims
to the proper level to minimize glare from lights behind
you after dark.
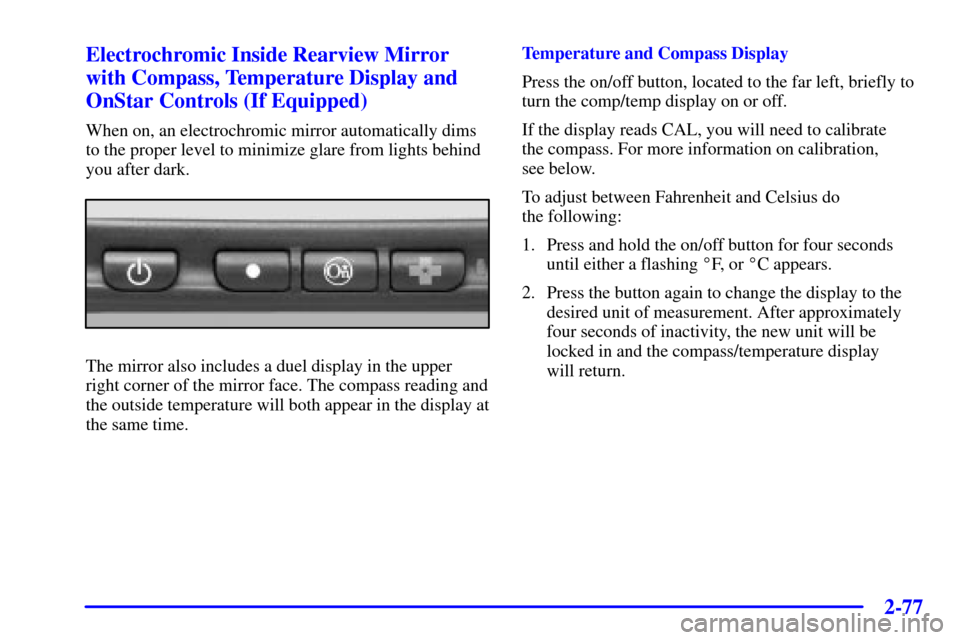
The mirror also includes a duel display in the upper
right corner of the mirror face. The compass reading and
the outside temperature will both appear in the display at
the same time.Temperature and Compass Display
Press the on/off button, located to the far left, briefly to
turn the comp/temp display on or off.
If the display reads CAL, you will need to calibrate
the compass. For more information on calibration,
see below.
To adjust between Fahrenheit and Celsius do
the following:
1. Press and hold the on/off button for four seconds
until either a flashing �F, or �C appears.
2. Press the button again to change the display to the
desired unit of measurement. After approximately
four seconds of inactivity, the new unit will be
locked in and the compass/temperature display
will return.
Page 158 of 497

2-78
Electrochromic Mirror Operation
The electrochromic (self dimming) mirror function is
turned on automatically each time the ignition is started.
To operate the electrochromic mirror do the following:
1. Make sure the green indicator light, located to the
left of the on/off button, is lit. If it's not, press and
hold the on/off button for six seconds until the green
light comes on, indicating that the mirror is in
electrochromic (self dimming) mode.
2. Turn off the electrochromic mirror function by
pressing and holding the on/off button for
six seconds until the green indicator light turns off.
Compass Variance
The mirror is set in zone eight upon leaving the factory.
It will be necessary to adjust the compass to compensate
for compass variance if you live outside of zone eight.
Under certain circumstances, as during a long distance
cross
-country trip, it will be necessary to adjust for
compass variance. Compass variance is the difference
between earth's magnetic north and true geographic
north. If not adjusted to account for compass variance,
your compass could give false readings.
To adjust for compass variance do the following:
1. Find your current location and variance zone number
on the following zone map.
2. Press and hold the on/off button for nine seconds or
until a Z and a zone number appears in the display.
The compass is now in zone mode.
3. Keep pressing the on/off button until the desired
zone number appears in the display. Release the
button. After about four seconds of inactivity, the
new zone number will be locked in and the
comp/temp display will return.
4. Calibrate the compass as described below.
Page 163 of 497
2-83
The pegs inside the compartment door are used to
make sure the button on the compartment door will
contact the control button on the garage door opener.
4. Add one peg at a time
until, with the
compartment door
closed, the PUSH button
on the compartment
door will operate the
garage door opener.
5. Now, with the
compartment door
closed, press the
button marked PUSH
again to make sure the
garage door opener
operates properly.
With the garage door opener positioned properly and
the right number of pegs in place, you should only
have to press the PUSH button slightly to operate
the opener.
6. Adjust the position of the garage door opener and
add or remove pegs, as needed, until the opener
operates properly.
Page 168 of 497

2-88
Ashtrays and Cigarette Lighter
Front Ashtray
The front ashtray is located near the center of the
instrument panel. Pull on the bottom of the ashtray door
to open it.
NOTICE:
If you store paper or other things that burn in
your ashtrays, they could be set on fire by
cigarettes or other smoking materials. That could
cause a fire and possibly damage your vehicle. Do
not store papers and other things that burn in
your ashtrays.
To remove the front ashtray, press the retainer spring
and pull the ashtray toward you. To replace the ashtray,
place the ashtray on the slides at the side of its location
in the instrument panel. Then slide the ashtray back to
its original position.To use the cigarette lighter, push it in all the way, and let
go. When it's ready, it will pop back out by itself.
NOTICE:
Holding a cigarette lighter in with your hand
while it's heating can make it overload, damaging
the lighter and the heating element. Just push the
lighter all the way in and let go. When it's done,
it will pop back by itself.
Sun Visors
To block out glare, you can swing down the visors. You
can also swing them out to help block glare at the front
and side windows.
The passenger's side sun visor may have a vanity mirror.
Page 169 of 497

2-89
Accessory Power Outlets
With accessory power outlets you can plug in auxiliary
electrical equipment such as a cellular telephone or
CB radio.
Two accessory power outlets are located near the
cigarette lighter. The cigarette lighter is designed to
fit only in the receptacle to the right of the accessory
power outlets.
To use the outlets, lift the cover. When not using them,
always close the cover.
Certain power accessory plugs may not be compatible to
the accessory power outlets and could result in blown
vehicle or adapter fuses. If you experience a problem,
see your dealer for additional information on the
accessory power plugs.NOTICE:
Adding some electrical equipment to your vehicle
can damage it or keep other things from working
as they should. This wouldn't be covered by your
warranty. Check with your dealer before adding
electrical equipment, and never use anything that
exceeds the fuse rating.
When adding electrical equipment, be sure to follow
the proper installation instructions included with
the equipment.
NOTICE:
Power outlets are designed for accessory plugs
only. Do not hang any type of accessory or
accessory bracket from the plug. Improper use of
the power outlet can cause damage not covered
by your warranty.