Page 108 of 387

2-44 Turn Signal and Lane-Change Signals
The turn signal has two upward (for right) and two
downward (for left) positions. These positions allow
you to signal a turn or a lane change.
To signal a turn, move the lever all the way up or
down. When the turn is finished, the lever will
return automatically.
An arrow on the instrument
panel cluster will flash in
the direction of the turn or
lane change.
To signal a lane change, raise or lower the lever until the
arrow starts to flash. Hold it there until you complete
your lane change. The lever will return by itself when
you release it.
If the arrow flashes faster than normal as you signal a
turn or a lane change, a signal bulb may be burned out
and other drivers won't see your turn signal.If a bulb is burned out, replace it to help avoid an
accident. If the arrows don't go on at all when you
signal a turn, check for burned
-out bulbs and then check
the fuse. See ªFuses and Circuit Breakersº in the Index.
Turn Signal On Chime
If you leave either one of your turn signals on and
drive more than 3/4 mile (1.2 km), a chime will sound
to alert you.
Headlamp High/Low-Beam Changer
To change your headlamps from low beams to high
beams, or from high to low, pull the multifunction lever
all the way toward you. Then release it.
When the high beams are
on, this light will appear on
the instrument panel cluster.
This light works only when the key is in ON. The fog
lamps (if equipped) are not illuminated when the high
beams are on.
Page 159 of 387
2-95
Highbeam Out
United States Canada
If this message appears, you may have a problem with
your high
-beam headlamps.
The message will stay on approximately 60 seconds.
When the ignition is turned off, this message will be
displayed again for three seconds to remind you that you
may have a problem with your highbeam
-headlamps.
Be sure to check your bulbs right away and replace them
if necessary.
See ªBulb Replacementº in the Index.
Driver Information Center
(DIC) (Option)
Optional Sunroof version shown
The DIC will show information about the vehicle and
the surroundings. It is located in the headliner between
the sun visors.
Page 238 of 387

4-38 Making Turns
NOTICE:
Making very sharp turns while trailering could
cause the trailer to come in contact with the
vehicle. Your vehicle could be damaged. Avoid
making very sharp turns while trailering.
When you're turning with a trailer, make wider
turns than normal. Do this so your trailer won't
strike soft shoulders, curbs, road signs, trees or
other objects. Avoid jerky or sudden maneuvers.
Signal well in advance.
Turn Signals When Towing a Trailer
When you tow a trailer, your vehicle may need
additional wiring. Check with your dealer. The arrows
on your instrument panel will flash whenever you signal
a turn or lane change. Properly hooked up, the trailer
lamps will also flash, telling other drivers you're about
to turn, change lanes or stop.
When towing a trailer, the arrows on your instrument
panel will flash for turns even if the bulbs on the trailer
are burned out. Thus, you may think drivers behind
you are seeing your signal when they are not. It's
important to check occasionally to be sure the trailer
bulbs are still working.
Page 277 of 387

6-
6-1
Section 6 Service and Appearance Care
Here you will find information about the care of your vehicle. This section begins with service and fuel information,
and then it shows how to check important fluid and lubricant levels. There is also technical information about your
vehicle, and a part devoted to its appearance care.
6
-2 Service
6
-3 Fuel
6
-5 Fuels in Foreign Countries
6
-5 Filling Your Tank
6
-8 Filling a Portable Fuel Container
6
-8 Checking Things Under the Hood
6
-12 Engine Oil
6
-19 Engine Air Cleaner/Filter
6
-21 Passenger Compartment Air Filter
(If Equipped)
6
-22 Automatic Transaxle Fluid
6
-26 Engine Coolant
6
-30 Radiator Pressure Cap
6
-30 Power Steering Fluid
6
-31 Windshield Washer Fluid
6
-33 Brakes6
-36 Battery
6
-37 Bulb Replacement
6
-41 Windshield Wiper Blade Replacement
6
-42 Tires
6
-52 Appearance Care
6
-53 Cleaning the Inside of Your Vehicle
6
-55 Care of Safety Belts
6
-56 Cleaning the Outside of Your Vehicle
6
-59 Finish Damage
6
-60 GM Vehicle Care/Appearance Materials
6
-61 Vehicle Identification Number (VIN)
6
-61 Service Parts Identification Label
6
-62 Electrical System
6
-70 Replacement Bulbs
6
-70 Capacities and Specifications
6
-71 Normal Maintenance Replacement Parts
Page 313 of 387
6-37 Vehicle Storage
If you're not going to drive your vehicle for 25 days
or more, remove the black, negative (
-) cable from
the battery. This will help keep your battery from
running down.
CAUTION:
Batteries have acid that can burn you and gas
that can explode. You can be badly hurt if you
aren't careful. See ªJump Startingº in the Index
for tips on working around a battery without
getting hurt.
Contact your dealer to learn how to prepare your vehicle
for longer storage periods.
Also, for your audio system, see ªTheft
-Deterrent
Featureº in the Index.
Bulb Replacement
For the proper type of replacement bulb, see
ªReplacement Bulbsº in the Index.
For any bulb changing procedure not listed in this
section, contact your dealer.
Halogen Bulbs
CAUTION:
Halogen bulbs have pressurized gas inside and
can burst if you drop or scratch the bulb. You or
others could be injured. Be sure to read and
follow the instructions on the bulb package.
Page 314 of 387
6-38 Headlamps, Front Parking, Turn Signal and
Sidemarker Lamps
A. High-Beam Headlamp
B. Low
-Beam Headlamp
C. Parking/Turn Signal and Sidemarker Lamp1. Open the hood.
2. Remove the air baffle.
3. Remove the two headlamp fasteners by pulling up
on them.
4. Gently pull the headlamp assembly away from the
vehicle and remove the electrical connector.
5. Remove the round dust caps to gain access to the bulbs.
6. Turn the bulb counterclockwise and remove it from
the retaining ring by gently pulling it away from the
headlamp assembly.
Page 315 of 387

6-39
7. Remove the electrical connector from the bulb by
raising the lock tab and pulling the connector away
from the bulb's base.
8. Install the electrical connector to the new bulb.
9. Install the new bulb by inserting the smallest tab
on the bulb base into the matching notch in the
retaining ring. Turn the bulb a quarter
-turn
clockwise until it stops.
10. Reverse Steps 1 through 5 to reinstall the
headlamp assembly.
11. Close the hood. Then, check the lamps.
Headlamp Aiming
If your vehicle is damaged in an accident, the headlamp
aim may be affected. Aim adjustment to the low beam
may be necessary if it is difficult to see lane markers
(for horizontal aim), or if oncoming drivers flash their
high beams at you (for vertical aim). If you believe your
headlamps need to be re
-aimed, we recommend that you
take your vehicle to the dealer for service. However, it is
possible for you to re
-aim your headlamps by following
the procedure in the service manual for your vehicle.
Tail/Stop/Turn Signal and Rear
Sidemarker Lamps
A. Rear
Sidemarker Lamp
B. Tail/Stop Lamp
C. Turn Signal Lamp
1. Open the trunk. If your vehicle has a convenience
net, unhook the net from the upper wing nut.
2. Remove the nut and convenience net.
3. Pull the carpet away from the rear of the vehicle.
Page 316 of 387

6-40
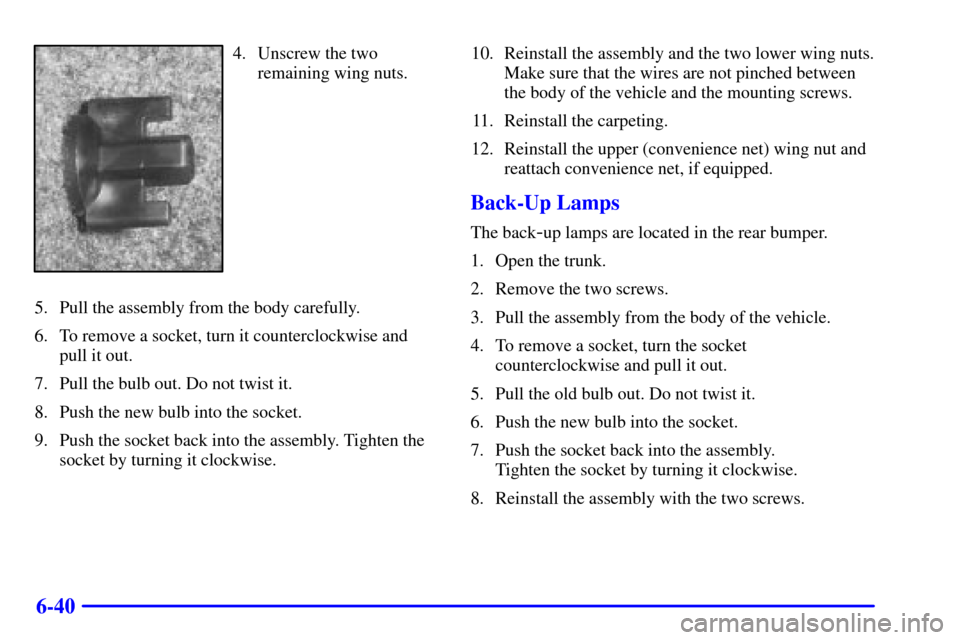
4. Unscrew the two
remaining wing nuts.
5. Pull the assembly from the body carefully.
6. To remove a socket, turn it counterclockwise and
pull it out.
7. Pull the bulb out. Do not twist it.
8. Push the new bulb into the socket.
9. Push the socket back into the assembly. Tighten the
socket by turning it clockwise.10. Reinstall the assembly and the two lower wing nuts.
Make sure that the wires are not pinched between
the body of the vehicle and the mounting screws.
11. Reinstall the carpeting.
12. Reinstall the upper (convenience net) wing nut and
reattach convenience net, if equipped.
Back-Up Lamps
The back-up lamps are located in the rear bumper.
1. Open the trunk.
2. Remove the two screws.
3. Pull the assembly from the body of the vehicle.
4. To remove a socket, turn the socket
counterclockwise and pull it out.
5. Pull the old bulb out. Do not twist it.
6. Push the new bulb into the socket.
7. Push the socket back into the assembly.
Tighten the socket by turning it clockwise.
8. Reinstall the assembly with the two screws.