Page 109 of 360

2-48
Interior Lamps
Instrument Panel Brightness Control
This feature controls the brightness of the instrument
panel lights.
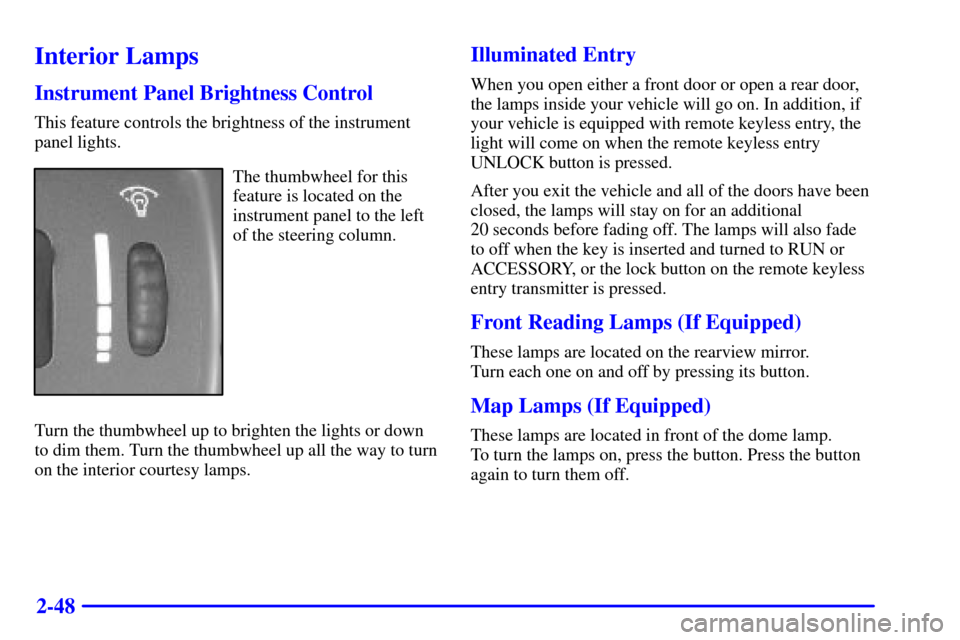
The thumbwheel for this
feature is located on the
instrument panel to the left
of the steering column.
Turn the thumbwheel up to brighten the lights or down
to dim them. Turn the thumbwheel up all the way to turn
on the interior courtesy lamps.
Illuminated Entry
When you open either a front door or open a rear door,
the lamps inside your vehicle will go on. In addition, if
your vehicle is equipped with remote keyless entry, the
light will come on when the remote keyless entry
UNLOCK button is pressed.
After you exit the vehicle and all of the doors have been
closed, the lamps will stay on for an additional
20 seconds before fading off. The lamps will also fade
to off when the key is inserted and turned to RUN or
ACCESSORY, or the lock button on the remote keyless
entry transmitter is pressed.
Front Reading Lamps (If Equipped)
These lamps are located on the rearview mirror.
Turn each one on and off by pressing its button.
Map Lamps (If Equipped)
These lamps are located in front of the dome lamp.
To turn the lamps on, press the button. Press the button
again to turn them off.
Page 111 of 360
2-50 Power Remote Control Mirrors
(If Equipped)
The power mirror control is
located on the driver's door.
Turn the control clockwise or counterclockwise to
choose the mirror you want to adjust. Then move the
control in the direction you want the mirror to move.
Adjust each mirror so you can see a little of the side of
your vehicle when you are sitting in a comfortable
driving position.
The mirror has a spring
-loaded breakaway design.
Convex Outside Mirror
Your passenger's side mirror is convex. A convex
mirror's surface is curved so you can see more from the
driver's seat.
CAUTION:
A convex mirror can make things (like other
vehicles) look farther away than they really are.
If you cut too sharply into the right lane, you
could hit a vehicle on your right. Check your
inside mirror or glance over your shoulder before
changing lanes.
Page 203 of 360

4-38 Total Weight on Your Vehicle's Tires
Be sure your vehicle's tires are inflated to the upper
limit for cold tires. You'll find these numbers on the
Tire
-Loading Information Label at the rear edge of the
driver's door, or see ªLoading Your Vehicleº in the Index.
Then be sure you don't go over the GVW limit for your
vehicle, including the weight of the trailer tongue.
Hitches
It's important to have the correct hitch equipment.
Crosswinds, large trucks going by and rough roads
are a few reasons why you'll need the right hitch.
Here are some rules to follow:
�The rear bumper on your vehicle is not intended
for hitches. Do not attach rental hitches or other
bumper
-type hitches to it. Use only a frame-mounted
hitch that does not attach to the bumper.
�Will you have to make any holes in the body of
your vehicle when you install a trailer hitch? If you
do, then be sure to seal the holes later when you
remove the hitch. If you don't seal them, deadly
carbon monoxide (CO) from your exhaust can get
into your vehicle. See ªCarbon Monoxideº in the
Index. Dirt and water can, too.
Safety Chains
You should always attach chains between your vehicle
and your trailer. Cross the safety chains under the
tongue of the trailer so that the tongue will not drop
to the road if it becomes separated from the hitch.
Instructions about safety chains may be provided by
the hitch manufacturer or by the trailer manufacturer.
Follow the manufacturer's recommendation for
attaching safety chains and do not attach them to
the bumper. Always leave just enough slack so you
can turn with your rig. And, never allow safety chains
to drag on the ground.
Trailer Brakes
Does your trailer have its own brakes? Be sure to read
and follow the instructions for the trailer brakes so
you'll be able to install, adjust and maintain them
properly. Because you have anti
-lock brakes, do not
try to tap into your vehicle's brake system. If you do,
both brake systems won't work well, or at all.
Page 246 of 360
6-7
While refueling, hang the fuel cap inside the fuel door
by placing the fuel cap tether in the hanger.
To remove the fuel cap, turn it slowly to the left
(counterclockwise). The fuel cap has a spring in it; if
you let go of the cap too soon, it will spring back to
the right.
CAUTION:
If you get gasoline on yourself and then
something ignites it, you could be badly burned.
Gasoline can spray out on you if you open the
fuel cap too quickly. This spray can happen if
your tank is nearly full, and is more likely in hot
weather. Open the fuel cap slowly and wait for
any ªhissº noise to stop. Then unscrew the cap all
the way.
Be careful not to spill gasoline. Clean gasoline from
painted surfaces as soon as possible. See ªCleaning the
Outside of Your Vehicleº in the Index.
Page 301 of 360

6-62 Fuses and Circuit Breakers
The wiring circuits in your vehicle are protected from
short circuits by a combination of fuses, circuit breakers
and fusible thermal links. This greatly reduces the
chance of damage caused by electrical problems.
Look at the silver
-colored band inside the fuse. If the
band is broken or melted, replace the fuse. Be sure you
replace a bad fuse with a new one of the identical size
and rating.
If you ever have a problem on the road and don't have a
spare fuse, you can ªborrowº one that has the same
amperage. Just pick some feature of your vehicle that
you can get along without
-- like the radio or cigarette
lighter
-- and use its fuse if it is the correct amperage.
Replace it as soon as you can.
There are two fuse blocks in your vehicle: the
instrument panel fuse block and the engine compartment
fuse block.Instrument Panel Fuse Block
The instrument panel fuse block is located on the
driver's side of the instrument panel. To open, push the
tab on the access door to the left and pull the door
forward. Make sure to insert the tabs when replacing
the cover.
Page 303 of 360
6-64
Fuse Usage
FOG Fog Lamps
HORN Horn
Blank Not Used
Blank Not Used
STOP/HZD Stop Lamps, Hazard Lamps
Blank Not Used
Blank Not Used
RR DEFOG Rear Window Defogger
PWR ACC Power Door Locks
Blank Not UsedFuse Usage
Blank Not Used
Blank Not Used
O
2 HTR Oxygen Sensor Heater
HVAC Climate Control System
WIPER Windshield Wiper
BCM Body Control Module
AMPL Audio Amplifier
PWR WDO Power Windows, Sunroof
RELAY DRL Daytime Running Lamps (Relay)
Blank Not Used
Page 338 of 360

7-32 At Least Once a Year
Key Lock Cylinders Service
Lubricate the key lock cylinders with the lubricant
specified in Part D.
Body Lubrication Service
Lubricate all hood latch assemblies, secondary latch,
pivots, spring anchor, release pawl, hood and body door
hinges, rear compartment and any folding seat hardware.
Part D tells you what to use. More frequent lubrication may
be required when exposed to a corrosive environment.Starter Switch Check
CAUTION:
When you are doing this check, the vehicle could
move suddenly. If it does, you or others could be
injured. Follow the steps below.
1. Before you start, be sure you have enough room
around the vehicle.
2. Firmly apply both the parking brake and the regular
brake. See ªParking Brakeº in the Index if necessary.
Do not use the accelerator pedal, and be ready to turn
off the engine immediately if it starts.
3. On automatic transaxle vehicles, try to start the
engine in each gear. The starter should work only in
PARK (P) or NEUTRAL (N). If the starter works
in any other position, your vehicle needs service.
On manual transaxle vehicles, put the shift lever in
NEUTRAL (N), push the clutch down halfway and
try to start the engine. The starter should work only
when the clutch is pushed down all the way to the
floor. If the starter works when the clutch isn't
pushed all the way down, your vehicle needs service.
Page 344 of 360
7-38
USAGEFLUID/LUBRICANT
Key Lock
CylindersMulti-Purpose Lubricant,
Superlube� (GM Part
No. 12346241 or equivalent).
Manual Transaxle
Shift LinkageChassis Lubricant (GM Part
No. 12377985 or equivalent) or
lubricant meeting requirements
of NLGI # 2, Category LB
or GC
-LB.
Clutch Linkage
Pivot PointsEngine oil.
Chassis
LubricationChassis Lubricant (GM Part
No. 12377985 or equivalent) or
lubricant meeting requirements
of NLGI # 2, Category LB
or GC
-LB.
USAGEFLUID/LUBRICANT
Hood Latch
Assembly,
Secondary Latch,
Pivots, Spring
Anchor and
Release PawlLubriplate� Lubricant Aerosol
(GM Part No. 12346293 or
equivalent) or lubricant meeting
requirements of NLGI # 2,
Category LB or GC
-LB.
Hood and
Door HingesMulti-Purpose Lubricant,
Superlube� (GM Part
No. 12346241 or equivalent).
Weatherstrip
ConditioningDielectric Silicone Grease
(GM Part No. 12345579
or equivalent).
Page:
< prev 1-8 9-16 17-24