Page 285 of 356
6-39
Bulb Replacement
For the proper type of replacement bulb, see
ªReplacement Bulbsº in the Index.
For any bulb changing procedure not listed in this
section, contact your dealer.
Halogen Bulbs
CAUTION:
Halogen bulbs have pressurized gas inside and
can burst if you drop or scratch the bulb. You or
others could be injured. Be sure to read and
follow the instructions on the bulb package.
Headlamps
Before replacing a headlamp bulb that does not light,
check to make sure that the wiring connector is securely
fastened to it.
See ªReplacement Bulbsº in the Index to check the type
of headlamp bulb you need to use before you begin to
replace the headlamp bulb. You must replace a
headlamp bulb with one that is exactly the same.
To replace a headlamp, do the following:
1. Open the hood.
2. Locate the headlamp bulb that needs to be replaced.
Page 289 of 356

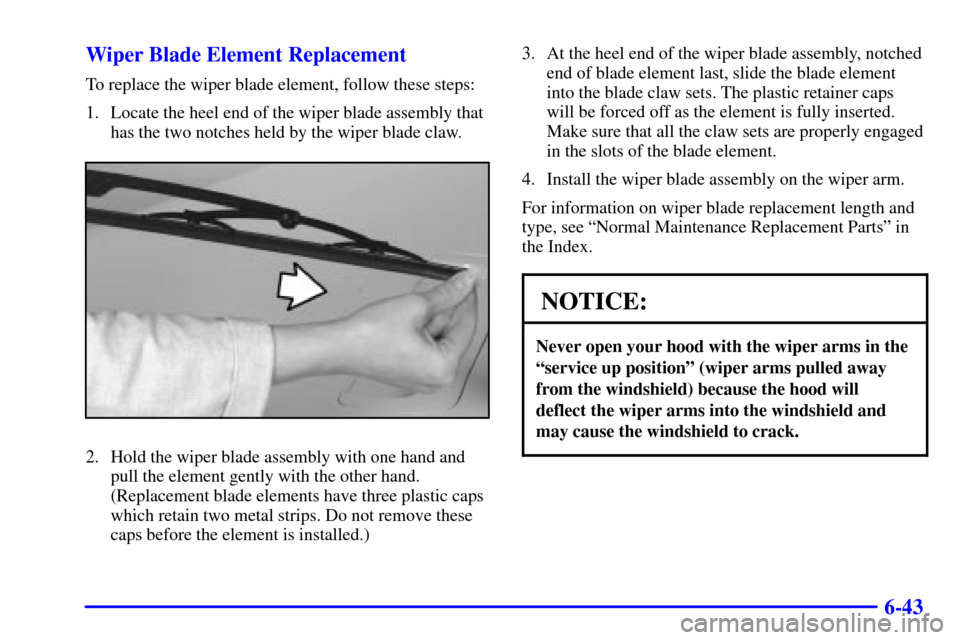
6-43 Wiper Blade Element Replacement
To replace the wiper blade element, follow these steps:
1. Locate the heel end of the wiper blade assembly that
has the two notches held by the wiper blade claw.
2. Hold the wiper blade assembly with one hand and
pull the element gently with the other hand.
(Replacement blade elements have three plastic caps
which retain two metal strips. Do not remove these
caps before the element is installed.)3. At the heel end of the wiper blade assembly, notched
end of blade element last, slide the blade element
into the blade claw sets. The plastic retainer caps
will be forced off as the element is fully inserted.
Make sure that all the claw sets are properly engaged
in the slots of the blade element.
4. Install the wiper blade assembly on the wiper arm.
For information on wiper blade replacement length and
type, see ªNormal Maintenance Replacement Partsº in
the Index.
NOTICE:
Never open your hood with the wiper arms in the
ªservice up positionº (wiper arms pulled away
from the windshield) because the hood will
deflect the wiper arms into the windshield and
may cause the windshield to crack.
Page 335 of 356

7-17
Part B: Owner Checks and Services
Listed in this part are owner checks and services which
should be performed at the intervals specified to help
ensure the safety, dependability and emission control
performance of your vehicle.
Be sure any necessary repairs are completed at once.
Whenever any fluids or lubricants are added to your
vehicle, make sure they are the proper ones, as shown
in Part D.
At Each Fuel Fill
It is important for you or a service station attendant to
perform these underhood checks at each fuel fill.
Engine Oil Level Check
Check the engine oil level and add the proper oil
if necessary. See ªEngine Oilº in the Index for
further details.
Engine Coolant Level Check
Check the engine coolant level and add DEX
-COOL�
coolant mixture if necessary. See ªEngine Coolantº in
the Index for further details.Windshield Washer Fluid Level Check
Check the windshield washer fluid level in the
windshield washer tank and add the proper fluid if
necessary. See ªWindshield Washer Fluidº in the
Index for further details.
At Least Once a Month
Tire Inflation Check
Make sure tires are inflated to the correct pressures.
Don't forget to check your spare tire. See ªTiresº in
the Index for further details.
At Least Twice a Year
Restraint System Check
Make sure the safety belt reminder light and all your
belts, buckles, latch plates, retractors and anchorages are
working properly. Look for any other loose or damaged
safety belt system parts. If you see anything that might
keep a safety belt system from doing its job, have it
repaired. Have any torn or frayed safety belts replaced.
Also look for any opened or broken air bag coverings,
and have them repaired or replaced. (The air bag system
does not need regular maintenance.)