2002 CHEVROLET C3500 HD reset
[x] Cancel search: resetPage 124 of 331

3-18
SEEK: Press the right or left arrow to seek to the
next station or previous station and stay there. The radio
will seek to stations with a strong signal only. The sound
will mute while seeking.
To scan stations, press and hold either SEEK arrow
for two seconds until SCAN appears on the display.
The radio will scan to a station, play for a few seconds,
then go on to the next station. Press either SEEK arrow
again to stop scanning. The radio will scan to stations
with a strong signal only. The sound will mute
while scanning.
P.SCAN (Preset Scan): Press this button to scan through
your favorite stations stored on your pushbuttons.
P.SCAN will appear on the display. The radio will scan
to the first preset station stored on your pushbuttons,
play for a few seconds, then go on to the next station.
Press this button again or one of the pushbuttons to
stop scanning. The channel number (P1 through P6) will
appear with the frequency. The radio will scan preset
stations with a strong signal only. The sound will mute
while scanning.Setting Preset Stations
The six numbered pushbuttons let you return to
your favorite stations. You can set up to 18 stations
(six AM, six FM1 and six FM2) by performing the
following steps:
1. Turn the radio on.
2. Press AM FM to select AM, FM1 or FM2.
3. Tune in the desired station.
4. Press AUTO TONE to select the setting you prefer.
5. Press and hold one of the six pushbuttons.
The sound will mute. When it returns, release the
pushbutton. Whenever you press that numbered
pushbutton, the station you set will return and the
tone you selected will be automatically selected for
that pushbutton.
6. Repeat the steps for each pushbutton.
Page 131 of 331

3-25 Care of Your Cassette Tape Player
A tape player that is not cleaned regularly can cause
reduced sound quality, ruined cassettes or a damaged
mechanism. Cassette tapes should be stored in their
cases away from contaminants, direct sunlight and
extreme heat. If they aren't, they may not operate
properly or may cause failure of the tape player.
Your tape player should be cleaned regularly after every
50 hours of use. Your radio may display CLN to indicate
that you have used your tape player for 50 hours without
resetting the tape clean timer. If this message appears
on the display, your cassette tape player needs to be
cleaned. It will still play tapes, but you should clean it
as soon as possible to prevent damage to your tapes and
player. If you notice a reduction in sound quality, try a
known good cassette to see if it is the tape or the tape
player at fault. If this other cassette has no improvement
in sound quality, clean the tape player.
The recommended cleaning method for your
cassette tape player is the use of a scrubbing action,
non
-abrasive cleaning cassette with pads which scrub
the tape head as the hubs of the cleaner cassette turn.
The recommended cleaning cassette is available through
your dealer (GM Part No. 12344789).When cleaning the cassette tape player with the
recommended non
-abrasive cleaning cassette, it is
possible that the cassette may eject, because the cut
tape detection feature on your radio may recognize it
as a broken tape. To prevent the cleaning cassette from
being ejected, use the following steps.
If your vehicle is equipped with the AM
-FM Stereo
with Cassette Tape Player do the following:
1. Turn the ignition to RUN or ACCESSORY.
2. Turn the radio on.
3. Insert the scrubbing action cleaning cassette.
4. Within five seconds, press and hold the REV and
FWD buttons at the same time for three seconds.
The tape symbol will flash on the display, showing
that the cut tape detection feature is no longer active.
5. Eject the cleaning cassette after the manufacturer's
recommended cleaning time.
If your vehicle is equipped with the AM
-FM Stereo
with Cassette Tape Player and Automatic Tone Control
do the following:
1. Turn the ignition to RUN or ACCESSORY.
2. Turn the radio off.
Page 132 of 331

3-26
3. Press and hold the TAPE AUX button for five
seconds. The tape symbol on the display will flash
for two seconds.
4. Insert the scrubbing action cleaning cassette.
5. Eject the cleaning cassette after the manufacturer's
recommended cleaning time.
When the cleaning cassette has been ejected, the broken
tape detection feature is active again.
You may also choose a non
-scrubbing action, wet-type
cleaner which uses a cassette with a fabric belt to clean
the tape head. This type of cleaning cassette will not
eject on its own. A non
-scrubbing action cleaner may
not clean as thoroughly as the scrubbing type cleaner.
The use of a non
-scrubbing action, dry-type cleaning
cassette is not recommended.
After you clean the player, press and hold the EJECT
button for five seconds to reset the CLN indicator.
The radio will display
--- to show the indicator
was reset.
Cassettes are subject to wear and the sound quality
may degrade over time. Always make sure the cassette
tape is in good condition before you have your tape
player serviced.
Care of Your Compact Discs
Handle discs carefully. Store them in their original cases
or other protective cases and away from direct sunlight
and dust. If the surface of a disc is soiled, dampen a
clean, soft cloth in a mild, neutral detergent solution
and clean it, wiping from the center to the edge.
Be sure never to touch the signal surface when handling
discs. Pick up discs by grasping the outer edges or the
edge of the hole and the outer edge.
Care of Your Compact Disc Player
The use of CD lens cleaner discs is not advised, due to
the risk of contaminating the lens of the CD optics with
lubricants internal to the CD mechanism.
Fixed Mast Antenna
The fixed mast antenna can withstand most car washes
without being damaged. If the mast should ever become
slightly bent, you can straighten it out by hand. If the
mast is badly bent, as it might be by vandals, you should
replace it.
Check every once in a while to be sure the mast is still
tightened to the cowl. If tightening is required, tighten
by hand, then with a wrench one quarter turn.
Page 171 of 331

4-39
NOTICE:
Using a PTO for more than four hours without
driving your vehicle can damage the transmission.
If using a PTO for more than four hours without
driving your vehicle, drive your vehicle for a while
to allow the transmission to cool.
Preset Mode: PTO speed control mode is used for
stationary applications. This mode provides a default
standby speed of 850 rpm (800 rpm with automatic
transmission) and two default PTO operation speeds
which follow:
1. PTO Set Speed of 1250 rpm, or
2. PTO Resume Speed of 1700 rpm.
The standby speed (800/850 rpm) is not to be used
as a PTO control speed. Vehicles not equipped with
cruise control will not have the resume speed capability.Using PTO speed control in Preset Mode
(Factory Setting):
1. Engage the PTO.
2. Select PARK (P) or NEUTRAL (N) range.
Apply the parking brake if NEUTRAL (N)
is selected.
3. Make sure your foot is off the brake pedal
(and off the clutch on vehicles equipped with
a manual transmission). Select the desired
engine speed for PTO operation. Be sure to
read the following Preset Mode information
regarding operation.
To engage PTO for mobile applications
(manual transmission):
If you are going to drive the vehicle, shift the
transmission into the gear you want, apply the
regular brakes and release the parking brake.
Release the clutch (and the regular brakes) as you
normally would. When you release the clutch,
the PTO will start.
Page 172 of 331

4-40
To engage a PTO while the vehicle is moving:
1. Hold the clutch pedal down.
2. Shift the transmission into NEUTRAL.
3. Engage the PTO.
4. Shift the transmission into the gear you want.
5. Release the clutch as you normally would.
When you release the clutch, the PTO will start.
Variable Mode: PTO speed control mode can be used
for both stationary and mobile applications. This mode
allows PTO to be controlled in a fashion similar to how
cruise control sets vehicle speed. The operator can set an
rpm (between 800 and 2200) with the cruise control
feature or with the SET position on the PTO switch.
The operator is then able to increase rpm in increments
of 100, or ªtap,º with the resume position on the
cruise control. Or, the operator can decrease rpm in
increments of 100 with either of the SET switches on
the PTO or the cruise control. Vehicles not equipped
with cruise control will not be able to increase in
100 rpm increments.Using PTO speed control in Variable Mode:
1. Engage the PTO.
2. Make sure your foot is off the brake pedal
(and off the clutch for vehicles equipped with
a manual transmission).
3. Select the desired engine speed (with the foot pedal)
and select SET on the PTO switch or with the
cruise control.
Engine speed will be governed to the PTO maximum
engine speed (2,200 rpm) while in either the preset or
variable PTO modes. All engine speed values listed
above are factory preset values. With the exception of
the ªtapº increment (100 rpm), all of these values are
programmable and can be adjusted by your GM dealer
or body upfitter. If the PTO software settings do not
match the settings shown here, then they may have
already been altered in order to satisfy the requirements
of the installed PTO system and body equipment.
Page 211 of 331

6-16
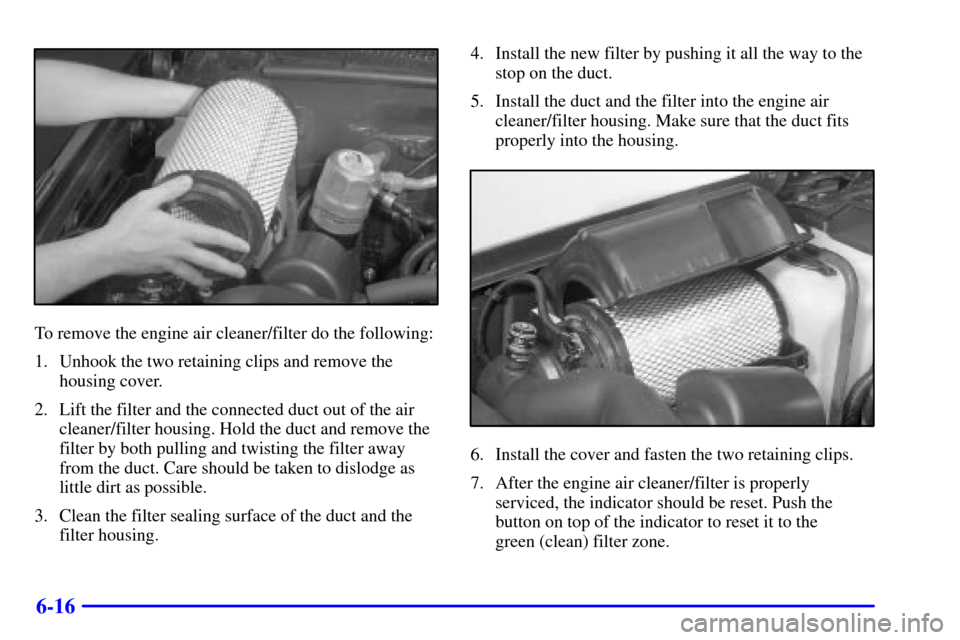
To remove the engine air cleaner/filter do the following:
1. Unhook the two retaining clips and remove the
housing cover.
2. Lift the filter and the connected duct out of the air
cleaner/filter housing. Hold the duct and remove the
filter by both pulling and twisting the filter away
from the duct. Care should be taken to dislodge as
little dirt as possible.
3. Clean the filter sealing surface of the duct and the
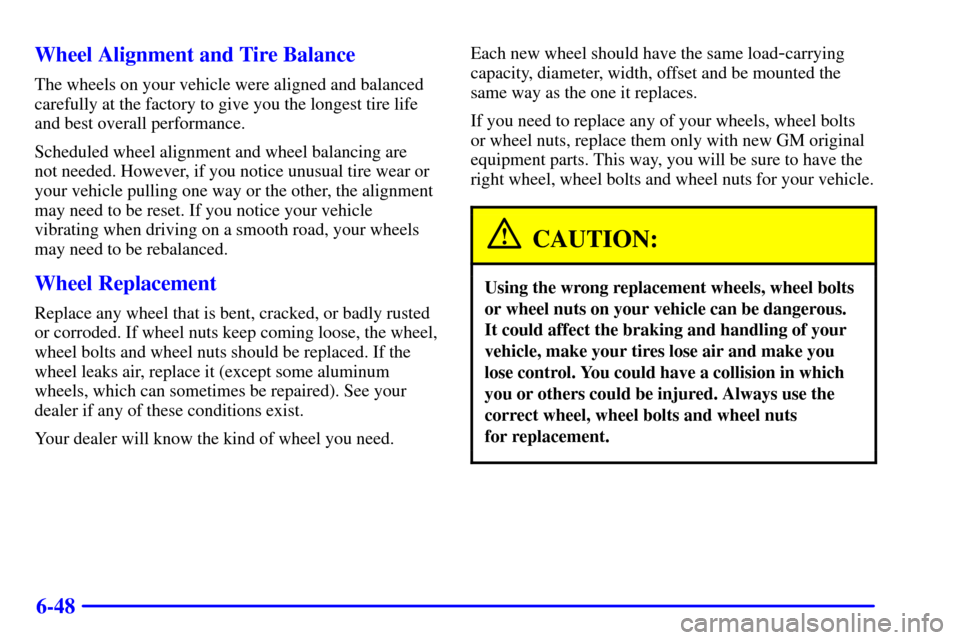
filter housing.4. Install the new filter by pushing it all the way to the
stop on the duct.
5. Install the duct and the filter into the engine air
cleaner/filter housing. Make sure that the duct fits
properly into the housing.
6. Install the cover and fasten the two retaining clips.
7. After the engine air cleaner/filter is properly
serviced, the indicator should be reset. Push the
button on top of the indicator to reset it to the
green (clean) filter zone.
Page 243 of 331

6-48 Wheel Alignment and Tire Balance
The wheels on your vehicle were aligned and balanced
carefully at the factory to give you the longest tire life
and best overall performance.
Scheduled wheel alignment and wheel balancing are
not needed. However, if you notice unusual tire wear or
your vehicle pulling one way or the other, the alignment
may need to be reset. If you notice your vehicle
vibrating when driving on a smooth road, your wheels
may need to be rebalanced.
Wheel Replacement
Replace any wheel that is bent, cracked, or badly rusted
or corroded. If wheel nuts keep coming loose, the wheel,
wheel bolts and wheel nuts should be replaced. If the
wheel leaks air, replace it (except some aluminum
wheels, which can sometimes be repaired). See your
dealer if any of these conditions exist.
Your dealer will know the kind of wheel you need.Each new wheel should have the same load
-carrying
capacity, diameter, width, offset and be mounted the
same way as the one it replaces.
If you need to replace any of your wheels, wheel bolts
or wheel nuts, replace them only with new GM original
equipment parts. This way, you will be sure to have the
right wheel, wheel bolts and wheel nuts for your vehicle.
CAUTION:
Using the wrong replacement wheels, wheel bolts
or wheel nuts on your vehicle can be dangerous.
It could affect the braking and handling of your
vehicle, make your tires lose air and make you
lose control. You could have a collision in which
you or others could be injured. Always use the
correct wheel, wheel bolts and wheel nuts
for replacement.