Page 203 of 399

3-31 Theft-Deterrent Feature
THEFTLOCK� is designed to discourage theft of your
radio. Your vehicle has a ªbuilt
-inº theft-deterrent
feature on each radio that is automatic
-- there is no
programming required. The radio in your vehicle cannot
be used in any other vehicle. When the radio was
originally installed in your vehicle at the factory, it
stored the Vehicle Identification Number (VIN). Each
time the ignition is turned on, the VIN is verified. If the
vehicle's VIN does not match the VIN stored in the
radio, THEFTLOCK will be activated and the audio
system will not play. If the radio is removed from your
vehicle, the original VIN in the radio can be used to
trace the radio back to your vehicle.
Audio Steering Wheel Controls
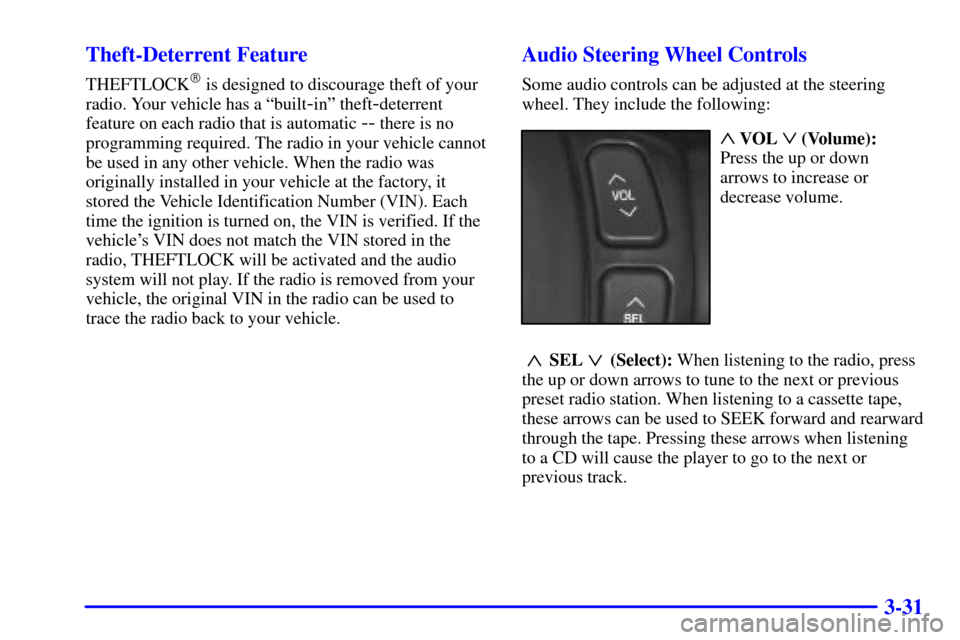
Some audio controls can be adjusted at the steering
wheel. They include the following:
~ VOL ! (Volume):
Press the up or down
arrows to increase or
decrease volume.
~SEL !(Select): When listening to the radio, press
the up or down arrows to tune to the next or previous
preset radio station. When listening to a cassette tape,
these arrows can be used to SEEK forward and rearward
through the tape. Pressing these arrows when listening
to a CD will cause the player to go to the next or
previous track.
Page 206 of 399

3-34 Care of Your Cassette Tape Player
A tape player that is not cleaned regularly can cause
reduced sound quality, ruined cassettes or a damaged
mechanism. Cassette tapes should be stored in their
cases away from contaminants, direct sunlight and
extreme heat. If they aren't, they may not operate
properly or may cause failure of the tape player.
Your tape player should be cleaned regularly after every
50 hours of use. Your radio may display CLEAN TAPE
to indicate that you have used your tape player for
50 hours without resetting the tape clean timer. If this
message appears on the display, your cassette tape
player needs to be cleaned. It will still play tapes, but
you should clean it as soon as possible to prevent
damage to your tapes and player. If you notice a
reduction in sound quality, try a known good cassette to
see if it is the tape or the tape player at fault. If this other
cassette has no improvement in sound quality, clean the
tape player.The recommended cleaning method for your
cassette tape player is the use of a scrubbing action,
non-abrasive cleaning cassette with pads which scrub
the tape head as the hubs of the cleaner cassette turn.
The recommended cleaning cassette is available through
your dealer (GM Part No. 12344789).
When cleaning the cassette tape player with the
recommended non
-abrasive cleaning cassette, it is
possible that the cassette may eject, because the cut tape
detection feature on your radio may recognize it as a
broken tape. To prevent the cleaning cassette from being
ejected, use the following steps:
1. Turn the ignition to ON or ACC.
2. Turn the radio off.
3. Press and hold the SOURCE button for
two seconds. The tape symbol on the display
will flash three times.
4. Turn the radio on and insert the scrubbing action
cleaning cassette.
5. Eject the cleaning cassette after the manufacturer's
recommended cleaning time.
Page 233 of 399

4-25
If you drive regularly in steep country, or if you're
planning to visit there, here are some tips that can make
your trips safer and more enjoyable.
�Keep your vehicle in good shape. Check all fluid
levels and also the brakes, tires, cooling system
and transaxle. These parts can work hard on
mountain roads.
�Know how to go down hills. The most important
thing to know is this: let your engine do some of the
slowing down. Shift to a lower gear when you go
down a steep or long hill.
CAUTION:
If you don't shift down, your brakes could get
so hot that they wouldn't work well. You would
then have poor braking or even none going
down a hill. You could crash. Shift down to let
your engine assist your brakes on a steep
downhill slope.
CAUTION:
Coasting downhill in NEUTRAL (N) or with the
ignition off is dangerous. Your brakes will have
to do all the work of slowing down. They could
get so hot that they wouldn't work well. You
would then have poor braking or even none going
down a hill. You could crash. Always have your
engine running and your vehicle in gear when
you go downhill.
�Know how to go uphill. You may want to shift
down to a lower gear. The lower gears help you
climb the hill better.
�Stay in your own lane when driving on two
-lane
roads in hills or mountains. Don't swing wide or cut
across the center of the road. Drive at speeds that let
you stay in your own lane.
�As you go over the top of a hill, be alert. There could be
something in your lane, like a stalled car or an accident.
�You may see highway signs on mountains that warn
of special problems. Examples are long grades, passing
or no
-passing zones, a falling rocks area or winding
roads. Be alert to these and take appropriate action.
Page 253 of 399

5-4
1. Check the other vehicle. It must have a 12-volt
battery with a negative ground system.
NOTICE:
If the other system isn't a 12-volt system with a
negative ground, both vehicles can be damaged.
2. Get the vehicles close enough so the jumper cables
can reach, but be sure the vehicles aren't touching
each other. If they are, it could cause a ground
connection you don't want. You wouldn't be able to
start your vehicle and the bad grounding could
damage the electrical systems.
To avoid the possibility of the vehicles rolling, set
the parking brake firmly on both vehicles involved in
the jump start procedure. Put an automatic transaxle
in PARK (P) or a manual transaxle in NEUTRAL
before setting the parking brake.
NOTICE:
If you leave your radio on, it could be badly
damaged. The repairs wouldn't be covered by
your warranty.
3. Turn off the ignition on both vehicles. Unplug
unnecessary accessories plugged into the cigarette
lighter or in the accessory power outlets. Turn off the
radio and all lamps that aren't needed. This will
avoid sparks and help save both batteries. And it
could save your radio!
4. Open the hoods and locate the positive (+) and
negative (
-) terminal locations on the other vehicle.
Your vehicle has a remote (+) jump starting terminal
and a remote negative (
-) jump starting terminal.
You should always use these remote terminals
instead of the terminals on the battery.
Page 312 of 399

6-31
If the ignition is in ON and the brake fluid is low, the
CHECK BRAKE FLUID message will be displayed in
the Driver Information Center (DIC).
When your brake fluid falls to a low level, your brake
warning light will come on. See ªBrake System Warning
Lightº in the Index.
What to Add
When you do need brake fluid, use only DOT
-3 brake
fluid. Use new brake fluid from a sealed container only.
See ªRecommended Fluids and Lubricantsº in
the Index.
Always clean the brake fluid reservoir cap and the area
around the cap before removing it. This will help keep
dirt from entering the reservoir.
CAUTION:
With the wrong kind of fluid in your brake
system, your brakes may not work well, or they
may not even work at all. This could cause a
crash. Always use the proper brake fluid.
NOTICE:
�Using the wrong fluid can badly damage
brake system parts. For example, just a few
drops of mineral
-based oil, such as engine
oil, in your brake system can damage brake
system parts so badly that they'll have to be
replaced. Don't let someone put in the
wrong kind of fluid.
�If you spill brake fluid on your vehicle's
painted surfaces, the paint finish can be
damaged. Be careful not to spill brake fluid
on your vehicle. If you do, wash it off
immediately. See ªAppearance Careº in
the Index.
Page 353 of 399
6-72
Minifuses Usage
1 ALDL
2 Accessory
3 Windshield Wipers
4 Not Used
5 Headlamp Low Beam Left Minifuses Usage
6 Headlamp Low Beam Right
7 Instrument Panel
8 Powertrain Control
Module Battery
9 Headlamp High Beam Right
10 Headlamp High Beam Left
11 Ignition 1
12 Fog Lamps
13 Transmission
14 Cruise Control
15 Coil MDL
16 Injector Bank #2
17 Not Used
18 Not Used
19 Powertrain Control
Module Ignition
20 Oxygen Sensor
Page 354 of 399
6-73
Minifuses Usage
21 Injector Bank #1
22 Auxiliary Power, (Cltr2)
23 Cigar Lighter
24 Daytime Running Lamps
25 Horn
26 Air Conditioner Clutch
Micro Relays Usage
27 Headlamp High Beam
28 Headlamp Low Beam
29 Fog Lamps
30 Daytime Running Lamps
31 Horn
32 Air Conditioner Clutch
Mini Relays Usage
33 Not Used
34 AccessoryMini Relays Usage
35 Not Used
36 Starter 1
37 Cooling Fan Secondary
38 Ignition 1
39 Cooling Fan Series/Parallel
40 Cooling Fan Primary
Maxibreaker Usage
41 Starter
42 Export Use
MaxiFuses Usage
43 Not Used
44 Antilock Brake System
45 Air Pump
46 Cooling Fan Secondary
47 Cooling Fan Primary
The spare fuses are located in numbers 48 through 52.
The fuse puller is located in number 53.
Page 357 of 399
6-76
Minifuses Usage
1 Fuel Pump
2 Heater, Ventilation, Air
Conditioner Blower
3 Memory Seat, Tilt and
Telescoping Steering
4 SDAR (XM� Satellite
Radio
-If Equipped)
5 Driver Door Module
6 Heated Seat Left Rear
7 Power Tilt and
Telescoping Steering
8 Supplemental Inflation Restraint
9 Not Used
10 Lamps Park Right
11 Fuel Tank Ventilation Solenoid
12 Ignition 1
13 Lamps, Parking Left