Page 55 of 395
1-49
CAUTION:
A child in a child restraint in the center front seat
can be badly injured or killed by the right front
passenger air bag if it inflates. Never secure a
child restraint in the center front seat. It's always
better to secure a child restraint in the rear seat.
You may secure a forward
-facing child restraint
in the right front passenger seat, but before you
do, always move the front passenger seat as far
back as it will go. It's better to secure the child
restraint in a rear seat.
See the earlier part about the top strap if the child
restraint has one.
1. Make the belt as long as possible by tilting the latch
plate and pulling it along the belt.
2. Put the restraint on the seat.
3. Run the vehicle's safety belt through or around the
restraint. The child restraint instructions will show
you how.
Page 57 of 395

1-51 Securing a Child Restraint in the Right
Front Seat Position
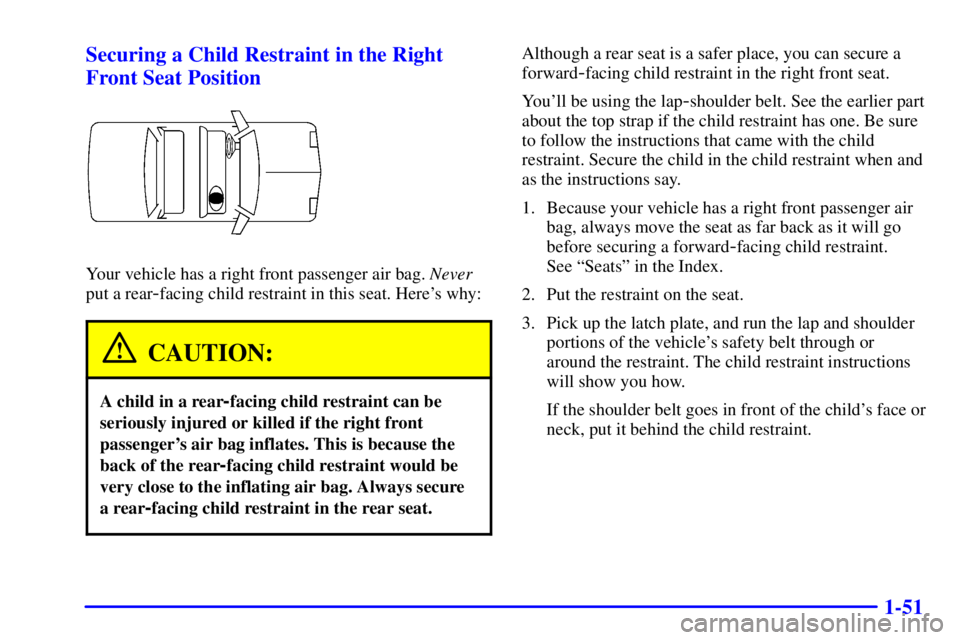
Your vehicle has a right front passenger air bag. Never
put a rear
-facing child restraint in this seat. Here's why:
CAUTION:
A child in a rear-facing child restraint can be
seriously injured or killed if the right front
passenger's air bag inflates. This is because the
back of the rear
-facing child restraint would be
very close to the inflating air bag. Always secure
a rear
-facing child restraint in the rear seat.
Although a rear seat is a safer place, you can secure a
forward
-facing child restraint in the right front seat.
You'll be using the lap
-shoulder belt. See the earlier part
about the top strap if the child restraint has one. Be sure
to follow the instructions that came with the child
restraint. Secure the child in the child restraint when and
as the instructions say.
1. Because your vehicle has a right front passenger air
bag, always move the seat as far back as it will go
before securing a forward
-facing child restraint.
See ªSeatsº in the Index.
2. Put the restraint on the seat.
3. Pick up the latch plate, and run the lap and shoulder
portions of the vehicle's safety belt through or
around the restraint. The child restraint instructions
will show you how.
If the shoulder belt goes in front of the child's face or
neck, put it behind the child restraint.
Page 122 of 395

2-59
You will also find two auxiliary power outlets located
inside the rear storage area. These outlets can be used
for accessories requiring power, such as a cellular phone
or fax machine. See ªAuxiliary Power Outletsº in
the Index.
Rear Armrest
Your vehicle's rear seat armrest contains two
cupholders. To access the cupholders, pull the
armrest down from the rear seatback.
Rear Storage Armrest (If Equipped)
The rear storage armrest contains two cupholders.
To access the cupholders, pull the armrest down from
the rear seatback.
The storage armrest also includes a storage area inside
the armrest. To open it, pull up on the lever at the front
edge of the armrest.
Rear Seat Pass Through
Your vehicle is equipped with a rear storage armrest
with a pass
-through feature that allows for trunk access.
Pull the rear armrest down, then push down on the trunk
access panel latch to open the panel. To close, push the
access panel until it latches.
Convenience Net
Your vehicle has a convenience net. You'll see it just
inside the back wall of the trunk.
Put small loads, like grocery bags, behind the net. It can
help keep them from falling over during sharp turns or
quick starts and stops.
The net isn't for larger, heavier loads. Store them in the
trunk as far forward as you can.
You can unhook the net so that it will lie flat when
you're not using it.
Page 140 of 395

2-77
CAUTION:
If the air bag readiness light stays on after you
start your vehicle, it means the air bag system
may not be working properly. The air bags in
your vehicle may not inflate in a crash, or they
could even inflate without a crash. To help avoid
injury to yourself or others, have your vehicle
serviced right away if the air bag readiness light
stays on after you start your vehicle.
The air bag readiness light should flash for a few
seconds when you turn the ignition key to RUN. If the
light doesn't come on then, have it fixed so it will be
ready to warn you if there is a problem.
Battery Warning Light
When you turn the key to
RUN, this light will come
on briefly, to show the
battery charging system
is working.
When the light goes off and stays off, the charging
system is working.
If the light stays on, a chime will sound indicating
you need service, and you should take your vehicle to
the dealer at once. To save your battery until you get
there, turn off all accessories and turn off your climate
control system.
Page 154 of 395

2-91
When the STABILITY SYSTEM ACTIVE message
is on, you should continue to steer in the direction you
want to go. The system is designed to help you in bad
weather or other difficult driving situations by making
the most of whatever road conditions will permit. If the
STABILITY SYSTEM ACTIVE message comes on,
you'll know that something has caused your vehicle to
start to spin, so you should consider slowing down.
Tire Pressure Status
- 140: If you see the TIRE
PRESSURE LOW message, you should stop as soon as
you can and check all your tires for damage. (If a tire is
flat, see ªIf a Tire Goes Flatº in the Index.) Also check
the tire pressure in all four tires as soon as you can. See
ªInflation
- Tire Pressureº and ªCheck Tire Pressure
Systemº in the Index.
There are times when you will have to reset (calibrate)
the Check Tire Pressure System. See ªCheck Tire
Pressure Systemº in the Index.
DIC Personal Choice Programming
The DIC is used to program personal choices for up to
two drivers. The drivers are recognized as DRIVER #1
and DRIVER #2. The DIC will identify a person as
UNKNOWN DRIVER if they are neither DRIVER #1
nor DRIVER #2. You will let the DIC know which
driver you are by using your remote keyless entry
transmitter or by pressing one of the MEMORY buttons
located on the driver's door. Each remote keyless entry
transmitter was pre
-programmed to belong to
DRIVER #1 or DRIVER #2. Each transmitter
may be programmed differently for each driver.
After you press the button with the unlock symbol on
your transmitter with the ignition in RUN, the DIC will
automatically display the identified driver number. The
vehicle will recall the personal choice settings that were
last made to correspond to your transmitter, including
your radio and comfort control settings. See ªComfort
Controls, Personal Choiceº in the Index.
Page 224 of 395

4-32
Loading Your Vehicle
Two labels on your vehicle show how much weight it
may properly carry. The Tire
-Loading Information label
found on the rear edge of the driver's door tells you the
proper size, speed rating and recommended inflation
pressures for the tires on your vehicle. It also gives you
important information about the number of people that
can be in your vehicle and the total weight that you can
carry. This weight is called the Vehicle Capacity Weight
and includes the weight of all occupants, cargo, and all
nonfactory
-installed options.
The other label is the Certification Label, found on the
rear edge of the driver's door. It tells you the gross
weight capacity of your vehicle, called the Gross
Vehicle Weight Rating (GVWR). The GVWR includes
the weight of the vehicle, all occupants, fuel and cargo.
Never exceed the GVWR for your vehicle, or the
Gross Axle Weight Rating (GAWR) for either the front
or rear axle.
And, if you do have a heavy load, you should spread
it out. Don't carry more than 176 lbs. (80 kg) in
your trunk.
Page 260 of 395

5-27
11. Using the wheel
wrench, tighten the
wheel nuts firmly in a
crisscross sequence.
CAUTION:
Incorrect wheel nuts or improperly tightened
wheel nuts can cause the wheel to become loose
and even come off. This could lead to an accident.
Be sure to use the correct wheel nuts. If you have
to replace them, be sure to get new GM original
equipment wheel nuts.
Stop somewhere as soon as you can and have
the nuts tightened with a torque wrench to
100 lb
-ft (140 N´m).
NOTICE:
Improperly tightened wheel nuts can lead to
brake pulsation and rotor damage. To avoid
expensive brake repairs, evenly tighten the wheel
nuts in the proper sequence and to the proper
torque specification.
12. Don't try to put the wheel cover on the compact
spare tire. It won't fit.
Store the wheel cover in the trunk until you have
the flat tire repaired or replaced.
NOTICE:
Wheel covers won't fit on your compact spare.
If you try to put a wheel cover on your compact
spare, you could damage the cover or the spare.
Page 261 of 395
5-28 Storing the Flat Tire and Tools
CAUTION:
Storing a jack, a tire or other equipment in the
passenger compartment of the vehicle could
cause injury. In a sudden stop or collision, loose
equipment could strike someone. Store all these
in the proper place.
After you've put the compact spare tire on your vehicle,
you'll need to store the flat tire in your trunk. Use the
following procedure to secure the flat tire in the trunk.Store the flat tire as far forward in the trunk as possible.
Store the jack and wheel wrench in their compartment in
the trunk.