2002 BMW Z8 instrument cluster
[x] Cancel search: instrument clusterPage 10 of 174

Contents
Overview
Controls and features
Cockpit16
Instrument cluster18
Indicator and warning lamps20
Hazard warning flashers24
Warning triangle24
First-aid kit24
Refueling25
Fuel quality26
Tire inflation pressure26
Locks and security systems:
Keys30
Electronic vehicle
immobilizer31
Central locking system32
Opening and closing Ð from the
outside32
Using the key32
Using the remote control33
Opening and closing Ð from the
inside36
Luggage compartment lid37
Alarm system38
Electric power windows40
The automatic convertible
top41
Adjustments:
Seats45
Steering wheel47
Mirrors47
Vehicle Memory, Key
Memory49
Passenger safety systems:
Safety belts50
Airbags51
Transporting children safely53
Driving:
Ignition and steering lock55
Starting the engine56
Switching off the engine57
Parking brake57
Manual transmission58
Turn signal indicator/Headlamp
flasher58
Washer/Wiper system59
Rear window defroster60
Cruise control61
Everything under control:
Odometer62
Tachometer62
Fuel gauge62
Coolant temperature gauge63
Service Interval Display63
Clock64
Multi-Information Radio (MIR)64
Technology for safety and
driving convenience:
Dynamic Stability Control
(DSC)65
Dynamic Performance
Control66
Flat Tire Monitor67
Contents
Page 15 of 174

Overview
Controls and features
Operation, care
and maintenance
Owner service procedures
Technical data
Index Advanced technology
15n
IndexDataTechnologyRepairsCar careControlsOverview
Cockpit16
Instrument cluster18
Indicator and warning lamps20
Hazard warning flashers24
Warning triangle24
First-aid kit24
Refueling25
Fuel quality26
Tire inflation pressure26
Overview
Page 18 of 174

18n
Instrument cluster
520us002
Page 19 of 174

19n
IndexDataTechnologyRepairsCar careControlsOverview
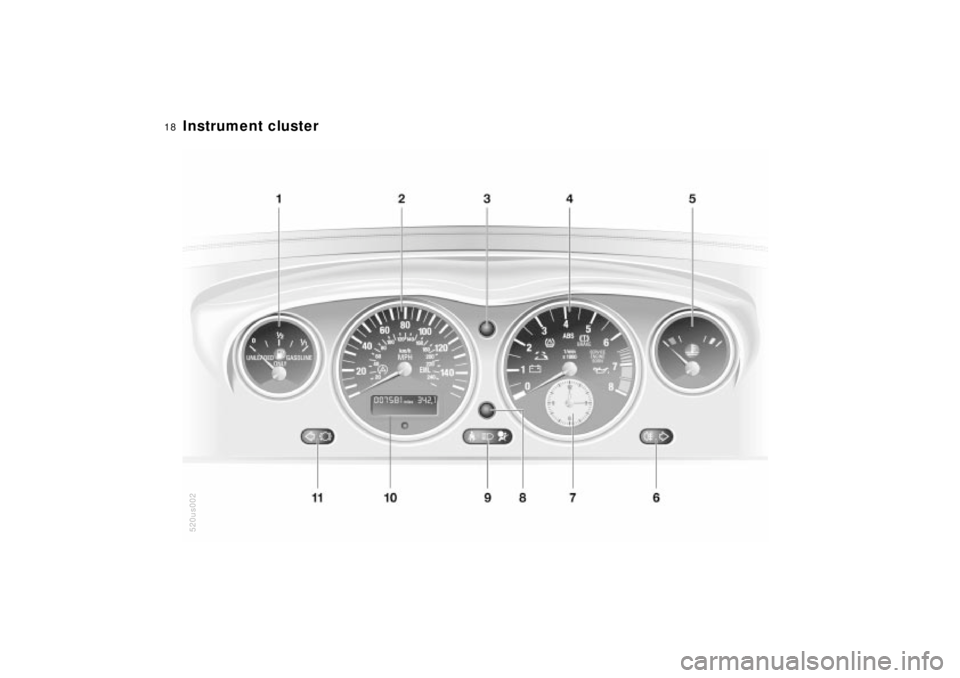
Instrument cluster
1 Fuel gauge with indicator lamp for
fuel reserve62
2 Speedometer with indicator and
warning lamps for
>
Dynamic Stability Control
(DSC)22
>
Engine electronics22
3 Instrument panel lighting69
4 Tachometer62
with indicator and warning lamps
for:
>
Battery charge current20
>
Convertible top operation41
>
Flat Tire Monitor20
>
Antilock Brake System (ABS)21
>
Parking brake/Brake hydraulic
system/Cornering Brake Control
(CBC)20
>
Service Engine Soon22
>
Engine oil pressure/Engine oil
level20, 21
5 Coolant temperature gauge with
"Coolant temperature too high"
warning lamp63
6 Indicator and warning lamps for:
>
Rear fog lamp22
>
Turn signal, right23
7 Clock648 Control button for:
>
Clock64
>
Trip odometer, reset to zero62
9 Indicator and warning lamps for:
>
Please fasten safety belts21
>
High beams23
>
Airbags21
10 Indicator for:
>
Odometer62
>
Trip odometer62
>
Service Interval63
11 Indicator and warning lamps for:
>
Turn signal, left23
>
Brake pads22
Page 41 of 174

41n
IndexDataTechnologyRepairsCar careControlsOverview
The automatic convertible topWeather protectionThe fabric convertible top combines
reliable protection from the elements
with simple, convenient operation. Here
are a few tips to ensure that you enjoy
your BMW Z8 roadster.
It is advisable to close the convertible
top when the vehicle is parked. The
closed convertible top not only protects
the passenger compartment from
unforeseeable damage from the
weather, it also provides a certain
degree of theft protection. Even if the
convertible top is closed, store your
valuables only in the locked luggage
compartment.
To prevent damage to its rear window,
avoid opening or closing the fabric top
unless the temperature is well above
freezing. Operate the convertible top only
when the vehicle is stationary,
otherwise the procedure will be inter-
rupted. Driving before the opening or
closing procedure has been properly
concluded can lead to damage or
injury.
Do not lay objects on the convertible
top, since they would fall off when the
convertible top is operated and cause
damage or injuries.
Make sure that no objects or people get
in the way while the convertible top is
opening or closing, so that no damage
or injuries occur.
The automatic operating procedure is
interrupted immediately if the switch
for actuating the top is released. The
procedure can be continued in the
desired direction by pressing this
switch.<
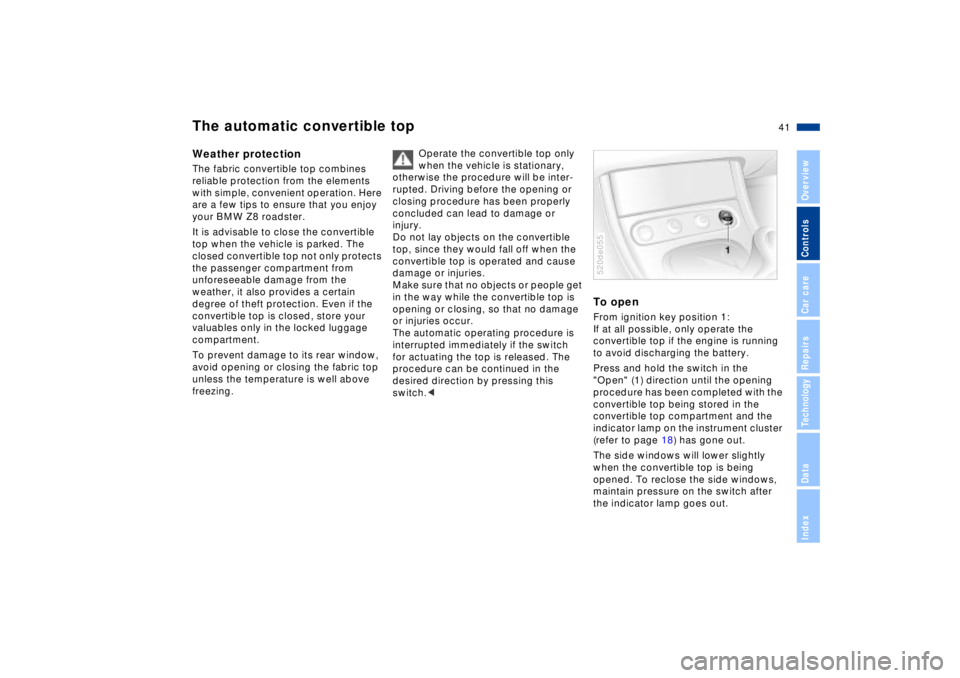
To openFrom ignition key position 1:
If at all possible, only operate the
convertible top if the engine is running
to avoid discharging the battery.
Press and hold the switch in the
"Open" (1) direction until the opening
procedure has been completed with the
convertible top being stored in the
convertible top compartment and the
indicator lamp on the instrument cluster
(refer to page 18) has gone out.
The side windows will lower slightly
when the convertible top is being
opened. To reclose the side windows,
maintain pressure on the switch after
the indicator lamp goes out. 520de055
Page 44 of 174

44n
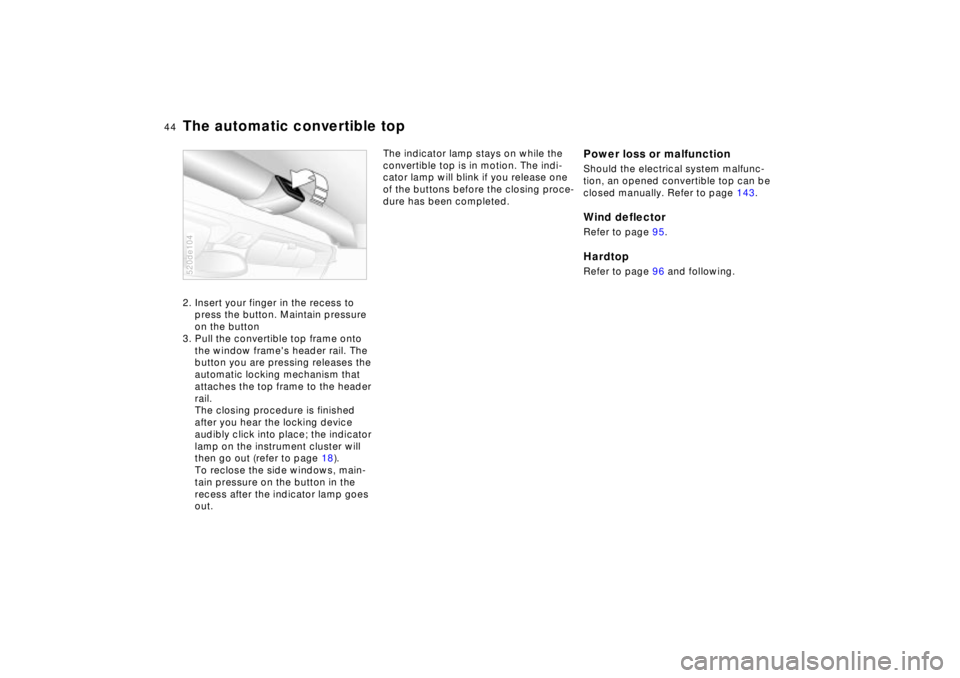
The automatic convertible top2. Insert your finger in the recess to
press the button. Maintain pressure
on the button
3. Pull the convertible top frame onto
the window frame's header rail. The
button you are pressing releases the
automatic locking mechanism that
attaches the top frame to the header
rail.
The closing procedure is finished
after you hear the locking device
audibly click into place; the indicator
lamp on the instrument cluster will
then go out (refer to page 18).
To reclose the side windows, main-
tain pressure on the button in the
recess after the indicator lamp goes
out. 520de104
The indicator lamp stays on while the
convertible top is in motion. The indi-
cator lamp will blink if you release one
of the buttons before the closing proce-
dure has been completed.
Power loss or malfunctionShould the electrical system malfunc-
tion, an opened convertible top can be
closed manually. Refer to page 143.Wind deflectorRefer to page 95.HardtopRefer to page 96 and following.
Page 52 of 174

52n
AirbagsSitting correctly with airbags
Comply with the following instruc-
tions for the airbags, otherwise,
the airbags may not be able to provide
their maximum protection, with
resulting risks to personal safety. All
passengers in the vehicle should be
aware of and comply with this informa-
tion:
The airbag is a supplemental restraint
device; it is not a substitute or replace-
ment for your safety belt, which you
should continue to wear at all times.
When adjusting your seat, assume a
comfortable driving posture allowing
comfortable and secure access to all of
the vehicle's controls. Avoid sitting too
close to the steering wheel.
Always hold the steering wheel by the
rim Ð hands in the "9 o'clock" and
"3 o'clock" positions Ð otherwise, your
hands or arms could be injured if the
airbag is triggered.
Never allow any other passengers,
animals or objects to intrude into the
area between the airbag and the driver
or front passenger.
Do not use the cover panel above the
front passenger airbag as a storage
area.
Do not apply adhesive materials to the
cover panels of the airbags, or cover or
modify them in any other way.
Do not use a rear-facing child seat in
the front passenger seat. If you use a
child-restraint system, carefully read
and comply with the instructions on
page 53.
Be sure that child seats are installed
correctly and with the greatest possible
distance between them and the side
airbag. Do not allow children to lean out
of the child's seat in the direction of the
side trim panels. If they do so, serious
injuries can occur if the airbag is trig-
gered.<
Even when all these guidelines are
observed, there is still a small residual
risk of injury to the face, hands and
arms occurring from airbag deployment
in isolated instances.
The ignition and inflation noise may
cause a mild temporary hearing loss in
extremely sensitive individuals.
You will find the proper airbag safety
precautions on both sun visors and on
the instrument cluster (US models).
For additional information concerning
the airbag system, refer to pages 123
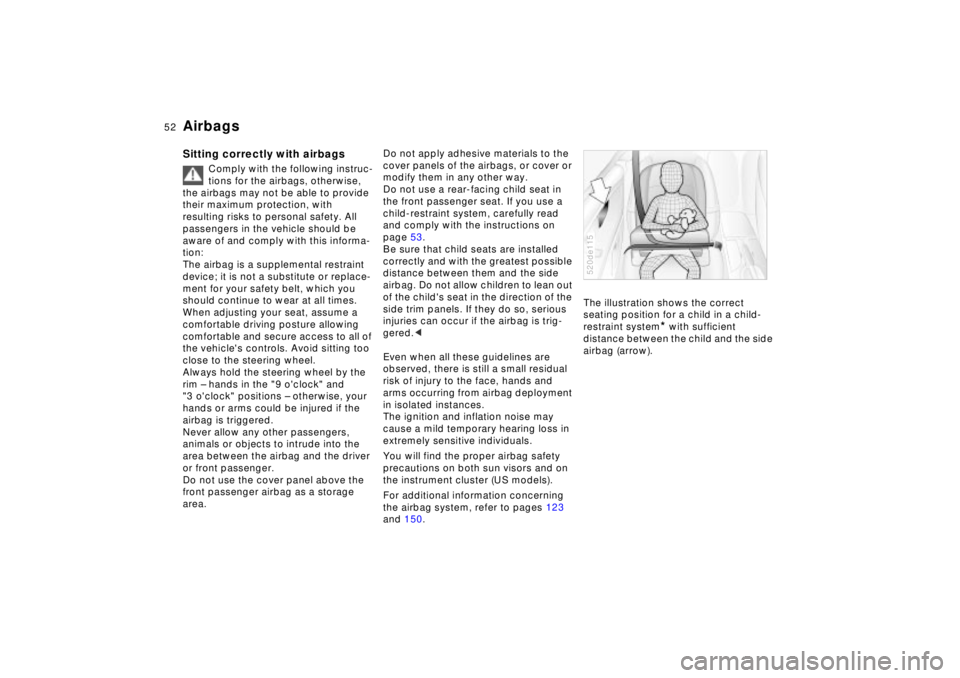
and 150.The illustration shows the correct
seating position for a child in a child-
restraint system
* with sufficient
distance between the child and the side
airbag (arrow).
520de115
Page 57 of 174

57n
IndexDataTechnologyRepairsCar careControlsOverview
Switching off the engine Parking brake Turn ignition key to position 1 or 0.
Never remove the ignition key
while the vehicle is rolling. If you
do so, the ignition lock would engage
when the steering wheel is turned.
When you leave the vehicle, always
remove the ignition key and engage the
steering lock.
Always engage the parking brake when
parking on hills and inclined surfaces,
as first gear or reverse may not provide
adequate resistance to rolling.<
The parking brake is primarily designed
to prevent the vehicle from rolling while
parked. It operates on the rear wheels. To engage The lock engages automatically when
you lift the lever, and the indicator lamp
in the instrument cluster comes on
when the ignition key is in position 2.
Refer to page 21.To releasePull up slightly on the lever, press the
button and lower the lever. 520de024
If, in rare circumstances, it should
be necessary to engage the
parking brake while the vehicle is in
motion, do not pull hard on the lever.
Keep your thumb pressed against the
release button while carefully pulling
the lever up to apply moderate pres-
sure.
Excessive pressure can lead to over-
braking and loss of traction (fishtailing)
at the rear axle.
The brake lamps do not come on when
the parking brake is engaged.
Always engage the parking brake when
parking on hills and inclined surfaces,
as selecting first gear or reverse may
not provide adequate resistance to
rolling.<
To avoid corrosion and one-sided
braking, apply the parking brake lightly
from time to time when coasting to a
standstill (at a traffic signal, for
instance), provided that it is safe to do
so.