2002 BMW Z8 CONVERTIBLE key
[x] Cancel search: keyPage 55 of 174
55n
IndexDataTechnologyRepairsCar careControlsOverview
Your vehicle is equipped with an elec-
trically powered steering lock mecha-
nism.To activate the electrical power
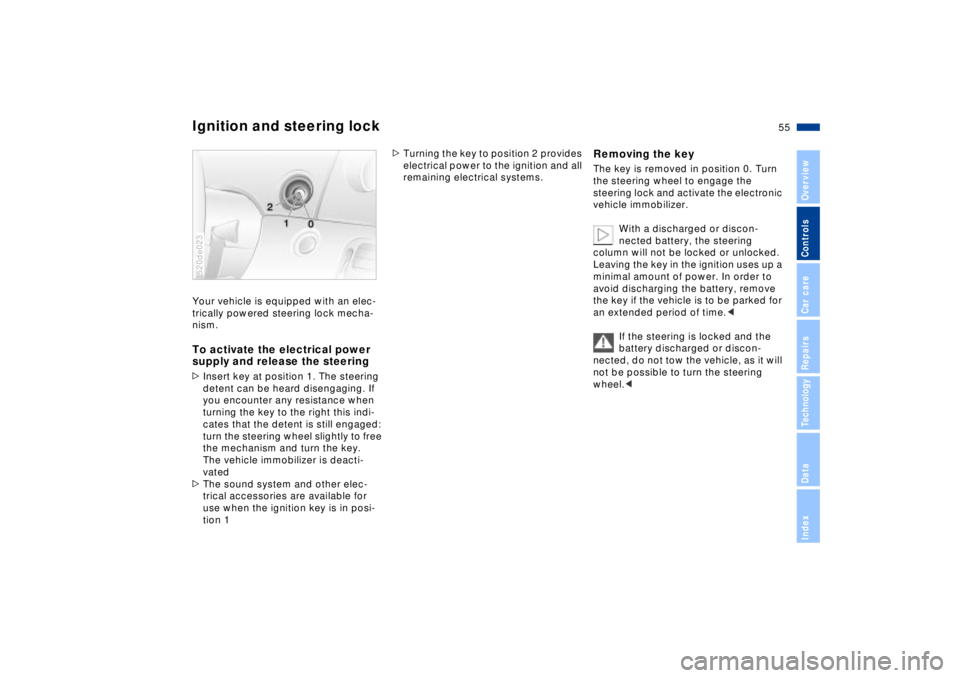
supply and release the steering>Insert key at position 1. The steering
detent can be heard disengaging. If
you encounter any resistance when
turning the key to the right this indi-
cates that the detent is still engaged:
turn the steering wheel slightly to free
the mechanism and turn the key.
The vehicle immobilizer is deacti-
vated
>The sound system and other elec-
trical accessories are available for
use when the ignition key is in posi-
tion 1 520de023
>Turning the key to position 2 provides
electrical power to the ignition and all
remaining electrical systems.
Removing the key The key is removed in position 0. Turn
the steering wheel to engage the
steering lock and activate the electronic
vehicle immobilizer.
With a discharged or discon-
nected battery, the steering
column will not be locked or unlocked.
Leaving the key in the ignition uses up a
minimal amount of power. In order to
avoid discharging the battery, remove
the key if the vehicle is to be parked for
an extended period of time.<
If the steering is locked and the
battery discharged or discon-
nected, do not tow the vehicle, as it will
not be possible to turn the steering
wheel.<
Ignition and steering lock
Page 56 of 174
56n
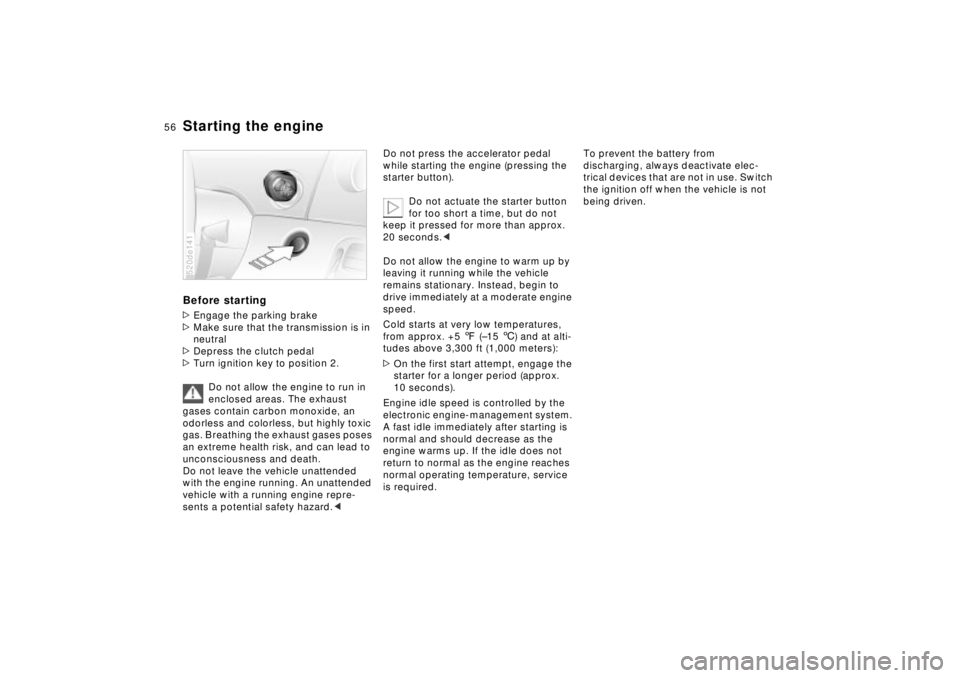
Starting the engine Before starting>Engage the parking brake
>Make sure that the transmission is in
neutral
>Depress the clutch pedal
>Turn ignition key to position 2.
Do not allow the engine to run in
enclosed areas. The exhaust
gases contain carbon monoxide, an
odorless and colorless, but highly toxic
gas. Breathing the exhaust gases poses
an extreme health risk, and can lead to
unconsciousness and death.
Do not leave the vehicle unattended
with the engine running. An unattended
vehicle with a running engine repre-
sents a potential safety hazard.<520de141
Do not press the accelerator pedal
while starting the engine (pressing the
starter button).
Do not actuate the starter button
for too short a time, but do not
keep it pressed for more than approx.
20 seconds.<
Do not allow the engine to warm up by
leaving it running while the vehicle
remains stationary. Instead, begin to
drive immediately at a moderate engine
speed.
Cold starts at very low temperatures,
from approx. +5 7 (Ð15 6) and at alti-
tudes above 3,300 ft (1,000 meters):
>On the first start attempt, engage the
starter for a longer period (approx.
10 seconds).
Engine idle speed is controlled by the
electronic engine-management system.
A fast idle immediately after starting is
normal and should decrease as the
engine warms up. If the idle does not
return to normal as the engine reaches
normal operating temperature, service
is required.
To prevent the battery from
discharging, always deactivate elec-
trical devices that are not in use. Switch
the ignition off when the vehicle is not
being driven.
Page 57 of 174
57n
IndexDataTechnologyRepairsCar careControlsOverview
Switching off the engine Parking brake Turn ignition key to position 1 or 0.
Never remove the ignition key
while the vehicle is rolling. If you
do so, the ignition lock would engage
when the steering wheel is turned.
When you leave the vehicle, always
remove the ignition key and engage the
steering lock.
Always engage the parking brake when
parking on hills and inclined surfaces,
as first gear or reverse may not provide
adequate resistance to rolling.<
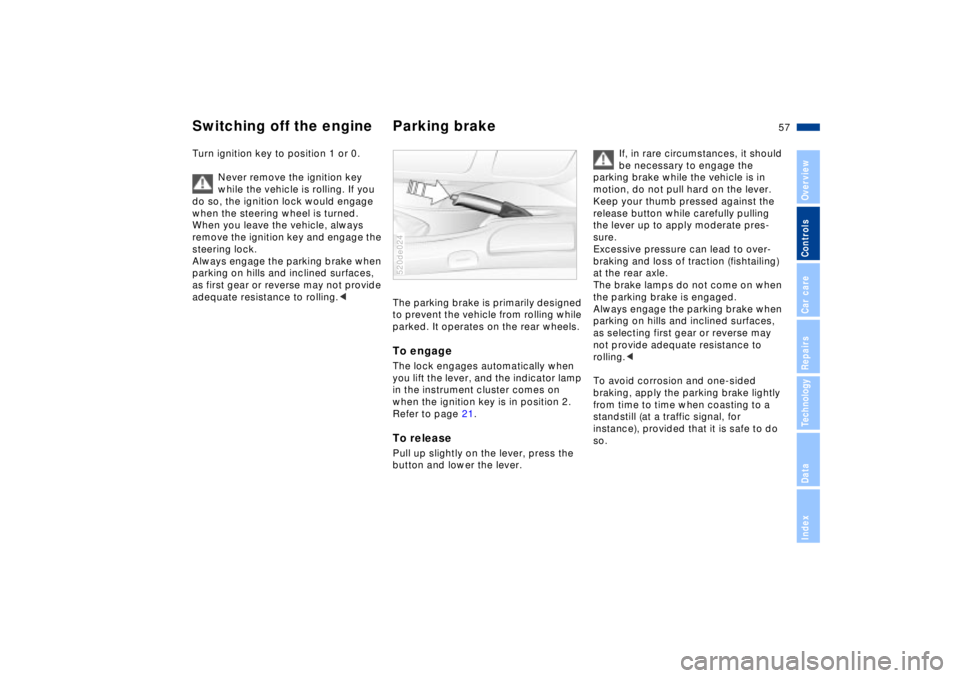
The parking brake is primarily designed
to prevent the vehicle from rolling while
parked. It operates on the rear wheels. To engage The lock engages automatically when
you lift the lever, and the indicator lamp
in the instrument cluster comes on
when the ignition key is in position 2.
Refer to page 21.To releasePull up slightly on the lever, press the
button and lower the lever. 520de024
If, in rare circumstances, it should
be necessary to engage the
parking brake while the vehicle is in
motion, do not pull hard on the lever.
Keep your thumb pressed against the
release button while carefully pulling
the lever up to apply moderate pres-
sure.
Excessive pressure can lead to over-
braking and loss of traction (fishtailing)
at the rear axle.
The brake lamps do not come on when
the parking brake is engaged.
Always engage the parking brake when
parking on hills and inclined surfaces,
as selecting first gear or reverse may
not provide adequate resistance to
rolling.<
To avoid corrosion and one-sided
braking, apply the parking brake lightly
from time to time when coasting to a
standstill (at a traffic signal, for
instance), provided that it is safe to do
so.
Page 58 of 174

58n
Manual transmission Indicator/Headlamp ßasher Every time you shift gears, always
depress the clutch pedal all the way
down, pushing the gear lever into the
desired position.
Always remember to depress the clutch
pedal when starting the engine; a lock-
out device prevents starting when the
clutch is engaged.
The shift lever's neutral plane is located
between 3rd and 4th gears.
The shift lever automatically returns to
the 3rd/4th plane whenever you select
neutral. 520de158
When shifting across the gate to
the 5th/6th gear plane always
remember to push the lever to the right
to avoid inadvertent engagement of 3rd
or 4th gear.<
Reverse Select only when the vehicle is
stationary. Press the shift lever to the
left to overcome the resistance.
As you do this, the backup lamp will
turn on automatically when the ignition
key is in position 2.
Never slip the clutch to prevent
the vehicle from rolling backwards
when stopping on hills. Slipping the
clutch for extended periods leads to
rapid, premature clutch wear.<
1 High beams (blue indicator lamp)
2 Headlamp flasher (blue indicator
lamp)
3 Turn signal indicator (green indicator
lamp and cyclical clicking from the
blinker relay)
If the indicator lamp and the clicking
from the relay are faster than normal,
one of the turn signal bulbs is defective. To signal brieflyPress the lever up to but not beyond
the pressure point. It then returns to the
center position when released. 520de025
Page 59 of 174
59n
IndexDataTechnologyRepairsCar careControlsOverview
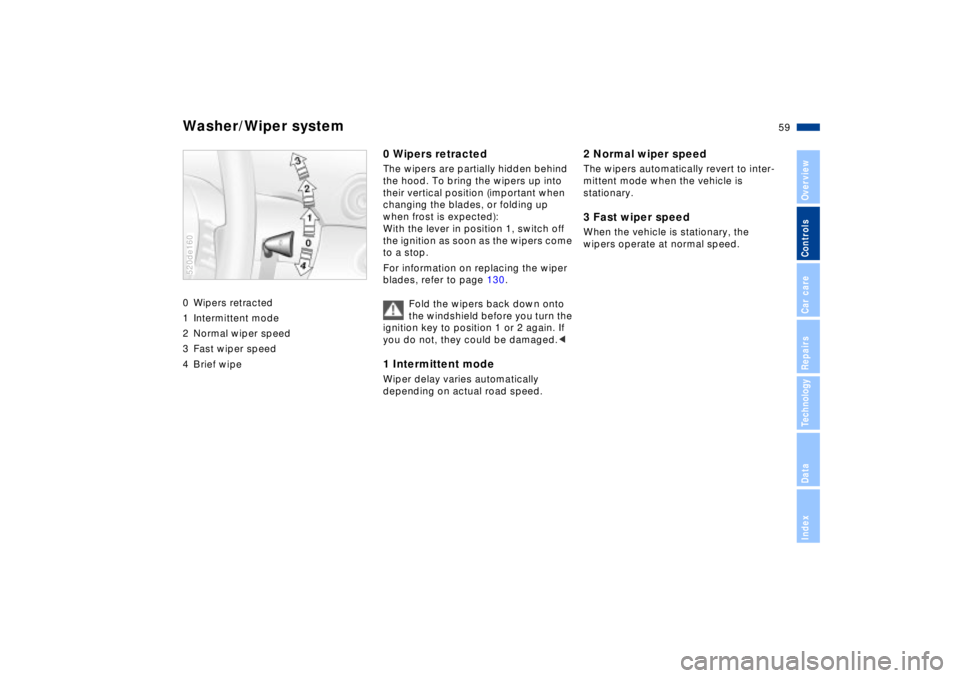
Washer/Wiper system0 Wipers retracted
1 Intermittent mode
2 Normal wiper speed
3 Fast wiper speed
4 Brief wipe520de160
0 Wipers retracted The wipers are partially hidden behind
the hood. To bring the wipers up into
their vertical position (important when
changing the blades, or folding up
when frost is expected):
With the lever in position 1, switch off
the ignition as soon as the wipers come
to a stop.
For information on replacing the wiper
blades, refer to page 130.
Fold the wipers back down onto
the windshield before you turn the
ignition key to position 1 or 2 again. If
you do not, they could be damaged.<1 Intermittent mode Wiper delay varies automatically
depending on actual road speed.
2 Normal wiper speedThe wipers automatically revert to inter-
mittent mode when the vehicle is
stationary. 3 Fast wiper speedWhen the vehicle is stationary, the
wipers operate at normal speed.
Page 60 of 174
60n
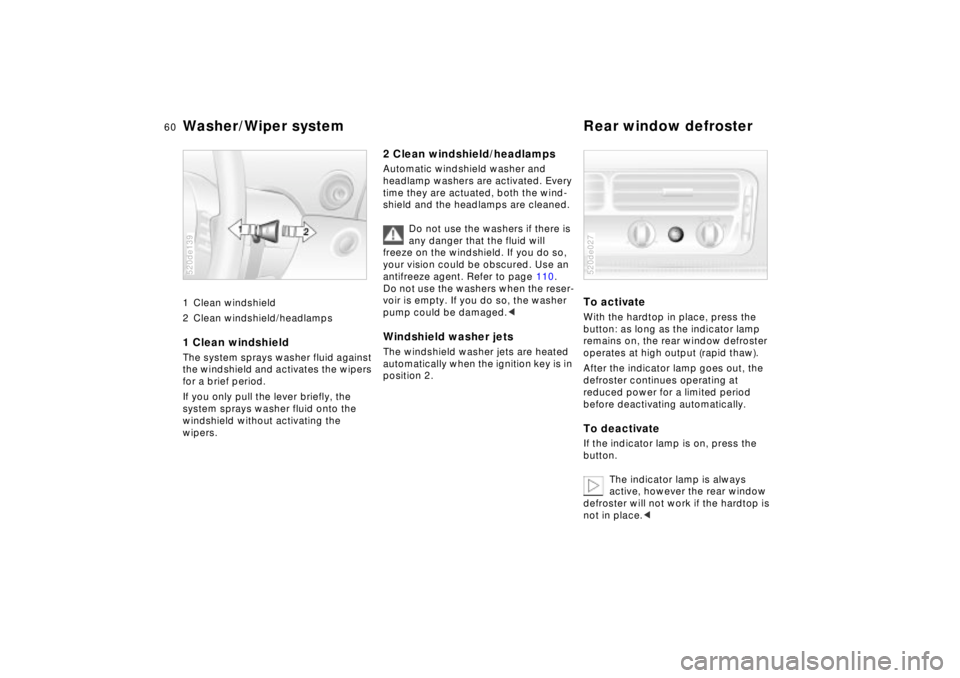
Washer/Wiper system Rear window defroster 1 Clean windshield
2 Clean windshield/headlamps1 Clean windshield The system sprays washer fluid against
the windshield and activates the wipers
for a brief period.
If you only pull the lever briefly, the
system sprays washer fluid onto the
windshield without activating the
wipers. 520de139
2 Clean windshield/headlampsAutomatic windshield washer and
headlamp washers are activated. Every
time they are actuated, both the wind-
shield and the headlamps are cleaned.
Do not use the washers if there is
any danger that the fluid will
freeze on the windshield. If you do so,
your vision could be obscured. Use an
antifreeze agent. Refer to page 110.
Do not use the washers when the reser-
voir is empty. If you do so, the washer
pump could be damaged.
position 2.
To activateWith the hardtop in place, press the
button: as long as the indicator lamp
remains on, the rear window defroster
operates at high output (rapid thaw).
After the indicator lamp goes out, the
defroster continues operating at
reduced power for a limited period
before deactivating automatically. To deactivate If the indicator lamp is on, press the
button.
The indicator lamp is always
active, however the rear window
defroster will not work if the hardtop is
not in place.<520de027
Page 61 of 174
61n
IndexDataTechnologyRepairsCar careControlsOverview
Cruise controlYou can store and automatically main-
tain any desired vehicle speed above
approx. 20 mph (30 km/h).
Refrain from using the cruise
control on twisting roads, when
high traffic density prevents driving at a
constant speed, and when driving on
slippery (snow, rain, ice) or loose
(gravel, sand) road surfaces.<520de061
Store and maintain
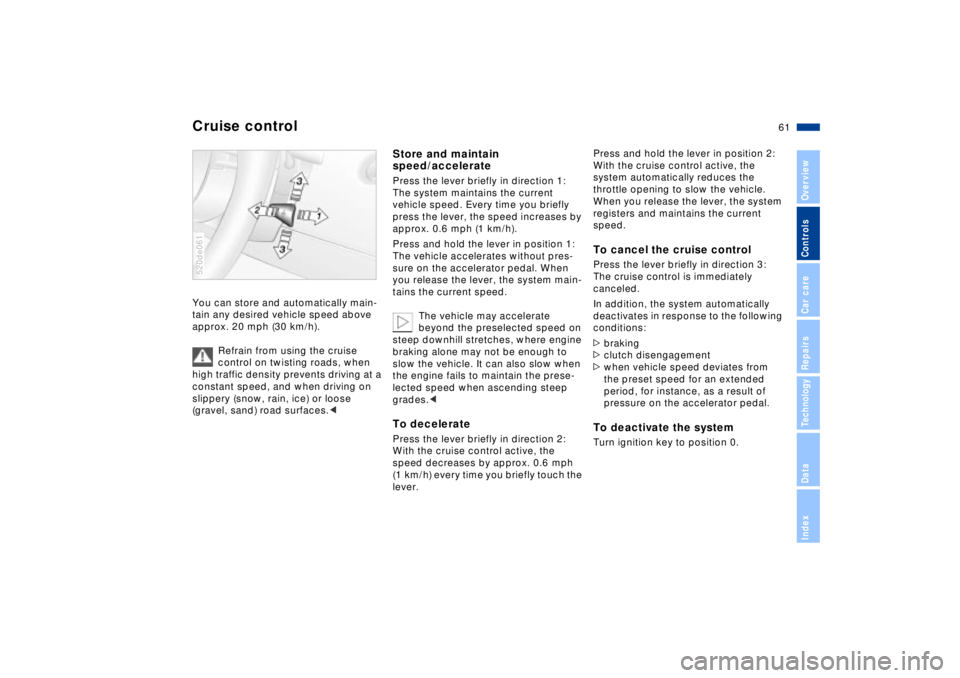
speed/acceleratePress the lever briefly in direction 1:
The system maintains the current
vehicle speed. Every time you briefly
press the lever, the speed increases by
approx. 0.6 mph (1 km/h).
Press and hold the lever in position 1:
The vehicle accelerates without pres-
sure on the accelerator pedal. When
you release the lever, the system main-
tains the current speed.
The vehicle may accelerate
beyond the preselected speed on
steep downhill stretches, where engine
braking alone may not be enough to
slow the vehicle. It can also slow when
the engine fails to maintain the prese-
lected speed when ascending steep
grades.< To decelerate Press the lever briefly in direction 2:
With the cruise control active, the
speed decreases by approx. 0.6 mph
(1 km/h) every time you briefly touch the
lever.
Press and hold the lever in position 2:
With the cruise control active, the
system automatically reduces the
throttle opening to slow the vehicle.
When you release the lever, the system
registers and maintains the current
speed. To cancel the cruise controlPress the lever briefly in direction 3:
The cruise control is immediately
canceled.
In addition, the system automatically
deactivates in response to the following
conditions:
>braking
>clutch disengagement
>when vehicle speed deviates from
the preset speed for an extended
period, for instance, as a result of
pressure on the accelerator pedal. To deactivate the system Turn ignition key to position 0.
Page 62 of 174
62n
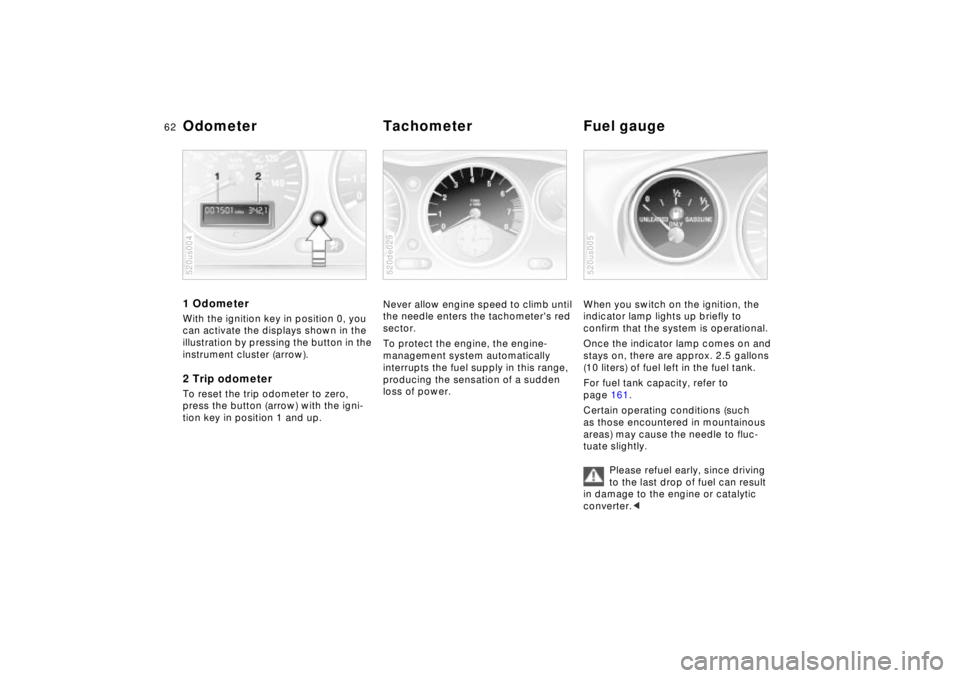
1 Odometer With the ignition key in position 0, you
can activate the displays shown in the
illustration by pressing the button in the
instrument cluster (arrow).2 Trip odometerTo reset the trip odometer to zero,
press the button (arrow) with the igni-
tion key in position 1 and up.520us004
Never allow engine speed to climb until
the needle enters the tachometer's red
sector.
To protect the engine, the engine-
management system automatically
interrupts the fuel supply in this range,
producing the sensation of a sudden
loss of power.520de029
When you switch on the ignition, the
indicator lamp lights up briefly to
confirm that the system is operational.
Once the indicator lamp comes on and
stays on, there are approx. 2.5 gallons
(10 liters) of fuel left in the fuel tank.
For fuel tank capacity, refer to
page 161.
Certain operating conditions (such
as those encountered in mountainous
areas) may cause the needle to fluc-
tuate slightly.
Please refuel early, since driving
to the last drop of fuel can result
in damage to the engine or catalytic
converter.<520us005
Odometer Tachometer Fuel gauge