2002 BMW Z3 change time
[x] Cancel search: change timePage 33 of 187
33n
IndexDataTechnologyRepairsMaintenanceControlsOverview
Opening and closing Ð from the outsideWith the remote control
*
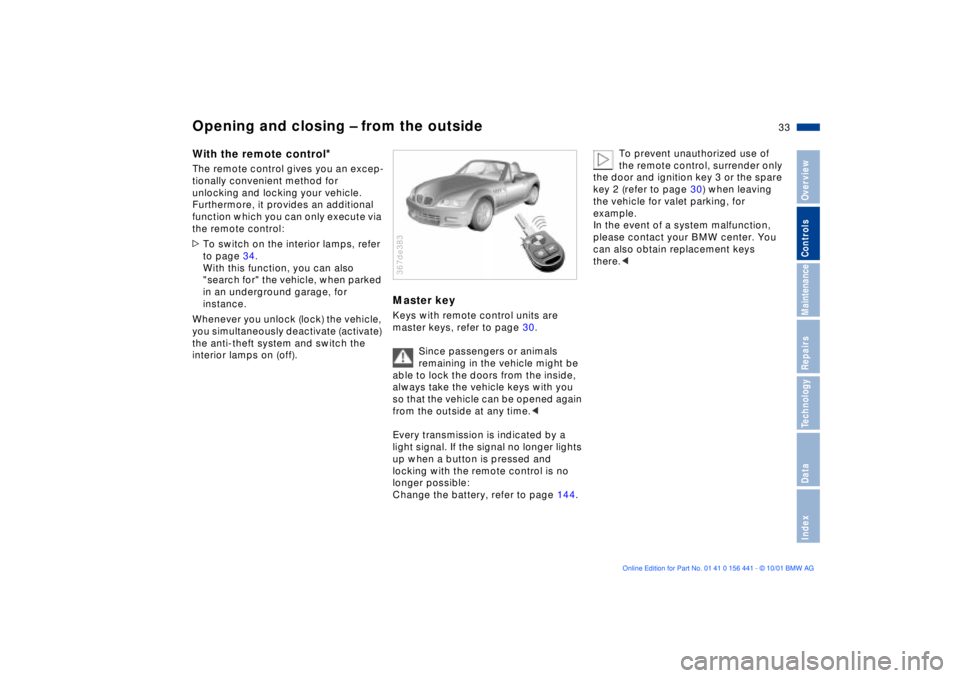
The remote control gives you an excep-
tionally convenient method for
unlocking and locking your vehicle.
Furthermore, it provides an additional
function which you can only execute via
the remote control:
>To switch on the interior lamps, refer
to page 34.
With this function, you can also
"search for" the vehicle, when parked
in an underground garage, for
instance.
Whenever you unlock (lock) the vehicle,
you simultaneously deactivate (activate)
the anti-theft system and switch the
interior lamps on (off).
Master keyKeys with remote control units are
master keys, refer to page 30.
Since passengers or animals
remaining in the vehicle might be
able to lock the doors from the inside,
always take the vehicle keys with you
so that the vehicle can be opened again
from the outside at any time.<
Every transmission is indicated by a
light signal. If the signal no longer lights
up when a button is pressed and
locking with the remote control is no
longer possible:
Change the battery, refer to page 144.367de383
To prevent unauthorized use of
the remote control, surrender only
the door and ignition key 3 or the spare
key 2 (refer to page 30) when leaving
the vehicle for valet parking, for
example.
In the event of a system malfunction,
please contact your BMW center. You
can also obtain replacement keys
there.<
Page 59 of 187
59n
IndexDataTechnologyRepairsMaintenanceControlsOverview
Starting the engineBefore starting>Engage the parking brake
>Be sure that the gearshift lever is in
"Neutral" (or the selector lever in "P"
if the vehicle is equipped with auto-
matic transmission)
>Depress the clutch pedal.
Do not run the engine in enclosed
spaces. The exhaust gases
contain carbon monoxide, an odorless
and colorless, but highly toxic gas.
Breathing the exhaust gases poses an
extreme health risk, and can lead to
unconsciousness and death.
Do not leave the vehicle unattended
with the engine running. An unattended
vehicle with a running engine repre-
sents a potential safety hazard.<
Starting the engine>Do not press the accelerator pedal
while starting the engine.
Do not actuate the starter for too
short a time. Do not turn it for
more than approx. 20 seconds. Release
the ignition key immediately after the
engine starts.
Do not allow the engine to warm up
by leaving it running while the vehicle
remains stationary. Instead, begin to
drive immediately at a moderate engine
speed.<
Should the engine fail to start on the
first attempt (if it is very hot or cold, for
instance):
>Press the accelerator pedal halfway
down while engaging the starter.
Cold starts at very low temperatures,
from approx. +5 7 (Ð15 6) and at
altitudes above approx. 3,300 ft
(1,000 m):
>On the first start attempt, engage the
starter for a longer period (approx.
10 seconds).
If these temperature conditions are
anticipated for a longer period, have the
engine oil changed to a special oil, refer
to page 124. Please contact your BMW
center for additional information.
Usually, it is not necessary to depress
the accelerator pedal. However, at high
altitudes or in very hot or very cold
weather, depress the pedal halfway
down when starting the engine.
Engine idle speed is controlled by the
engine computer system. Increased
speeds at start-up are normal and
should decrease as the engine warms
up. If engine speed does not decrease,
service is required.
To prevent the battery from
discharging, always switch off any
accessories which are not required.
Switch off the ignition when the vehicle
is not being driven.
Page 66 of 187

66n
Washer/Wiper system Rear window defroster6 Intermittent operation/
Cleaning the rear windowPress the lever briefly:
The intermittent setting of the rear
window wiper is switched on or off.
Press and hold the lever:
The system sprays washer fluid against
the rear window and activates the
wiper. After the lever is released, the
wiper continues to cycle for a few
seconds.
To change the wiper blades, refer to
page 136.
Cleaning the headlamps*If the headlamps are on, they will also
be cleaned every fifth time you activate
the cleaning the windshield 5 mode.
Do not use the washers if there is
any danger that the fluid will freeze
on the windshield, otherwise vision
could be obscured. For this reason, use
an antifreeze agent, refer to page 122.
Do not use the washers when the reser-
voir is empty, otherwise damage to the
washer pump could result.< Windshield washer nozzlesThe windshield washer nozzles are
heated automatically
* when the ignition
key is in position 2.
The Z3 coupe is equipped with a rear
window defroster.To switch onPress the button, the indicator lamp
comes on.To switch offPress the button if the indicator lamp is
on.367us721
Z3 coupe
Page 71 of 187

71n
IndexDataTechnologyRepairsMaintenanceControlsOverview
Computer
*
To enter the timeEnter the numbers for hours and
minutes by pressing the button.
Enter the hour first. Each time the
button is pressed, the hour display
increases by one. Pressing and holding
the button starts the rapid advance.
Confirm the time set with the
button. Now enter the minutes when
two zeros appear.
Enter the minutes in the same manner
as the hours.
Press the save button : the time is
started exactly on the second. The
colon stops flashing.To reset the timePress and hold the button for
approx. 3 seconds: enter the hour when
the colon begins to flash.
Enter the numbers by pressing the
button in the same manner as when
entering the time.
Setting the 12-hour or 24-hour
modePress and hold the buttons
simultaneously for approx. 1 second.
Then press the button. Now, the
mode changes from 12 to 24 hours
whenever you press the button.
When you select the 12-hour mode,
AM or PM will appear on the right-hand
side of the display panel.
The last mode selected is adopted
when you press or automatically
stored approx. 5 seconds after the last
setting.
Outside temperatureIf the outside temperature drops to
approx. +37.5 7 (+3 6), a warning
signal sounds (ice warning). The
temperature display appears automati-
cally and flashes for 8 seconds.
The warning is repeated whenever the
temperature has reached at least
+43 7 (+6 6) and then drops to
+37.5 7 (+3 6) again.
The ice warning does not alter the
fact that surface ice can form at
temperatures above +37.5 7 (+3 6),
on bridges or shaded road surfaces, for
instance.< 367us712
Page 115 of 187

115n
IndexDataTechnologyRepairsMaintenanceControlsOverview
Special features of winter tires Snow chains
*
Choosing the right tireBMW recommends winter tires (M+S
radial tires) for operation under
inclement winter driving conditions.
While so-called all season tires (M+S
designation) provide better winter trac-
tion than summer tires with the load
ratings H, V, W, Y and ZR, they gener-
ally do not achieve the performance of
winter tires.
In the interests of sure tracking and safe
steering response, mount winter tires
which are made by the same manufac-
turer and which have the same tread
configuration at all four wheels.Comply with recommended speed
Never exceed the maximum
speed for which the winter tires
are rated.
Unprofessional attempts by laymen to
service tires can lead to damage and
accidents.
Have this work performed by skilled
professionals only. Any BMW center
has the required technical knowledge
and the proper equipment and will be
happy to assist you.<
Tire condition, tire pressureOnce the tire wears to below 0.16 in
(4 mm), winter tires display a percep-
tible decrease in their ability to cope
with winter driving conditions, and
should be replaced in the interest of
safety.
Comply with the specified tire inflation
pressures Ð and be sure to have the
wheel and tire assemblies balanced
every time you change the tires.BMW narrow-link snow chains are
intended for mounting in pairs at the
rear wheels only. Comply with all manu-
facturer's safety precautions when
mounting the chains. Do not exceed a
speed of 30 mph (50 km/h) while
driving with mounted snow chains.
Page 126 of 187
126n
Coolant Brake fluid To add coolantWait until the engine cools before
removing the cap from the expansion
tank. The needle of the coolant gauge
in the instrument cluster must be
located in the blue field; otherwise,
there is a danger of scalding.
1. Turn the cap slightly counterclock-
wise in order to allow accumulated
pressure to escape, then open
2. If the coolant is low, slowly add
coolant until the correct level is
reached Ð do not overfill.
The coolant is a mixture of water and
extended-duty antifreeze with corrosion
inhibitor. Always maintain the
prescribed all-season 50 : 50 mixture
ratio for year-round protection against
internal corrosion. No other additives
are required.
Replace the coolant regularly. Refer to
the Service and Warranty Information
Booklet (US models) or the Warranty
and Service Guide Booklet (Canadian
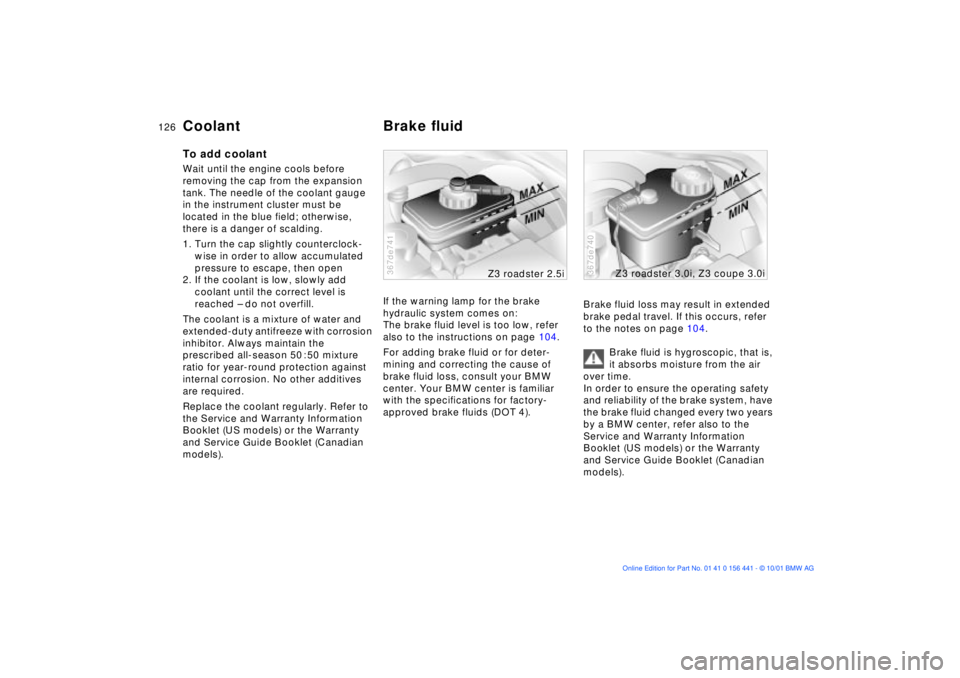
models).If the warning lamp for the brake
hydraulic system comes on:
The brake fluid level is too low, refer
also to the instructions on page 104.
For adding brake fluid or for deter-
mining and correcting the cause of
brake fluid loss, consult your BMW
center. Your BMW center is familiar
with the specifications for factory-
approved brake fluids (DOT 4).
367de741
Z3 roadster 2.5i
Brake fluid loss may result in extended
brake pedal travel. If this occurs, refer
to the notes on page 104.
Brake fluid is hygroscopic, that is,
it absorbs moisture from the air
over time.
In order to ensure the operating safety
and reliability of the brake system, have
the brake fluid changed every two years
by a BMW center, refer also to the
Service and Warranty Information
Booklet (US models) or the Warranty
and Service Guide Booklet (Canadian
models).367de740
Z3 roadster 3.0i, Z3 coupe 3.0i
Page 128 of 187
128n
The BMW Maintenance System has
been designed as a reliable means of
providing maximum driving and oper-
ating safety Ð and as cost-effectively as
possible for you.
Please keep in mind that regular main-
tenance is not only necessary for the
safety of your vehicle, but also plays a
significant role in maintaining the resale
value of your vehicle.
367us709
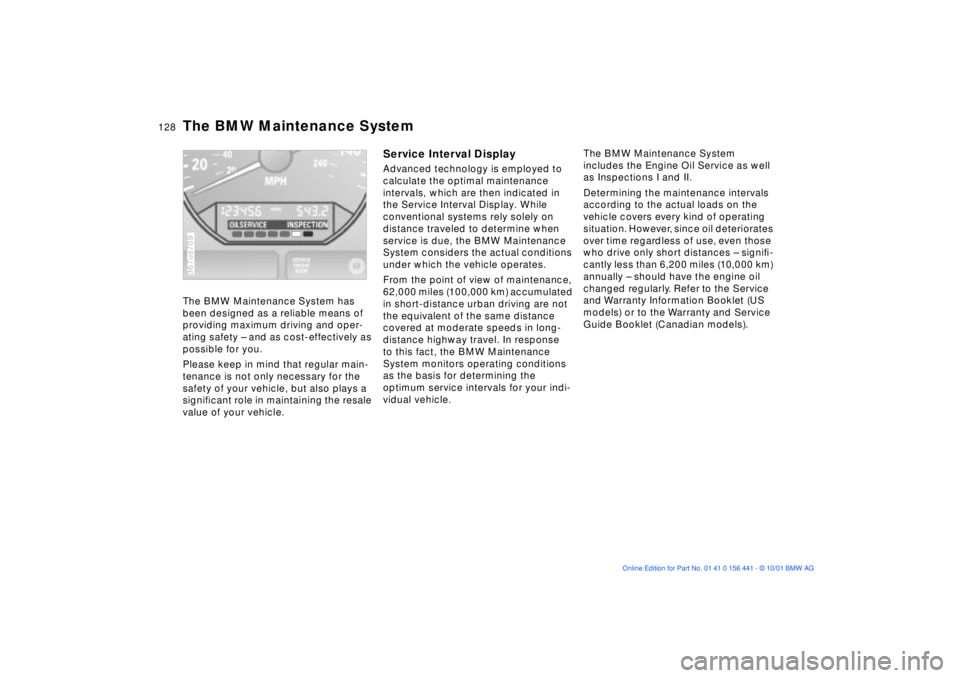
Service Interval DisplayAdvanced technology is employed to
calculate the optimal maintenance
intervals, which are then indicated in
the Service Interval Display. While
conventional systems rely solely on
distance traveled to determine when
service is due, the BMW Maintenance
System considers the actual conditions
under which the vehicle operates.
From the point of view of maintenance,
62,000 miles (100,000 km) accumulated
in short-distance urban driving are not
the equivalent of the same distance
covered at moderate speeds in long-
distance highway travel. In response
to this fact, the BMW Maintenance
System monitors operating conditions
as the basis for determining the
optimum service intervals for your indi-
vidual vehicle. The BMW Maintenance System
includes the Engine Oil Service as well
as Inspections I and II.
Determining the maintenance intervals
according to the actual loads on the
vehicle covers every kind of operating
situation. However, since oil deteriorates
over time regardless of use, even those
who drive only short distances Ð signiÞ-
cantly less than 6,200 miles (10,000 km)
annually Ð should have the engine oil
changed regularly. Refer to the Service
and Warranty Information Booklet (US
models) or to the Warranty and Service
Guide Booklet (Canadian models).
The BMW Maintenance System
Page 149 of 187
149n
IndexDataTechnologyRepairsMaintenanceControlsOverview
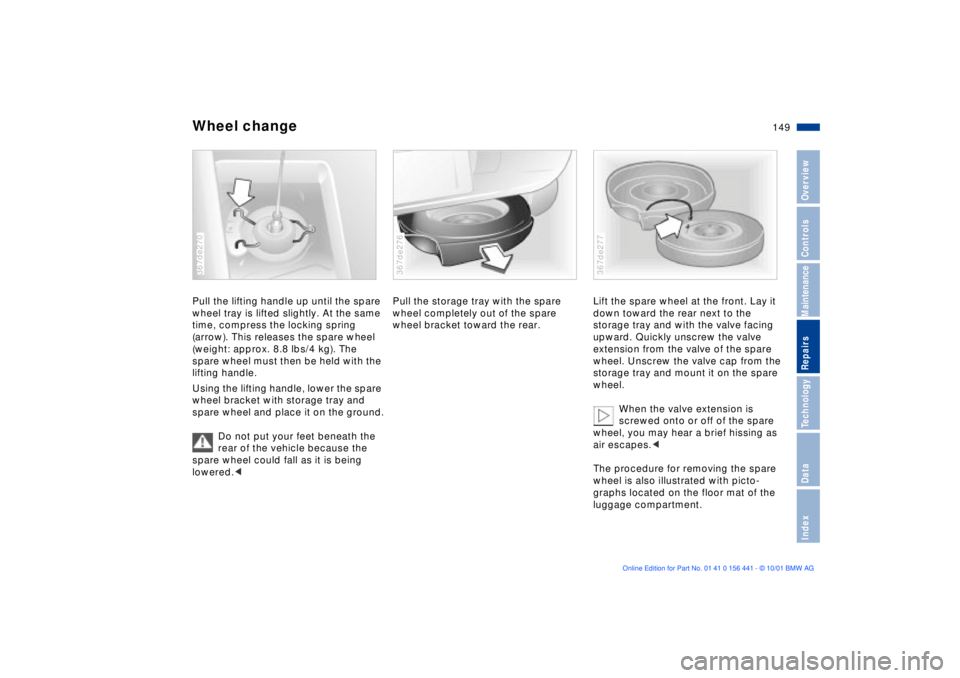
Wheel changePull the lifting handle up until the spare
wheel tray is lifted slightly. At the same
time, compress the locking spring
(arrow). This releases the spare wheel
(weight: approx. 8.8 lbs/4 kg). The
spare wheel must then be held with the
lifting handle.
Using the lifting handle, lower the spare
wheel bracket with storage tray and
spare wheel and place it on the ground.
Do not put your feet beneath the
rear of the vehicle because the
spare wheel could fall as it is being
lowered.< 367de270
Pull the storage tray with the spare
wheel completely out of the spare
wheel bracket toward the rear.367de276
Lift the spare wheel at the front. Lay it
down toward the rear next to the
storage tray and with the valve facing
upward. Quickly unscrew the valve
extension from the valve of the spare
wheel. Unscrew the valve cap from the
storage tray and mount it on the spare
wheel.
When the valve extension is
screwed onto or off of the spare
wheel, you may hear a brief hissing as
air escapes.<
The procedure for removing the spare
wheel is also illustrated with picto-
graphs located on the floor mat of the
luggage compartment.367de277