2002 BMW M6 CONVERTIBLE steering
[x] Cancel search: steeringPage 56 of 186
56n
Adjusting steering wheel Heated steering wheel
*
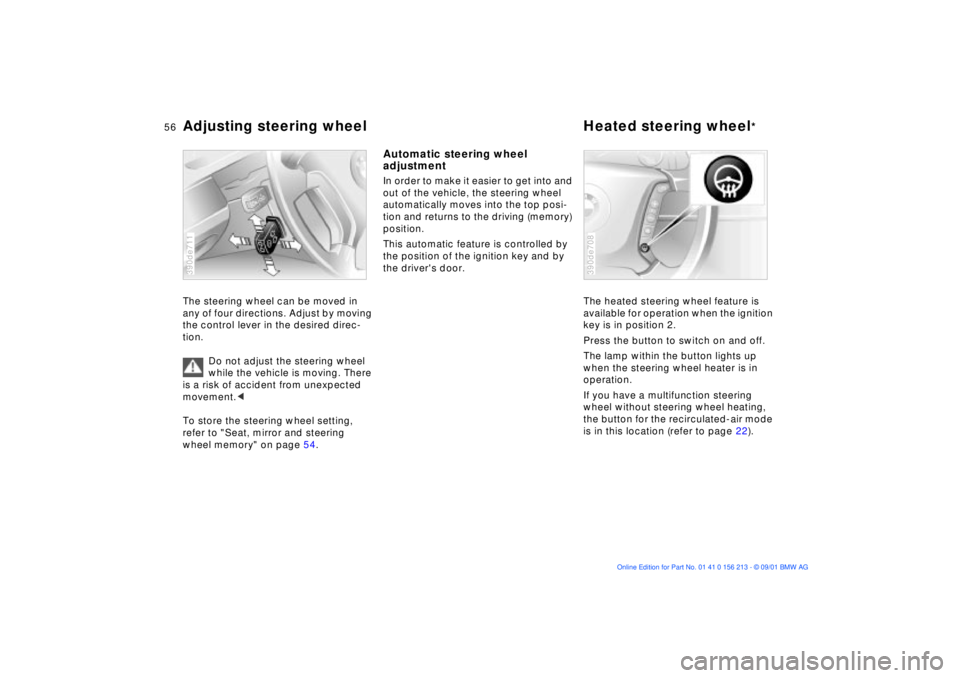
The steering wheel can be moved in
any of four directions. Adjust by moving
the control lever in the desired direc-
tion.
Do not adjust the steering wheel
while the vehicle is moving. There
is a risk of accident from unexpected
movement.<
To store the steering wheel setting,
refer to "Seat, mirror and steering
wheel memory" on page 54.390de711
Automatic steering wheel
adjustmentIn order to make it easier to get into and
out of the vehicle, the steering wheel
automatically moves into the top posi-
tion and returns to the driving (memory)
position.
This automatic feature is controlled by
the position of the ignition key and by
the driver's door.
The heated steering wheel feature is
available for operation when the ignition
key is in position 2.
Press the button to switch on and off.
The lamp within the button lights up
when the steering wheel heater is in
operation.
If you have a multifunction steering
wheel without steering wheel heating,
the button for the recirculated-air mode
is in this location (refer to page 22).
390de708
Page 57 of 186
57n
OverviewControlsMaintenanceRepairsDataIndex
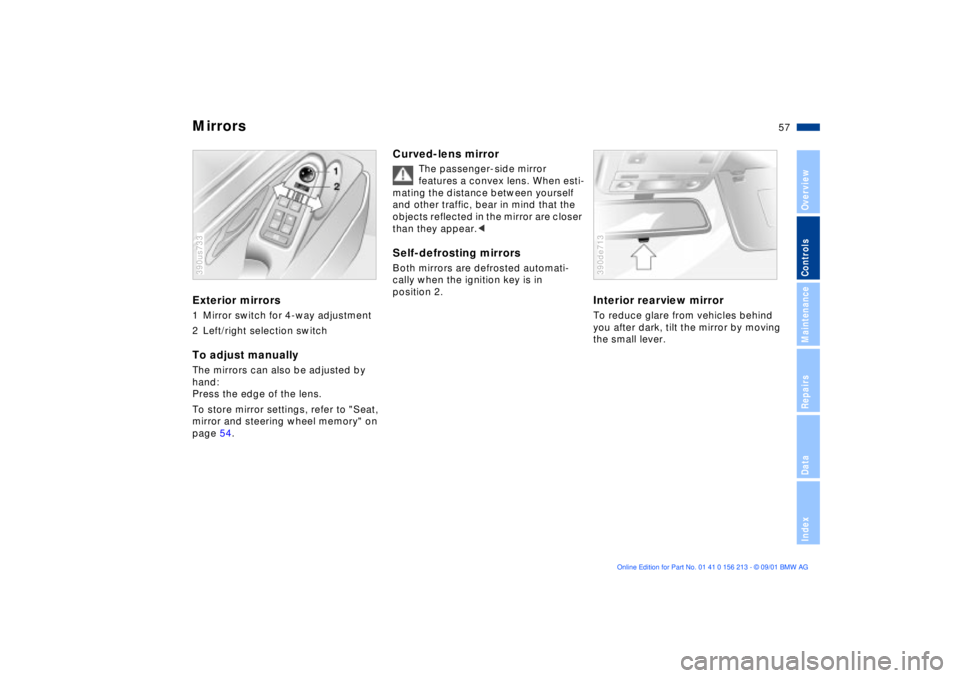
MirrorsExterior mirrors1 Mirror switch for 4-way adjustment
2 Left/right selection switchTo adjust manuallyThe mirrors can also be adjusted by
hand:
Press the edge of the lens.
To store mirror settings, refer to "Seat,
mirror and steering wheel memory" on
page 54.390us733
Curved-lens mirror
The passenger-side mirror
features a convex lens. When esti-
mating the distance between yourself
and other traffic, bear in mind that the
objects reflected in the mirror are closer
than they appear.<
Self-defrosting mirrorsBoth mirrors are defrosted automati-
cally when the ignition key is in
position 2.
Interior rearview mirrorTo reduce glare from vehicles behind
you after dark, tilt the mirror by moving
the small lever.390de713
Page 59 of 186

59n
OverviewControlsMaintenanceRepairsDataIndex
Airbags
Never apply stickers or adhesive-
backed objects of any kind to the
airbag covers. Never attempt to reup-
holster the covers or modify them in any
way. If the airbags deploy in response
to an accident, if you note any signs of
system malfunction, or if you wish to
have any parts of the airbag passenger-
restraint system deactivated, always
contact your BMW center, to whom we
strongly urge you to entrust all testing,
repair and dismantling operations.
Never attempt to modify or tamper with
either the system's electrical wiring or
any of its individual components.
System components include the uphol-
stered surfaces on the steering wheel,
instrument panel, the trim panels on the
front and rear doors (with rear airbags)
and the roof braces as well as the sides
of the headliner above the doors.
Never attempt to remove or dismantle
the steering wheel.
To ensure compliance with official
safety regulations, always entrust
disposal of airbag generators to your
BMW center. Attempts to carry out
service procedures undertaken by
anyone other than specially-trained
professionals can result in system
failure or undesired airbag deployment,
both of which can lead to personal
injury. If the airbags deploy in response
to an accident, always remember to
avoid all contact with system compo-
nents, as they are hot and can cause
burns in the period immediately
following deployment.<
All vehicle occupants should
always sit upright and be properly
restrained (infants and small children in
appropriate child-restraint systems;
larger children and adults using the
safety belts). Never let an occupant's
head rest near or on a side airbag: the
inflating airbag could cause a serious or
fatal injury. Please note that the word
"Airbag" imprinted on the door trim
panel indicates the airbag's location.
Accident research shows that the
safest place for children in an automo-
bile is in the rear seat. However, a child
sitting in the rear seat and not properly
restrained may place his or her head on
or near the side airbag, if installed. For
example, a child Ð even though belted Ð
may fall asleep with his or her head
against the side airbag. It may be diffi-
cult for a driver to ensure that children
in the rear seat will remain properly
positioned at all times and do not place
their heads on or near the side airbag.
Therefore, we recommend that the
rear-seat side airbags, if provided, be
deactivated if you plan to transport chil-
dren in the rear seat.
The rear-seat side airbags may already
have been deactivated, either at the
time of manufacture or by a BMW
center. Labels in the rear door opening
should indicate the status of your rear-
seat side airbags. If you are uncertain of
their status, or wish to have the airbags
activated or deactivated, please
contact your BMW center.<
Even when all these guidelines are
followed, there is still a small residual
risk of injuries to the face, hands and
arms occurring in isolated instances.
The ignition and inflation noise may
provoke a mild temporary hearing loss
in extremely sensitive individuals.
Airbag warning information is also
provided on the sun visors.
Page 65 of 186

65n
OverviewControlsMaintenanceRepairsDataIndex
Vehicle Memory, Key MemoryThe system then relies on a bilateral
data exchange to identify the individual
user and dial in the selected settings
whenever the remote control unit is
used to disengage the door locks.
In order for you to distinguish between
different keys, colored decals are
supplied together with the keys.What the system can doYour BMW center can provide you with
details on the capabilities of the Vehicle
Memory and Key Memory systems. A
few examples follow below:
Examples for Vehicle Memory:
>Various signals as acknowledgment
when locking or unlocking your
vehicle
>Activates/deactivates the "Follow me
home" function.Examples for Key Memory:
>Locks the vehicle when you start off
>Automatically adjusts the driverÕs
seat, the exterior mirrors and the
steering wheel position to your
personal programmed settings when
you unlock the vehicle
>The automatic climate control
assumes your preset comfort settings
when you unlock the vehicle.
You will see this symbol through-
out the Owner's Manual. It is to
remind you at appropriate places of the
settings that are available to you.<
Page 66 of 186
66n
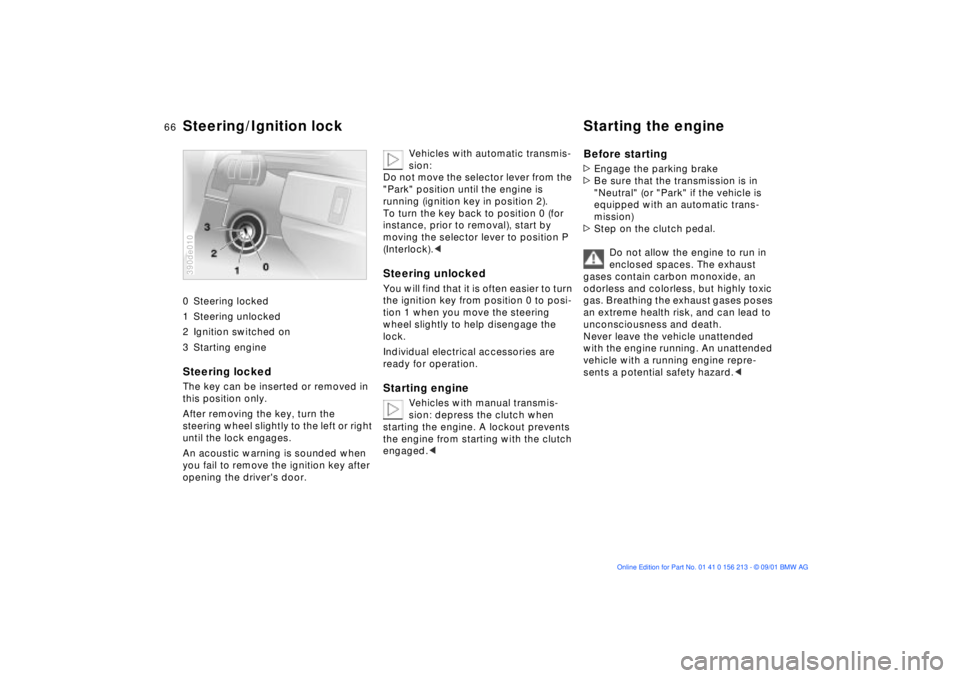
0 Steering locked
1 Steering unlocked
2 Ignition switched on
3 Starting engine
Steering locked The key can be inserted or removed in
this position only.
After removing the key, turn the
steering wheel slightly to the left or right
until the lock engages.
An acoustic warning is sounded when
you fail to remove the ignition key after
opening the driver's door. 390de010
Vehicles with automatic transmis-
sion:
Do not move the selector lever from the
"Park" position until the engine is
running (ignition key in position 2).
To turn the key back to position 0 (for
instance, prior to removal), start by
moving the selector lever to position P
(Interlock).<
Steering unlocked You will find that it is often easier to turn
the ignition key from position 0 to posi-
tion 1 when you move the steering
wheel slightly to help disengage the
lock.
Individual electrical accessories are
ready for operation.Starting engine
Vehicles with manual transmis-
sion: depress the clutch when
starting the engine. A lockout prevents
the engine from starting with the clutch
engaged.<
Before starting>Engage the parking brake
>Be sure that the transmission is in
"Neutral" (or "Park" if the vehicle is
equipped with an automatic trans-
mission)
>Step on the clutch pedal.
Do not allow the engine to run in
enclosed spaces. The exhaust
gases contain carbon monoxide, an
odorless and colorless, but highly toxic
gas. Breathing the exhaust gases poses
an extreme health risk, and can lead to
unconsciousness and death.
Never leave the vehicle unattended
with the engine running. An unattended
vehicle with a running engine repre-
sents a potential safety hazard.<
Steering/Ignition lock Starting the engine
Page 68 of 186
68n
Switching off the engine Parking brakeTurn the ignition key to position 1 or 0.
Do not remove the ignition key
while the vehicle is rolling. The
steering locks, making it impossible to
steer the vehicle.
Always remove the ignition key and
engage the steering lock before leaving
the vehicle.
Vehicles with manual transmission:
Always engage the parking brake
when parking on hills and inclined
surfaces, as first gear or reverse may
not provide adequate resistance to
rolling.
Vehicles with automatic transmission:
Place the selector lever in "Park."<
Vehicles with automatic transmission:
The vehicle must be stationary and the
selector lever in "Park" before you can
remove the ignition key.
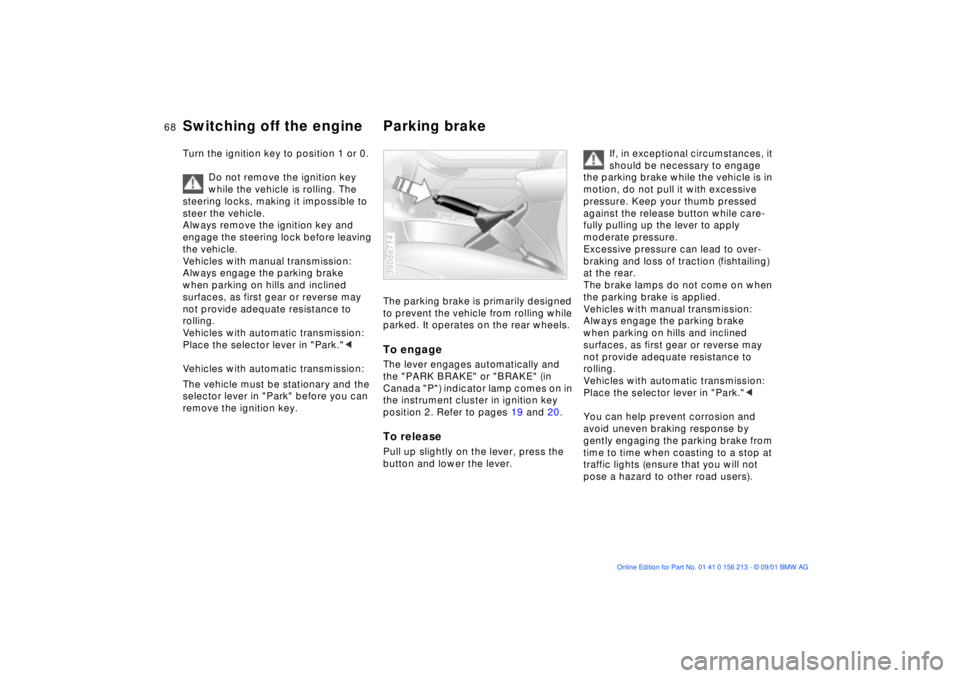
The parking brake is primarily designed
to prevent the vehicle from rolling while
parked. It operates on the rear wheels.To engageThe lever engages automatically and
the "PARK BRAKE" or "BRAKE" (in
Canada "P") indicator lamp comes on in
the instrument cluster in ignition key
position 2. Refer to pages 19 and 20.To releasePull up slightly on the lever, press the
button and lower the lever.390de714
If, in exceptional circumstances, it
should be necessary to engage
the parking brake while the vehicle is in
motion, do not pull it with excessive
pressure. Keep your thumb pressed
against the release button while care-
fully pulling up the lever to apply
moderate pressure.
Excessive pressure can lead to over-
braking and loss of traction (fishtailing)
at the rear.
The brake lamps do not come on when
the parking brake is applied.
Vehicles with manual transmission:
Always engage the parking brake
when parking on hills and inclined
surfaces, as first gear or reverse may
not provide adequate resistance to
rolling.
Vehicles with automatic transmission:
Place the selector lever in "Park."<
You can help prevent corrosion and
avoid uneven braking response by
gently engaging the parking brake from
time to time when coasting to a stop at
traffic lights (ensure that you will not
pose a hazard to other road users).
Page 86 of 186

86n
ComputerMode selectionWhen the ignition key is in position 1
or 2, you can press the button in the
turn signal lever to retrieve information
from the computer for display. Tap the
button toward the steering column to
scroll to the next status display in the
sequence.
The displays appear in the following
order: outside temperature, average
fuel consumption, cruising range,
average speed.
Starting with ignition key position 1,
the last active setting is displayed.
The range of available displays varies
according to your individual vehicle's
equipment.390de700
Outside temperature and
average fuel consumptionYou can change the units of measure
(7/6) for the outside temperature
display by
1. pressing and holding the trip
odometer reset button (in ignition key
position 1)
2. and then turning the ignition key to 0.
Refer also to page 80.Cruising range and average speedThe computer bases its calculations of
the cruising range on the previous
driving style and conditions.
The computer ignores any time spent
when the vehicle is stationary and the
engine is not running in its average
speed calculations.390us126
To delete the displayPress the button in the turn signal lever
while the average speed is being shown
to cancel the display of computer infor-
mation.To restart calculationsYou can maintain pressure on the
button within the turn signal lever to
reset the computer and initiate new
calculations of average speed and fuel
consumption. This feature is only avail-
able when the engine is running.Computer with alphanumeric
display
*
If you vehicle is equipped with Check
Control featuring an alphanumeric
display, a description of the corre-
sponding computer can be found
starting on page 91 as well as in the
"Owner's Manual for Onboard
Computer."
Page 105 of 186
105n
OverviewControlsMaintenanceRepairsDataIndex
Air conditioningTemperature
The numbers in the display
panel are reference figures for
general orientation. We
recommend a setting of 70 7
(22 6) for a congenial in-car climate.
When you start the vehicle, this system
adjusts the air to the selected tempera-
ture as quickly as possible, and then
maintains that temperature constantly.
Air distribution
You can direct the emerging
air toward the windows ,
toward your upper body or
into the footwell . All inter-
mediate settings are also available. In
the setting, there is a low flow of air
onto the windows to keep them free of
condensation.
Air supply
You can control the emerging
air's flow rate through an infi-
nitely-variable range. The
heating and ventilation
become more and more effective as the
air supply settings are increased. In the
"0" setting, the blower and climate
control are switched off and the outside
air supply is blocked.
Rear window defroster
The indicator lamp comes
on to indicate that the rear
window defroster is in operation. The
rear window defroster switches off
automatically.
Cooling
The air conditioning cools
and dehumidifies the
incoming air before reheating it to the
selected temperature. Depending on
the weather, the windshield may fog
over briefly when the engine is started.
You can reduce condensation forming
on the windows by switching on the air
conditioning.
Condensation forms in the air
conditioning system during opera-
tion, which then exits under the vehicle.
Traces of condensed water of this kind
are thus normal.<
Recirculated-air mode
You can respond to
unpleasant odors in the
surrounding environment by using this
mode to temporarily suspend the flow
of outside air into the vehicle's interior.
The system then recirculates the air
currently within the vehicle.
If your vehicle is equipped with a multi-
function steering wheel
featuring a
recirculated-air button then you can
also select the recirculated-air mode
from this location (refer to page 22).
If the windows should fog over in
the recirculated-air mode, switch
the recirculated-air mode off and
increase the air supply as required.<