2002 BMW M3 CONVERTIBLE inflation pressure
[x] Cancel search: inflation pressurePage 112 of 159

112n
Winter tires Snow chains** * *Choosing the right tireBMW recommends winter tires (M+S
radial tires) for driving in adverse winter
road conditions. So-called all-season
tires with the M+S identification mark
do indeed possess better winter trac-
tion than summer tires that have the H,
V, W, Y and ZR speed ratings, they
generally fail to provide the same levels
of performance as snow tires.
In the interests of safe tracking and
steering response, install radial tires
made by the same manufacturer and
with the same tread configuration on all
four wheels if you elect to mount winter
tires.
When mounting winter wheels,
observe the different recess on
the front and rear wheels, as otherwise
damage may result.<
Do not exceed specified
maximum speeds
Never exceed the maximum
speed for which the tires are
rated.
Unprofessional attempts by laymen to
service tires can lead to damage and
accidents.
Have this work performed by skilled
professionals only. Your BMW center
will be glad to assist you with both their
expertise and the proper equipment for
your vehicle.<
Tire condition, tire pressureOnce winter tires wear to a tread depth
of less than 0.16 inches (4 mm), their
performance under winter driving
conditions deteriorates noticeably.
Worn tires should therefore be replaced
for safety considerations.
Comply with the specified tire inflation
pressures Ð and be sure to have the
wheel and tire assemblies balanced
every time you change the tires.
The use of fine-link BMW snow chains
is only permitted in pairs with the winter
tires on the rear wheels. Comply with all
manufacturer's safety precautions
when mounting the chains. Do not
exceed a maximum speed of 30 mph
(50 km/h) with snow chains.
After mounting or removing snow
chains, always reinitialize the sequential
M gearbox
* SMG II, refer to page 83.
It is not possible to mount snow
chains on tires with 18- and
19-inch wheels.
Deactivate the Flat Tire Monitor when
using snow chains. Malfunction warn-
ings and undetected losses in pressure
are a possibility when driving with snow
chains.
For further information, refer to
page 82.<
Page 134 of 159

134n
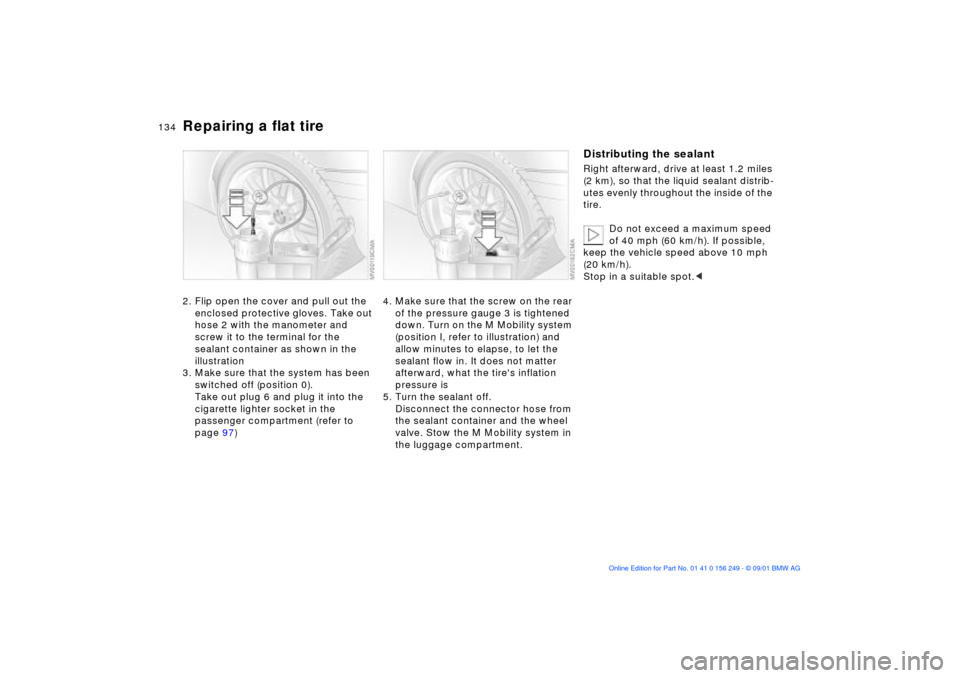
Repairing a flat tire2. Flip open the cover and pull out the
enclosed protective gloves. Take out
hose 2 with the manometer and
screw it to the terminal for the
sealant container as shown in the
illustration
3. Make sure that the system has been
switched off (position 0).
Take out plug 6 and plug it into the
cigarette lighter socket in the
passenger compartment (refer to
page 97)
4. Make sure that the screw on the rear
of the pressure gauge 3 is tightened
down. Turn on the M Mobility system
(position I, refer to illustration) and
allow minutes to elapse, to let the
sealant flow in. It does not matter
afterward, what the tire's inflation
pressure is
5. Turn the sealant off.
Disconnect the connector hose from
the sealant container and the wheel
valve. Stow the M Mobility system in
the luggage compartment.
Distributing the sealantRight afterward, drive at least 1.2 miles
(2 km), so that the liquid sealant distrib-
utes evenly throughout the inside of the
tire.
Do not exceed a maximum speed
of 40 mph (60 km/h). If possible,
keep the vehicle speed above 10 mph
(20 km/h).
Stop in a suitable spot.<
Page 135 of 159

135n
OverviewControlsMaintenanceRepairsDataIndex
Repairing a flat tire Inflating tire to correct pressure1. Take out the hose with the pressure
gauge and screw it onto the valve.
Take the plug out and plug it into the
cigarette lighter socket in the
passenger compartment
2. Reset the air pressure to 29 psi
(200 kilopascal), and:
>Increase tire pressure: turn on the
M Mobility system (position I). Turn
the unit off while you check the
current setting for the tire inflation
pressure
>Decrease tire pressure: turn the
screw on the back of the mano-
meter, a valve located there will
open
Even if the tire fails to hold the
pressure, you should still carry out
Step 3 before proceeding to drive the
vehicle again, refer to "Distributing
sealant" for more information. Then
repeat Steps 1 through 3.
The use of the M Mobility system may
be ineffective if the damaged area in
the tire is larger than approx. 0.16 in
(4 mm). Please consult the nearest
BMW center if the tire cannot be
temporarily repaired with the M Mobility
system.<
3. Unscrew the hose from the valve and
stow the M Mobility system in the
luggage compartment. Screw the
dust cap onto the valve again.
Do not exceed the maximum
speed limit described below,
otherwise it could lead to accidents.<
When you start driving again, do not
exceed the permissible maximum
speed of 50 mph (80 km/h).
You will find corresponding
instructions for using the
M Mobility system on the device.
Replace the defective tire as soon as
possible and have the new wheel
balanced. Reinitialize the Flat Tire
Monitor, and refer to page 83 for further
information. Have the M Mobility
system refilled. Contact your BMW
center for this.<
Protect valve stems against dirt using
screw-on dust caps. Dirty valve stems
frequently lead to slow pressure loss.
Page 153 of 159

Everything from A to Z
153n
OverviewControlsMaintenanceRepairsDataIndex
Height145
High beams70, 86
indicator lamp20
Holder for beverages96
Hood release113t
Horn14
I
Ice warning78
Identification mark,
tires111
Ignition key28
Ignition key positions61
Ignition lock61
Imprint4
Independent ventilation
system, refer to the
"Onboard Computer
Owner's Manual"
Indicator lamps17
Individual settings, Vehicle
Memory, Key Memory60
Inflation pressure, tires109
Inside rearview mirror
automatic dimming51
INSPECTION76
Instrument cluster15
Instrument lighting86
Instrument panel14 Interface socket
for Onboard
Diagnostics122
Interior lamps31, 87
remote control31
Interior motion
sensor37, 38
deactivate38
Interior temperature,
adjusting89
J
Jump-starting137
K
Key28
with remote control28
Key Memory60 L
Lamp switch85
Lamps
daytime driving lamps85
fog lamps86
high beams86
interior lamps87
low beams85
parking lamps85
reading lamps87
standing lamps86
Lamps and bulbs126
Language selection, refer to
the separate Owner's
Manual
Lashing eyes101
LATCH child-restraint
system installation56
Leather care, refer to the
"Caring for your vehicle"
manual
Length145
License plate lamps, bulb
replacement131t
Lighting, refer to lamps
LIGHTS ON warning85
Load-securing devices101
Low ambient
temperatures117 Low beam headlamp
bulb replacement127t
Low beams85
Lower convertible top
compartment panel37
Luggage compartment34
bulb replacement130t
capacity146
increase volume37
lighting34
lower convertible top
compartment panel37
open from inside34
open from outside34
open via remote
control31
Luggage compartment
lid34
electrical
malfunction34t
emergency release from
luggage compartment's
interior35
manual operation34t
Luggage rack101
Lumbar support45
adjusting45
Page 155 of 159

Everything from A to Z
155n
OverviewControlsMaintenanceRepairsDataIndex
Refueling22
Releasing
fuel filler door following an
electrical
malfunction22t
Remote control30
Removing condensation
from the windows92
Replace windshield wiper
blades126t
Replacement key28
Replacing bulbs126t
Reporting safety defects11
Restraint system54
Rims111
Rollover protection
system58
indicator lamp20
lowering58t
Roof load capacity146
Roof-mounted luggage
rack101 S
Safety belts47, 48
Safety buttons33
Seat adjustment
lumbar support45
thigh support45
Seat heating49
Seat memory48
Seat-integrated safety belts
(SGS)47
Seats
adjusting44, 45
Secure glove compartment
and luggage compartment
separately34
Securing cargo100
Securing cargo in luggage
compartment101
Sequential M gearbox
SMG II64
Service and Warranty
Information Booklet120
Service Interval
Display76, 120
Set clock77
Set interior temperature92
SGS (Seat-integrated safety
belts)47 Side airbags52
Side impact Head Protection
System52
Side turn signals
bulb replacement128t
Ski bag98
Snow chains112
Spare key28
Speedometer15
Sport-mode
identification84
Standing lamps86
Starting problems62t
Steering lock61
Steering wheel with
multifunction buttons21
Steering wheel,
adjusting50
Stopping the vehicle62
Storage areas96
Storage compartments96
Stowing cargo100
Stroke144
Summer tires111
Switching off the engine62
Symbols, used8 T
Tachometer75
Tail lamps129
bulb replacement129t
Tank capacity147
Technical data144
Technical
modifications10, 121
Telephone hookup96
Temperature display
ice warning78
interior temperature92
outside temperature78
Temperature gauge
engine coolant76
Temperature
layering90, 94
Temperature, adjusting89
Thigh support, adjusting45
Third brake lamp131
Tilt alarm sensor38
deactivate31
remote control31
Tire inflation
pressures24, 25, 109
Tire wear indicator109
Page 157 of 159

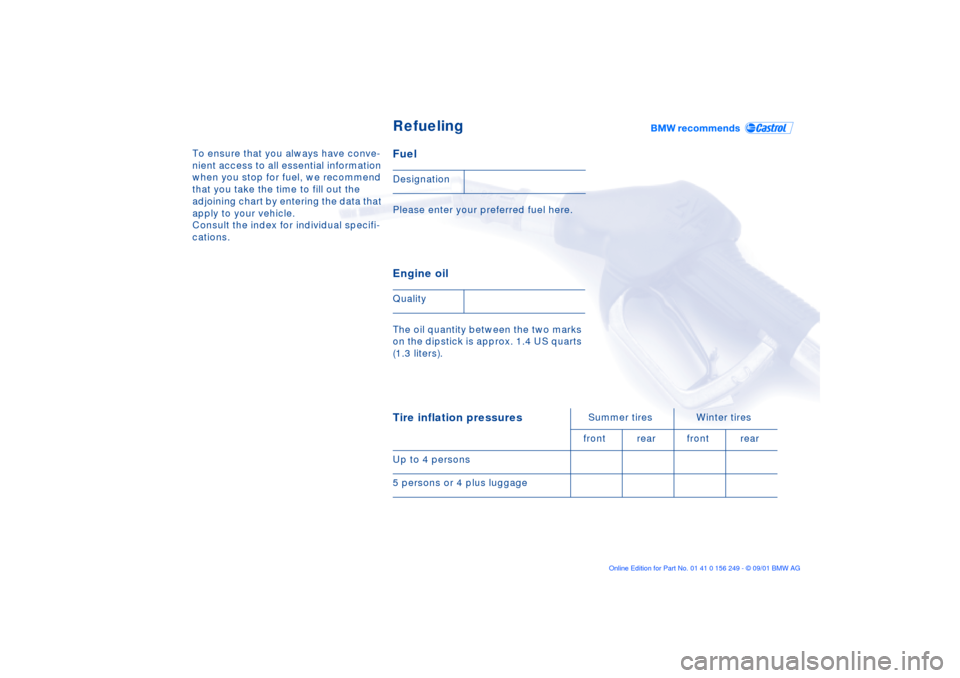
To ensure that you always have conve-
nient access to all essential information
when you stop for fuel, we recommend
that you take the time to fill out the
adjoining chart by entering the data that
apply to your vehicle.
Consult the index for individual specifi-
cations.
Fuel Please enter your preferred fuel here. Engine oil The oil quantity between the two marks
on the dipstick is approx. 1.4 US quarts
(1.3 liters). Designation
QualityTire inflation pressures
Summer tires Winter tires
front rear front rear
Up to 4 persons
5 persons or 4 plus luggage
Refueling