2002 BMW 540I SEDAN change time
[x] Cancel search: change timePage 52 of 186
52n
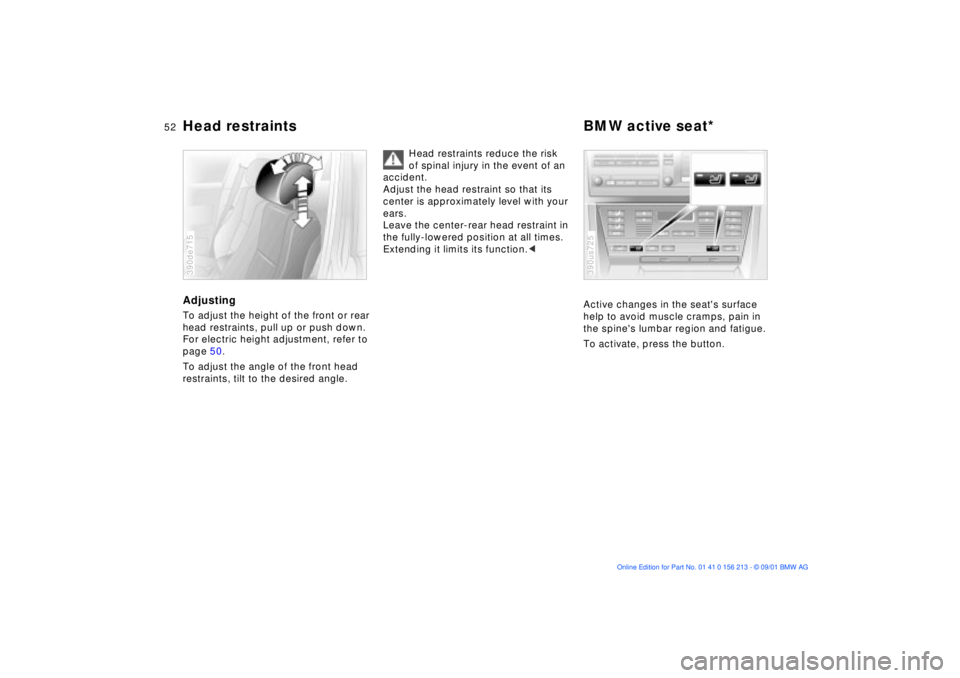
Head restraints BMW active seat*AdjustingTo adjust the height of the front or rear
head restraints, pull up or push down.
For electric height adjustment, refer to
page 50.
To adjust the angle of the front head
restraints, tilt to the desired angle.390de715
Head restraints reduce the risk
of spinal injury in the event of an
accident.
Adjust the head restraint so that its
center is approximately level with your
ears.
Leave the center-rear head restraint in
the fully-lowered position at all times.
Extending it limits its function.<
Active changes in the seat's surface
help to avoid muscle cramps, pain in
the spine's lumbar region and fatigue.
To activate, press the button.390us725
Page 86 of 186
86n
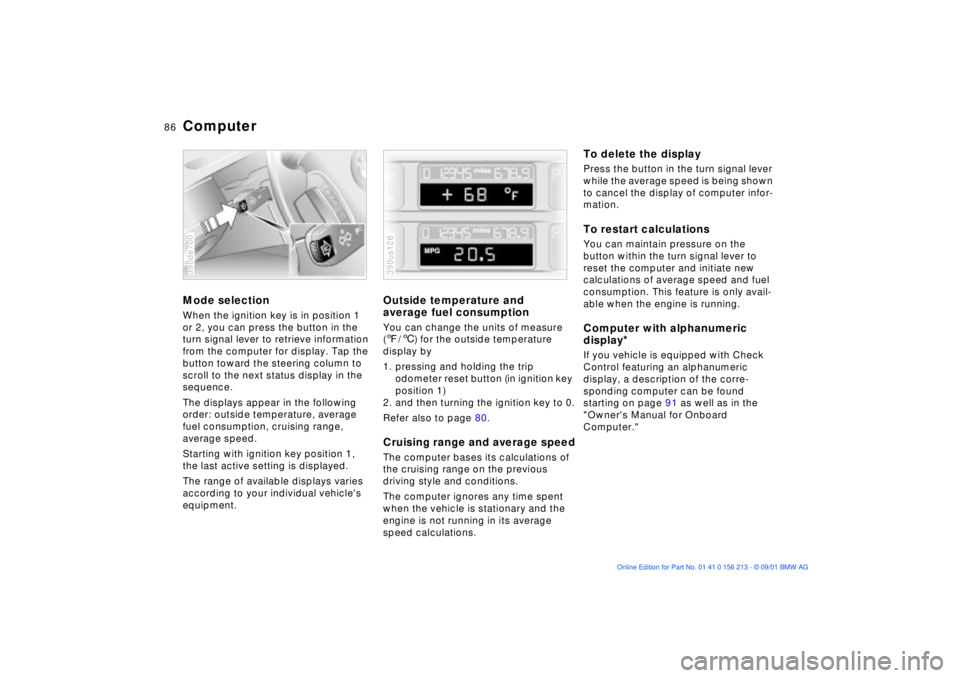
ComputerMode selectionWhen the ignition key is in position 1
or 2, you can press the button in the
turn signal lever to retrieve information
from the computer for display. Tap the
button toward the steering column to
scroll to the next status display in the
sequence.
The displays appear in the following
order: outside temperature, average
fuel consumption, cruising range,
average speed.
Starting with ignition key position 1,
the last active setting is displayed.
The range of available displays varies
according to your individual vehicle's
equipment.390de700
Outside temperature and
average fuel consumptionYou can change the units of measure
(7/6) for the outside temperature
display by
1. pressing and holding the trip
odometer reset button (in ignition key
position 1)
2. and then turning the ignition key to 0.
Refer also to page 80.Cruising range and average speedThe computer bases its calculations of
the cruising range on the previous
driving style and conditions.
The computer ignores any time spent
when the vehicle is stationary and the
engine is not running in its average
speed calculations.390us126
To delete the displayPress the button in the turn signal lever
while the average speed is being shown
to cancel the display of computer infor-
mation.To restart calculationsYou can maintain pressure on the
button within the turn signal lever to
reset the computer and initiate new
calculations of average speed and fuel
consumption. This feature is only avail-
able when the engine is running.Computer with alphanumeric
display
*
If you vehicle is equipped with Check
Control featuring an alphanumeric
display, a description of the corre-
sponding computer can be found
starting on page 91 as well as in the
"Owner's Manual for Onboard
Computer."
Page 88 of 186
88n
Multi-Information Display (MID)
*
Only make entries when the
vehicle is standing still Ð to avoid
endangering yourself or other road
users.<
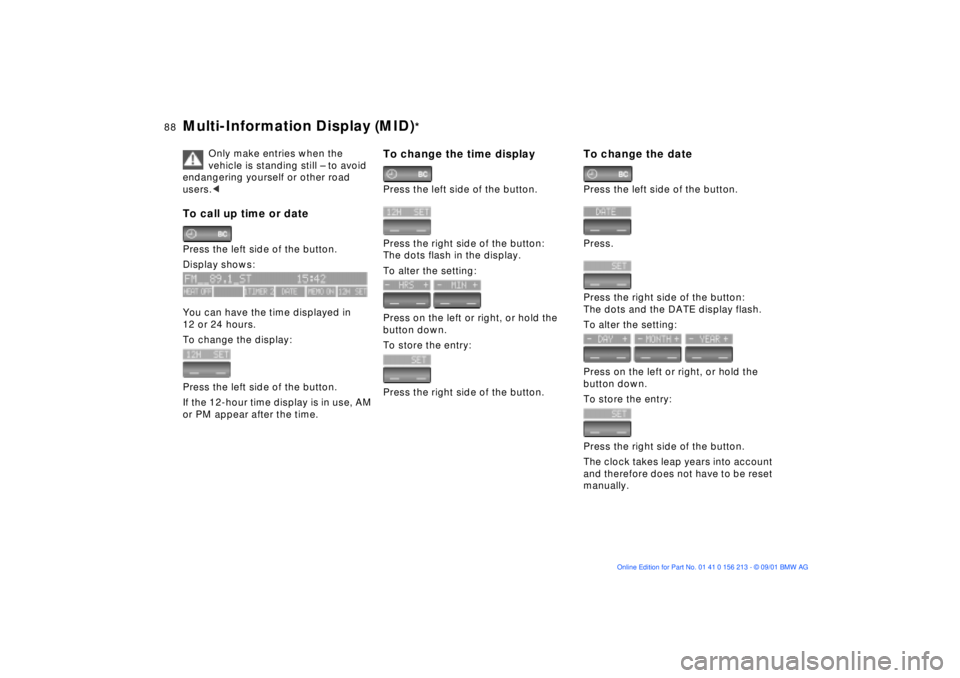
To call up time or datePress the left side of the button.
Display shows:
You can have the time displayed in
12 or 24 hours.
To change the display:
Press the left side of the button.
If the 12-hour time display is in use, AM
or PM appear after the time.
To change the time displayPress the left side of the button.
Press the right side of the button:
The dots flash in the display.
To alter the setting:
Press on the left or right, or hold the
button down.
To store the entry:
Press the right side of the button.
To change the datePress the left side of the button.
Press.
Press the right side of the button:
The dots and the DATE display flash.
To alter the setting:
Press on the left or right, or hold the
button down.
To store the entry:
Press the right side of the button.
The clock takes leap years into account
and therefore does not have to be reset
manually.
Page 90 of 186
90n
Digital clock in the MID
*
Enter the switch-on times for the
parked-car ventilation
*
You can enter two different activation
times.
The ventilation will shut off automati-
cally after 30 minutes.
To use the parked-car ventilation
system, please refer to the infor-
mation provided starting on page 112.<
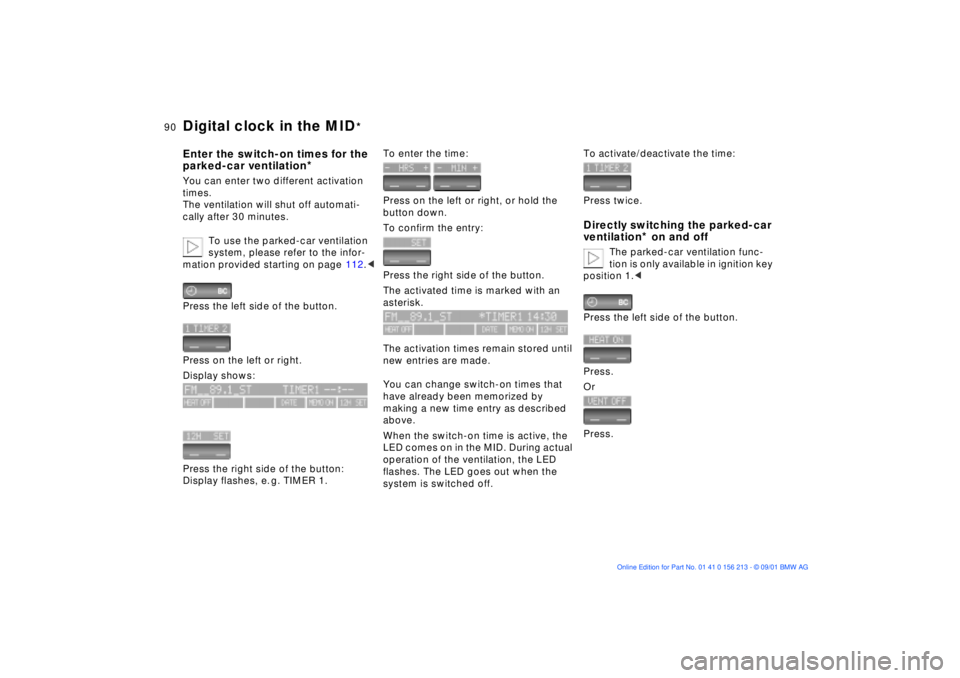
Press the left side of the button.
Press on the left or right.
Display shows:
Press the right side of the button:
Display flashes, e. g. TIMER 1.
To enter the time:
Press on the left or right, or hold the
button down.
To confirm the entry:
Press the right side of the button.
The activated time is marked with an
asterisk.
The activation times remain stored until
new entries are made.
You can change switch-on times that
have already been memorized by
making a new time entry as described
above.
When the switch-on time is active, the
LED comes on in the MID. During actual
operation of the ventilation, the LED
flashes. The LED goes out when the
system is switched off.
To activate/deactivate the time:
Press twice.Directly switching the parked-car
ventilation
* on and off
The parked-car ventilation func-
tion is only available in ignition key
position 1.<
Press the left side of the button.
Press.
Or
Press.
Page 100 of 186

100n
Tire Pressure Monitor (RDC)*Loss of tire pressureIf, after a certain period of time, the air
pressure has gone down significantly
(which is normal for any tire), the yellow
indicator lamp comes on or the
message "CHECK TIRE PRESSURE"
appears in the Check Control.
This alerts you that you should have the
tires inflated to the specified pressures
as soon as possible.
If you are prompted to check the
tire pressure shortly after a
correction has been made, this indi-
cates that the corrected values were
not accurate. Please check the inflation
pressure again and make corrections
according to the inflation pressure
table.<
Flat tireIf there is a tire failure with a loss of air
pressure, the red indicator lamp comes
on or the message "TIRE DEFECT"
appears in the Check Control. In addi-
tion, a gong sounds.
If this occurs, reduce vehicle speed
immediately and stop the vehicle in a
safe location. Avoid hard brake applica-
tions. Do not oversteer. Replace the flat
tire.
The spare tire which is available in
your vehicle as standard equip-
ment is equipped with the electronics
required for RDC and, following activa-
tion of the system, is also monitored
after it is mounted.<
The RDC cannot alert you to
severe and sudden tire damage
caused by external factors.<
Have the tires changed at your
BMW center.
Your BMW center has the information
needed for working with RDC and is
equipped with the necessary special
tools.<
System interferenceDuring the period of the malfunction,
the yellow indicator lamp comes on
or the message "TIRECONTROL INAC-
TIVE" appears in the Check Control.
You will also see the same message
>in the event of a system fault
>if a wheel is mounted without the
RDC electronics
>if, in addition to the spare tire, addi-
tional wheels with RDC electronics
are on board.
Please contact your BMW center for
additional information.
Page 101 of 186
101n
OverviewControlsMaintenanceRepairsDataIndex
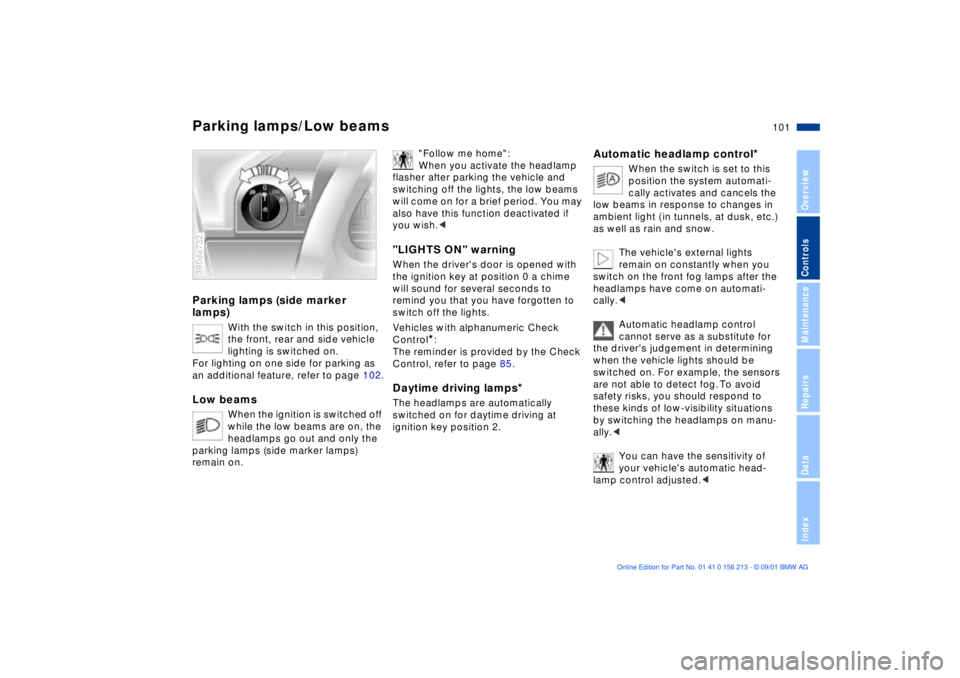
Parking lamps (side marker
lamps)
With the switch in this position,
the front, rear and side vehicle
lighting is switched on.
For lighting on one side for parking as
an additional feature, refer to page 102.
Low beams
When the ignition is switched off
while the low beams are on, the
headlamps go out and only the
parking lamps (side marker lamps)
remain on.
390de732
"Follow me home":
When you activate the headlamp
flasher after parking the vehicle and
switching off the lights, the low beams
will come on for a brief period. You may
also have this function deactivated if
you wish.<
"LIGHTS ON" warningWhen the driver's door is opened with
the ignition key at position 0 a chime
will sound for several seconds to
remind you that you have forgotten to
switch off the lights
.
Vehicles with alphanumeric Check
Control
*:
The reminder is provided by the Check
Control, refer to page 85.
Daytime driving lamps
*
The headlamps are automatically
switched on for daytime driving at
ignition key position 2.
Automatic headlamp control
*
When the switch is set to this
position the system automati-
cally activates and cancels the
low beams in response to changes in
ambient light ( in tunnels, at dusk, etc.)
as well as rain and snow.
The vehicle's external lights
remain on constantly when you
switch on the front fog lamps after the
headlamps have come on automati-
cally.<
Automatic headlamp control
cannot serve as a substitute for
the driver's judgement in determining
when the vehicle lights should be
switched on. For example, the sensors
are not able to detect fog. To avoid
safety risks, you should respond to
these kinds of low-visibility situations
by switching the headlamps on manu-
ally.<
You can have the sensitivity of
your vehicle's automatic head-
lamp control adjusted.<
Parking lamps/Low beams
Page 113 of 186
113n
OverviewControlsMaintenanceRepairsDataIndex
The conceptThe BMW Universal Transmitter
replaces up to three hand-held transmit-
ters to control different devices such as
a garage door opener, alarm systems or
a door locking system. The BMW
Universal Transmitter recognizes and
"learns" the transmitted signal from each
of the original hand-held transmitters.
The signal of an original hand-held
transmitter can be programmed on one
of the three channel buttons. Following
that, each of the devices can be actu-ated with the appropriately-programmed
channel button. The indicator lamp
flashes to confirm transmission of the
signal.
Before you sell your vehicle, the
programmed channel buttons should
be cleared. Refer to page 115 for the
description of this process.
To prevent potential injuries or
damage during the programming
operation and before every remote trig-
gering of a programmed device using
the BMW Universal Transmitter, be sure
that there are no persons, animals or
objects within the range of movement
of the respective device. Also, comply
with the safety precautions of the orig-
inal hand-held transmitter.<
To Canadian residents:
During programming, your hand-
held transmitter may automatically stop
transmitting after two seconds. This
may not be long enough to program the
BMW Universal Transmitter. If you are
programming from one of these hand-
held transmitters, the Universal Trans-
mitter's lamp may begin to flash in a
series of double flashes. If this occurs,
continue to hold the button on the
Universal Transmitter while you reacti-
vate your hand-held transmitter. You
may have to repeat this function several
times while programming.<
Before programming, read the
"User's information" section on
page 115.<
The original hand-held transmitter
If this symbol is depicted on the
packaging or in the user's
instructions for the original
hand-held transmitter, it may be
assumed that this original hand-held
transmitter is compatible with the BMW
Universal Transmitter.
Checking for the change codeIn order to determine whether the orig-
inal hand-held transmitter is equipped
with a change code system, you may
either refer to the instructions for the
original hand-held transmitter or
program a channel button as described
in the left column on page 114 under
"Programming."
Following that, press and hold the
programmed channel button of the
BMW Universal Transmitter. If the indi-
cator lamp of the BMW Universal
Transmitter flashes rapidly for two
seconds and then stays on continu-
ously, the original hand-held transmitter
is equipped with a change code
system. If the change code system is
available, program the channel buttons
as described in the right-hand column
on page 114 under "Programming a
hand-held transmitter with change
code."
If you have additional questions,
please consult your BMW center
or call 1-800-355-3515.<
BMW Universal Transmitter
*
Page 136 of 186

136n
Special characteristics of winter tires Snow chains
*
Choosing the right tireBMW recommends winter tires (M+S
radial tires) for operation under
inclement winter driving conditions.
While all-season tires (M+S designa-
tion) provide better winter traction than
summer tires with the load ratings H, V,
W, Y and ZR, they generally do not
achieve the performance of winter tires.
In the interests of safe tracking and
steering response, install radial tires
made by the same manufacturer and
with the same tread configuration on all
four wheels if you elect to mount winter
tires.Do not exceed specified
maximum speeds
Never exceed the maximum
speed for which the winter tires
are rated.
Unprofessional attempts by laymen to
service tires can lead to damage and
accidents.
Have this work performed by skilled
professionals only. Any BMW center
has the required technical knowledge
and the proper equipment and will be
happy to assist you.<
Tire condition, tire pressureWinter tires display a perceptible loss in
their ability to cope with winter driving
conditions once the tread wears to
below 0.16 in (4 mm), and should thus
be replaced.
Comply with the specified tire inflation
pressures Ñ and be sure to have the
wheel and tire assemblies balanced
every time you change the tires.BMW close-mesh tire chains
are
approved exclusively for use in combi-
nation with winter tires on the rear
wheel only. Comply with all manufac-
turer's safety precautions when
mounting the chains. Do not exceed a
speed of 30 mph (50 km/h) while
driving with mounted snow chains.
It is not possible to mount snow
chains on tires with 17-inch
wheels.<