2002 BMW 525I SPORT WAGON tow
[x] Cancel search: towPage 6 of 186

Contents
Operation, maintenance
Owner service procedures
Technical data
Under the hood:
Hood137
Engine compartment
essentials138
Washer fluids139
Engine oil140
Coolant142
Brake fluid143
Maintenance:
The BMW Maintenance
System144
Laws and regulations:
Technical modifications145
California Proposition
65 Warning145
OBD interface socket146
Replacement procedures:
Onboard tool kit150
Windshield wiper blades150
Lamps and bulbs151
Changing a wheel156
Battery160
Fuses160
Assistance, giving and
receiving:
Jump-starting162
Towing the vehicle163Engine specifications168
Dimensions169
Weights171
Capacities173
Page 39 of 186

39n
OverviewControlsMaintenanceRepairsDataIndex
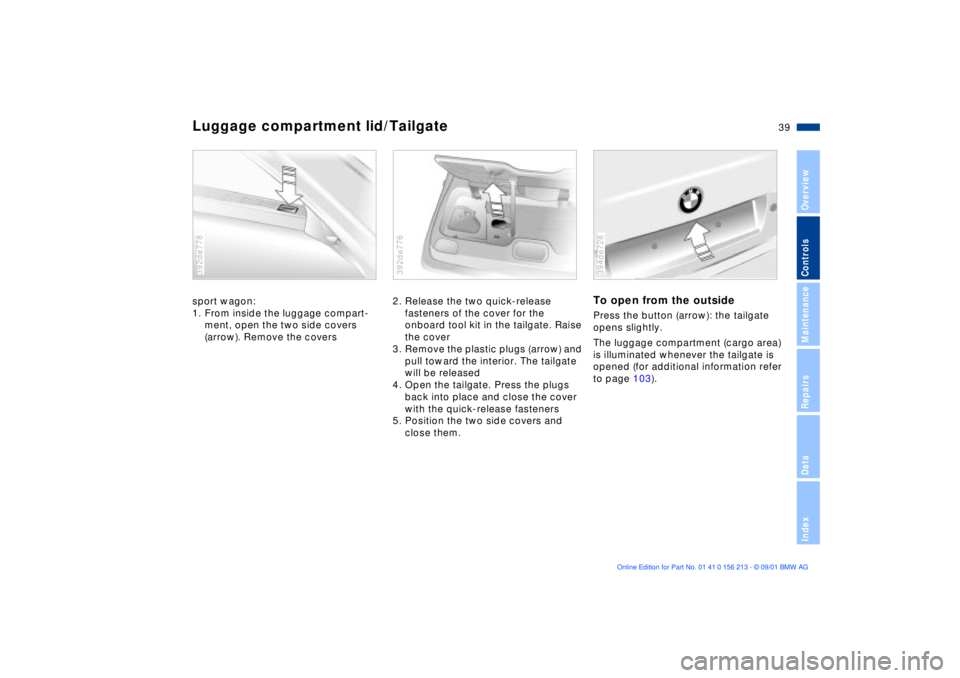
Luggage compartment lid/Tailgatesport wagon:
1. From inside the luggage compart-
ment, open the two side covers
(arrow). Remove the covers392de778
2. Release the two quick-release
fasteners of the cover for the
onboard tool kit in the tailgate. Raise
the cover
3. Remove the plastic plugs (arrow) and
pull toward the interior. The tailgate
will be released
4. Open the tailgate. Press the plugs
back into place and close the cover
with the quick-release fasteners
5. Position the two side covers and
close them.392de776
To open from the outsidePress the button (arrow): the tailgate
opens slightly.
The luggage compartment (cargo area)
is illuminated whenever the tailgate is
opened (for additional information refer
to page 103).394de728
Page 42 of 186

42n
Luggage compartment Alarm systemLuggage strapsUse the straps on the floor of the
luggage compartment to secure smaller
items of luggage.
Movement is reduced when objects are
placed on the straps.
The fittings at the corners of the
luggage compartment provide you
with a convenient means of attaching
luggage nets
* and flexible straps for
securing suitcases and luggage.
Refer also to "Cargo loading" on
page 126.
394de302
HangerOn the left-hand side of the luggage
compartment is a hanger for fastening
shopping bags, packages and similar
items.394de144
The conceptThe vehicle alarm system responds
>when a door, the hood, the luggage
compartment lid/tailgate or the rear
window is opened
>to movement inside the vehicle (inte-
rior motion sensor)
>to variations in the vehicle's tilt angle
such as those occurring during
attempts to steal the wheels or tow
the vehicle
>to interruption of battery voltage.
The system responds to unauthorized
vehicle entry and attempted theft by
simultaneously activating the following
>an acoustic alarm for 30 seconds
>the hazard warning flashers, for
approx. five minutes
>the high beams flash on and off in the
same rhythm as the hazard warning
flashers.
Page 46 of 186

46n
Sliding/tilt sunroof
*
To prevent injuries, exercise care
when closing the sliding/tilt
sunroof and keep it in your field of
vision until it is shut.
Before leaving the vehicle, switch off
the electric sunroof mechanism by
taking out the ignition key. Do not leave
children unattended in the vehicle with
access to vehicle keys. The key could
be used to start the engine and operate
vehicle systems such as the power
sunroof, etc. Unsupervised use of these
systems can result in serious personal
injury.<
For the convenience mode via the door
lock or the remote control, refer to
page 33 or 35.
Raising Ð Opening Ð ClosingWith the ignition key in position 1 or 2,
press the switch or slide it in the
desired direction until you feel resis-
tance.
When lifting, the headliner retracts
several inches.
The headliner insert can not be
closed with the sunroof in its
raised position.<
After the ignition has been switched off,
you can still operate the sliding/tilt
sunroof as long as neither of the front
doors has been opened.390de724
Automatic
* opening and closing
Press the switch past the resistance
point and then release it.
Other automatic operations are:
>With the sunroof open, press the
switch briefly toward "Lift:" the
sunroof automatically extends to its
fully-raised position
>With the sunroof lifted, press the
switch briefly toward "Open:" the
sunroof automatically opens all the
way.
Pressing the switch again briefly stops
the motion.Safety featureIf the sliding/tilt sunroof encounters
resistance at a point roughly past the
middle of its travel when it is closing,
the closing cycle is interrupted and the
sliding/tilt sunroof will open again
slightly.
Page 47 of 186

47n
OverviewControlsMaintenanceRepairsDataIndex
Sliding/tilt sunroof
*
Despite this safety feature, be
extremely careful that the travel
path of the sunroof is not obstructed
whenever it is closed. Remember that
the safety mechanism may not be able
to detect obstructions under all circum-
stances (with very thin objects, for
instance). You can disable this safety
feature by pressing the switch beyond
the pressure point and holding it.<
Sliding/tilt sunroof with glass
moonroof
*
The options and control procedures are
essentially the same as those previ-
ously described for the sliding/tilt
sunroof. In order to open the raised
roof, press the control switch towards
"Open" and maintain pressure until the
roof has reached the desired position.
The headliner insert slides back some-
what when you raise the sunroof, and
retracts along with the sunroof panel
when you slide it back. The insert then
remains open, and you can slide it back
and forth to adjust it whenever the
sunroof is not fully retracted.
Interruption in the electrical
supplyAfter interruptions in the electrical
supply (when the battery is discon-
nected, for instance), the sunroof may
only lift. To reinitialize the mechanism:
1. Raise the sliding/tilt sunroof fully
2. Press and hold the switch for approx
twenty seconds.390de725
Manual operationIn the event of an electrical malfunction,
you can also operate the sliding/tilt
sunroof manually:
1. Remove the interior lamp, then reach
into the exposed opening and press
out the cover
2. Use the Allen key from the onboard
tool kit (refer to page 150) to turn the
sliding/tilt sunroof in the desired
direction.390de376
Page 72 of 186

72n
Automatic transmission
*
Electronic transmission control
module
If the indicator lamp comes on
and/or if the message "TRANS.
FAILSAFE PROG" appears in
the Check Control
* display panel, this
indicates a malfunction in the transmis-
sion control system.
Bring the vehicle to a stop, select the
"Park" position, apply the parking brake
and shut the engine off (ignition key
position 0). Restart the engine after a
few seconds. If the indicator lamp goes
out again after a few seconds, the
normal transmission functions have
been restored. You may continue to
drive as usual.
If the indicator lamp does not go out,
you can move the selector lever to all
positions. However, the vehicle will now
only drive forward with limited gear
selection.
You should respond by avoiding
extreme engine loads and referring the
problem to the nearest BMW center.
Never perform work in the engine
compartment without first
ensuring that the transmission is in
"Park" or "Neutral" as the vehicle could
otherwise start to move off on its own.<
For jump-starting, towing and tow-
starting, refer to pages 162 and 163.
Page 75 of 186

75n
OverviewControlsMaintenanceRepairsDataIndex
Automatic transmission with Steptronic
*
ATC executes upshifts and downshifts
only when the new gear will provide a
suitable combination of vehicle and
engine speed, i.e., ATC will not execute
downshifts that would cause the engine
to overrev. The gear selected will
appear briefly in the instrument cluster
followed by the current gear.
If you are driving in the manual
mode and wish to accelerate
rapidly from low road speeds (when
passing, for instance), you must shift
down manually or with the "kickdown"
function.<
You can only change from "S/M" to
selector lever positions "P," "R," and
"N" via the "D" position.
Electronic transmission control
module
If the indicator lamp comes on
or the message "TRANS. FAIL-
SAFE PROG" appears in the
Check Control
*, there is a fault in the
transmission system.
Bring the vehicle to a stop. Move the
transmission selector lever to "P."
Engage the parking brake and turn the
engine off (ignition key to position 0).
Wait a few seconds, then start the
engine.
If the indicator lamp goes out after a
few seconds, normal transmission
performance has been restored. You
may continue to drive as usual. If the
indicator lamp does not go out, you can
place the selector lever in all positions.
However, the vehicle will now only drive
forward with limited gear selection.
If this happens, avoid extreme engine
loads and refer the problem to the
nearest BMW center.
Never perform work in the engine
compartment without first
ensuring that the transmission is in
"Park" or "Neutral" as the vehicle could
otherwise start to move off on its own.<
For jump-starting, towing and tow-
starting, refer to pages 162 and 163.
Page 86 of 186

86n
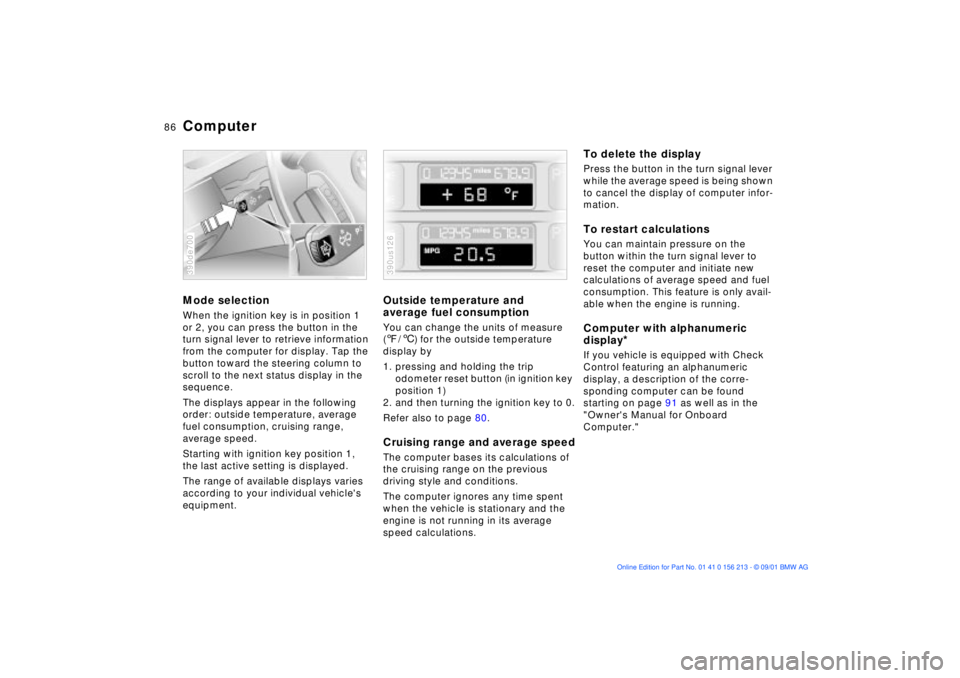
ComputerMode selectionWhen the ignition key is in position 1
or 2, you can press the button in the
turn signal lever to retrieve information
from the computer for display. Tap the
button toward the steering column to
scroll to the next status display in the
sequence.
The displays appear in the following
order: outside temperature, average
fuel consumption, cruising range,
average speed.
Starting with ignition key position 1,
the last active setting is displayed.
The range of available displays varies
according to your individual vehicle's
equipment.390de700
Outside temperature and
average fuel consumptionYou can change the units of measure
(7/6) for the outside temperature
display by
1. pressing and holding the trip
odometer reset button (in ignition key
position 1)
2. and then turning the ignition key to 0.
Refer also to page 80.Cruising range and average speedThe computer bases its calculations of
the cruising range on the previous
driving style and conditions.
The computer ignores any time spent
when the vehicle is stationary and the
engine is not running in its average
speed calculations.390us126
To delete the displayPress the button in the turn signal lever
while the average speed is being shown
to cancel the display of computer infor-
mation.To restart calculationsYou can maintain pressure on the
button within the turn signal lever to
reset the computer and initiate new
calculations of average speed and fuel
consumption. This feature is only avail-
able when the engine is running.Computer with alphanumeric
display
*
If you vehicle is equipped with Check
Control featuring an alphanumeric
display, a description of the corre-
sponding computer can be found
starting on page 91 as well as in the
"Owner's Manual for Onboard
Computer."