2002 BMW 330Ci COUPE tool kit
[x] Cancel search: tool kitPage 6 of 147

Contents
Owner service procedures
Technical data
Index
Replacement procedures:
Onboard tool kit118
Windshield wiper blades118
Lamps and bulbs118
Changing a wheel123
Battery127
Fuses127
Assistance, giving and
receiving:
Jump-starting128
Towing the vehicle129Engine data132
Dimensions133
Weights134
Capacities135Everything from A to Z138
Page 39 of 147

39n
OverviewControlsMaintenanceRepairsDataIndex
Sliding/tilt sunroof
*
The headliner insert slides back some-
what when you raise the sunroof. When
the sunroof is opened the headliner
retracts with it.
Do not use force to close the
headliner insert with the sunroof in
its raised position, as damage to the
mechanism could result.<
To use the convenience mode via the
remote control or the door lock, refer to
page 30 or 31.Automatic opening and closingPress the switch briefly past the resis-
tance point: the sunroof travels to either
the fully-closed or fully-open position.
Pressing the switch again stops the
motion immediately.
Safety featureIf the sliding/tilt sunroof encounters
resistance
>when it is closing from the raised
position
>when it is closing from a point
roughly past the middle of its travel
the closing cycle is interrupted and the
sliding/tilt sunroof will open again
slightly.
Despite this safety feature, be
extremely careful that the travel
path of the sunroof is not obstructed
whenever it is closed. Remember that
the safety mechanism may not be able
to detect obstructions under all circum-
stances (with very thin objects, for
instance).
You can disable this safety feature by
pressing the switch beyond the pres-
sure point and holding it.<
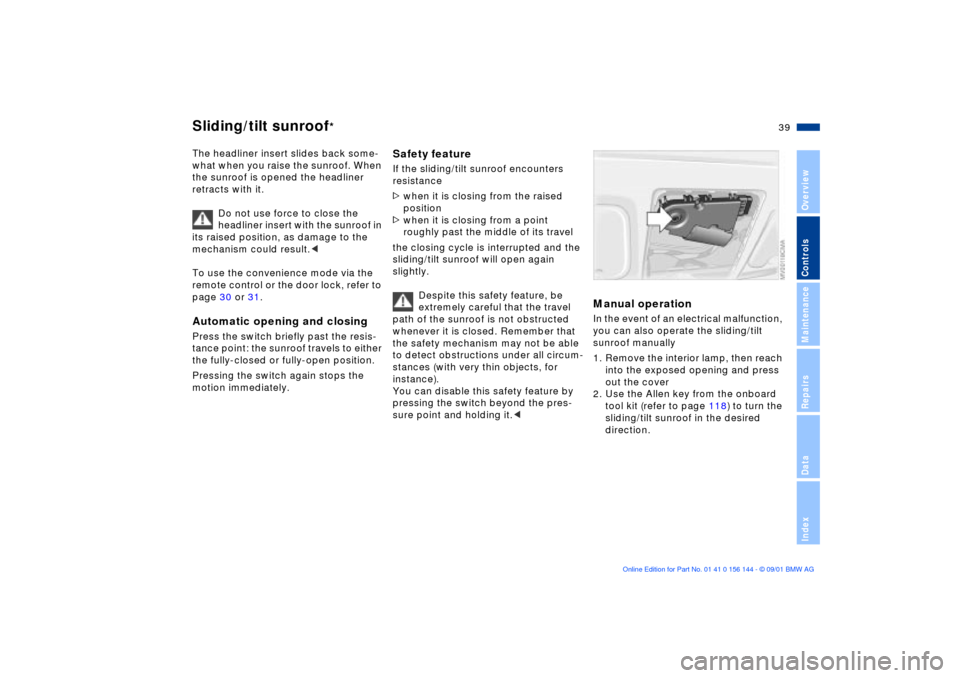
Manual operationIn the event of an electrical malfunction,
you can also operate the sliding/tilt
sunroof manually
1. Remove the interior lamp, then reach
into the exposed opening and press
out the cover
2. Use the Allen key from the onboard
tool kit (refer to page 118) to turn the
sliding/tilt sunroof in the desired
direction.
Page 118 of 147

118n
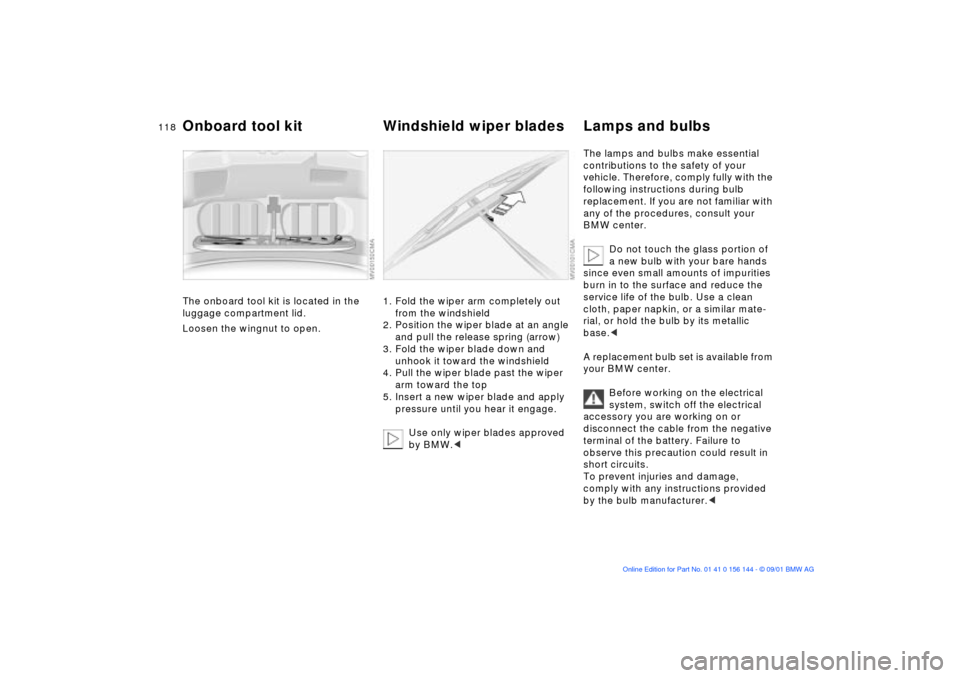
The onboard tool kit is located in the
luggage compartment lid.
Loosen the wingnut to open.
1. Fold the wiper arm completely out
from the windshield
2. Position the wiper blade at an angle
and pull the release spring (arrow)
3. Fold the wiper blade down and
unhook it toward the windshield
4. Pull the wiper blade past the wiper
arm toward the top
5. Insert a new wiper blade and apply
pressure until you hear it engage.
Use only wiper blades approved
by BMW.<
The lamps and bulbs make essential
contributions to the safety of your
vehicle. Therefore, comply fully with the
following instructions during bulb
replacement. If you are not familiar with
any of the procedures, consult your
BMW center.
Do not touch the glass portion of
a new bulb with your bare hands
since even small amounts of impurities
burn in to the surface and reduce the
service life of the bulb. Use a clean
cloth, paper napkin, or a similar mate-
rial, or hold the bulb by its metallic
base.<
A replacement bulb set is available from
your BMW center.
Before working on the electrical
system, switch off the electrical
accessory you are working on or
disconnect the cable from the negative
terminal of the battery. Failure to
observe this precaution could result in
short circuits.
To prevent injuries and damage,
comply with any instructions provided
by the bulb manufacturer.<
Onboard tool kit Windshield wiper blades Lamps and bulbs
Page 124 of 147

124n
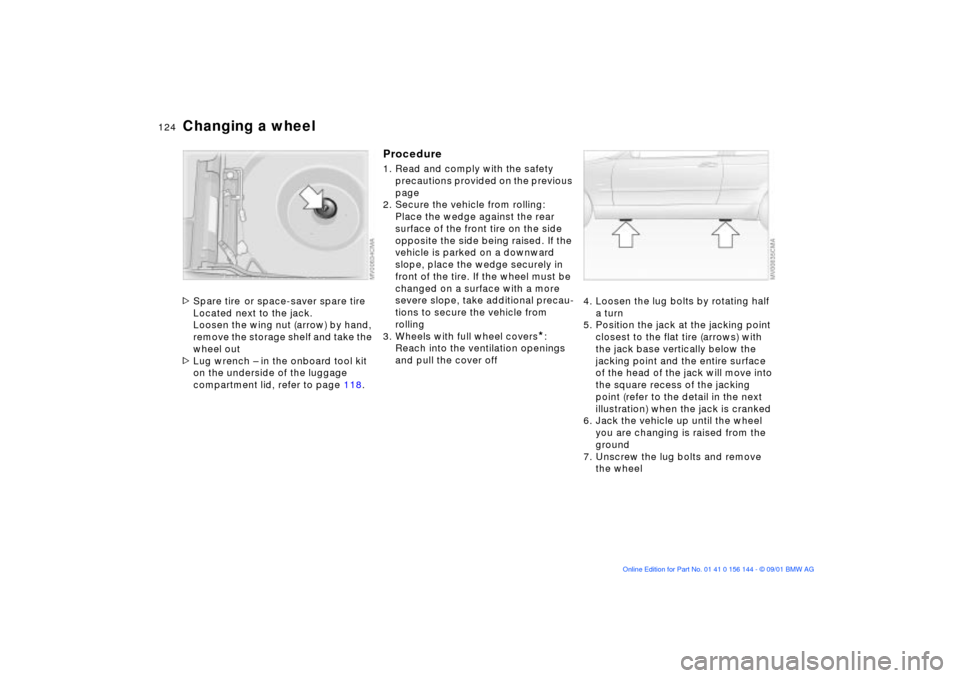
Changing a wheel>Spare tire
or space-saver spare tire
Located next to the jack.
Loosen the wing nut (arrow) by hand,
remove the storage shelf and take the
wheel out
>Lug wrench Ð in the onboard tool kit
on the underside of the luggage
compartment lid, refer to page 118.
Procedure1. Read and comply with the safety
precautions provided on the previous
page
2. Secure the vehicle from rolling:
Place the wedge against the rear
surface of the front tire on the side
opposite the side being raised. If the
vehicle is parked on a downward
slope, place the wedge securely in
front of the tire. If the wheel must be
changed on a surface with a more
severe slope, take additional precau-
tions to secure the vehicle from
rolling
3. Wheels with full wheel covers
*:
Reach into the ventilation openings
and pull the cover off4. Loosen the lug bolts by rotating half
a turn
5. Position the jack at the jacking point
closest to the flat tire (arrows) with
the jack base vertically below the
jacking point and the entire surface
of the head of the jack will move into
the square recess of the jacking
point (refer to the detail in the next
illustration) when the jack is cranked
6. Jack the vehicle up until the wheel
you are changing is raised from the
ground
7. Unscrew the lug bolts and remove
the wheel
Page 129 of 147

129n
OverviewControlsMaintenanceRepairsDataIndex
Towing the vehicleTow fittingThe screw-in tow fitting is stored in the
onboard tool kit; be sure that it remains
in the vehicle at all times. This fitting is
designed for installation in the tow
sockets located at the front and rear of
the vehicle. It is intended for towing on
paved road surfaces only. This fitting
should not be used to pull a vehicle out
of deep snow, mud, sand, etc.
Always comply with all applicable
towing laws and regulations.Access to tow socketsFront:
Press out the cover panel with a screw-
driver inserted in the recess at the top.
Rear:
Press out the cover panel with a screw-
driver inserted in the recess at the top.
Screw the tow fitting in until it is all
the way in. Failure to screw the
fitting all the way in can cause thread
damage.
Never attach tie-down hooks, chains,
straps, or tow hooks to tie rods, control
arms, or any other part of the vehicle
suspension, as severe damage to these
components will occur, leading to
possible accidents.<
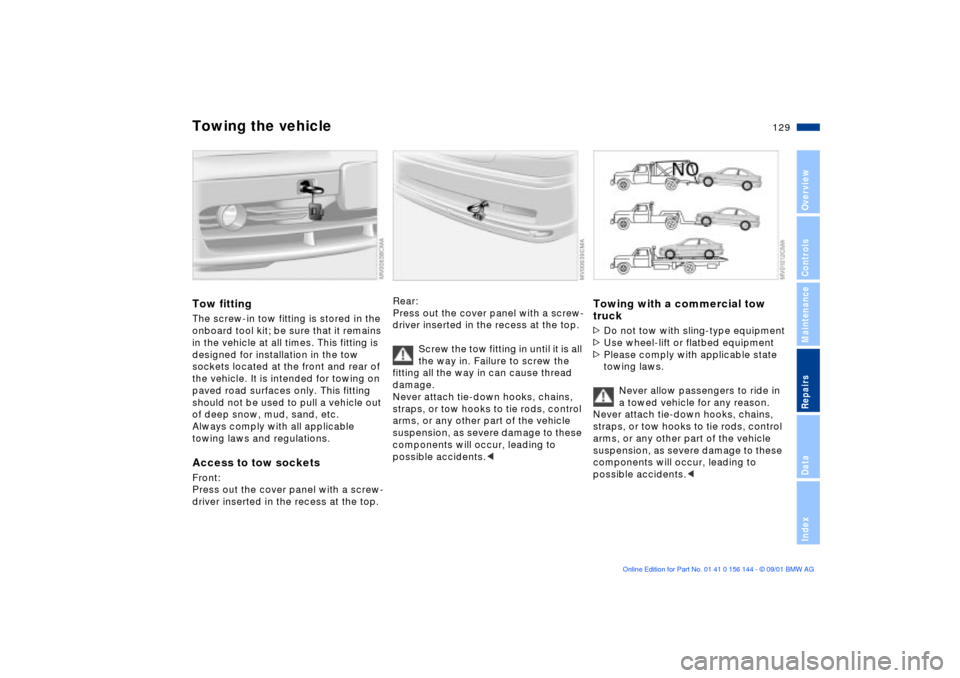
Towing with a commercial tow
truck>Do not tow with sling-type equipment
>Use wheel-lift or flatbed equipment
>Please comply with applicable state
towing laws.
Never allow passengers to ride in
a towed vehicle for any reason.
Never attach tie-down hooks, chains,
straps, or tow hooks to tie rods, control
arms, or any other part of the vehicle
suspension, as severe damage to these
components will occur, leading to
possible accidents.c
Page 142 of 147

Everything from A to ZOil change intervals, see the
Service and Warranty
Information Booklet/
Warranty and Service
Guide Booklet
Oil dipstick109
Oil filter change135
OIL SERVICE65
Onboard computer66
refer to the "Onboard
Computer Owner's
Manual"
Onboard tool kit118
Opening and closing
from the inside32
via the door lock31
via the remote control29
Outlets, ventilation83
Outside temperature
display67
P
Paint care, refer to the
"Caring for your vehicle"
manual
Park assistant69
Park Distance Control
(PDC)69
Parking aid69
Parking brake56
Parking lamps77
bulb replacement119
PDC (Park Distance
Control)69
Performance132
Pocket light87
Power seat adjustment42
Power windows38
Premium sound system86
Protective function38 Q
Quality Grades102
R
Rain sensor60
RDC (Tire Pressure
Monitor)73
Reading lamps
front79
rear79
Rear center 3-point belt91
Rear fog lamps
bulb replacement121
Rear lamps121
Rear reading lamps79
Rear window
defroster81, 85
Rear-seat backrest,
removable91
Rearview mirror47
Recirculated-air mode81
Reclining seat40
Refueling22
Release backrest43
Releasing the fuel filler door
after an electrical
malfunction22
Remote control29
Removable rear-seat
backrest91 Remove window
condensation82, 84
Replace windshield wiper
blades118
Replacement keys28
Replacing lamps and
bulbs118
Reporting safety defects11
Reverse56
Roller sun blind86
Roof load capacity134
Roof-mounted luggage
rack94
S
Safety belts
correct use40
height adjustment44
Safety defects, reporting11
Safety tires103, 126
Seat adjustment40
Seat heating46
Seat memory45
Seats40
Securing cargo93
Securing child-restraint
system52
Page 143 of 147

Everything from A to Z
143n
OverviewControlsMaintenancRepairsDataIndex
Selector lever, automatic
transmission57
Service and Warranty
Information Booklet (US
models)113
Service Interval
Display65, 113
Setting temperature81
Shiftlock57
Side airbags48
Side Impact Head Protection
System48
Ski bag92
Sliding/tilt sunroof38
electrical malfunction39
manual operation39
Snow chains105
Socket89
Sound system86
Space-saver spare
tire25, 123
Spare key28
Spare tire123
Speedometer15
Sport steering wheel21
Sports seat
manual adjustment41
power adjustment42 Standing lamps78
Starting the engine54
Steering wheel46
Steering wheel lock54
Stopping the vehicle55
Storage compartments87
Stowing cargo93
Stroke132
Sun blind cover86
Switching off the engine55
Switching off the interior
motion sensor37
Switching off the tilt alarm
sensor37
Symbols8
Synthetic oils110
T
Tachometer64
Tail lamps
bulb replacement121
Tank capacity135
Technical data132
Technical
modifications10, 114
Telephone preparation89
Temperature display
outside temperature67 Temperature gauge
engine coolant65
Temperature
layering82, 85
Thigh support
adjustment41
Third brake light122
Through-loading system91
Tilt alarm sensor30, 37
remote control30
switching off37
Tire change123
Tire condition101
Tire damage101
Tire inflation
pressures24, 101
monitoring73
table25
Tire Pressure Monitor
(RDC)73, 103, 126
Tire pressure warning73
Tire Quality Grading103
Tire replacement102
Tire tread101
Tires and wheels101
Tool kit118
Torque132
Towing fittings129 Towing the vehicle129
Track133
Transmission56
Transmitter keys28
Transporting children
safely51
Tread depth, tires101
Tread Wear Indicator101
Trip odometer64
Trunk lid, refer to luggage
compartment lid33
Trunk, refer to luggage
compartment35
Turn signal
indicator20, 59, 120
bulb replacement120
Turning radius133
U
Uniform Tire Quality
Grading103