2002 BMW 330Ci COUPE key
[x] Cancel search: keyPage 32 of 147

32n
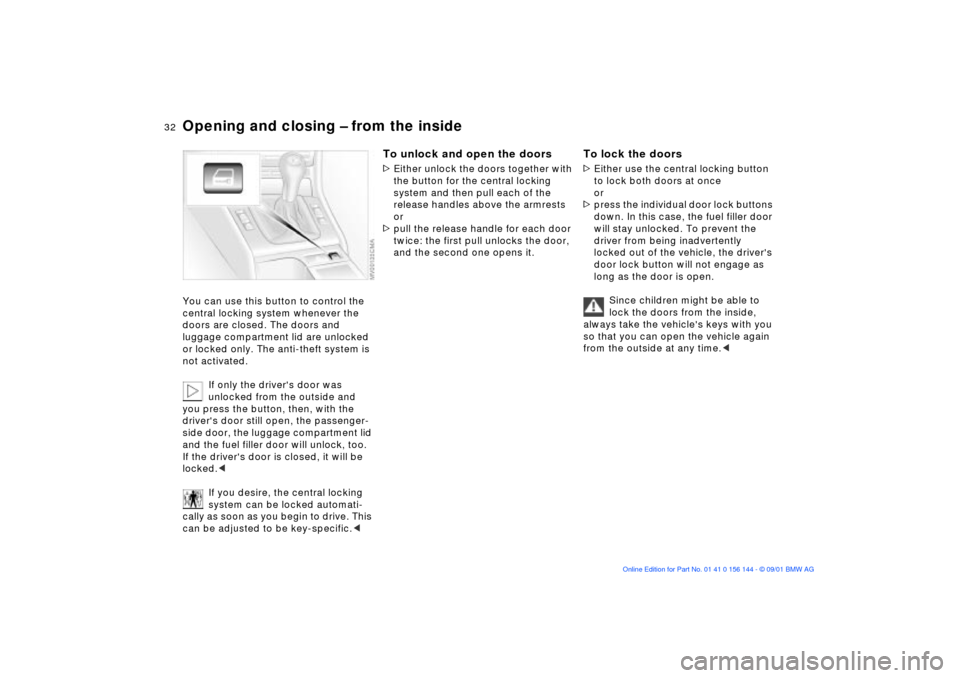
Opening and closing Ð from the insideYou can use this button to control the
central locking system whenever the
doors are closed. The doors and
luggage compartment lid are unlocked
or locked only. The anti-theft system is
not activated.
If only the driver's door was
unlocked from the outside and
you press the button, then, with the
driver's door still open, the passenger-
side door, the luggage compartment lid
and the fuel filler door will unlock, too.
If the driver's door is closed, it will be
locked.<
If you desire, the central locking
system can be locked automati-
cally as soon as you begin to drive. This
can be adjusted to be key-specific.<
To unlock and open the doors>Either unlock the doors together with
the button for the central locking
system and then pull each of the
release handles above the armrests
or
>pull the release handle for each door
twice: the first pull unlocks the door,
and the second one opens it.
To lock the doors>Either use the central locking button
to lock both doors at once
or
>press the individual door lock buttons
down. In this case, the fuel filler door
will stay unlocked. To prevent the
driver from being inadvertently
locked out of the vehicle, the driver's
door lock button will not engage as
long as the door is open.
Since children might be able to
lock the doors from the inside,
always take the vehicle's keys with you
so that you can open the vehicle again
from the outside at any time.<
Page 33 of 147

33n
OverviewControlsMaintenanceRepairsDataIndex
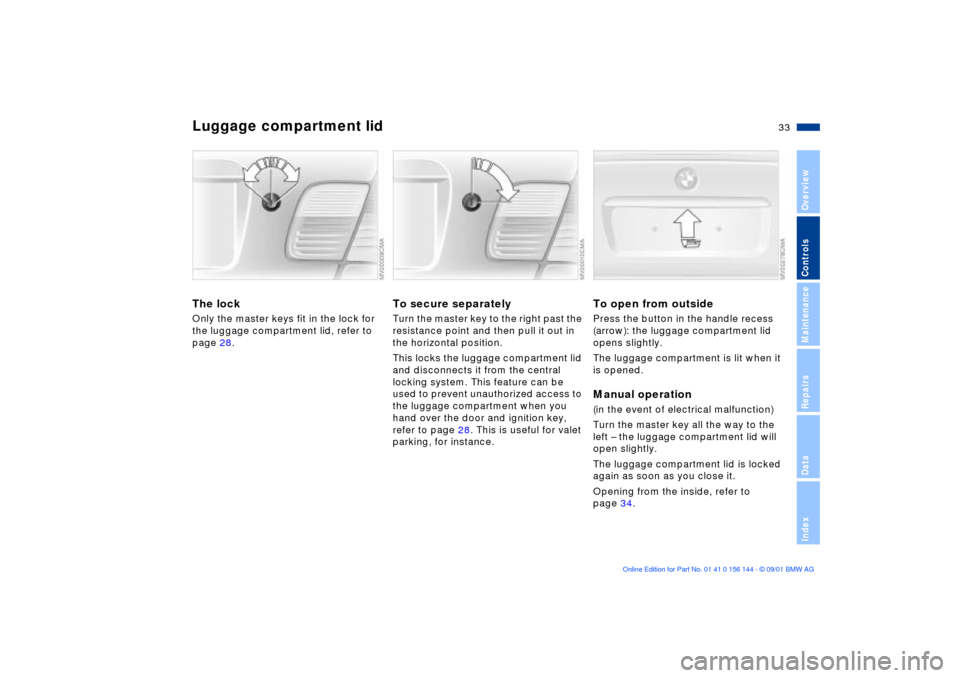
Luggage compartment lid The lockOnly the master keys fit in the lock for
the luggage compartment lid, refer to
page 28.
To secure separatelyTurn the master key to the right past the
resistance point and then pull it out in
the horizontal position.
This locks the luggage compartment lid
and disconnects it from the central
locking system. This feature can be
used to prevent unauthorized access to
the luggage compartment when you
hand over the door and ignition key,
refer to page 28. This is useful for valet
parking, for instance.
To open from outsidePress the button in the handle recess
(arrow): the luggage compartment lid
opens slightly.
The luggage compartment is lit when it
is opened. Manual operation(in the event of electrical malfunction)
Turn the master key all the way to the
left Ð the luggage compartment lid will
open slightly.
The luggage compartment lid is locked
again as soon as you close it.
Opening from the inside, refer to
page 34.
Page 37 of 147

37n
OverviewControlsMaintenanceRepairsDataIndex
Alarm system
*
Electric power windows
>The indicator lamp goes out when the
system is disarmed: no manipulation
or attempted intrusions have been
detected in the period since the
system was armed
>The indicator lamp flashes for
10 seconds when the system is
disarmed: an attempted entry has
been detected in the period since the
system was armed.
Following triggering of an alarm, the
indicator lamp will flash continuously.Avoiding unintentional alarmsThe tilt alarm sensor and interior motion
sensor may be switched off at the same
time. You can do this to prevent a false
alarm from being triggered in garages
with elevator ramps, for instance, or
when the vehicle is transported by train:
Lock the vehicle twice (= arm the
system). Press the button on the
remote control twice in succession or
lock the vehicle twice with the key.
The indicator lamp lights up briefly and
then flashes continuously. The tilt alarm
sensor and interior motion sensor are
deactivated for as long as the system
remains armed.
Interior motion sensorIn order for the interior motion sensor to
function properly, the windows and the
sliding/tilt sunroof must be completely
closed.
Nevertheless, you should deactivate
the interior motion sensor (refer to
previous column) if
>children or animals are left in the
vehicle
>the windows or the sliding/tilt sunroof
are being left open.
To open and close windowsIgnition key in position 1 and 2.
>Press the switch up to the resistance
point: the window retracts (the tilt-out
window moves outward); it remains in
motion for as long as you maintain
pressure on the switch
>Press the switch briefly past the pres-
sure point: the window moves auto-
matically. Pressing the switch again
stops the opening cycle.
You can close the windows in the same
manner by pulling the switch. The tilt-
out windows do not reclose automati-
cally.
After the ignition has been switched off:
You can still use the electric power
windows for up to 15 minutes, as long
as no one opens any of the doors.
Page 38 of 147

38n
Electric power windows Sliding/tilt sunroof
*
When leaving the vehicle, always
remove the ignition key from the
lock and remember to close the doors
to prevent children from operating the
power windows and injuring them-
selves, etc.<
For the convenience mode via the
remote control or the door lock, refer to
page 30 or 31.
Safety feature A contact strip is located on the inside
upper frame of each of the front
windows. If pressure is exerted against
this contact strip while a window is
being raised, the system will respond
by stopping the window and then
retracting it a small distance.
Despite this safety feature, be
extremely careful to ensure that
the closing path of the window is not
obstructed. Some types of objects
might fail to trigger the contact strip in
some situations (very thin objects, for
instance).
You can override this safety feature by
pressing the switch beyond the resis-
tance point and holding it.<
To prevent injuries, exercise care
when closing the sliding/tilt
sunroof and keep it in your field of
vision until it is shut.
When leaving the vehicle, always
remove the ignition key from the lock
and remember to close the doors to
prevent children from operating the
sliding/tilt sunroof and injuring them-
selves, etc.<
Raising Ð Opening Ð ClosingIgnition key in position 1 and 2.
After the ignition has been switched off,
you can still operate the sliding/tilt
sunroof for up to 15 minutes as long as
neither of the doors has been opened.
Raising/Opening/Closing: press the
switch or slide it in the desired direction
until you feel resistance.
If you briefly press the switch in the
"raise" direction while the sunroof is
open, the sunroof will rise to its upper-
most position.
Page 39 of 147

39n
OverviewControlsMaintenanceRepairsDataIndex
Sliding/tilt sunroof
*
The headliner insert slides back some-
what when you raise the sunroof. When
the sunroof is opened the headliner
retracts with it.
Do not use force to close the
headliner insert with the sunroof in
its raised position, as damage to the
mechanism could result.<
To use the convenience mode via the
remote control or the door lock, refer to
page 30 or 31.Automatic opening and closingPress the switch briefly past the resis-
tance point: the sunroof travels to either
the fully-closed or fully-open position.
Pressing the switch again stops the
motion immediately.
Safety featureIf the sliding/tilt sunroof encounters
resistance
>when it is closing from the raised
position
>when it is closing from a point
roughly past the middle of its travel
the closing cycle is interrupted and the
sliding/tilt sunroof will open again
slightly.
Despite this safety feature, be
extremely careful that the travel
path of the sunroof is not obstructed
whenever it is closed. Remember that
the safety mechanism may not be able
to detect obstructions under all circum-
stances (with very thin objects, for
instance).
You can disable this safety feature by
pressing the switch beyond the pres-
sure point and holding it.<
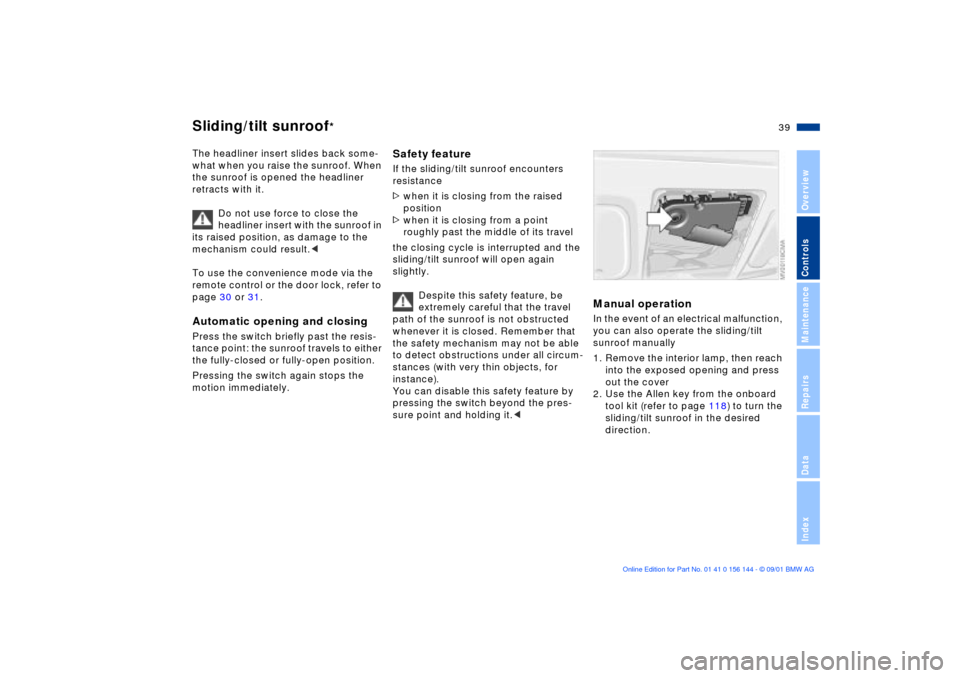
Manual operationIn the event of an electrical malfunction,
you can also operate the sliding/tilt
sunroof manually
1. Remove the interior lamp, then reach
into the exposed opening and press
out the cover
2. Use the Allen key from the onboard
tool kit (refer to page 118) to turn the
sliding/tilt sunroof in the desired
direction.
Page 45 of 147

45n
OverviewControlsMaintenanceRepairsDataIndex
Seat and mirror memory
*
You can store and recall three different
driver's seat and exterior mirror posi-
tions.
Memory will not retain the adjust-
ment made to the lumbar
support.
to the desired position
3. Press the
M
EMORY button: the indi-
cator lamp in the button lights up
4. Press memory button 1, 2 or 3, as
desired. Indicator lamp goes out.
To select a stored setting
Do not select a memory position
while the vehicle is moving. If you
do so, there is a risk of accident from
unexpected seat movement.<
Ignition key in position 1:
>Briefly press memory button 1, 2 or 3,
as desired.
Movement stops immediately when
one of the seat adjustment or
memory buttons is activated during
the adjustment process.
The driver's door is closed and the igni-
tion key is either removed or in posi-
tion 0 or 2:
>Press and hold the desired memory
button (1, 2 or 3) until the adjustment
process is completed.
If you press the
M
EMORY button
accidentally: press the button
again; the indicator lamp goes out.<
Your BMW center can adjust your
vehicle's systems in such a
manner that your personalized settings
are automatically set for the seat and
exterior mirror positions when you
unlock the vehicle with your personal
remote control.<
Before activating the programmed
adjustment feature ensure that the
footwell behind the driver's seat is
empty and unobstructed. If you fail to
do so, any persons or objects behind
the seat could be injured or damaged
by a rearward movement of the seat.<
Page 46 of 147

46n
Seat and mirror memory
*
Seat heating
*
Steering wheel
Passenger-side exterior mirror tilt
function(Automatic curb monitor
*)
1. Move the mirror selector switch 1 to
the "driver's mirror" position
2. When the selector lever is placed in
"Reverse," the passenger-side mirror
tilts downward. This allows the driver
to see the area directly adjacent to
the vehicle during parking (curbs,
etc.).
You can deactivate this automatic
feature by setting the mirror selector
switch to the "passenger side" position.
The seat cushion and backrest can
be heated with the ignition key in posi-
tion 2.
You can select different heating modes
by repeatedly pressing the buttons.
You can also switch the higher heating
modes off directly:
Press the button and hold it slightly
longer.
To adjust1. Push the locking lever downward
2. Adjust the steering column's rake
and reach to suit your seat position
3. Pull the lever back in to clamp the
steering wheel in the new position.
Do not adjust the steering wheel
while the vehicle is moving, other-
wise you run the risk of an accident due
to unexpected movement.<
Page 47 of 147

47n
OverviewControlsMaintenanceRepairsDataIndex
Mirrors To adjust exterior mirrors1 Switch for 4-way adjustment
2 Selection switch for changing
between mirrors
To adjust manuallyThe mirrors can also be adjusted by
hand:
Press the edge of the lens.
Storing mirror settings, refer to Seat
and mirror memory on page 45.
The mirror on the passenger's side
features a lens with a more convex
surface than the mirror installed on the
driver's side. When estimating the
distance between yourself and other
traffic, bear in mind that the objects
reflected in the mirror are closer than
they appear. This means that estimates
of the distance to following traffic
should not be regarded as precise. This
precaution also applies to the non-
spherical outer section of the lens.
Both mirrors are automatically heated
when you turn the ignition key to posi-
tion 2.
Interior rearview mirror To reduce glare from vehicles behind
you when you are driving at night, tilt
the lens by turning the button.
Vehicles without alarm system:
Tilt the small lever forward.