2002 BMW 330Ci CONVERTIBLE buttons
[x] Cancel search: buttonsPage 21 of 159
21n
OverviewControlsMaintenanceRepairsDataIndex
Multifunction steering wheel (MFL)
*
The buttons integrated in the multifunc-
tion steering wheel (MFL) are provided
so that you can operate a number of
accessories quickly and without being
distracted from traffic conditions. You
may operate:
>
Selected radio functions
>
The cruise control
>
Selected cellular phone functions.
The controls are active only when
the corresponding systems and
accessories are switched on.
<
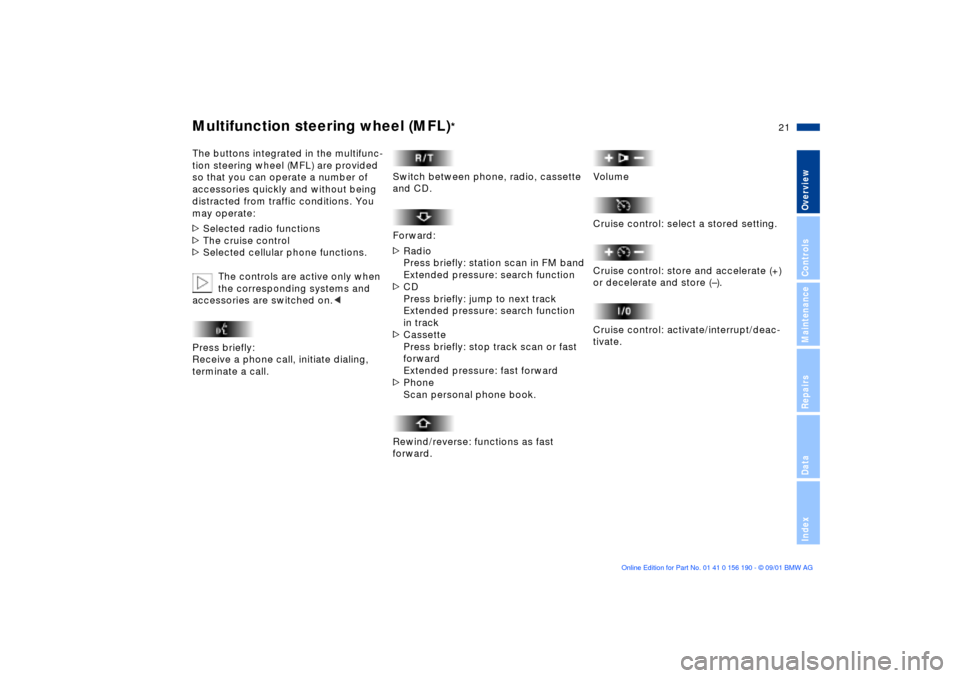
Press briefly:
Receive a phone call, initiate dialing,
terminate a call.
Switch between phone, radio, cassette
and CD.
Forward:
>
Radio
Press briefly: station scan in FM band
Extended pressure: search function
>
CD
Press briefly: jump to next track
Extended pressure: search function
in track
>
Cassette
Press briefly: stop track scan or fast
forward
Extended pressure: fast forward
>
Phone
Scan personal phone book.
Rewind/reverse: functions as fast
forward.
Volume
Cruise control: select a stored setting.
Cruise control: store and accelerate (+)
or decelerate and store (Ð).
Cruise control: activate/interrupt/deac-
tivate.
Page 28 of 159
28n
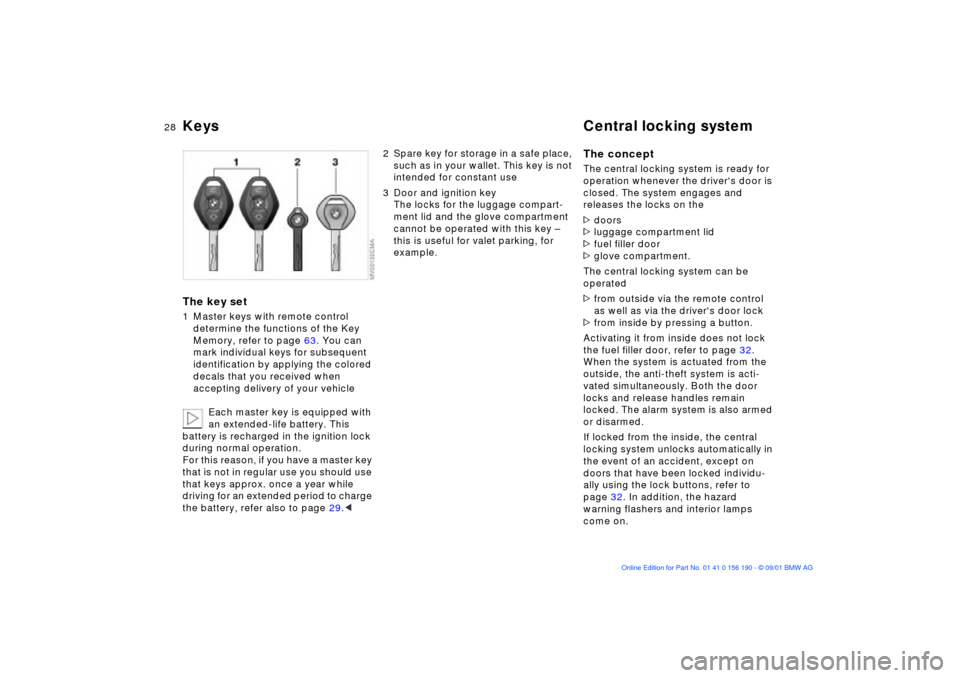
Keys Central locking systemThe key set1 Master keys with remote control
determine the functions of the Key
Memory, refer to page 63. You can
mark individual keys for subsequent
identification by applying the colored
decals that you received when
accepting delivery of your vehicle
Each master key is equipped with
an extended-life battery. This
battery is recharged in the ignition lock
during normal operation.
For this reason, if you have a master key
that is not in regular use you should use
that keys approx. once a year while
driving for an extended period to charge
the battery, refer also to page 29.<
2 Spare key for storage in a safe place,
such as in your wallet. This key is not
intended for constant use
3 Door and ignition key
The locks for the luggage compart-
ment lid and the glove compartment
cannot be operated with this key Ð
this is useful for valet parking, for
example.
The conceptThe central locking system is ready for
operation whenever the driver's door is
closed. The system engages and
releases the locks on the
>doors
>luggage compartment lid
>fuel filler door
>glove compartment.
The central locking system can be
operated
>from outside via the remote control
as well as via the driver's door lock
>from inside by pressing a button.
Activating it from inside does not lock
the fuel filler door, refer to page 32.
When the system is actuated from the
outside, the anti-theft system is acti-
vated simultaneously. Both the door
locks and release handles remain
locked. The alarm system is also armed
or disarmed.
If locked from the inside, the central
locking system unlocks automatically in
the event of an accident, except on
doors that have been locked individu-
ally using the lock buttons, refer to
page 32. In addition, the hazard
warning flashers and interior lamps
come on.
Page 32 of 159
32n
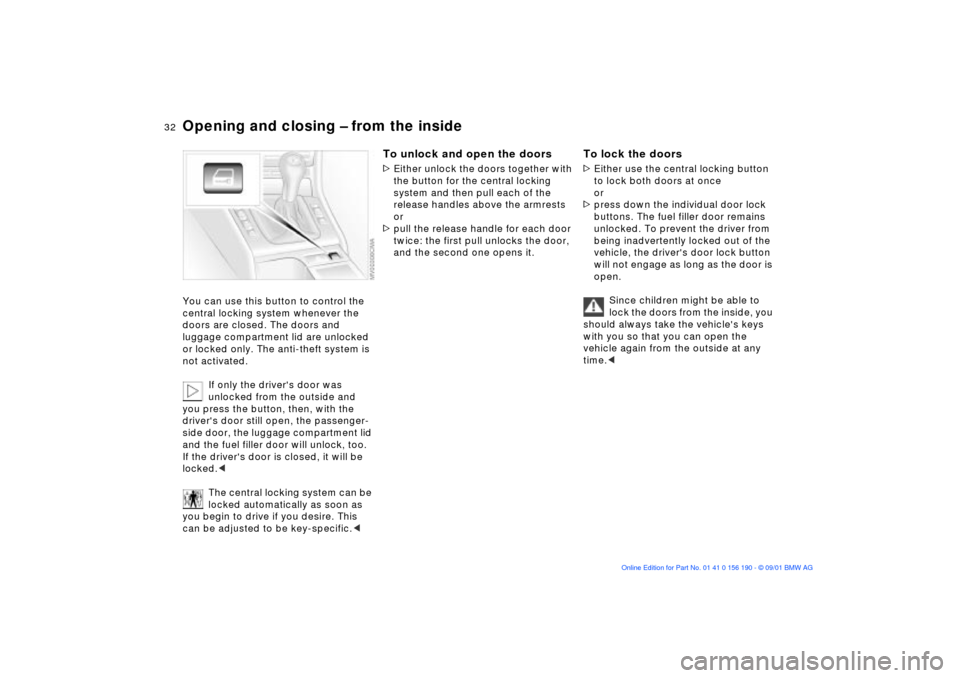
Opening and closing Ð from the insideYou can use this button to control the
central locking system whenever the
doors are closed. The doors and
luggage compartment lid are unlocked
or locked only. The anti-theft system is
not activated.
If only the driver's door was
unlocked from the outside and
you press the button, then, with the
driver's door still open, the passenger-
side door, the luggage compartment lid
and the fuel filler door will unlock, too.
If the driver's door is closed, it will be
locked.<
The central locking system can be
locked automatically as soon as
you begin to drive if you desire. This
can be adjusted to be key-specific.<
To unlock and open the doors>Either unlock the doors together with
the button for the central locking
system and then pull each of the
release handles above the armrests
or
>pull the release handle for each door
twice: the first pull unlocks the door,
and the second one opens it.
To lock the doors>Either use the central locking button
to lock both doors at once
or
>press down the individual door lock
buttons. The fuel filler door remains
unlocked. To prevent the driver from
being inadvertently locked out of the
vehicle, the driver's door lock button
will not engage as long as the door is
open.
Since children might be able to
lock the doors from the inside, you
should always take the vehicle's keys
with you so that you can open the
vehicle again from the outside at any
time.<
Page 44 of 159
44n
Fully-automatic convertible top
*
While the convertible top is in
motion, the rear window will move
toward the passenger compartment
and will gently press the heads of the
passengers sitting in the rear forward.
Normally, this is not dangerous. To
avoid possibly being pinched, passen-
gers in the back seat should lean their
heads slightly forward while the
convertible top is in motion.<
The side power windows are lowered a
small distance whenever the top is set
in motion by pressing the button and
after the opening or closing process is
completed, they will go back up, if you
keep holding the button down for more
than 2 seconds after the indicator lamp
has gone out.
The luggage compartment lid cannot be
opened while the convertible top is in
motion.
Do not close the side power
windows using the buttons if the
convertible top operation has been
interrupted.<
After having been stored for an
extended period of time in the
convertible top compartment Ñ e. g.
during the winter months because the
hardtop was being used Ñ you may have
to support the convertible top by hand
when closing it for the first time:
If the convertible top should halt just
before the closing phase is completed,
press against the front section of the
convertible top frame from the outside to
help the closing process along. Continue
pressing the switch while doing so until
the top starts up again on its own.<
If the opening or closing process
has been interrupted, the convert-
ible top will remain in that position for
15 minutes.
After that, the convertible top can be
moved again and, if it is an emergency
situation, you may need to help the top
along manually. This can also be done
in ignition key position 0.
In certain cases, the luggage compart-
ment lid cannot be opened if the
opening or closing operation has been
interrupted.
Manual closing in the event of an
electrical malfunction
The best way to close the convert-
ible top manually is to stand
outside the vehicle, keeping the driver's
door open and the driver's seat flipped
forward. No one is to be in the rear seat
during this operation.<
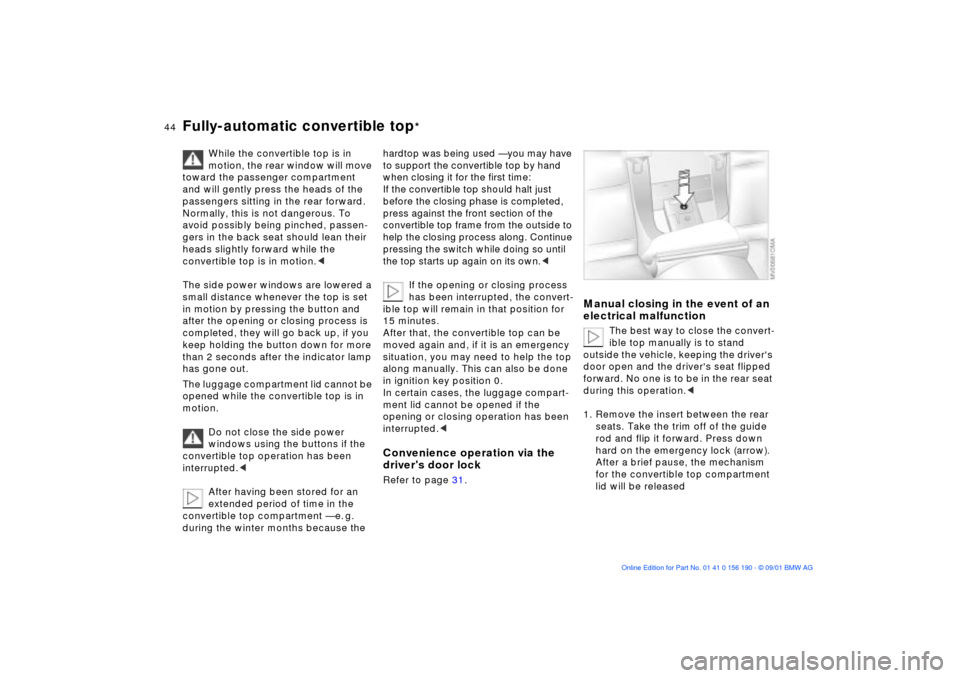
1. Remove the insert between the rear
seats. Take the trim off of the guide
rod and flip it forward. Press down
hard on the emergency lock (arrow).
After a brief pause, the mechanism
for the convertible top compartment
lid will be released
Page 53 of 159
53n
OverviewControlsMaintenanceRepairsDataIndex
Seat and mirror memory
*
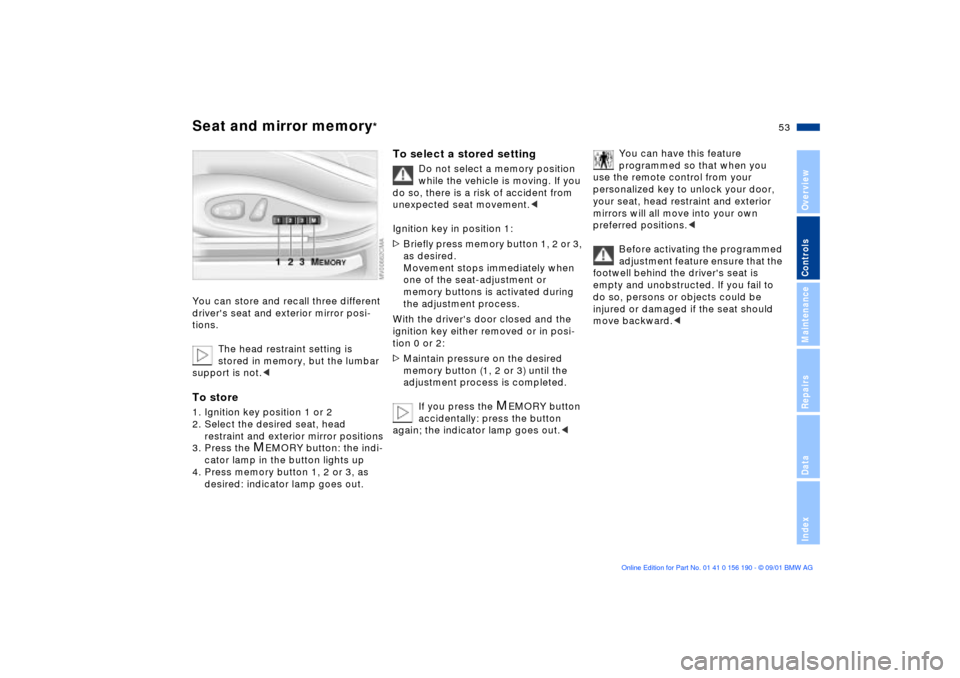
You can store and recall three different
driver's seat and exterior mirror posi-
tions.
The head restraint setting is
stored in memory, but the lumbar
support is not.
restraint and exterior mirror positions
3. Press the
M
EMORY button: the indi-
cator lamp in the button lights up
4. Press memory button 1, 2 or 3, as
desired: indicator lamp goes out.
To select a stored setting
Do not select a memory position
while the vehicle is moving. If you
do so, there is a risk of accident from
unexpected seat movement.<
Ignition key in position 1:
>Briefly press memory button 1, 2 or 3,
as desired.
Movement stops immediately when
one of the seat-adjustment or
memory buttons is activated during
the adjustment process.
With the driver's door closed and the
ignition key either removed or in posi-
tion 0 or 2:
>Maintain pressure on the desired
memory button (1, 2 or 3) until the
adjustment process is completed.
If you press the
M
EMORY button
accidentally: press the button
again; the indicator lamp goes out.<
You can have this feature
programmed so that when you
use the remote control from your
personalized key to unlock your door,
your seat, head restraint and exterior
mirrors will all move into your own
preferred positions.<
Before activating the programmed
adjustment feature ensure that the
footwell behind the driver's seat is
empty and unobstructed. If you fail to
do so, persons or objects could be
injured or damaged if the seat should
move backward.<
Page 54 of 159

54n
Seat and mirror memory
*
Seat heating
**Steering wheel
Passenger-side exterior mirror tilt
function(Automatic curb monitor
*)
1. Move the mirror selector switch 1 to
the "driver's mirror" position
2. When the selector lever is placed in
"Reverse," the passenger-side mirror
tilts downward. This allows the driver
to see the area directly adjacent to
the vehicle during parking (curbs,
etc.).
You can deactivate this automatic
feature by setting the mirror selection
switch to the "passenger side" position.
The seat cushion and backrest can be
heated with the ignition key in
position 2.
You can select different heating modes
by repeatedly pressing the buttons.
You can also switch the higher heating
modes off directly:
Press the button and hold it slightly
longer.
Adjustment1. Push the locking lever downward
2. Adjust the steering column's rake
and reach to suit your seat position
3. Pull the lever back in.
Never adjust the steering wheel
while the vehicle is moving, other-
wise you run the risk of an accident due
to unexpected movement.<
Page 80 of 159

80n
Automatic Stability Control plus Traction (ASC+T)
The conceptThis system optimizes vehicle stability
and traction, especially when you are
starting off, accelerating or when going
through curves.
ASC+T recognizes the danger present
in traction loss and will increase driving
stability and traction by reducing the
engine's output, and if necessary, by
applying the brakes to the rear wheels.
ASC+T is ready each time you start the
engine.
Indicator lamp
The indicator lamp in the instru-
ment cluster goes out shortly
after you switch on the ignition,
refer to pages 18, 19.
The indicator lamp flashes:
ASC+T is actively controlling drive
torque and braking intervention.
The indicator lamp fails to go out after
the engine is started, or it comes on
during normal driving and stays on:
There is a system malfunction or the
system was deactivated with the
button. Consequently, interventions to
increase driving stability (as described
in the preceding column) are no longer
available. You can still drive the vehicle
perfectly well without ASC+T
In the event of a fault, please contact
your BMW center, refer to
pages 18, 19.
Switch off the ASC+TPress the button; the indicator lamp
comes on and stays on.
The illustration depicts the arrangement
of the buttons if the vehicle is fully
equipped. This may vary, depending on
the equipment actually installed.
In the following rare situations, it may
be effective to deactivate the ASC+T
for a brief period:
>When rocking the vehicle or starting
off in deep snow or on loose surfaces
>When driving with snow chains.
To maintain vehicle stability,
always drive with the ASC+T acti-
vated whenever possible.<
Page 111 of 159
111n
OverviewControlsMaintenanceRepairsDataIndex
Hardtop
*
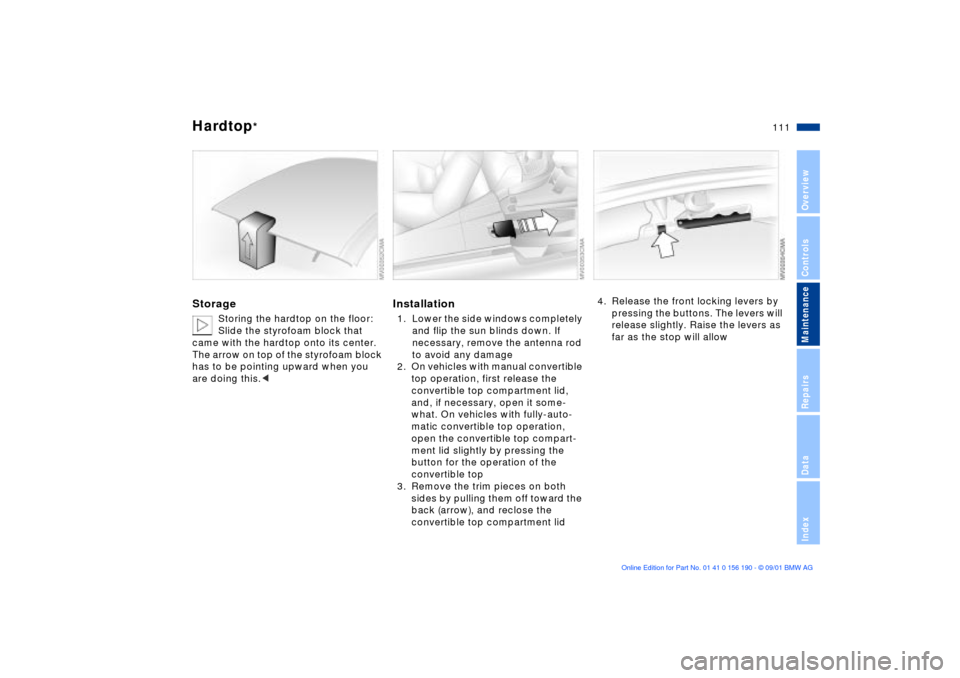
Storage
Storing the hardtop on the floor:
Slide the styrofoam block that
came with the hardtop onto its center.
The arrow on top of the styrofoam block
has to be pointing upward when you
are doing this.<
Installation1. Lower the side windows completely
and flip the sun blinds down. If
necessary, remove the antenna rod
to avoid any damage
2. On vehicles with manual convertible
top operation, first release the
convertible top compartment lid,
and, if necessary, open it some-
what. On vehicles with fully-auto-
matic convertible top operation,
open the convertible top compart-
ment lid slightly by pressing the
button for the operation of the
convertible top
3. Remove the trim pieces on both
sides by pulling them off toward the
back (arrow), and reclose the
convertible top compartment lid
4. Release the front locking levers by
pressing the buttons. The levers will
release slightly. Raise the levers as
far as the stop will allow