2002 BMW 330Ci CONVERTIBLE light
[x] Cancel search: lightPage 87 of 159

87n
OverviewControlsMaintenanceRepairsDataIndex
Parking lamps/Low beamsParking lamps
The front, rear and side vehicle
lighting is switched on. You can
use the parking lamps for
parking. For lighting on one side for
parking as an additional feature, refer to
page 88.
Low beams
When the ignition is switched off
while the low beams are on, the
headlamps go out and only the
parking lamps remain on.
Follow me home lamps:
When you activate the headlamp
flasher after parking the vehicle with the
lamps turned off, the low-beam head-
lamps will come on for a short time. You
can also have this function deacti-
vated.<
LIGHTS ON warningWhenever you open the driver's door
after having turned the ignition key to
position 0, you will hear an acoustic
signal for a few seconds to remind you
if the lamps have not been switched off.Daytime driving lamps
*
If you desire, the light switch can be left
in the second position:
When the ignition is switched off, the
external lighting is also switched off.
You can have your vehicle's
daytime driving lamps set to
reflect your personal requirements.<
Automatic headlight control
*
When the switch is set to this
position the system automati-
cally activates and cancels the
low beams in response to changes in
ambient light ( in tunnels, at dusk, etc.)
as well as rain and snow.
The vehicle's external lights
remain on constantly when you
switch on the front fog lamps after the
headlights have come on automati-
cally.<
Automatic headlight control
cannot serve as a substitute for
the driver's judgement in determining
when the vehicle lights should be
switched on. For example, the sensors
are not able to detect fog. To avoid
safety risks, you should respond to
these kinds of low-visibility situations
by switching the headlights on manu-
ally.<
You can have the sensitivity of
your vehicle's automatic head-
light control adjusted.<
Page 88 of 159

88n
Instrument lighting
High beams/Standing lamps
Fog lamps
Turn the rotary dial to adjust the illumi-
nation intensity.
1 High beams (blue indicator lamp)
2 Headlamp flasher (blue indicator
lamp)
3 Standing lampsStanding lamps, left or rightAs an additional feature, you can
illuminate your vehicle on either side for
parking:
With the ignition key in position 0,
engage the lever in the appropriate
turn-signal position.
Fog lamps
The green indicator lamp in the
instrument cluster comes on to
indicate that the front fog lamps
are on.
If the automatic headlight control
is on, the low beams will come on
automatically whenever you switch on
the front fog lamps.<
Page 96 of 159

96n
Automatic climate control
*Glove compartment
Microfilter/activated-charcoal
filterThe built-in microfilter removes dust
and pollen from the incoming air. The
activated-charcoal filter provides addi-
tional protection by filtering gaseous
pollutants from the outside air. Your
BMW center replaces this combined
filter as a standard part of your sched-
uled maintenance. A substantial reduc-
tion in airflow indicates that the filter
needs to be replaced before scheduled
maintenance.
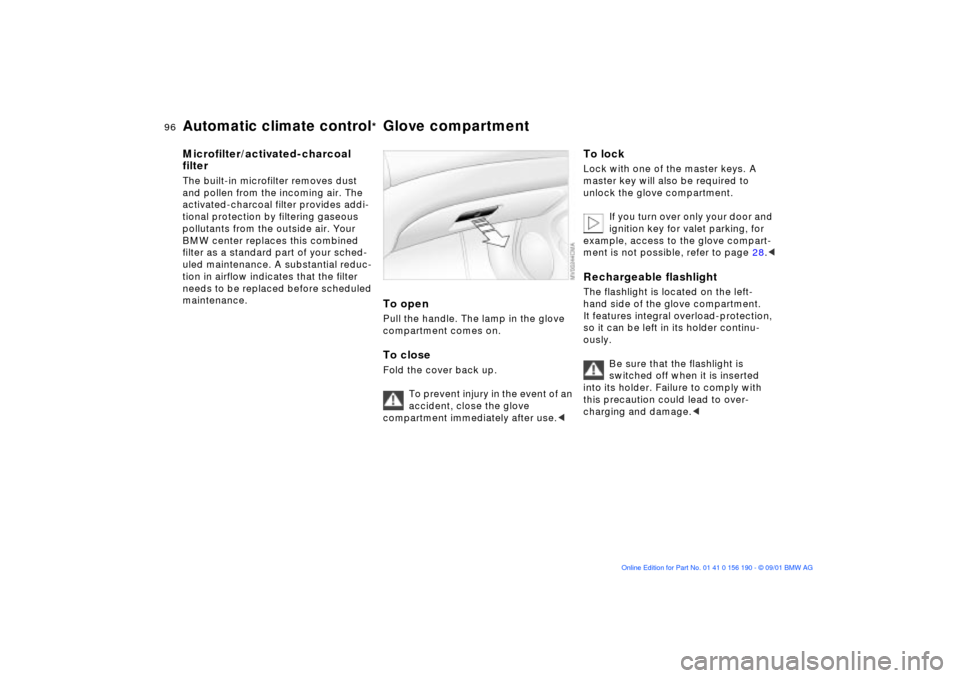
To openPull the handle. The lamp in the glove
compartment comes on.To closeFold the cover back up.
To prevent injury in the event of an
accident, close the glove
compartment immediately after use.<
To lockLock with one of the master keys. A
master key will also be required to
unlock the glove compartment.
If you turn over only your door and
ignition key for valet parking, for
example, access to the glove compart-
ment is not possible, refer to page 28.
It features integral overload-protection,
so it can be left in its holder continu-
ously.
Be sure that the flashlight is
switched off when it is inserted
into its holder. Failure to comply with
this precaution could lead to over-
charging and damage.<
Page 97 of 159

97n
OverviewControlsMaintenanceRepairsDataIndex
BMW Universal Transmitter
*
The concept The BMW Universal Transmitter
replaces up to three hand-held trans-
mitters of different devices such as
garage-door openers, alarm systems,
or door locking systems. The BMW
Universal Transmitter recognizes and
learns the transmitted signal of each of
the original hand-held transmitters.
The signal of an original hand-held
transmitter can be programmed on one
of the three channel keys. Following
that, each of the devices can be
actuated with the appropriately-
programmed channel key. The indicator
lamp flashes to confirm transmission of
the signal.
If the vehicle is sold, the memory of the
channel keys should be cleared as
described on page 99.
During programming and before
every remote actuation of a
programmed device by the BMW
Universal Transmitter, check to be sure
that there are no persons, animals or
objects within the actuation range of
the device in order to prevent possible
injuries or damage. Also, comply with
the safety precautions of the original
hand-held transmitter.<
To Canadian residents:
During programming, your hand-
held transmitter may automatically stop
transmitting after two seconds. This
may not be long enough to program the
BMW Universal Transmitter. If you are
programming from one of these hand-
held transmitters, the Universal Trans-
mitter's light may begin to flash in a
series of double-blinks. If this occurs,
continue to hold the key of the
Universal Transmitter while you reacti-
vate your hand-held transmitter. You
may have to repeat this function several
times while programming.<
Before programming, read the
"User information" section on
page 99.<
Original hand-held transmitter
If this symbol is present on the
packaging or in the instructions
of the original hand-held trans-
mitter, it may be assumed that this
hand-held transmitter is compatible
with the BMW Universal Transmitter.
Checking for the conversion code To determine whether the original
hand-held transmitter is provided with a
conversion-code system, you may
either read the instructions for the orig-
inal hand-held transmitter or program a
channel key as described on the next
page (left-hand column under
"Programming").
Then press and hold the programmed
channel key of the BMW Universal
Transmitter. If the indicator lamp of the
BMW Universal Transmitter flashes for
two seconds and then comes on
steadily, the original hand-held trans-
mitter is provided with a conversion-
code system. With a conversion-code
system, program the channel keys as
described on the next page (right-hand
column under "Programming a hand-
held transmitter with conversion code").
If you have additional questions,
please consult your BMW center
or call 1-800-355-3515.
You can also visit this website
www.bmwusa.com.<
Page 101 of 159

101n
OverviewControlsMaintenanceRepairsDataIndex
Ashtray, front
*
Ashtray, rear
*
Cigarette lighterPress the lighter 1 in. You can remove
the lighter from its socket for use as
soon as it springs back out.
Hold or touch the hot cigarette
lighter by the knob only. Holding
or touching it in other areas could result
in burns.
The cigarette lighter remains opera-
tional when the ignition key has been
removed. For this reason, children
should never be left in the vehicle unat-
tended.
etc., up to a rating of approx. 200 watts
at 12 volts. Avoid damage to the socket
caused by inserting plugs of different
shapes or sizes.
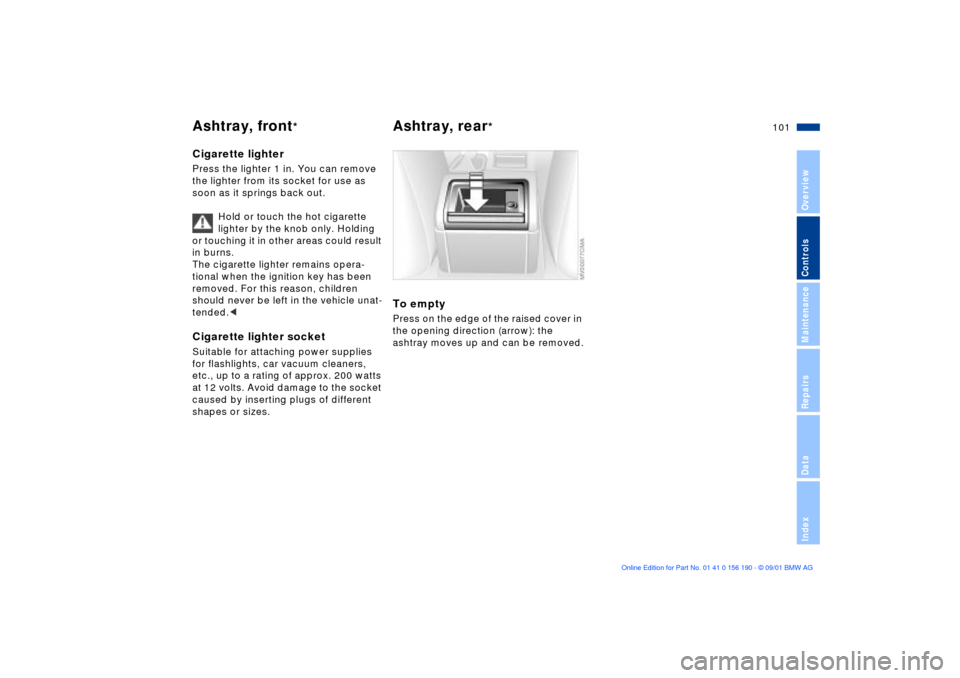
To emptyPress on the edge of the raised cover in
the opening direction (arrow): the
ashtray moves up and can be removed.
Page 104 of 159

104n
Cargo loadingSecuring cargo >For small, light items, use the rubber-
lined, non-skid side of the floor mat
or secure using the luggage compart-
ment net
* or elastic straps
>For large, heavy pieces, consult your
BMW center for load-securing
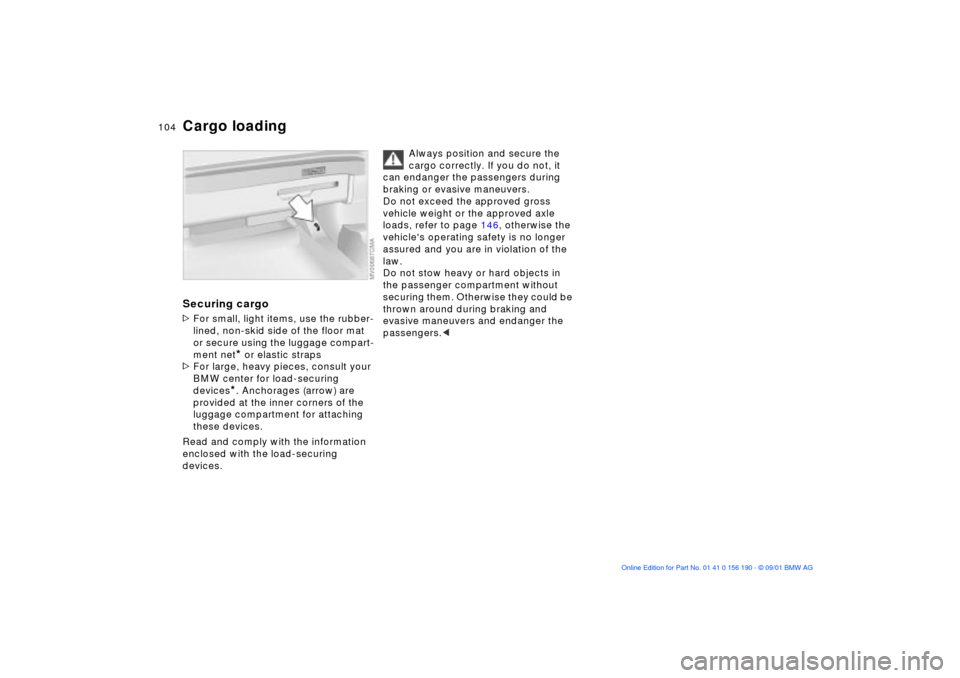
devices*. Anchorages (arrow) are
provided at the inner corners of the
luggage compartment for attaching
these devices.
Read and comply with the information
enclosed with the load-securing
devices.
Always position and secure the
cargo correctly. If you do not, it
can endanger the passengers during
braking or evasive maneuvers.
Do not exceed the approved gross
vehicle weight or the approved axle
loads, refer to page 146, otherwise the
vehicle's operating safety is no longer
assured and you are in violation of the
law.
Do not stow heavy or hard objects in
the passenger compartment without
securing them. Otherwise they could be
thrown around during braking and
evasive maneuvers and endanger the
passengers.<
Page 108 of 159

108n
To ensure that your vehicle continues to
provide maximum economy throughout
an extended service life, we request
that you devote careful attention to the
following instructions.
Engine and differentialThe first 1,200 miles (2,000 km):
Attempt to constantly vary both vehicle
and engine speed during these initial
miles while remembering to avoid
engine speeds in excess of 4,500 rpm
and/or vehicle speeds of over 100 mph
(160 km/h):
Always obey all official speed limits.
Refrain from using full throttle and avoid
pressing the accelerator beyond the
kickdown point.
After the initial 1,200 miles (2,000 km)
you can gradually increase both engine
and vehicle speeds.
Please remember to observe the same
break-in procedures if either the engine
or the differential is replaced later in the
course of the vehicle's service life.
TiresOwing to technical factors associated
with their manufacture, tires do not
achieve their full traction potential until
an initial break-in period has elapsed.
We thus ask you to drive with extra care
during the first 200 miles (300 km).
Always obey all official speed limits.
When the vehicle is operated on
wet or slushy roads, a wedge of
water may form between the tire and
the road surface. This phenomenon is
referred to as aquaplaning, or hydro-
planing, and can lead to partial or
complete loss of traction, vehicle
control and braking effectiveness.
Reduce your speed on wet roads.
rotors achieve the optimal pad-surface
and wear patterns required for trouble-
free operation and an extended service
life later on.
To break-in the separate parking brake
drums, apply the parking brake lightly
when coasting to a standstill (at a traffic
signal, for instance); use caution to
avoid posing a danger to other road
users. You can prevent corrosion in the
drums by periodically repeating this
procedure.
The brake lamps do not come on
when you engage the parking
brake.
Vacuum for the brake system servo unit
on your BMW is available only when the
engine is running. When you move the
vehicle with the engine off Ð when
towing, for example Ð substantially
higher levels of pedal force will be
required to brake the vehicle.
operate at optimum efficiency.
Remember to engage the clutch care-
fully during this initial period.
Break-in procedures
Page 109 of 159

109n
OverviewControlsMaintenanceRepairsDataIndex
Driving notes Antilock Brake System Brake system
Brakes: do not drive with your foot
resting on the brake pedal. Even
light but consistent pedal pressure can
lead to high temperatures, brake wear
and possibly even brake failure.
Aquaplaning: when driving on wet or
slushy roads, reduce vehicle speed. If
you do not, a wedge of water may form
between the tires and the road surface.
This phenomenon can lead to partial or
complete loss of contact between the
tires and road surface, vehicle control
and braking ability.
Driving through water: do not drive
through water on the road if it is deeper
than 1 ft (30 cm), and then only at
walking speed. Otherwise, the vehicle's
engine, the electrical systems and the
transmission may be damaged.
Clothes hooks (with hardtop): when
hanging clothing from the hooks, be
sure that they will not obstruct the
driver's vision. Do not hang heavy
objects on the hooks. If you do so, they
could cause personal injury during
braking or evasive maneuvers.<
The conceptThe Antilock Brake System (ABS) keeps
the wheels from locking during braking,
thereby enhancing active driving safety.Braking with ABSIf you are in a situation that requires full
braking, you will exploit the full benefits
of the ABS system if you apply
maximum pedal pressure ("panic stop").
Since the vehicle maintains steering
responsiveness, you can avoid possible
obstacles with a minimum of steering
effort, despite the full brake application.
Pulsation at the brake pedal combined
with sounds from the hydraulic circuits
indicates to the driver that ABS is in its
active mode.
Brake fluid level If the brake fluid level is too low and
brake pedal travel has become longer,
there may be a defect in one of the
brake system's hydraulic circuits.
Proceed to the nearest BMW
center. It may be necessary to
apply higher levels of pressure to the
pedal when stopping and braking
distances may also be longer. Please
remember to adapt your driving style
accordingly.<