2002 BMW 330Ci CONVERTIBLE turn signal
[x] Cancel search: turn signalPage 78 of 159

78n
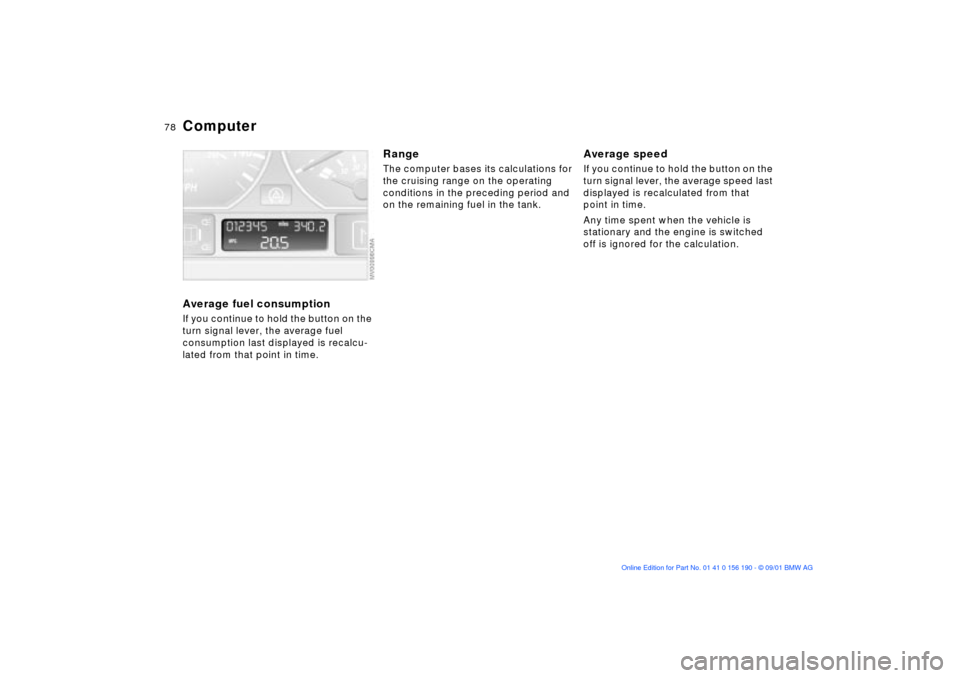
ComputerAverage fuel consumptionIf you continue to hold the button on the
turn signal lever, the average fuel
consumption last displayed is recalcu-
lated from that point in time.
RangeThe computer bases its calculations for
the cruising range on the operating
conditions in the preceding period and
on the remaining fuel in the tank.
Average speedIf you continue to hold the button on the
turn signal lever, the average speed last
displayed is recalculated from that
point in time.
Any time spent when the vehicle is
stationary and the engine is switched
off is ignored for the calculation.
Page 86 of 159

86n
Flat Tire Monitor
*
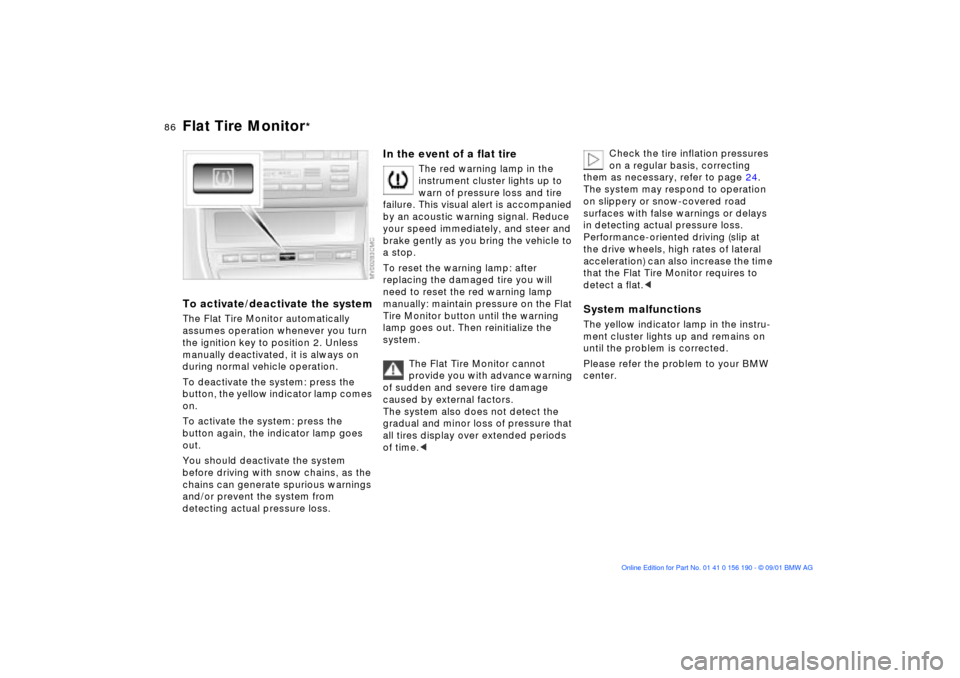
To activate/deactivate the systemThe Flat Tire Monitor automatically
assumes operation whenever you turn
the ignition key to position 2. Unless
manually deactivated, it is always on
during normal vehicle operation.
To deactivate the system: press the
button, the yellow indicator lamp comes
on.
To activate the system: press the
button again, the indicator lamp goes
out.
You should deactivate the system
before driving with snow chains, as the
chains can generate spurious warnings
and/or prevent the system from
detecting actual pressure loss.
In the event of a flat tire
The red warning lamp in the
instrument cluster lights up to
warn of pressure loss and tire
failure. This visual alert is accompanied
by an acoustic warning signal. Reduce
your speed immediately, and steer and
brake gently as you bring the vehicle to
a stop.
To reset the warning lamp: after
replacing the damaged tire you will
need to reset the red warning lamp
manually: maintain pressure on the Flat
Tire Monitor button until the warning
lamp goes out. Then reinitialize the
system.
The Flat Tire Monitor cannot
provide you with advance warning
of sudden and severe tire damage
caused by external factors.
The system also does not detect the
gradual and minor loss of pressure that
all tires display over extended periods
of time.<
Check the tire inflation pressures
on a regular basis, correcting
them as necessary, refer to page 24.
The system may respond to operation
on slippery or snow-covered road
surfaces with false warnings or delays
in detecting actual pressure loss.
Performance-oriented driving (slip at
the drive wheels, high rates of lateral
acceleration) can also increase the time
that the Flat Tire Monitor requires to
detect a flat.<
System malfunctionsThe yellow indicator lamp in the instru-
ment cluster lights up and remains on
until the problem is corrected.
Please refer the problem to your BMW
center.
Page 87 of 159

87n
OverviewControlsMaintenanceRepairsDataIndex
Parking lamps/Low beamsParking lamps
The front, rear and side vehicle
lighting is switched on. You can
use the parking lamps for
parking. For lighting on one side for
parking as an additional feature, refer to
page 88.
Low beams
When the ignition is switched off
while the low beams are on, the
headlamps go out and only the
parking lamps remain on.
Follow me home lamps:
When you activate the headlamp
flasher after parking the vehicle with the
lamps turned off, the low-beam head-
lamps will come on for a short time. You
can also have this function deacti-
vated.<
LIGHTS ON warningWhenever you open the driver's door
after having turned the ignition key to
position 0, you will hear an acoustic
signal for a few seconds to remind you
if the lamps have not been switched off.Daytime driving lamps
*
If you desire, the light switch can be left
in the second position:
When the ignition is switched off, the
external lighting is also switched off.
You can have your vehicle's
daytime driving lamps set to
reflect your personal requirements.<
Automatic headlight control
*
When the switch is set to this
position the system automati-
cally activates and cancels the
low beams in response to changes in
ambient light ( in tunnels, at dusk, etc.)
as well as rain and snow.
The vehicle's external lights
remain on constantly when you
switch on the front fog lamps after the
headlights have come on automati-
cally.<
Automatic headlight control
cannot serve as a substitute for
the driver's judgement in determining
when the vehicle lights should be
switched on. For example, the sensors
are not able to detect fog. To avoid
safety risks, you should respond to
these kinds of low-visibility situations
by switching the headlights on manu-
ally.<
You can have the sensitivity of
your vehicle's automatic head-
light control adjusted.<
Page 88 of 159

88n
Instrument lighting
High beams/Standing lamps
Fog lamps
Turn the rotary dial to adjust the illumi-
nation intensity.
1 High beams (blue indicator lamp)
2 Headlamp flasher (blue indicator
lamp)
3 Standing lampsStanding lamps, left or rightAs an additional feature, you can
illuminate your vehicle on either side for
parking:
With the ignition key in position 0,
engage the lever in the appropriate
turn-signal position.
Fog lamps
The green indicator lamp in the
instrument cluster comes on to
indicate that the front fog lamps
are on.
If the automatic headlight control
is on, the low beams will come on
automatically whenever you switch on
the front fog lamps.<
Page 98 of 159

98n
BMW Universal Transmitter
*
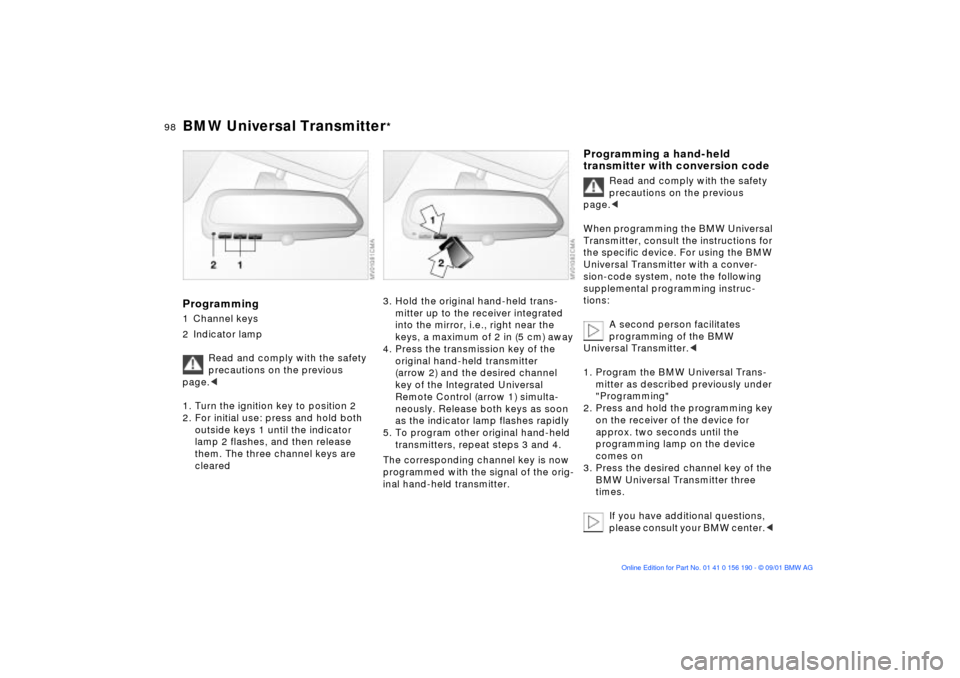
Programming 1 Channel keys
2 Indicator lamp
Read and comply with the safety
precautions on the previous
page.<
1. Turn the ignition key to position 2
2. For initial use: press and hold both
outside keys 1 until the indicator
lamp 2 flashes, and then release
them. The three channel keys are
cleared
3. Hold the original hand-held trans-
mitter up to the receiver integrated
into the mirror, i.e., right near the
keys, a maximum of 2 in (5 cm) away
4. Press the transmission key of the
original hand-held transmitter
(arrow 2) and the desired channel
key of the Integrated Universal
Remote Control (arrow 1) simulta-
neously. Release both keys as soon
as the indicator lamp flashes rapidly
5. To program other original hand-held
transmitters, repeat steps 3 and 4.
The corresponding channel key is now
programmed with the signal of the orig-
inal hand-held transmitter.
Programming a hand-held
transmitter with conversion code
Read and comply with the safety
precautions on the previous
page.<
When programming the BMW Universal
Transmitter, consult the instructions for
the specific device. For using the BMW
Universal Transmitter with a conver-
sion-code system, note the following
supplemental programming instruc-
tions:
A second person facilitates
programming of the BMW
Universal Transmitter.<
1. Program the BMW Universal Trans-
mitter as described previously under
"Programming"
2. Press and hold the programming key
on the receiver of the device for
approx. two seconds until the
programming lamp on the device
comes on
3. Press the desired channel key of the
BMW Universal Transmitter three
times.
If you have additional questions,
please consult your BMW center.<
Page 132 of 159

132n
Lamps and bulbsTurn signal, front21 watt bulb
1 Extend a screwdriver through the
upper opening and loosen the
internal clamp
2 Extract the lamp by removing it from
the front
3 Apply gentle pressure and turn the
bulb to the left, then remove it for
replacement
4 Align the lamp assembly's two ridges
and the centering pin with the guides
on the vehicle when installing
5 Slide in the lamp, applying gentle
pressure until you hear it snap into
place.
Side turn signals5 watt bulb
1. Use finger pressure against the rear
end of the lens (arrow) to press it
forward for removal
2. Apply gentle pressure to the bulb
while turning it to the left to remove.
Page 133 of 159

133n
OverviewControlsMaintenanceRepairsDataIndex
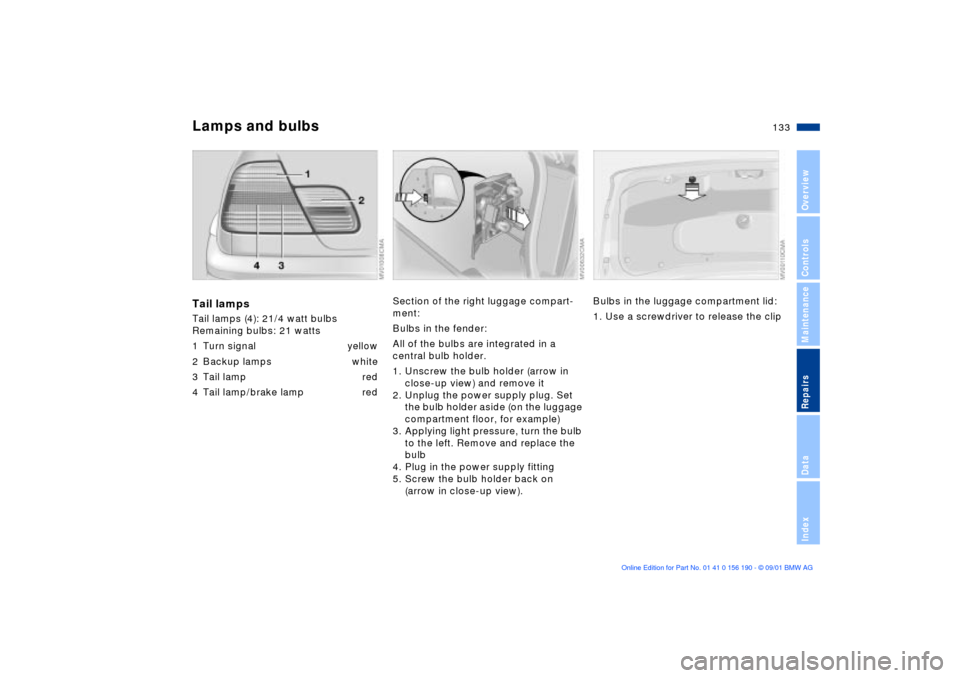
Lamps and bulbsTail lampsTail lamps (4): 21/4 watt bulbs
Remaining bulbs: 21 watts
1 Turn signal yellow
2 Backup lamps white
3 Tail lamp red
4 Tail lamp/brake lamp red
Section of the right luggage compart-
ment:
Bulbs in the fender:
All of the bulbs are integrated in a
central bulb holder.
1. Unscrew the bulb holder (arrow in
close-up view) and remove it
2. Unplug the power supply plug. Set
the bulb holder aside (on the luggage
compartment floor, for example)
3. Applying light pressure, turn the bulb
to the left. Remove and replace the
bulb
4. Plug in the power supply fitting
5. Screw the bulb holder back on
(arrow in close-up view).
Bulbs in the luggage compartment lid:
1. Use a screwdriver to release the clip
Page 155 of 159

Everything from A to Z
155n
OverviewControlsMaintenanceRepairsDataIndex
Seats48
adjustment48
adjustment
precautions48
Securing cargo103
Securing child-restraint
system59
Selector lever, automatic
transmission67
Service and Warranty Infor-
mation Booklet (US
models)125
Service Interval
Display75, 125
Setting the temperature91
Shiftlock67
Side airbags56
Sitting correctly with
airbags48
Ski bag102
Socket for electrical
appliances101
Spare key28
Spare tire135
Speedometer15
Sports seat, adjustment49
Standing lamps88
Starting the engine64 Steering wheel lock64
Stopping the vehicle65
Storage compartments99
Stowing cargo103
Stroke144
Switching off the engine65
Symbols8
Synthetic oils122
T
Tail lamps
bulb replacement133
Tank capacity147
Technical data144
Technical
modifications10, 126
Telephone preparation100
Temperature display
outside temperature77
Temperature gauge
engine coolant75
Temperature
layering92, 95
Temperature setting91, 94
Third brake light134 Tilt alarm sensor37
operating via remote
control30
switching off37
Tire change135
Tire condition113
Tire inflation
pressures24, 113
checking24
indicator83
monitoring83
Tire inflation pressures
table25
Tire Pressure Monitor
(RDC)83, 115, 138
Tire pressures24
refer also to tire inflation
pressures
Tire replacement114
Tire tread113
Tires108
Tools130
Torque144
Tow fittings141
Towing the vehicle141
Track145
Transmission66 Transmitter keys28
Transporting children
safely59
Tread depth, tires113
Tread wear113
Trip odometer74
Trunk lid, refer to luggage
compartment lid33
Trunk, refer to luggage
compartment35
Turn signal
indicators20, 69
Turn signals
bulb replacement132
Turning radius145
U
Uniform Tire Quality
Grading115
Universal Transmitter97
Use antifreeze, radiator123 V
Vehicle keys28
Vehicle Memory63
Vehicle weight146
Vehicle, starting64
Ventilation90, 93
draft-free92, 95