2002 BMW 325XI ignition
[x] Cancel search: ignitionPage 4 of 155

Contents
© 2001 Bayerische Motoren Werke
Aktiengesellschaft
Munich, Germany
Reprinting, including excerpts, only with the
written consent of BMW AG, Munich.
Order No. 01 41 0 156 168
US English VIII/01
Printed in Germany
Printed on environmentally friendly paper
(bleached without chlorine, suitable for recycling).
Overview
Controls and features
Cockpit14
Instrument cluster15
Indicator and warning lamps17
Multifunction steering wheel
(MFL)21
Hazard warning triangle22
Refueling22
Fuel specifications23
Tire inflation pressures24
Opening and closing:
Keys28
Central locking system28
Opening and closing Ð via the
remote control29
Opening and closing Ð via the
door lock31
Opening and closing Ð from the
inside32
Luggage compartment lid33
Luggage compartment35
Alarm system36
Electric power windows37
Sliding/tilt sunroof39
Adjustments:
Correct sitting posture41
Seats41
Manual seat adjustment42
Power seat adjustment43
Lumbar support43
Head restraints44
Safety belts45
Seat and mirror memory46
Seat heating47
Steering wheel47
Mirrors48
Passenger safety systems:
Airbags49
Transporting children safely52
Vehicle Memory, Key
Memory55
Driving:
Ignition lock56
Starting the engine56
Switching off the engine57
Parking brake58
Manual transmission58
Automatic transmission with
Steptronic59
Indicator/Headlamp flasher61
Washer/Wiper system/Rain
sensor62
Cruise control64
Everything under control:
Odometer66
Tachometer66
Energy control66
Fuel gauge67
Temperature gauge67
Service Interval Display67
Check Control68
Clock68
Computer69
Technology for safety and
driving convenience:
Park Distance Control (PDC)71
Automatic Stability Control plus
Traction (ASC+T)72
Dynamic Stability Control
(DSC)73
Contents
Page 17 of 155

17n
OverviewControlsMaintenanceRepairsDataIndex
Indicator and warning lamps
Technology that monitors itself
The system runs an operational check
on the indicator and warning lamps
identified with the
l
symbol each time
you switch on the ignition. They each
light up once for different periods of
time.
If a fault should occur in one of these
systems, the corresponding lamp does
not go out after the engine is started, or
it lights up while the vehicle is moving.
You will see how to react to this below.
Red: stop immediately
Battery charge current
l
The battery is no longer being
charged. Indicates a defective
alternator drive belt or a problem with
the alternator's charge circuit. Please
contact the nearest BMW center.
If the drive belt is defective, stop
and switch off the engine immedi-
ately to prevent overheating and
serious engine damage. If the drive belt
is defective, increased steering effort is
also required.
<
Engine oil pressure
l
Stop the vehicle immediately
and switch off the engine.
Check the engine oil level; top off as
required. If the oil level is correct:
please contact the nearest BMW
center.
Do not continue driving, as the
engine could sustain serious
damage from inadequate lubrication.
<
Brake warning lamp
l
If the lamp comes on when the
parking brake is not engaged:
check the brake fluid level. Before
driving further, be sure to comply with
the instructions on pages 106 and 118
Brake warning lamp for Cana-
dian models.
Tire Pressure Monitor (RDC)/
Flat Tire Monitor
l
In addition, an acoustic signal is
sounded: a tire failure has occurred.
Reduce vehicle speed immediately and
stop the vehicle. Avoid hard brake
applications. As you steer the vehicle,
use caution and avoid overcorrecting.
For additional information: refer to
pages 78 and 80
Page 28 of 155

28n
Keys Central locking systemThe key set1 Master key with remote control unit,
for information on programming the
Key Memory refer to page 55.
You can mark individual keys for
subsequent identification by applying
the colored decals that you received
when accepting delivery of your
vehicle
There is an extended-life battery
in every master key that is
charged automatically in the ignition
lock as you drive.
For this reason, if you have a master
key that is not being used otherwise,
use those keys approximately once a
year while driving for an extended
period to charge the battery, refer also
to page 29.<
2 Spare key for storage in a safe place,
such as in your wallet. This key is not
intended for constant use
3 Door and ignition key
The locks for the luggage compart-
ment lid and the glove compartment
cannot be operated with this key Ð
this is useful for valet parking, for
instance
The conceptThe central locking system is ready for
operation whenever the driver's door is
closed. The system engages and
releases the locks on the
>doors
>luggage compartment lid
>fuel filler door.
The central locking system can be
operated
>from outside via the remote control
as well as via the driver's door lock
>from inside by pressing a button.
Activating it from inside does not lock
the fuel filler door, refer to page 32.
When the system is actuated from the
outside, the anti-theft system is acti-
vated simultaneously. Both the door
locks and release handles remain
locked. The alarm system is also acti-
vated or deactivated.
If locked from the inside, the central
locking system unlocks automatically in
the event of an accident, except on
doors that have been locked individu-
ally using the lock buttons, refer to
page 31. In addition, the hazard
warning flashers and interior lamps
come on.
Page 29 of 155

29n
OverviewControlsMaintenanceRepairsDataIndex
Opening and closing Ð via the remote controlThe conceptThe remote control gives you an excep-
tionally convenient method for
unlocking and locking your vehicle.
Furthermore, it provides two additional
functions which you can only execute
via the remote control:
>To switch on interior lamps, refer to
page 30.
With this function, you can also
search for the vehicle, when parked
in an underground garage, for
instance
>To open the luggage compartment
lid, refer to page 30.
The luggage compartment lid will
open slightly, regardless of whether it
was previously locked or unlocked.
Whenever you unlock (lock) the vehicle,
you simultaneously deactivate (activate)
the anti-theft system, disarm (arm) the
alarm system and switch the interior
lamps on (off).
You can have a signal set to
confirm that the vehicle's locks
have engaged securely.<
Since children might be able to
lock the doors from the inside,
always take the vehicle keys with you
so that the vehicle can be opened again
from the outside at any time.<
If it is no longer possible to lock
the vehicle via the remote control,
the battery is discharged. Use this key
while driving for an extended period in
order to recharge the battery.
To prevent unauthorized use of the
remote control, surrender only the door
and ignition key or the spare key, for
example when leaving the vehicle for
valet parking, refer to page 28.
In the event of a system malfunction,
please contact your BMW center. You
can also obtain replacement keys
there.<
1 Unlock and convenience opening
2 Lock and secure, interior lamp activa-
tion, disarming tilt alarm sensor and
interior monitor sensor
3 Open the luggage compartment lidTo unlockPress the button once to unlock the
driver's door.
Press the button a second time to
disengage all vehicle locks.
Page 33 of 155

33n
OverviewControlsMaintenanceRepairsDataIndex
Luggage compartment lid The lockOnly the master keys fit in the lock of
the luggage compartment lid, refer to
page 28.
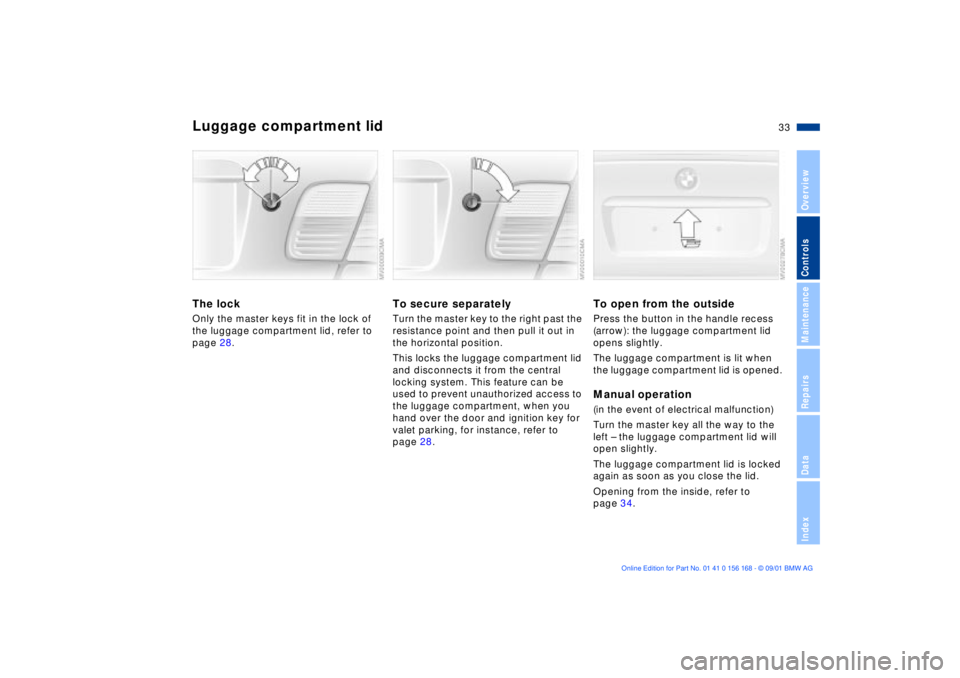
To secure separatelyTurn the master key to the right past the
resistance point and then pull it out in
the horizontal position.
This locks the luggage compartment lid
and disconnects it from the central
locking system. This feature can be
used to prevent unauthorized access to
the luggage compartment, when you
hand over the door and ignition key for
valet parking, for instance, refer to
page 28.
To open from the outsidePress the button in the handle recess
(arrow): the luggage compartment lid
opens slightly.
The luggage compartment is lit when
the luggage compartment lid is opened. Manual operation(in the event of electrical malfunction)
Turn the master key all the way to the
left Ð the luggage compartment lid will
open slightly.
The luggage compartment lid is locked
again as soon as you close the lid.
Opening from the inside, refer to
page 34.
Page 37 of 155

37n
OverviewControlsMaintenanceRepairsDataIndex
Alarm system
*
Electric power windows
>If the indicator lamp goes out when
the system is disarmed: no manipula-
tion or attempted intrusions have
been detected in the period since the
system was armed
>If the indicator lamp flashes for
10 seconds when the system is
disarmed: an attempted entry has
been detected in the period since the
system was armed.
Following triggering of an alarm, the
indicator lamp will flash continuously.Avoiding unintentional alarmsThe tilt alarm sensor and interior motion
sensor may be switched off at the same
time. You can do this to prevent a false
alarm from being triggered in garages
with elevator ramps, for instance, or
when the vehicle is transported by
trailer or train:
Lock the vehicle twice (= arm the
system). Press button on the remote
control twice in succession or lock the
vehicle twice with the key.
The indicator lamp lights up briefly and
then flashes continuously. The tilt alarm
sensor and interior motion sensor are
deactivated for as long as the system
remains armed.
Interior motion sensorIn order for the interior motion sensor to
function properly, the windows and the
sliding/tilt sunroof must be completely
closed.
Nevertheless, you should deactivate
the interior motion sensor (refer to
previous column) if
>children or animals are left in the
vehicle
>the windows or the sliding/tilt sunroof
are being left open.
To open and close windowsWith ignition key in position 1 or 2.
>Press the switch up to the resistance
point: the window retracts; it remains
in motion for as long as you maintain
pressure on the switch
>Press the switch briefly past the pres-
sure point: the window moves auto-
matically. Pressing the switch again
stops the opening cycle.
You can close the windows in the same
manner by pulling the switch.
Separate switches are located under
the windows in the rear passenger
area.
Page 38 of 155

38n
Electric power windowsAfter the ignition has been switched off:
You can still use the electric power
windows for up to 15 minutes, as long
as no one opens any of the front doors.
When leaving the vehicle, always
remove the ignition key from the
lock and remember to close the doors
to prevent children from operating the
power windows and injuring them-
selves, etc.<
For the convenience mode via the
remote control or the door lock, refer to
pages 30 or 31.
Safety feature A contact strip is located on the inside
upper frame of each of the front
windows. If pressure is exerted against
this contact strip while a window is
being raised, the system will respond
by stopping the window and then
retracting it a small distance.
Despite this safety feature, be
extremely careful to ensure that
the closing path of the window is not
obstructed. Some types of objects
might fail to trigger the contact strip in
some situations (very thin objects, for
instance).
You can override this safety feature by
pressing the switch beyond the resis-
tance point and holding it.<
Safety switch
*
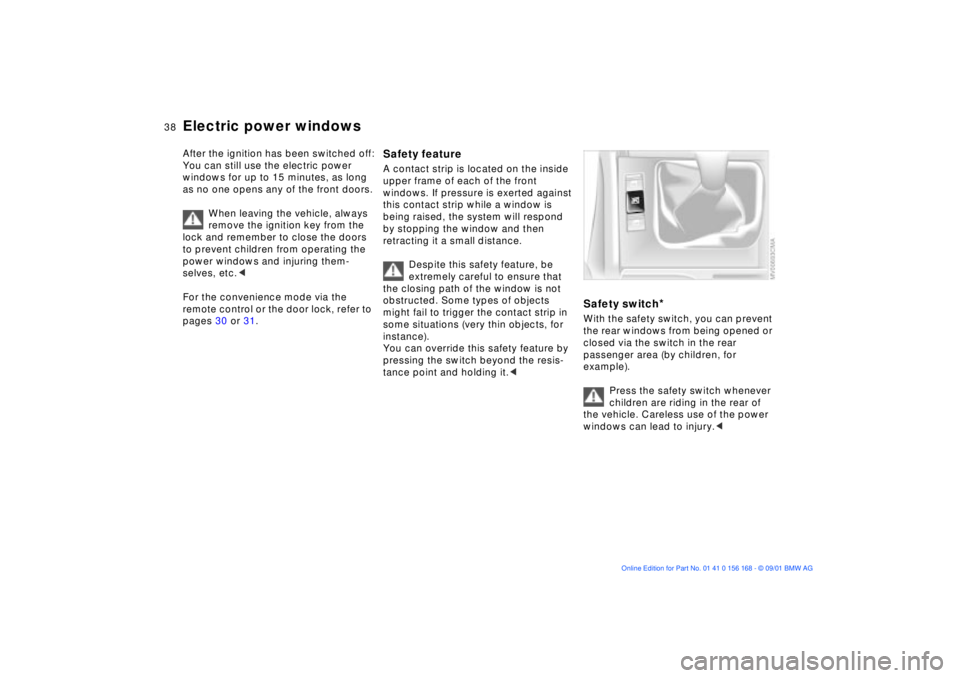
With the safety switch, you can prevent
the rear windows from being opened or
closed via the switch in the rear
passenger area (by children, for
example).
Press the safety switch whenever
children are riding in the rear of
the vehicle. Careless use of the power
windows can lead to injury.<
Page 39 of 155

39n
OverviewControlsMaintenanceRepairsDataIndex
Sliding/tilt sunroof
*
To prevent injuries, exercise care
when closing the sliding/tilt
sunroof and keep it in your field of
vision until it is shut.
When leaving the vehicle, always
extract the ignition key from the lock
and remember to close the doors to
prevent children from operating the
sliding/tilt sunroof and injuring them-
selves, etc.<
Raising Ð opening Ð closingWith ignition key in position 1 or 2.
After the ignition has been switched off,
you can still operate the sliding/tilt
sunroof for up to 15 minutes as long as
neither of the front doors has been
opened.
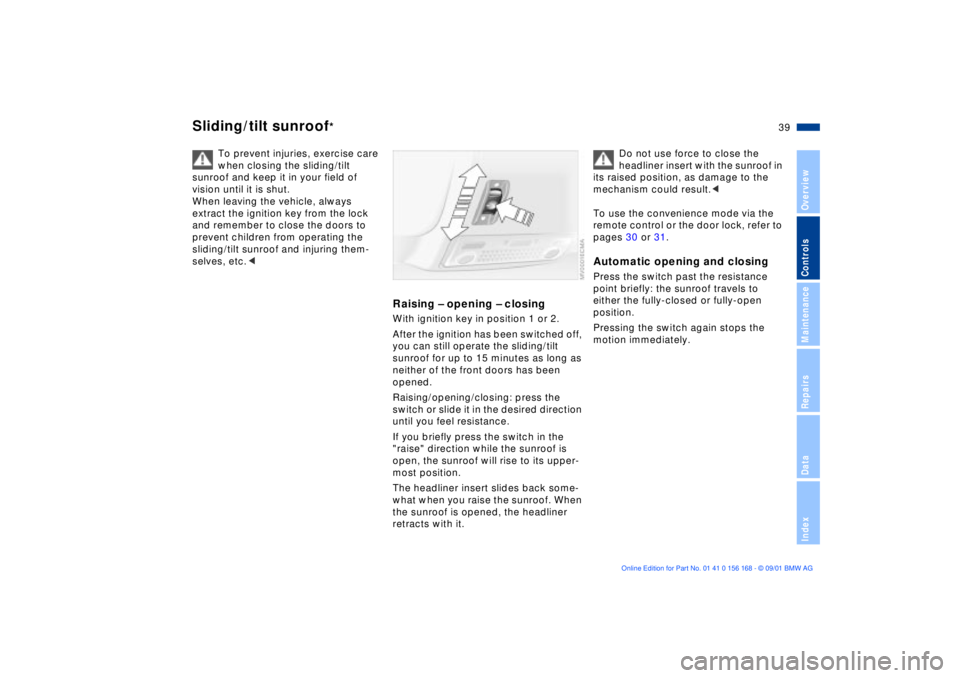
Raising/opening/closing: press the
switch or slide it in the desired direction
until you feel resistance.
If you briefly press the switch in the
"raise" direction while the sunroof is
open, the sunroof will rise to its upper-
most position.
The headliner insert slides back some-
what when you raise the sunroof. When
the sunroof is opened, the headliner
retracts with it.
Do not use force to close the
headliner insert with the sunroof in
its raised position, as damage to the
mechanism could result.<
To use the convenience mode via the
remote control or the door lock, refer to
pages 30 or 31.
Automatic opening and closingPress the switch past the resistance
point briefly: the sunroof travels to
either the fully-closed or fully-open
position.
Pressing the switch again stops the
motion immediately.