Page 84 of 155
84n
Interior lampsThe interior lamps operate automati-
cally.Switching the interior lamps on
and off manuallyPress button 1 briefly:
If you want the interior lamps to remain
off all the times, press and hold the
button for approx. 3 seconds.
Press the button briefly to revert to
normal operation.Front reading lamps
*
Switch on and off with the button 2
adjacent to each lamp.
Rear reading lampsSwitch on and off with the button 2
adjacent to each lamp.
In order to prevent battery
discharge, all of the lamps in the
vehicle are automatically switched off
approx. 15 minutes after you turn the
ignition key to position 0.<
Page 92 of 155

92n
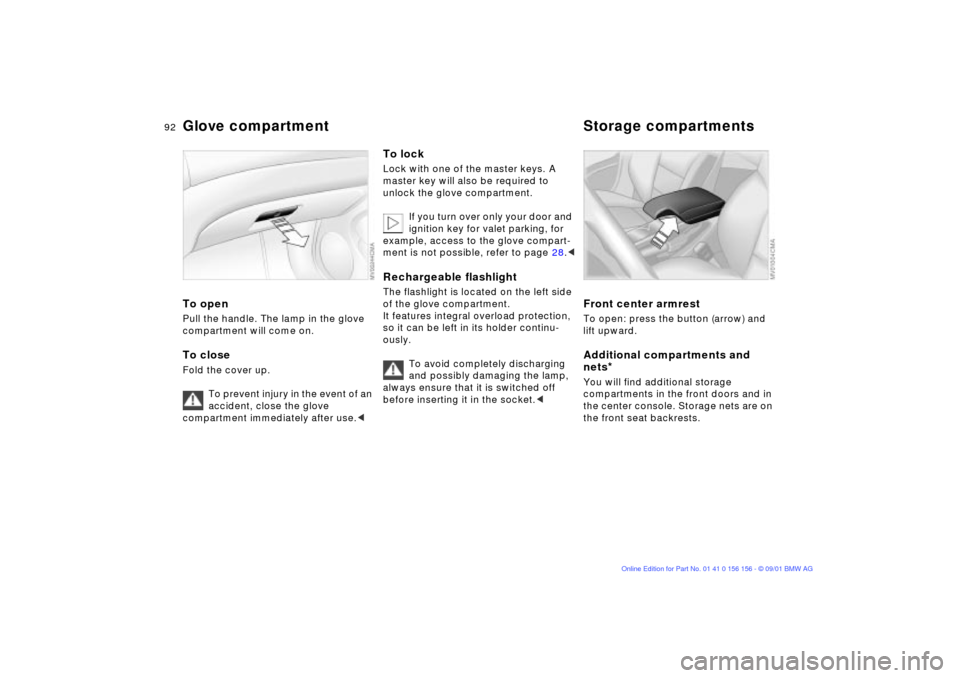
Glove compartment Storage compartmentsTo openPull the handle. The lamp in the glove
compartment will come on.To closeFold the cover up.
To prevent injury in the event of an
accident, close the glove
compartment immediately after use.<
To lockLock with one of the master keys. A
master key will also be required to
unlock the glove compartment.
If you turn over only your door and
ignition key for valet parking, for
example, access to the glove compart-
ment is not possible, refer to page 28.
of the glove compartment.
It features integral overload protection,
so it can be left in its holder continu-
ously.
To avoid completely discharging
and possibly damaging the lamp,
always ensure that it is switched off
before inserting it in the socket.<
Front center armrest To open: press the button (arrow) and
lift upward.Additional compartments and
nets
*
You will find additional storage
compartments in the front doors and in
the center console. Storage nets are on
the front seat backrests.
Page 94 of 155
94n
Cellular phone
*
Ashtray, front
*
Hands-free systemOn vehicles with telephone prepara-
tion
* or communications package
* the
cover for the hands-free microphone is
located in the headliner near the interior
lamp.
For further information on using your
cellular phone, refer to the separate
"Owner's Manual".
To emptyPress on the edge of the open cover
(arrow): the ashtray moves up and can
be removed.
Cigarette lighterPress the lighter 1 in. You can remove
the lighter from its socket for use as
soon as it snaps back out.
Hold or touch the hot cigarette
lighter by the knob only. Holding
or touching it in other areas could result
in burns.
The cigarette lighter remains opera-
tional when the ignition key has been
removed. For this reason, children
should never be left in the vehicle unat-
tended.
for flashlights, car vacuum cleaners,
etc., up to a rating of approx. 200 watts
at 12 volts. Avoid damage to the socket
caused by inserting plugs of different
shapes or sizes.
Page 149 of 155

Everything from A to Z
149n
OverviewControlsMaintenanceRepairsDataIndex
I
Ice warning68
Icy roads68
Ignition keys28
Ignition lock55
Imprint4
Indicator lamps17
Inflation pressures24, 107
INSPECTION66
Instrument cluster15
Instrument lighting83
Instrument panel15
Interface socket
for onboard diagnostics
(OBD)121
Interior lamps30, 84
remote control30
Interior motion sensor35
operation via remote
control30
switching off36
Interior rearview mirror47
automatic dimming
feature48
Interlock55
J
Jack129
Jump-starting134 K
Key Memory54
Key set28
Keys28 L
Lamps and bulbs,
replacement125
Lashing eyes100
License plate lamps, bulb
replacement128, 129
LIGHTS ON warning82
Litter bag holder93
Loading and driving
notes100
Load-securing devices100
Lock buttons32
Low beams82
bulb replacement125
Lug wrench129
Luggage cover, refer to
cargo area cover
Luggage rack100
M
M+S tires111
Maintenance66, 119
Malfunction displays67
Manual operation
doors31
fuel filler door22
sliding/tilt sunroof39
tailgate33
Manual seat adjustment41
Manual transmission57
Manually controlled recircu-
lated-air90
Master keys28
Memory settings45
MFL (Multifunction steering
wheel)21
Microfilter87, 91
Mirror defrosting47
Mirror memory45
Mirrors47
Mobile phone94
Modifications,
technical10, 120
Motion sensor, refer to
interior motion sensor35
Multifunction steering wheel
(MFL)21
O
OBD interface socket121
Odometer65
Oil
additives115
capacity143
consumption115
quality116
specifications116
viscosity116
Oil change intervals, see the
Service and Warranty
Information Booklet
Oil dipstick115
Oil filter change143
OILSERVICE66
Onboard computer68
refer also to the "Owner's
Manual Onboard
Computer"
Onboard tool kit124
Opening and closing
from the inside32
via the door lock31
via the remote control29
Outside temperature
display68