Page 126 of 155
126n
Lamps and bulbsParking lampsEngine compartment, left side:
1. Turn the bulb holder to the left
(arrow) and remove it
2. Remove and replace the bulb.
5 watt bulb
Turn signal, front 21 watt bulb
1 Extend a screwdriver through the
upper opening and loosen the screw,
continuing until you can extract the
bulb by removing it from the front
2 Disconnect the plug
3 Apply gentle pressure and turn the
bulb toward the word "AUF" (refer to
the marking on the housing), then
remove it for replacement
4 Connect the plug
5 Align the lamp assembly's two ridges
and the centering pin with the guides
on the vehicle when installing
6 Slide in the lamp, applying gentle
pressure to seat it firmly
7. Tighten the screw.
Page 129 of 155

129n
OverviewControlsMaintenanceRepairsDataIndex
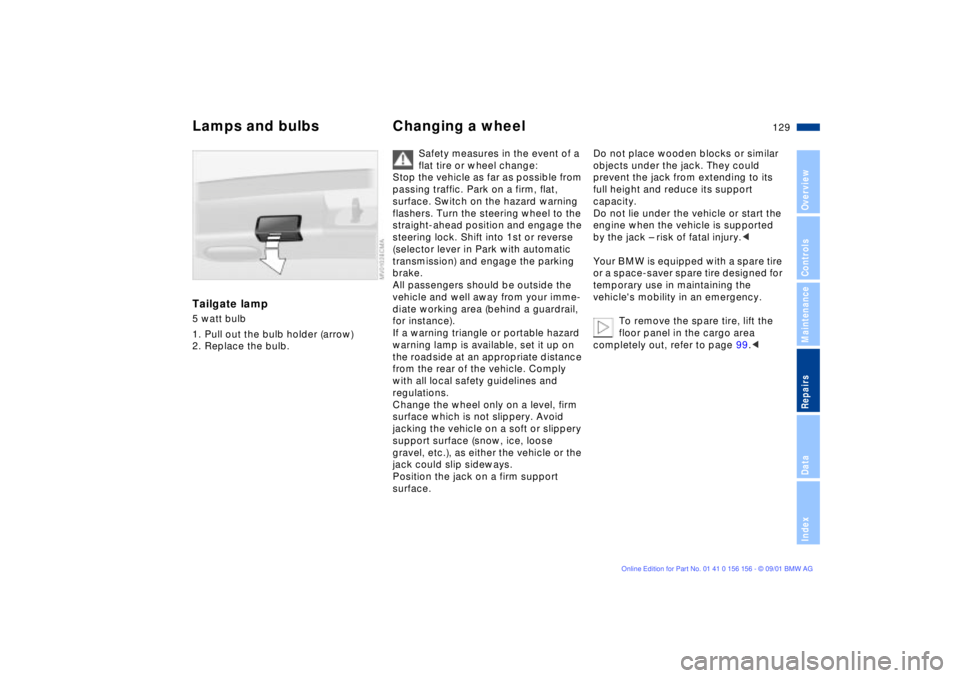
Lamps and bulbs Changing a wheelTailgate lamp5 watt bulb
1. Pull out the bulb holder (arrow)
2. Replace the bulb.
Safety measures in the event of a
flat tire or wheel change:
Stop the vehicle as far as possible from
passing traffic. Park on a firm, flat,
surface. Switch on the hazard warning
flashers. Turn the steering wheel to the
straight-ahead position and engage the
steering lock. Shift into 1st or reverse
(selector lever in Park with automatic
transmission) and engage the parking
brake.
All passengers should be outside the
vehicle and well away from your imme-
diate working area (behind a guardrail,
for instance).
If a warning triangle or portable hazard
warning lamp is available, set it up on
the roadside at an appropriate distance
from the rear of the vehicle. Comply
with all local safety guidelines and
regulations.
Change the wheel only on a level, firm
surface which is not slippery. Avoid
jacking the vehicle on a soft or slippery
support surface (snow, ice, loose
gravel, etc.), as either the vehicle or the
jack could slip sideways.
Position the jack on a firm support
surface.
Do not place wooden blocks or similar
objects under the jack. They could
prevent the jack from extending to its
full height and reduce its support
capacity.
Do not lie under the vehicle or start the
engine when the vehicle is supported
by the jack Ð risk of fatal injury.<
Your BMW is equipped with a spare tire
or a space-saver spare tire designed for
temporary use in maintaining the
vehicle's mobility in an emergency.
To remove the spare tire, lift the
floor panel in the cargo area
completely out, refer to page 99.<
Page 133 of 155

133n
OverviewControlsMaintenanceRepairsDataIndex
Changing a wheel Battery Fuses
Safety tires are only possible in
conjunction with Tire Pressure
Monitor (RDC) or Flat Tire Monitor.<
If the defective wheel cannot be seen
as such immediately from the outside,
check the tire inflation pressure at all
four wheels.
Have the tires changed by your
BMW center. For safety reasons,
do not have a safety tire repaired. Your
BMW center has the information
needed for working with safety tires
and is equipped with the necessary
special tools.<
If appropriate, please consult your
BMW center to reequip your
vehicle from summer to winter tires Ð or
vice versa.<
Battery careThe battery is absolutely maintenance-
free, that is, the original electrolyte will
normally last for the service life of the
battery under moderate climatic condi-
tions.
Please consult your BMW center
whenever you have any questions
concerning the battery. Since the battery
is absolutely maintenance-free, the
following is for your information only.<
Never disconnect the battery
when the engine is running; the
ensuing voltage surge would seriously
damage the vehicle's onboard elec-
tronic systems.
vehicle, leave the engine off at all times.
Connect the charge cables to the termi-
nals in the engine compartment.
Terminal locations, refer to Jump-
starting on page 134.
Return used batteries to a recycling
point or your BMW center. Maintain
the battery in an upright position for
transport and storage. Secure the
battery against tilting during transport.<
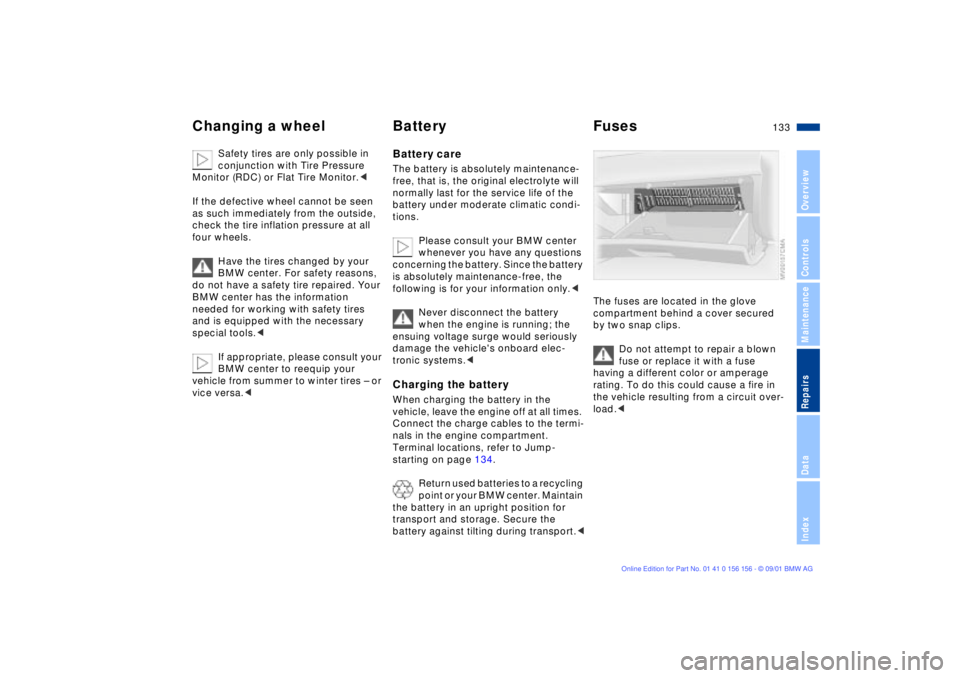
The fuses are located in the glove
compartment behind a cover secured
by two snap clips.
Do not attempt to repair a blown
fuse or replace it with a fuse
having a different color or amperage
rating. To do this could cause a fire in
the vehicle resulting from a circuit over-
load.<
Page 134 of 155

134n
Do not use spray starter fluids to start
the engine.
When your battery is discharged you can
used two jumper cables to start your
vehicle with power from the battery in a
second vehicle. You can also use the
same method to help start another
vehicle. Always use jumper cables with
fully insulated handles on the terminal
clamps.
Do not touch high-voltage wiring
and cables on a running engine.
Contact with components carrying high
voltage can be harmful or fatal. Care-
fully observe the following instructions
to avoid personal injury and/or damage
to one or both vehicles.<
1. Ensure that the battery in the support
vehicle is also rated at 12 volts. This
information is provided on the top of
the battery casing
2. Do not disconnect your battery from
your vehicle's electrical system.
Switch off all electrical accessories in
both vehicles
3. Make absolutely certain that there is
no contact between the bodywork of
the two vehicles Ð short circuit
hazard
4. Start the engine on the support
vehicle and allow it to run
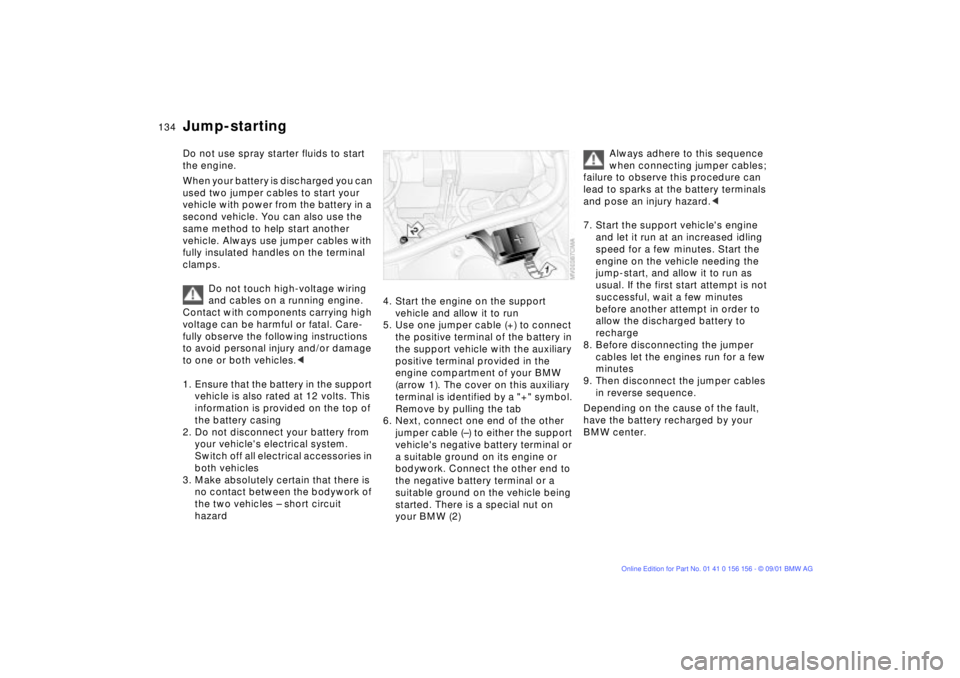
5. Use one jumper cable (+) to connect
the positive terminal of the battery in
the support vehicle with the auxiliary
positive terminal provided in the
engine compartment of your BMW
(arrow 1). The cover on this auxiliary
terminal is identified by a "+" symbol.
Remove by pulling the tab
6. Next, connect one end of the other
jumper cable (Ð) to either the support
vehicle's negative battery terminal or
a suitable ground on its engine or
bodywork. Connect the other end to
the negative battery terminal or a
suitable ground on the vehicle being
started. There is a special nut on
your BMW (2)
Always adhere to this sequence
when connecting jumper cables;
failure to observe this procedure can
lead to sparks at the battery terminals
and pose an injury hazard.<
7. Start the support vehicle's engine
and let it run at an increased idling
speed for a few minutes. Start the
engine on the vehicle needing the
jump-start, and allow it to run as
usual. If the first start attempt is not
successful, wait a few minutes
before another attempt in order to
allow the discharged battery to
recharge
8. Before disconnecting the jumper
cables let the engines run for a few
minutes
9. Then disconnect the jumper cables
in reverse sequence.
Depending on the cause of the fault,
have the battery recharged by your
BMW center.
Jump-starting
Page 136 of 155
136n
Towing the vehicleBMW 325xi, 330xi, 330xd:
Towing with a raised axle1 Place the transmission in neutral
2 Switch off the engine
3 Towing speed:
30 mph (50 km/h)
4 Towing distance:
max. 95 miles (150 km).
Remove the rear driveshaft for
longer towing distances with the
front axle lifted; remove the front drive-
shaft for towing over longer distances
with the rear axle lifted. Failure to
comply with this will result in damage to
the transfer box.<
Page 140 of 155
140n
BMW 325i/325xi
Displacement
Number of cylinders cu. in (cmm) 152.2 (2,494)
6
Maximum output
at engine speed hp (kW)
rpm184 (135)
6,000
Maximum torque
at engine speedlb ft (Nm)
rpm175 (237)
3,500
Compression ratioe
10.5
Stroke
Borein (mm)
in (mm)2.95 (75)
3.31 (84)
Fuel-injection system Digital electronic engine-management system (DME)
Engine data
Page 143 of 155
143n
OverviewControlsMaintenanceRepairsDataIndex
Capacities
Notes
Fuel tank
Reserve gal. (liters)
gal. (liters)approx. 16.6 (approx. 63)
approx. 2.1 (approx. 8)Fuel specification, refer to
page 23
Windshield /
Headlamp washer reservoir (front) quarts (liters) approx. 5.6 (approx. 5.3)Specifications, refer to page 114
Cooling system including heating circuit quarts (liters) approx. 8.9 (approx. 8.4) Specifications, refer to page 117
Engine oil and filter change
quarts (liters)
quarts (liters)325i:
approx. 6.9 (approx. 6.5)
325xi:
approx. 7.9 (approx. 7.5)BMW High Performance
synthetic oil
Oil specifications, refer to
page 115
Manual and automatic transmission, transfer box
and differentialÐ Lifetime lubricant, no oil change
required
Page 146 of 155

Everything from A to ZA
ABS (Antilock Brake
System)19, 105
Accessories10
Activated-charcoal filter91
Adaptive Transmission
Control (ATC)59
ADB (Automatic Differential
Brake)73
Adding
brake fluid118
coolant117
engine oil115
washer fluid114
Adjusting
backrest41
manual seat41
mirrors47
power seat42
steering wheel46
thigh support41
Air conditioning85
Air distribution86, 89
Air outlets,
ventilation85, 88
Air supply86, 89 Airbags18, 48
sitting correctly40
Alarm system35
Antifreeze and anti-
corrosion agents117
disposal117
Antilock Brake System
(ABS)19, 105
Anti-theft system35
Approved gross vehicle
weight142
Aquaplaning105, 107
Armrest92
ASC+T (Automatic Stability
Control plus Traction)71
Ashtray
front94
rear95
ATC (Adaptive Transmission
Control)59
Attach vehicle vacuum
cleaner94
AUC (Automatic recircu-
lated-air control)90 Automatic climate
control88, 89
Automatic cruise control63
Automatic Differential Brake
(ADB)73
Automatic headlight
control82
Automatic recirculated-air
control (AUC)90
Automatic Stability Control
plus Traction (ASC+T)71
Automatic transmission58
Automatic transmission with
Steptronic18, 58
Average fuel
consumption69
Average speed69
Axle loads142
B
Backrest41
Backup lamps57
bulb replacement127
Battery133
care133
charging133
disposal133 Battery charge current
indicator17
Beverage holder93
Blower86, 89
BMW High Performance
Synthetic Oil116
BMW Maintenance
System119
BMW sports seat
manual adjustment41
power adjustment42
Bore140
Bottle holder, refer to
beverage holder93
Brake fluid118
disposal118
Brake lamps
bulb replacement127
Brake pads19
Brake system
brake fluid level106
brake pads106
brake rotors,
corrosion106
defect in hydraulic
circuits106
disc brakes106
A-Z